How Much Fuel Is Needed To Power A Light Bulb For A Year?

What-it-takes-to-power-a-light-bulb-for-a-year

It is not possible to determine how much fossil fuel is needed to power a light bulb for a year without knowing the specific type of light bulb and the source of energy being used to power it.

Light bulbs are available in a range of wattages, which refers to the amount of electricity they use. A higher wattage bulb will use more electricity and therefore require more energy to power it. The amount of energy needed to power a light bulb will also depend on the type of fossil fuel being used to generate electricity. Different fossil fuels have different energy densities, which means that they contain different amounts of energy per unit of weight.

As a rough estimate, a 60 watt incandescent light bulb that is turned on for 8 hours a day will use approximately 528 kilowatt-hours of electricity over the course of a year. The amount of fossil fuel needed to generate this electricity will depend on the specific type of fossil fuel being used and the efficiency of the power plant that is generating the electricity. For example, a coal-fired power plant may use more fossil fuel to generate the same amount of electricity as a natural gas-fired power plant.

It is also worth noting that using energy-efficient light bulbs, such as LED bulbs, can significantly reduce the amount of energy needed to power a light bulb and therefore reduce the amount of fossil fuel required to generate that energy.

What items would you add to your survival preps to give you a power source if the electrical grid goes down?

Could you produce enough to live off the grid with solar, wind, or hydro?


How To Build Your Own Solar Thermal Panel From Recycled Trash

The guys at the Sietch have a great little idea here, making their own solar thermal collector with spare parts and trash readily available in any scrap yard  worldwide. This would be good if the SHTF and we had to live off the grid. Enjoy. Let us know if you build your own.

Materials needed:

Water
2 buckets
Drill (with both drill bits and screw bits)
Some scissors
A saw (a simple hand saw will do)
Some wood
A pane of glass.
The back of a small refrigerator.
12 feet of air pump hose used in fish tanks
Backing material (we used an old door mat)
A box of wood screws
Aluminum Foil
Role of duct tape
Angle Cutter (or hack saw)
Time: This project took about 3 hours of constructions time. It took a couple weeks to find all the parts.

Now onto the project. The first thing we did was collect all of the parts.

Our local dump has a coolant removal program that has refrigerators and dehumidifiers that they remove old freon from. With this in mind I found the perfect heat collector. The back of a fridge is basically a heat dispersal system, with a slight modification is can be used to collect large amounts of heat.

Make sure that the freon, or other coolant has been removed, and cut the grill off at the base, near the large coolant holder.

There was an old couch that had been run over by one of the large dump plows, the inside wood was the perfect size for the frame.

I found a pane of glass and an old rubber door mat that made the perfect backing and front.

The glass was a real find, and may be the only part of the panel that may need to be purchased. Make sure your glass is big enough to fit over your collector and have enough room to attach it to the frame.

The door mat was HUGE, so I had to cut it in half. Funny thing seems there was a lot of nasty black goo, and a metal sheet in the middle. Who knew. Remove the metal plate (or cut it in half as well) and leave the goo.

Once The backing was cut to size, it was time to start building the frame.

As you can see I sort of built the frame around the collector, leaving enough backing to hold it all together.

The frame is held on by building a similar frame on the back and driving large wood screws through the front frame, the backing and into the back frame.

I added some foil to the backing. The reason for this is that counter to what you would think, you do not want the backing to warm up. You only want the collector to absorb heat (it was so nice of the fridge company to paint it black for us). The foil will take any sun that was not absorbed by the collector on the first pass and bounce it back over the collector for another try at absorption. The glass cover will keep all the heat inside the panel for further absorption.

Light can pass through glass, but heat can not.

Notice how duct tape was used on the inside to seal all cracks, you could use caulk but I didn’t have any so I used the cheapest option. It worked well, and held the foil in place.

Next we cut some notches for the entry and return ports to the collector.

Note again the use of duct tape to seal cracks.

I got some air pump hose from the local fish store and attached them to the end of the entry and return ports.

The duct tape was applied to make sure it was a tight fit, it was later removed as it was not needed.

Next we attached the collector to the backing, using the mounting brackets that came on the fridge and some duct tape. If you wanted you could use some screws and wood, but I found the tape and the natural tension of the construction to be enough to hold it in place.

Lastly we attach the glass to the top. This serves to trap all the infrared radiation from the sun inside our panel where our collector will absorb it. Again light can pass through glass, but heat can not.

As you can see simple duct tape is enough to hold it on. I would recommend using some sort of mounting bracket however as after a couple days in the sun the tape started to droop allowing the glass to slide off. A few screws would solve this, but I am cheap so I just put new tape on.

Set your panel up at an angle so that it catches the most sun.

Here is the gross part, put one end of the hose into your bucket of cold water, and make sure it is at the bottom of the bucket, next grab the return hose and start sucking. That’s right, unfortunately you have to prime the panel by getting some water into it. This can be done without getting water in your mouth, but inevitably I sucked just a little too hard and ended up with a mouth full of nasty water. I would recommend having a friend do this part. 🙂

Set your cold water bucket (source) up higher than your warm water bucket (return) and the whole thing will gravity siphon. Due to the design of this collector (both ports return to the same location on the panel) it will not thermo siphon. For that to happen I would need to cut the long return pipe and have it exit at the top of the panel.

A word of warning, this panel works VERY WELL. We tested it on a very sunny day and within seconds the water coming out of the panel was hot enough TO SCALD. I burned my fingers. This very hot water is only formed when the water inside the panel is allowed to sit for about a minute without moving. If the water is moving (do to the gravity siphon) the water exiting the return pipe is about 110 degrees, and while hot, will not burn you.

The water does not flow through the panel very fast (as the pipes are very small) but that is sort of a good thing as it allows the water to heat up a lot on its journey through the collector. It does take a while to heat up a 5 gallon bucket of water, I ended up building an insulated return bucket that was all black and sealed on the top except for the port where the water tube enters. This kept the returned hot water hot long enough to be of use.

I let this guy run for a couple of hours one hot sunny day and heated up a five gallon bucket of cold water (measured at 70 degrees F) to over 110 degrees F. The temp that day was about 76 degrees F. If the water is allowed to sit in the panel for several minutes and then forced out (by blowing in one of the hoses) the water was measure at 170 degrees F. All in all we are much happier with the performance (and cost) of this panel. It performs much better than the previous one.

Our next modifications to this design will be to alter the return port so that it will thermo siphon, in this way the return hose can be fed into the source bucket and the water will continually circulate in the panel getting hotter and hotter. We have also talked about adding mirrors to the panel to concentrate more heat. Our goal is to boil water. This entire project cost less than five dollars, as I already had the screws, and the duct tape. The only thing I purchased was the air hose, which cost $3.76.

Enjoy the hot water.

[source]

7 DIY Pop Can Solar Heaters

There are hundreds of different DIY passive solar air collector plans floating around, but I’m focusing on a few that incorporate recycled aluminum pop, beer or juice cans as the “solar absorber“.

These DIY pop can solar panels are inspired by Cansolair – a commercially-produced product invented by a man from Newfoundland, Canada.

What’s Passive Solar Heating?


Passive solar air heating is considered the most cost-effective renewable energy – utilizing the energy from the sun by capturing it with an absorbing medium. There are plenty of online sites dedicated to passive solar applications, but you can get the basics via Wikipedia.

Passive solar heating intrigues me. It’s the only “free” heating source that I can think of. If it worked at night, it would be perfect.

GregCa5 - BuilditsolarCrowd Sourcing a Design


I intend to build one of these at some point and my research has turned up several designs and methods of construction – from very well executed to the afternoon “garage experiment”.

After spending several hours sorting through many pages of Google results, I’ve narrowed it down to a selection of results that’s representative of the designs, methods and materials DIYers are experimenting with – from good to bad.

A couple of these show up repeatedly in just about any Google search related to pop or beer can heaters (the Red Garage Project for example). I’ve included what I feel are the best designs that merit a look and some interesting ideas that you could adapt for your own purposes.

I know mine will incorporate the best ideas taken from the designs highlighted below.

Here’s what’s out there

solarni_panel_13s - freeonplate1. Solar Panel out of Aluminum Cans (by Malden P)

This design most closely resembles the commercial product sold by Cansolair. The site has very good pictures and step by step details to build a full-size passive solar heater.

Rating: Excellent Design. Definitely worth a look


2. Beer Can Solar Heater (by bornonazero)

This is a similar (and very well executed) design originally presented as a pictures-only You Tube video. There’s also an updated video with a bit of descriptive narration added.

Rating: Definitely worth a look.


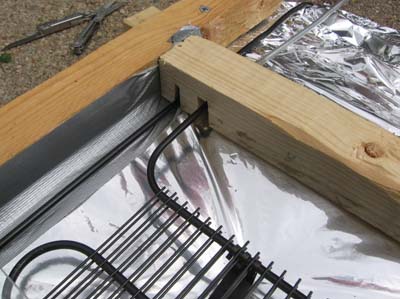
3. Greg’s Pop-Can Solar Space Heating Collector (Greg West)

This design on “Build it Solar” is excellent. The PDF download is very detailed with good pictures. It features aluminum plenums in a box made of polyiso rigid insulation and has a flat face of Twinwall polycarbonate glazing. Lot’s of good ideas in this one.

Rating: Well worth the download (3MB PDF).


solarbox_1453_resized -hemmings
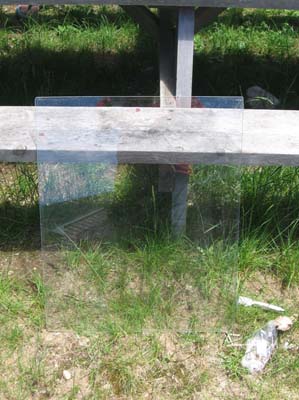
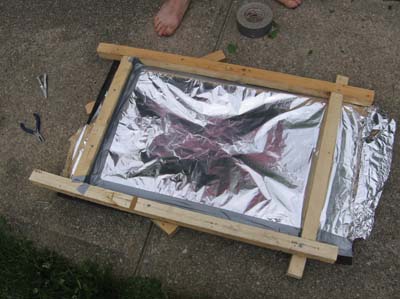
4. The Ubiquitous Red Garage Project (Hemmings Blog)

This version pops up in a lot of searches which is really frustrating because it’s not a good design and it probably turns more people off the idea than it inspires. I have no idea why so many sites linked to it or posted about it.

The design has efficiency deficiencies like no plenums – meaning the air doesn’t pass through the cans – which is kinda the point, and what produces most of the heat.

On the plus side, he built a second, larger version and I have togive him props for recycling a patio door for the glazing.

Rating: Take a pass or give it a quick scan and move on.


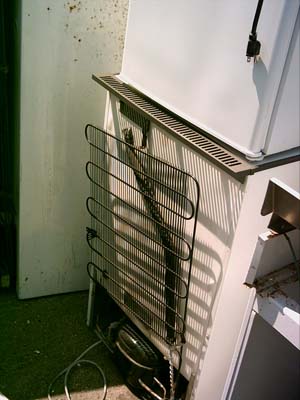
5. Colorado Wind Power

This one is a bit crude in the approach, but it would be fast and easy to do. However, I’m not so keen on the idea of superheating Styrofoam and pumping the resulting off gasses into my home.

solarhotairburn - colorado wind powerThe best takeaway from this one is two unique methods to make the holes in the can bottoms:

• using a blow torch (which would be pretty much instant)

• using a belt sander, which takes out the full bottom cleanly.

If you needed to MacGyver one of these in an emergency, then this would get you there. If you’re going for a longer-term installation, keep looking.

Rating: Have a quick look just to say you did.


High heat paint - Brians solar
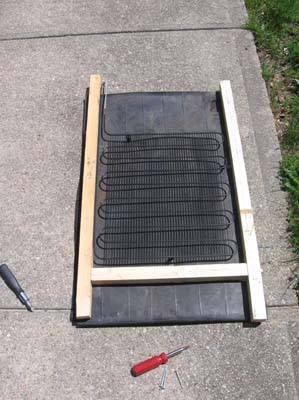
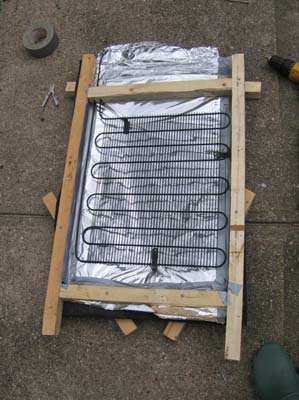
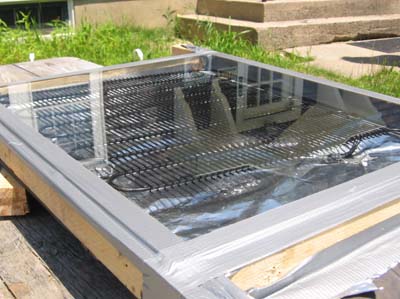
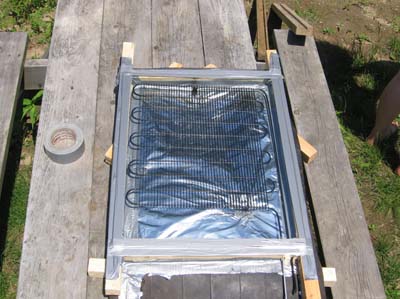
6. Brian’s Pop Can Solar Heater

This one is kind of in the middle of the pack – the functional design looks to be sound, but it loses points on the fit and finish.

If I’m going to invest the time and energy in building one of these, I want it to look good and be reasonably sure it will stand up to the extreme conditions it will be subjected to.

Brian does provide some performance data that shows what kind of results you could expect (in Alabama).

Rating: Look it over for ideas to use.


Moonshine solar - version 37. Moonshine Solar

These small-scale window units are a little different and I’m really drawn to them. The designer started with few randomly placed cans in a housing and has since revised the design twice, incorporating some of the conventions common to the more sophisticated designs.

I like the idea of having a portable “room heater” as opposed to – full-sized panel mounted on the side of the house for several reasons.

• Less cost to build
• No installation required
• Portability

My partner and I both work at home, but our offices are in different areas of the house – a couple of portable “space heaters” would be more likely to keep us comfortable than a single large one located in the only practical location, which is a long way from my office.

Rating: Definitely worth a look [Update: It seems the website for Moonshine Solar has been taken down since I was doing my research. Still, an idea that’s worth consideration.]

Wrap up

Passive solar heaters make sense and are an excellent DIY project that should pay for itself in a year or two. There are a lot of good ideas in examples above but the main points to consider carefully would be:

  • High internal Heat – use components that will stand up to repeated extreme temperature swings.
  • Insulation – avoid or cover Styrofoam insulation that could give off gas or degrade due to UV exposure.
  • Location – maximum southern exposure during the warmest part of the day

The pop can heater is just one of many types of passive solar heating installations. I’ll explore other designs in the coming months.

[source

5 Big Tips for Living Without Electricity

no power

When Hurricane or “Super Storm” Sandy hit here last autumn, I didn’t have power for eleven days. I was one of the lucky ones, though — I still had my house, a gas-powered stove, and gas-heated water. Here’s what I learned about living without electricity.

Light

  1. Headlamps are better than flashlights. Have one for each person.
  2. Large camping lanterns with fluorescent bulbs are great but be aware that they will only light up your immediate area. They also burn through batteries fast.
  3. Candles are traditional and don’t require batteries, but they also don’t provide much light.
  4. Another idea I’ve read about but haven’t yet tried is to charge up solar-powered LED garden lights during the day and distribute them around the house at night.

Refrigeration & Cooking

  1. If you’re not following Eve’s Tips for Living Without Refrigeration, you’ll want to get a cooler ready for your perishables. Alternatively, you can designate a freezer as your cooler. Organize your food so that you know what’s where and what you’re going to grab first.
  2. Freeze as much ice as possible — in containers, water bottles, and ice trays. If you can’t fit in or freeze all your bottles, fill them with drinking water. Set your fridge and freezer temperature settings to their coldest point.
  3. Bag your meat and ice cream to avoid a mess later.
  4. If you have the means to cook, plan and print your recipes before the power cuts.
  5. Once the power cuts, keep the fridge and freezer doors closed for at least a few hours. How long the temperature will stay down will depend on how full they are. Just be sure to grab the ice while it’s still frozen.
  6. Load up your cooler with the ice and your priority perishables. Open it as seldom as possible. Watch out for the inevitable leaks as the ice melts.
  7. Even after the ice has melted, the cold water and small size of the cooler will keep temperatures down.
  8. If you have a gas stovetop and a lighter or matches, you’re all set for cooking. You can make soups and stir-frys out of the last of your perishables, and then start on canned and packet meals. Even foods that don’t normally go in a pot can be heated by steaming them.
 

off grid living

Temperature Control

The worst part of a power outage in the late fall and winter months is losing your heat. A fireplace helps, but burning logs isn’t enough. Unless you’re already in an enclosed space, the warm air is going to be sucked away. To avoid this, you can create a temporarily enclosed space, for example by using some good tape and a few plastic painter’s drop sheets. If you manage to get your fireplace and stove into the same space, it helps to boil some water and steam up the room a little. However, it’s not wise to run gas heat in an enclosed space for long (and a gas fireplace shouldn’t be enclosed at all). Also, the steam will eventually soften up your walls.

Keeping Cool During a Summer Power Outage

Connectivity

  1. Your best tools for keeping in touch are a battery- or hand-crank- powered radio, a corded landline phone with a backup battery, and your cellphone. The landline will only last so long, but that way you can give your cellphone a rest before it’s needed.
  2. Charge up any laptops in your home. You may not have wifi after the power cuts, but they can be used to charge up any USB-powered devices, like your phone.
  3. Write down or print out any phone numbers and emergency information you may need (e.g. where the nearest shelters and pet shelters are).
  4. Solar power is a great resource if you have or can build a solar charger, but don’t hold your breath — it may take a long time to power your devices.
  5. Prepare for gas shortages by rationing the gas in your car if necessary. Walk or bike when you can.
off grid transport

Staying Positive

  1. It’s not easy in the dark, without many of your usual creature comforts. But this is just another adventure, same as if you got on a plane to somewhere exotic. You’re a post-apocalyptic pioneer, reinventing to survive and living with the bare minimum.
  2. Go back to the basics — I like to have some good books to read (especially old favorites) and some pen and paper to scribble ideas and play word games. Others prefer a deck of cards and some board games.
  3. Clean clothes can do wonders. This is when your hand-washable, quick-drying travel clothes made of wool or synthetics really pay off.

Source: Off The Blueprint