5 Essential Items to Take Hunting

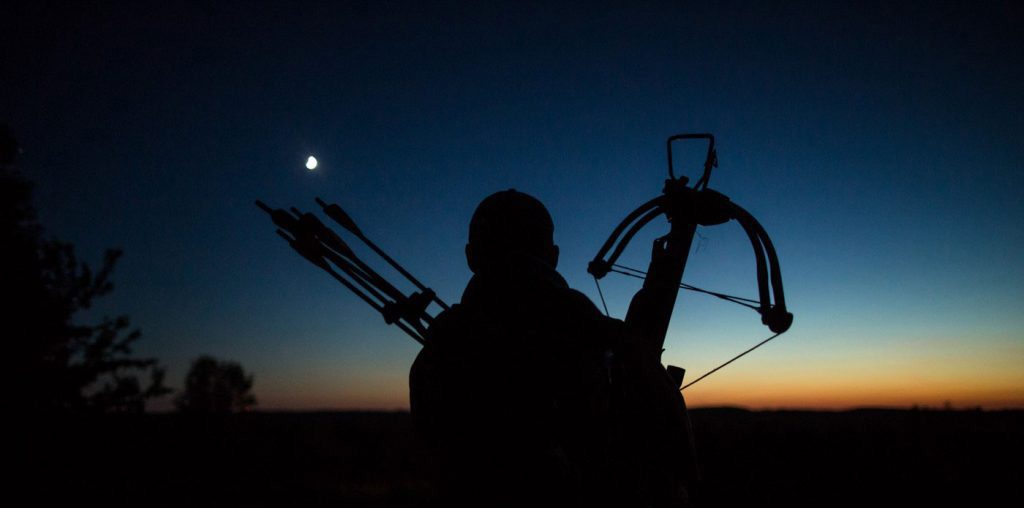
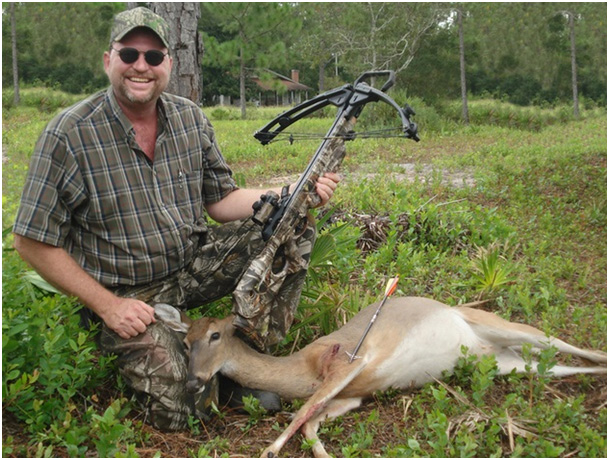
The first item that comes to mind for a hunting expedition is a riffle and a hunting vest, but what about all of the other needed essentials? It’s key to remember that you might be trekking out into the wilderness, and you might find yourself being there longer than expected. So, use this guide to remember the 5 important items that many hunters seem to forget.

Essential Hunting Items

1. Hunting Binoculars

One of the most often forgotten items is your hunting binoculars.

The most obvious reason is that without a pair of good quality binoculars, you might miss some animal at a distance. Forgetting your binoculars means that you may come back with less to show for, making for a less enjoyable hunting trip.

But, more importantly, you can use binoculars for navigation, to discern your path and spot sources of water, roads, and civilization at a distance.

Other Benefits to Bringing Binoculars

• Be able to decipher an animal from a rock or foliage (Also, so you know you aren’t shooting at a human!).

• See your terrain more clearly to prevent injuries or see signs of animals that the naked eye would not be able to see.

• Allows you to spot predators or wildlife you’d rather avoid.

Important Features on My Binoculars?

You don’t want binoculars that magnify too far or too near. It’s important to get the right set that matches the terrain you will be hunting in. Generally, in wooded terrain you’ll want something with less magnification, such as 8x and in open terrain you can go as high as 12x. You can go higher, but you’ll end up needing a stand or tripod.

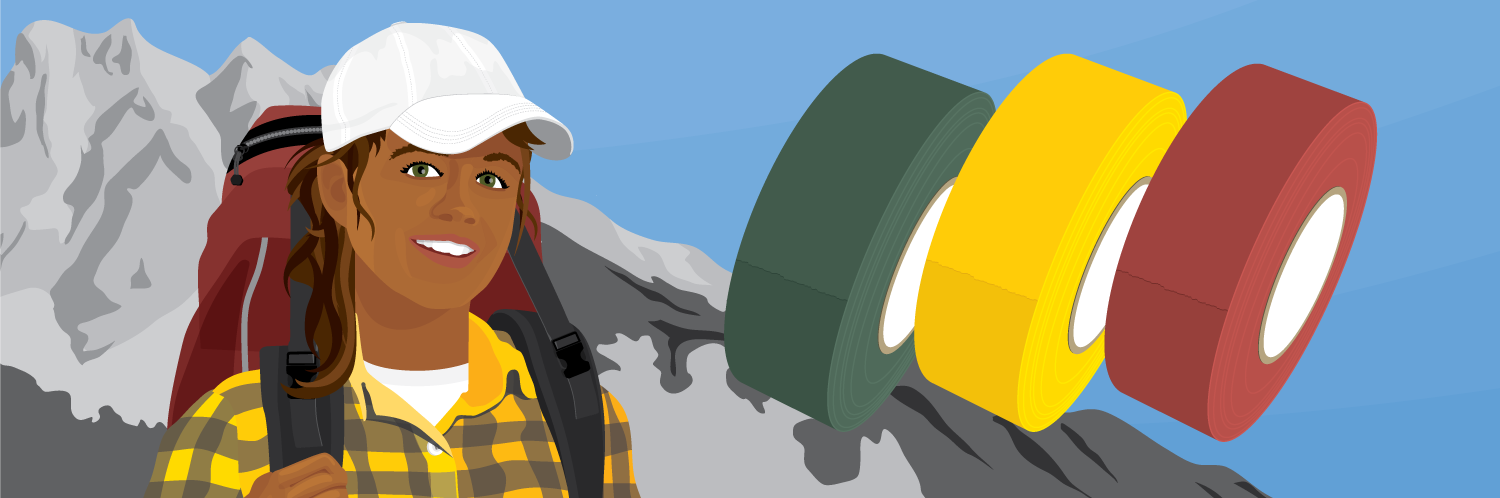
2. Cold Weather Gear?

Staying warm while you are out hunting is crucial for any tracking expedition. Even if you have double checked the weather forecast. It is always safe to stay prepared for unexpected cold fronts. You should keep some cold weather gear in your daypack and take it with you, just in case.

If you get disoriented or injured, you might find yourself spending the night in the woods. It doesn’t matter if it’s the middle of the summer or not, it will feel cold when compared to the daytime highs. Also, you can get hypothermia even if it’s as warm as 70 degrees if you are wet and not clothed properly.

Which Cold Weather Gear Should I Bring?

You’ll want properly fitted boots so as not to reduce blood flow to your toes along with spare socks. You’ll also want:

• Clothing articles that are not made out of cotton as this material absorbs moisture and doesn’t insulate when wet.

• Keep your head warm with a hat or beanie while protecting your face with a face mask.

• Bring gloves that are not made out of cotton.

• Have spare, loosely fitting layers available to add or take away as temperatures change.

• Hand warmers that you can keep in your pockets.

• A Winter coat, one of the most important items to help keep warm. See this guide on the best winter coats for extreme cold.

3. Water Purifier

The fact is you can only carry so much water. If you are unexpectedly stuck in the wilderness for more than a day, you’ll need to find a water source. Since unpurified water can leave you sick, weak, and unable to walk your way out, you need to clean all contaminants from water.

The most obvious way to do this is by boiling your water. But, starting a fire is not always practical and in many places there may be a high danger of fire. So, the best option is to bring a water purifier.

What Can I Use a Water Purifier On?

With a water purifier at your disposal, you can obtain water from the environment around you. This includes water from a creek or any other wild body of water.

Various Types?

There are different types of water purifiers that you can purchase for your next trip. Each type will have pros and cons and you should weigh what you need vs their price and other features.

Here are a few types:

• Water filtration pump

• Squeeze or gravity flow system filters

• Tablets or drops

• Lifestraw

• Lightweight backcountry stove

4. A Compass

Although we tend to use GPS to get around these days, it still is important to carry another location device such as a compass. Hunters are frequently out in the middle of nowhere to find the best prey, putting themselves in risk of either their phone losing service, getting destroyed, or running out of battery.

There are a variety of compasses based on how you plan to use them and the difficulty of the terrain you will be in.

5. A Topographical Map

A topographical map is a detailed and accurate representation of two-dimensional features on the Earth’s surface that are natural and human-made. It will allow you to know the features of the surround area without being able to actually see them.

Why Bring it?

According to Real Tree, topographical maps are an essential when hunting out in an area that is less familiar. You can even use these maps to locate deer travel corridors.

More importantly, even if you get completely lost or disoriented, you can figure out where you are and navigate back to safety. There are plenty of stories of people who have got lost and died less than a mile from well worn trails, you don’t want to be one of them. So, bring a compass and a map.

How Can I Read One?

Topographical maps can be confusing to read without the proper training. You’ll want to spend some time learning the major and minor terrain features, how to convert from grid to magnetic north, and how to determine your exact location in a variety of ways.

What Else Do I Need?

Hunting expeditions lead one far away from civilization, making it a priority to pack properly. While there are probably 100 different things you might want to take, you have to balance between necessity and your ability to carry it.

Regardless of what you do or do not bring, make sure you have these 5 items.

5 Tips To Learning About Outdoor Sports

Outdoor sports are not everyone’s cup of tea, most people prefer other sports. Learning a sport may be a little difficult because most people do not engage in them regularly. However, there are easy and fun ways you can learn about sports;


  1.       Look out for outdoor sport events near your area

Nowadays, lots of outdoor sport events are held, mostly in sports clubs, ranches, etc. The easiest way to find out about such events is through the internet, mostly social media platforms. This can be a great way to learn about these kind of sports especially because you will participate and a lot of people attend these kind of events. What’s more, there are usually multiple sports taking place with competition and this makes it even more fun.


  1.       Try enclosed outdoor sports first

Hiking, rock climbing, skydiving and the other outdoor sports don’t sound fun to some people. So, instead of going for the actual rock climbing -or any of the outdoor sports- try indoor rock climbing first. Although it may not provide the same experience as the actual rock climbing, it may just ignite the interest you never knew you had. Also, it is a fun and easier way to learn about the actual outdoor sports.


  1.       Visit an outdoor gear store

Most of these store owners are professionals so, this way you learn about both the sport and gear from an expert. Also, you may have wanted to get gear for an outdoor activity you are interested in, for example hunting. You learn about the gear you want in depth and specificity for instance; the best rifle for squirrel hunting or the best bow for deer hunting, etc.

  1.       Suggest outdoor sports to your friends

Instead of you and your friends going out next time, suggest that you go for a forest hike or for biking. It is even a lot more fun when with friends than strangers and the more you take part in them, the more you learn about them. Also, don’t go for the same sports every time, try different ones. As long as your friends are for it, you will actually want to engage in them as compared to when you are alone.


  1.       Browse the internet

When trying to learn, you can never go wrong with the internet. Even though participating may be an excellent way to learn about outdoor sports, you don’t have to go that way. You can browse the internet and get all the information you require about a particular outdoor sport. You even get to know about the best places and terrains to go for the sports and the safety measures and precautions to take. Afterward, you can engage in the sport whenever you have free time.

Outdoor sports can be hectic if not well prepared for. Preparation is not only physically, but also mentally. So, if you intent to fully engage in these kind of sports then prepare well and don’t forget to get in condition.

The Top 3 Pros and Cons to Using a Crossbow Versus a Compound Bow

Hunters and people who love the game of archery will need a bow, obviously. The question in their head as they shop may be which one would suit them best. Is it the crossbow or the compound bow?

Archery sport helps players develop various qualities within them. For instance, since you will learn to shoot at multiple targets, you will need to have some level of focus. Therefore, these people are keen when they perform other tasks.

Today we will analyze different pros, cons of the crossbow, and the compound bow.

Crossbow

This modern bow works precisely as a rifle. It consists of distinct features that make it stand out and increase its power. The hunter will hold it in a horizontal position when aiming at specific targets.

Pros for using a crossbow

  1. Ease of use

Hunters love a tool that is quick in function. One benefit that the crossbow features is that you do not need hours to practice shooting at a target.

As mentioned earlier, it works exactly like a rifle; therefore, you only need to press the trigger to release the arrow. People with disabilities can use the bow since you do not require both hands necessarily.

  1. Power

Once you release the trigger, the shaft moves at lightning speed. Within a few milliseconds, the arrow can dig deep into the target’s surface or animal skin. The user has to use a lot of force to remove the arrow from the surface that it strikes.

  1. Accuracy

The bow has a scope fitted at the top for the user to aim the target with. This means that you do not spend a lot of time trying to point at the game or prey. The scope also assists when the light conditions are poor. For this reason, many people rely on this tool, especially when hunting.

Cons of the Crossbow

  1. The bow is heavy. It becomes a problem when you have to carry it for longer distances.
  2. The bow releases some noise once you press the trigger, which distracts preys if you are aiming at more than one.
  1. Some states limit the use of crossbows. Users need to check with their state laws to see if they need to acquire a license to use one within the state boundaries.

Compound Bows

This is also a modern bow. The user will hold it in a vertical position when aiming at a target. You will also need to pull the string to release the arrow, unlike the crossbow where you just press the trigger.

Pros of the Compound Bow

  1. It is ideal for people who are learning how to aim and shoot. While you do this, it helps to develop your focus.
  1. The bow is not noisy. This is suitable for hunters because you have the liberty of shooting at more animals without distracting other prey around it.
  1. Most love it because it is light. It has additional straps that ease the weight, especially when walking for long distances.

Cons of the compound bow

  1.  People use much time learning how to aim. This would be a significant disadvantage for beginners. You also have to learn how to focus when aiming at your target as well.
  1. They are not as powerful. Most people prefer to use the bow for the sport rather than hunting. The strength you apply on the string determines the distance that the arrow travels.
  1. Compound bows are not suitable for individuals with disabilities. Additionally, if you have an injured arm, it would be difficult to handle the bow.

Conclusion

The type of bow you choose depends on your preference. Check www.archery-den.com/best-crossbows/ to see the most suitable bow for you. You will find a variety of bows to pick depending on your budget.


5 Tips to Learning How to Hunt


Hunting is a favorite pastime of many. In fact, people have been hunting for years and it is a sport that has been able to bring family members together for centuries. In addition to bringing people together, hunting provides a great deal of food for one’s family and also helps the environment with natural population control. While there will always be some that do not believe in the hunt, there are cultures that rely on it for survival and see it as a way of life. If you have never gone hunting before, this article will provide some tips to help you learn how to hunt.


  • Slow and steady wins the race. No matter what you are hunting for, it is important to be slow and steady in your approach. The reason for this is that animals have a keen sense of smell and can hear things from farther away than humans can. New hunters tend to find the notion of staying still and moving slow to be a hard concept to grasp at first. One of the best ways to get the hang of being still or moving slow is to use your watch. Find a place to perch or hide and stay there for at least 5 minutes before you decide to slowly creep to another area.


  • Stop when you hear noise. Whether you hear a deer, squirrel, or a group of ducks, when you hear a noise, it is best to stop and be still for a few minutes. When you stop and can be still, you can take in what is going on around you. If you make a sound and an animal is around, they will stand still and look around for a period of time. A duck may fly off into the distance while alerting others of the same species.


  • The environment can make a difference. Whether you choose to hunt during the day or in the early morning hours, the environment in which you seek animals or ducks makes a big difference. For example, if you are seeking out a duck, check to see which direction the wind is blowing. In addition, look for water holes as ducks are typically attracted to them. Setting up decoy ducks and using a good set of waders are important recommended tips for hunting ducks that should not be overlooked.


  • Bring proper tools. When hunting, it is important to field dress your prey right away or you will risk spoiling the meat. This is particularly true for deer meat but also for other smaller game. Make sure to bring along a pair of skinning shears as you should skin the fur off of smaller animals such as a rabbit or a squirrel as soon as you kill it. The reason for this is that the fur will come off easier when the animal is still warm. One of the most important reasons to handle this right away is that many animals carry fleas. Fleas can carry disease. When you skin the animal, you can get rid of the fleas before it has time to attach to the meat.


  • Dress warm and bring a canteen. It is important to dress for the weather and stay hydrated while you are out hunting. If you are out hunting for a full day you don’t want to get cold or dehydrated. Make sure you wear enough layers and bring waterproof clothing if you think there may be a chance of rain. It’s alway a good idea to workout how much fluid you need for the amount of hours you intend on hunting and pack appropriately.


How to Teach Your Kids to be Prepared… For Anything! [INFOGRAPHIC]

Family survival planning is a very engaging and beneficial undertaking. Not only is it important that everyone is on the same page, should disaster strike, it can be a great bonding experience to bring you all closer. In the long run, this gives you the necessary tools to become a cohesive unit of togetherness that can combat any situation, should the worst happen.

There’s such a wealth of activities you can engage in that your kids will love as well, so it doesn’t have to be a monotonous task, but rather real life lessons exploring the outdoors for example.  If you have young children, then you can start these valuable lessons from as early as five years old to really bed in some of the key lessons that can then be expanded upon, right up to their teenage years. Broadly speaking, there are a few main considerations to address as a starting point.

Shelter, food and spotting early warning signs are great kick off points for any discussion or activity and can be a recurring theme throughout your lessons. After that point, your judgment and intimate knowledge of your kids will dictate how you move forward.

With that in mind, check out the below infographic provided by MIkes Gear Reviews to get a better understanding and ideas of how to prepare your kids for anything life throws their way.

Teach kids to survive


How to Make a Good Emergency Plan for Your Family

Maybe you receive a fair bit of warning, like a weather report predicting a hurricane, or maybe a sudden tectonic shift creates an earthquake with both immediate and cascading, destructive effects. Either way, there is no reason to be caught off guard and without an emergency plan.

Given that even fairly basic emergency plans can be prepared relatively easily and cheaply, finding yourself surprised by a sudden catastrophe places yourself and loved ones at risk without a good justification. If you are still sitting on the fence, or more likely the couch, here are five reasons why you should have an emergency plan ready and waiting for the unforeseen.

How to Build a Disaster Kit Infographic

5 Reasons Why is Important to Have a Family Emergency Plan

Speed – When a disaster strikes, time is the most valuable resource and one that you simply cannot get more of. That is why a proper emergency plan includes more than just the supplies you have collected. It includes a comprehensive approach that accounts for all stages of response. One of the most important is the very first stage.

Regardless the disaster, the first stage will involve organizing the party in a single location if possible. If the party members are separated, plans for reaching various rally points before meeting up can give a quick recovery to a chaotic circumstance. Unless the disaster calls for you to ride it out, like with a tornado or some other such disaster, those first moments can determine whether a disaster is manageable or filled with regret.

Efficiency – Considering response time is one the most vital elements for successfully reacting to a disaster, a well-developed kit will require a plan that provides each member of your party with a set of responsibilities so that they do not have to figure it out on the fly. Setting up a series of rally points or keeping a well-stocked and organized bug out bag on hand will only go so far if you have to figure out the steps after your party meets up on the spot.

Moreover, if everyone knows what they are supposed to do and has a specific set of tasks, your party as a whole can accomplish more in the limited amount of time before bugging out or hunkering down than one or two people could alone. Remember, children can contribute too–just make sure their tasks do not strain them physically as their endurance levels are likely not as developed as the adult party members

Reason vs Instinct – People are constantly saying that the best answer is usually your first thought. This may be true when you are in a safe and comfortable situation without the threat of injury or death, but when survival is on the line, people’s instincts usually do not serve them any better than a random guess.

However, if you take the time to develop a plan of action for when disaster strikes, you will be more likely to keep a cool head, reason through the risks, and determine an appropriate course of action. Remember, anyone in a profession that involves risk of bodily harm trains for hundreds, sometimes thousands, of hours to develop the kind of mindfulness necessary to make rational decisions in high-stress scenarios.

Supplies – Once a disaster strikes, what you have on hand is likely the only supplies you will be able to procure. In fact, even if you have some warning, there is a good chance that a run on supplies by unprepared people will likely clean out your local stores in record time, not to mention delay you further from escaping or hunkering down as the situation calls.

That is why you should make sure that you have a fully stocked and packed bug out bag for every member of your party–ready and waiting to go the second it is needed. Keep in mind, having your supplies packed in an easily reachable place is just as important as having the supplies in the first place.

Self-Reliance – Despite what you may see on news reports during a disaster, most assistance that people receive occurs well after the disaster has already passed. As heartening as it is to witness neighbors from the surrounding region pitch in to help out those caught in an unfortunate event, they generally only do so once their own safety can be secured.

As sad as it may seem, you cannot rely on government institutions or other authorities to come to your aid when disaster strikes. Chances are, they are already overwhelmed with calls for similar relief. Moreover, charities and NGOs generally begin their relief after the danger has passed as well.

Things to Consider When Making an Emergency Plan

As alluded to earlier, a solid emergency plan includes far more than simply a bug out bag with all of the supplies necessary for a few days. The plan should account for all the steps each party member will need to take before, during, and after the immediate danger has passed. This can be broken up into three sections.

Pre Planning – This is arguably the most important part of an emergency plan. This is the point when you figure out where the party will meet up depending on their dispersion. Moreover, the different members should understand their assigned tasks as well as the routes and location should you need to leave the area.

In the Mix – Once it comes time to put your plan into action, you will need the members of your party to respond without hesitation. That is why it is important that your party actually runs through the plan before a disaster strikes, ideally to the point that it becomes muscle memory, so that no time is wasted when rubber meets the road.

Survival – Depending on the disaster, you may well be without many of the modern amenities so many people have come to rely upon for their daily survival. That is why you need to know how to survive in the wild for extended periods of time. Various survival skills like building a shelter, starting a fire, and securing food and water are vital.

You can find an easy to read checklist packed with tips and necessities for a proper emergency plan at Survivor’s Fortress.

Conclusion

Just remember, your actual plan is every bit as important, if not more so, than your bug out supplies. While planning may not provide that immediate rush of accomplishment or sense of satisfaction that a well-prepared bug out bag can, supplies without a plan can only take you so far.

Keep in mind, your plan needs to account for all stages of disaster response. If you are bugging in, your plan may not involve as many steps, but each step is just as vital to ensuring your survival. Moreover, every party member needs to know the different roles and tasks to be accomplished.

With a thoughtful plan that considers numerous types of disasters, includes a variety of redundancies, and maintains the ability to improvise if necessary, you and your party should feel confident in its ability to handle whatever the world throws at it.

Further Reading:

How to Prepare Fresh Game Meat For Storage

If you’re hunting for meat, the last thing you can afford is for the meat to spoil before you even get it home (or to a processing facility). It’s tough to understand all of the ins and outs of preserving game meat, especially if you’re hunting in warm temperatures.

Here are a few of the most common questions I hear about game preservation:

  • How long should you wait to skin an animal? Do you need to do it immediately?
  • Does the temperature outside matter?
  • How can I keep my meat safe from bears and other predators?

Some of these questions are easier to answer than other. For example, if your hunting grounds are accessible by vehicle, game preservation is a pretty simple process. In fact, there’s really only one step to it: Collect the dead deer or other game animal and haul it to a cooler to be processed as fast as possible.

In the backcountry, or further away from a vehicle, it’s considerably more difficult. However, if you understand the common causes of spoilage and the ways to prevent it, you shouldn’t have any problems. Let’s get started…

What Factors Cause Meat to Spoil?

The biggest cause of meat spoilage is the body heat emitted by the animal itself.

While an animal’s normal internal temperature usually hovers around 99 degrees, this can actually increase once an animal dies. How is that possible?

Well, the animal’s muscles continue to generate heat; without the assistance of a functioning circulatory system, this heat doesn’t circulate properly through the animal’s body.

That’s why the most important thing to do is to lower the meat’s temperature to the temperature of the air around you–once you accomplish this, you’re nearly “home free”.

Should You Skin Your Deer?

Skinning an animal isn’t always necessary–if the outdoor temperature is 40 degrees Fahrenheit or lower, you can simply gut the deer while leaving its hide intact.

Deer are relatively small, so they cool faster than larger game animals.

In warm weather (above 50 degrees), however, you should take special care to skin animals quickly–especially large animals like elk with heavy hides. Removing the hide is essential to cool the meat so it doesn’t spoil.

How to skin wild game

If you need a little guidance on skinning game, I personally really like this resource provided by Outdoor Hill.

Hunting with Arrows

Many expert hunters recommend using a crossbow when you hunt elk and even deer; one reason for this is that an arrow doesn’t harm the meat nearly as much as different types of ammunition.

Bow hunting

Granted, hunting big game with an arrow is easier said than done, but it’s a lot easier with the right crossbow scope.

Should You Hang the Carcass?

Yes, you should hang the carcass up. Air circulation is essential to quick-cool meat, and hanging is the best way to accomplish an all-around circulation.

Should you hang wild game kills?

This doesn’t mean however that you need to hang the deer very high–remember, the air is cooler lower to the ground.

Should You Gut Your Game?

It’s tough to gut large game animals such as elk–you don’t want to be knee-high in blood and guts, after all.

A better method is to slit the hide from tail to head. Then you can skin the upper half, remove all legs, and debone the ribs, neck, and brisket.

Should You Bone the Carcass?

If you’re carrying the meat for a long distance, boning can make a huge different in the amount of weight you’ll be carrying.

Boning the meat also ensures that it will cool quicker, which will prevent spoilage. At the very least, you should remove the biggest portions of bone, such as the shoulders and hips; these large bones can maintain the heat within the carcass for hours after death.

Although some argue that boning the meat will expose it to more dirt and cause the meat to dry out, it’s an easy problem to solve: you just need to bag the meat and seal it well.

Preventing Excess Moisture

Next to heat, bacteria is one of the most common culprits when it comes to spoilage. The bacteria that spoils meat thrive best in wet environments.

While you should still wash the meat, you should wipe it dry and leave it out to dry in the air for awhile before you bag it.

Keeping the Meat Clean

If you’re hunting in the cold weather, you most likely won’t have to deal with flies. In higher temperatures, though, they’re a formidable opponent.

how to store willd game meat

If you’re hunting in warm weather, you should bag all skinned meat as soon as possible. Invest in high-quality, compact and easy-to-carry bags.

What About Air Temperature?

Once you’re able to extinguish the carcass’s natural body heat, the temperature of the air around you is not much of an issue. If you’re hunting in hot temperatures, however, this article from Field and Stream has handy tips to keep your meat fresh.

As long as you can cool the meat to 40 degrees, time is one your side. Most commercial butchers age their beef or game for a few weeks; they quick-age beef even faster, and at a higher temperature.

Bear Safety

Although it’s understandable to want to keep your meat (and yourself) safe from bears, it’s unlikely that you’ll be able to hang an animal carcass at a “bear-proof” height: bears can reach 10 feet or higher.

Your best bet is to skin, bone, then bag the meat as quickly as possible; this will lessen the time that the animal’s scent will dissipate through the air, attracting bears and other predators.

Most Important Takeaways

If you’re hunting for meat, as opposed to sport, these are important rules to follow. Don’t sabotage your efforts and your health by allowing meat to get dirty, infected, or spoiled by the natural body heat reserved in it after death.

Here are the most important things to remember to keep your game meat fresh, especially if you’re hunting without a vehicle nearby:

  • Skin the animal as quickly as possible, this will help the meat cool to the outside temperature.
  • You should, at the very least, remove all large bones. They will weigh you down, and they cause the meat to retain more heat for longer.
  • Wash and hang your meat to dry.
  • Bag your meat as soon as possible, especially if you are in a warmer climate, or you are in an area known to be populated with bears and other predatory animals.

I wish you the best of luck properly preserving the game meat that you hunt. Let me know if you have any questions, comments, or ideas of your own in the section below. Happy hunting!

Chris Browning is the senior editor of Gun News Daily. The site was originally built by his father who used it as a resource center for people looking to learn more about gun education and safety. This legacy was carried on by Chris, who relaunched the magazine in 2015 and began to rebuild GND.

For the bulk of his career, Chris worked as a private military contractor for a number of NGOs. He is currently living outside Loveland, Colorado where he runs GND and a local coffee shop. Chris is also actively involved in the local community where he runs annual skeet shooting events.

Gun News Daily


Sticky Stuff: 15 Ways Duct Tape Can Save The Day

Original Article by PartSelect Blog

Written by Alison Hudson

No matter what the seasons is, a trip in the backcountry requires a few essential items: food, shelter, and duct tape. For some people, the list could be whittled down to simply duct tape. Its adhesive capabilities and waterproof exterior make it one of the most dextrous tools you can carry; in a pinch, it can be used to build a shelter and create snares to catch food. Try turning a freeze-dried meal into a tent or vice versa! If you aren’t sold on the wonders of duct tape, here are fifteen reasons to bring a roll on your next wilderness expedition (and a few tips for how to keep your stash of tape organized and safe from the elements).


How to Pack It

On a backcountry trip, you won’t be happy carting around an entire roll of duct tape, replete with the inner cardboard roll: it’s heavy, it’s bulky, the cardboard will disintegrate when it gets wet, and the roll takes up an inordinate amount of space. Here are a few techniques for efficiently packing duct tape to bring on your next trip.


Flat Wrap

A little time consuming, but with a nice, compact final product. Simply start unrolling a little of the tape. When you have about 4 inches unspooled, fold the tape back on itself so you have two sides that are not sticky. Keep folding the tape on top of itself until you have the amount you need for your trip. Pack the duct tape in a ziplock bag to keep it from sticking to other things in your pack.


Spool

This is a common trick used by people who hike with trekking poles. Start by holding the trekking pole sideways so that it’s easier to work with the tape. Then wrap the duct tape around the trekking pole until you have the desired amount. If you don’t like a thick roll of tape, consider wrapping half on one pole and half on the other.


Half Spool

For little fixes, it’s nice to have a thin strip of duct tape, rather than the bulky width of the tape on the roll. To create a half spool, find something round, like a tent pole splint or a pencil. Using a sharp blade, slice the duct tape on the roll so that you have either two or three equal widths of tape; if you score all the way around the roll, it’s a lot easier to pull off. Start rolling one strip around the pencil until you have enough.


Mix it Up

Duct tape now comes in a variety of colors and patterns, all of which have the same strength and stickiness of the original silver tape. If you’re hunting, pick up some camo-colored tape (or hunter orange for making yourself visible). If you’re wrapping tape around trekking poles, having two different colors of tape can help differentiate the two poles. If you anticipate using the tape to mend clothing, tents, or other wearable items, black, blue, or dark green make more discreet patches than the bright silver. Neon shades work especially well for marking trails because they show up so much better than silver or dark colors.

Fix Things

The original purpose of duct tape was to make repairs. This is one of its best applications in the wilderness, where supplies are limited and multi-purpose items are priceless.


Fix Your Gear

Broken Ski

A broken ski can be a huge hindrance, especially if you’re far from your car. Duct tape can be used for an easy fix, whether it’s a nordic or downhill set up. Using a thin tree branch as a splint, tightly wrap duct tape around the stick and both pieces of broken ski.


Repair a Tent (pole)

A broken tent pole can be detrimental to an extended camping trip. Even if your tent came with a splint for a broken pole, duct tape is a lot easier to use. Place the broken ends side by side, so they overlap, and wrap them tightly with tape.


Inflatable Mattress

Nothing is quite as pernicious as a leaky inflatable mattress. In a pinch, a circular duct tape patch will keep the air from escaping while you sleep through the night. Be sure to clean the area around the patch before placing the tape to make a better seal.


Repair Clothes

Rips, tears, shredded cuffs, all of these can easily be fixed with some masterfully placed duct tape. For rips, use a round piece of tape because the lack of corners makes it more likely to stay in place. For cuffs, fold a piece over the edge and press it smooth.


Repair Sunglasses

Broken ear piece, loose lenses, snapped nose bridge: these are just some of the ways in which sunglasses can break at the more inopportune time. Duct tape can be used to fix all of these problems, whether it means wrapping the nose bridge in a thin strip, wrapping the ear piece with a wide piece, or carefully outlining the lens with tape to keep it from falling out.

Fix Yourself

Band Aid

It may not have the same padding, but duct tape will keep a wound dry while keeping dirt and other detritus from causing an infection.


Ankle Wrap

Though not as flexible as athletic tape, duct tape will make a useable ankle wrap in a pinch. Wrap the tape with the sticky side out to prevent tearing skin away when the wrap is removed.


Prevent Snow Blindness

Forgot your glacier glasses in Base Camp? Duct tape can be used to make improvised sunglasses that will help prevent snow blindness and other eye injuries from bright sun on snow or water. Simply cut a width of duct tape (or two) that will extend across your face and make two very narrow slits where your eyes line up with the tape.


Tick-proof

In deep weeds or grasses where ticks are prevalent, it’s vital to seal all entrances to bare skin. Wrap duct tape around the bottom of your pants and tops of your socks to keep ticks from slipping through while you walk.


Cover Bug Bites

Some bug bites react well to being covered with tape, especially chigger bites. If you’re getting plagued by bug bites, use duct tape to cover the itchy bites and prevent worse damage.

Prevent Things from Breaking

Duct tape is perfect for preemptive use on gear that could get damaged.


Pants Cuff Care

How many pairs of hiking pants or rain pants have you seen with blown out cuffs? It’s easy to ruin a pair of expensive pants by walking on the cuff. To prevent fraying, use a piece of duct tape to reinforce the hem. This is especially useful for rain pants, which are expensive to replace.


Waterproof Map Case

Duct tape is an inexpensive way to waterproof papers and other items that need to be protected from the rain. To make a map case, start by cutting two pieces of cardboard to match the size of your map or other papers. Once you’re created the template, cover the cardboard with stripe of duct tape. Be sure to overlap the edges of each piece to make it extra waterproof.


Dry Bag For Electronics

Using the same process described above, you can easily create a waterproof case for your electronics (everything from a smart phone to a satellite phone).


Hide-a-Key

It’s the last day of your wilderness trip and you’re back at the trail head exploding your back in search of the car key. Next time, use a piece of duct tape to secure your key under the car. That way you don’t have to worry about losing it in the woods or a lake.


Mark a Trail

Bright strips of duct tape can be used to flag a trail through the woods so that you or others can follow the path without getting lost.


A roll of duct tape and some creativity will go a long way toward relieving a stressful situation in the wilderness. Always pack more tape than you think you’ll need and don’t be afraid to experiment with bold ideas; when duct tape first came out on the market it was used on weapons, military vehicles, and boots. There is no situation too sticky for some duct tape.

Buy your duct tape in bulk and save some money with Sams Club discount codes


Embed Large Illustration:

<a href=”https://www.partselect.com/blog/duct-tape-hacks/”><img src=”https://www.partselect.com/assets/content/23995/duct-tape-embed-large.png” border=”0″ /></a><br />Source: <a href=”http://www.partselect.com/blog/”>Partselect.com</a>