32 Survival Uses For Trash Bags


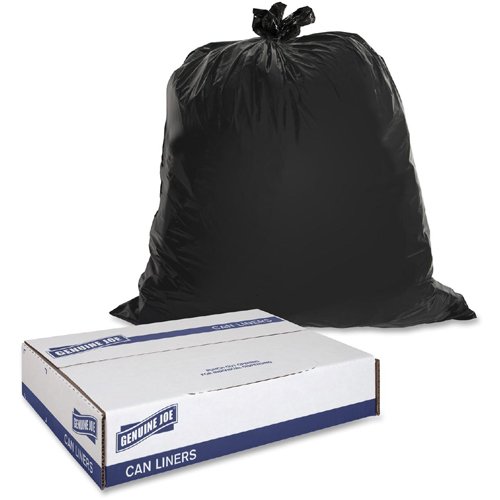
Heavy-duty plastic bags, like those meant for trash and yard debris, can be used in a surprisingly wide variety of ways to help ensure your survival during a disaster situation like an earthquake, hurricane, or even Zombie outbreak. These light-weight, extremely low cost, readily available, and incredibly versatile tools should be in every B.O.B. (Bug Out Bag)  and Emergency kit.

Trash Bags

We’ve listed a few of our favorite survival uses for plastic bags, but keep in mind that this everyday item is only limited by your imagination… and whether or not you happen to have a few on hand.


MEDICAL 

While it might be the first thing that comes to mind when you think of a trash bag or yard debris bag; a clean, unused bag can be used for a wide variety of medical purposes.

Waterproof bandages – After applying the appropriate bandage to a wound, place a layer of plastic bag over the bandage to protect it from outside moisture and contamination. Secure the protective covering properly, and remove and change the bandage and covering as needed.

Fight hypothermia – The potentially deadly effects of hypothermia can be battled by utilizing a large plastic bag as a “hot box” or additional layer to trap heat next to the body. Simply cut a hole for your head (and arms if needed), and wear the bag as a pullover. You can also simply drape the bag over your body, as you might a survival blanket.

Cold Compress – Fill with snow, ice, or cold water. Fold or tie off bag and apply as needed.

Handle medical waste – Plastic bags can be utilized as gloves for handling medical waste and contaminates such as blood, organs, vomit, and fecal matter… though we’re not sure why you’d handle the last two, unless you’re cleaning up a mess. Check the bag for punctures and/or rips BEFORE you try them on as gloves.

Tourniquet – Like many other flexible materials, large plastic bags can be used as a makeshift tourniquet. While it wont be the best thing for long term use, it can make a world of difference for the short run… remember it’s all about surviving the moment, you can worry about the long-term later.

Sling – Plastic bags can be used to support and immobilize a broken or wounded arm.


WATER

Containers come in handy when you need to collect, transport, and/or treat water, but there’s even more that you can use them for when it comes to water.

Collection/Storage – Lining a trash can, hole in the ground, or other receptacle with a clean plastic bag makes the collection of rainwater safer than simply letting it fill into a potentially contaminated container. Plastic bags can also be used as scoops for collecting water from pools, streams, and other bodies of water.

Solar Still – Fully enclose the leafy green area of a tree branch, securing the plastic bag tightly at the opening. Let it sit in the sun for a few hours as the condensation builds within the bag . Carefully remove the bag when ready, and repeat the process as needed. This method doesn’t typically result in large amounts of liquid, but every little bit counts… especially during a survival situation.

Transport – Creating a sturdy double walled bag for transporting water can be done in just a few steps. Cut or tear open the sealed end of a plastic bag so you are left with a tube. Twist or tie a knot in the center of the bag so you are left with two open ends and a shape like an hourglass. Fold one side over the other and you’re left with a double walled water carrying device.

Filter/Purify – Water isn’t any good to you if it isn’t safe to drink, but a simple plastic bag can go a long way to making water potable. Learn other important tips and tricks for water filtration and purification here: H20 (Water).

Gravity Filter – Gravity filters are simple multi-layer systems that remove the majority of contaminates, and you can easily make one at home. Double wall a plastic bag as seen in the WATER: Transportation portion of this article. Cut a small “spout” hole into the lowest point possible, without destroying the integrity of the bag too much. Reinforce the spout with a bit of duct tape so it doesn’t split when filled. Next, place a coffee filter, bandana, or similar cloth or material for filtering inside the bag and up against the spout. Then carefully pack and layer the following materials into the lower portion of the bag: 2″-3″ finely crushed charcoal, 2″ fine sand, 1″ small stones, 1″fine sand, and 1″ moss, grass, or other porous material. Gently fill the bag with water, tie a knot into the top, hang it up, and allow it to do the job.

Solar Treatment / SODIS – This can be a fairly unpredictable method for treating water, especially during cloudy or winter weather, but when done properly, it can work like a charm. The SODIS method relies on the power of solar rays to purify water; this is only helpful if larger contaminates have first been removed with basic filtration methods like the one listed above. Utilizing a large plastic bag for this method should be a last resort, as not all bags are made from food grade materials. This method is only effective when using CLEAR plastic, tinted or colored materials will not work. 

Solar Shower – Fill a darkly colored plastic bag with water, hang it above head height, let it sit in the sun for a bit to warm up, poke a couple of small holes in the bottom, and enjoy a nice warm shower.


FOOD

Collecting, capturing, and storing food can be difficult during a survival situation, but a trash bag can make the task a whole lot easier.

Collection – Whether you’re raiding the wilds, a nearby farm, or grocery store, containers come in handy… and that’s just what a trash bag is, a container. No matter what you find or where you find it, you’ll need a way to carry your collected goods.

Storage – Just like with water, lining a trash can, hole in the ground, or other receptacle with a clean plastic bag makes the storage of food much safer than placing it into a potentially contaminated or uncovered container. Plastic bags can be sealed by twisting the top and adding a bit of cordage, or simply by tying a knot in the top of the bag itself.

In addition to being a great lightweight container for food items, plastic bags can be tied and hung away from the ground and the prying hands of Zombies, other survivors, and wild animals. A well-sealed bag can offer the advantage of a longer shelf-life of some foods… as long as you store it in a cool dry place.

Trapping Set them as netting for bugs and fish, or use them as sacks to quickly and more easily bag a bird, squirrel, or other small animal that lends itself to capture.


SHELTER

From additional security to being used as shelters themselves, heavy-duty plastic bags can be utilized in a number of ways when it comes to provide protection from the elements and the undead.

Tarp Tent – Just like an emergency blanket, poncho, or tarp, a plastic bag can be used to create basic Tarp Tent style shelters and protective covers. Cutting the bag down the length of one side, and slicing it along the bottom, can double the square feet of material available for your shelter or cover. Make sure to carry a bit of paracord with you to help when securing your shelter.

Tube Tent – Tear or cut open the sealed end of a large plastic bag, duct tape the tube to another bag, slide yourself inside, and rest well. The ambient heat from your body will build and help to keep your body warm… even in wet and windy weather.

Ground Cover – This one is as simple as it sounds, but it’s important too… especially when you’re sleeping in the wild. Keeping your body away from moisture and the cold of the ground can greatly increase your chances of survival.

Window Black Out – Just because you’re home doesn’t mean you have to look like you are. Blacking out your windows is an important step to ensuring you aren’t hassled by outsiders or spotted by Zombies in a post apocalyptic world. Covering your windows with black trash bags can keep the light from getting out, and you from being seen.

Quarantine – Duct tape and plastic bags can be used to create a fairly effective quarantine area, whether at home or in the field. Simply seal off an area with the bags and duct tape, and make sure it isn’t breached. You’ll need to fully cover any potential areas of transmission, such as heating vents, windows, doorways, etc. 


GEAR/OTHER

Beyond water and food collection, medical assistance, and shelter; plastic trash bags can be utilized as a substitute for many types of gear.

Rain Poncho – The only downside to wearing a plastic bag as a rain poncho is that they don’t breathe. This means that while it will hold the rain and snow out, it will also hold your sweat in. Pay close attention to your body temperature and water-loss when wearing a non-permeable covering like this.

Gear Bag / Dry Bag– Twist the bag a few times just above the line of the gear inside. Fold the excess over top of the bag and carry it upside down. This should create a relatively water-tight seal that still allows for somewhat easy access to important gear and supplies.

Water-proof Boots/Gaiters – Applied over boots, and even bare or minimally covered feet, plastic bags make an excellent material for water-proofing and protection from the elements. They can also be wrapped around the shins or legs as makeshift gaiters for travel through swampy or other exceedingly wet areas.

Flotation Device – Filled with air and twisted shut, heavy-duty trash bags are extremely lightweight and buoyant. They can be used to assist in crossing deep water by simply being held onto, or they can be applied to a raft or other flotation device.

Sleeping Bag / Mattress – Similar to being used as a Tube Tent, large plastic bags make great sleeping bags when stuff with materials like leaves, fabric, stuffing, packing peanuts, etc. Fill the bag as full as possible and crawl in, or use it as a sleeping surface for the night. Not only will this method protect you from the cold, it will help to keep away potential contaminates as well.

Washing Machine – Placing garments into a plastic bag that has been partially filled with water and soap, can actually make a world of difference when attempting to get your clothes clean. Once everything is in there, just jostle it around, empty it out, rinse your clothing, and hang them to dry. Remember, proper hygiene can go a long way to keeping you alive.

Restroom – Sometimes the plumbing goes out, but that doesn’t mean you don’t need to use the bathroom. Placed into a drained toilet or into a 5 gallon bucket, plastic bags can make dealing with waste, a much cleaner and easier process. These can also be used to line latrines when you’re worried about contaminating a nearby water source.


OTHER MISC USES

Creating smoke for signal fires, lashing, patches for clothing and other gear, And of course… collecting and removing refuse, among about a million other uses.

Because not all trash bags are made with the intent of heavy-duty use, it’s a good idea to grab a few construction grade bags from your local hardware store or garden center. Keep a few on hand in your Bug Out Bag and E-kits and utilize them as needed… though we hope you never have to.


[source]

Does It Really Take $50,000 To Be A Prepper?

What Does it Cost to Prepare

Scouring the internet for information on disaster preparedness sheds an interesting light on what most people think it costs to ready themselves for the unexpected. Guides abound on how to prepare with minimal investments – but most put the focus on unreliable foodstuffs, tools, and supplies.

At the opposite end of the spectrum are the complete “how to” guides, that claim to show a family how to prepare for any emergency. These guides tend to indicate that the total cost of preparing a family of four for a natural disaster ranges from $5,000 to over $50,000.

Does It Really Take $50,000 To Be A Survival Prepper?

Preparing for the Worst – Not As Expensive As Most Think

Preparing for a disaster doesn’t mean that you and your family could survive in an underground bunker for thirty years without ever accessing the outside world. It means preparing for the inevitable and unexpected emergencies that can arise at any time.

Disaster preparedness isn’t limited to hurricanes, blizzards, and failures of the national infrastructure. It extends into the smaller disasters that we encounter while going about our everyday lives – like getting stranded in a broken down vehicle in the middle of nowhere, or finding yourself injured while on a hike.

Preparing for these situations is relatively inexpensive. With the help of products like these Backpack Survival Kits it can be incredibly simple, too.

Would you have access to digital money in a disaster scenario? #Bitcoin

Preparing for Different Types of Emergencies

While the ideal disaster preparedness plan includes provisions for long periods of isolation from modern amenities (such as running water and food supplies), the majority of emergencies the average person will encounter require far less extensive planning.

Breakdown / Stranded Emergencies – If your vehicle were to break down, or if you found yourself stranded in the middle of nowhere, what would you do? With a ready-made kit, like the Guardian Elite (which comes prepared in a sturdy, easy-to-carry back pack) you would have food, and first aid supplies on hand. Toss in a few bottles of water before you head out, and you’ll have that covered, too.

Temporarily Unavailable Food Supplies – Whether it’s a true natural disaster or merely a predicted blizzard, when the newsman warns that rough weather is moving in, everyone rushes to the grocery store and clears the shelves. Having a one month supply of food on hand would ensure that your family doesn’t go hungry, and with kits like the Meal Package, is not only affordable, but incredibly easy to store.

In both of the cases described above, your total investment is going to be far less than what you might expect. Since the kits are ready made and based on government recommendations for preparedness, you can also be sure that they’re relatively complete.

Don’t put off preparing for disaster because you don’t think you can afford it – it’s far less expensive than you think.

Please share your cost saving prepper and survival ideas in the comments below.


Ostrich Myth, But Human Nature

Don’t bury your head in the sand. Don’t be the person that refuses to think about an unpleasant situation, hoping that it will improve so that you will not have to deal with it, PREPARE for it.

Don't Be This Guy

No matter where you live, you have the possibility of experiencing a natural disaster. But by putting our heads in the sand, we can leave our families at risk if we don’t prepare. Don’t be this person.

Hey you, Are You Prepared?

When the success or failure of your families survival hinge upon your readiness, a head-in-the-sand approach will surely backfire. Be ready, Be prepared.

source: yearzerosurvival

Myth: Ostriches bury their heads in the sand when they are scared or threatened.

How To Build Your Own Heavy Duty 275 Gallon RAIN BARREL

Heavy Duty 275 Gallon RAIN BARREL
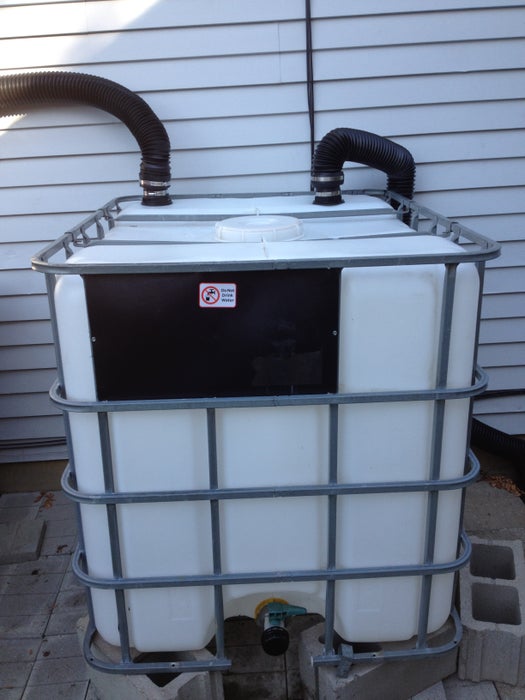
My wife asked for a rain barrel for her flowers. Our water bill has added up again and again, so I started checking craigslist for possibilities. As luck would have it, I found a polytank that was original used for similac baby food storage. That was great, since I didn’t want to worry about chemicals in the tank killing the plants and garden. The seller offered to deliver for the $35 purchase price. Great deal!!

Step 1:

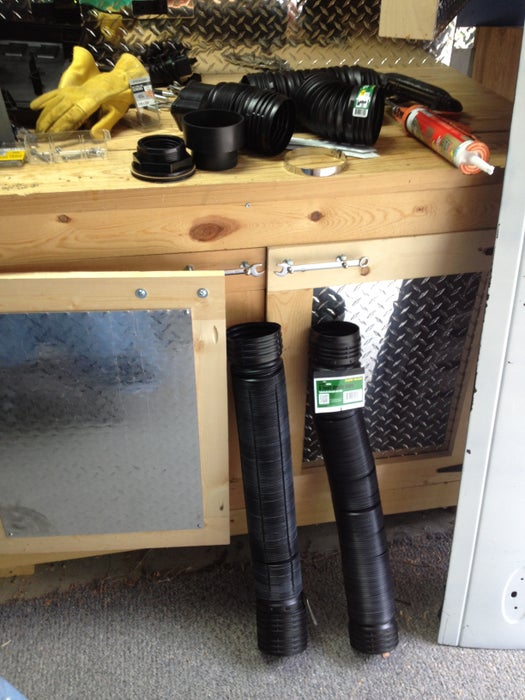
The first thing I did was to go to the hardware store and get connections so I could hook up my downspouts. I found black plastic tubing that was cheap and useful.

Step 2:

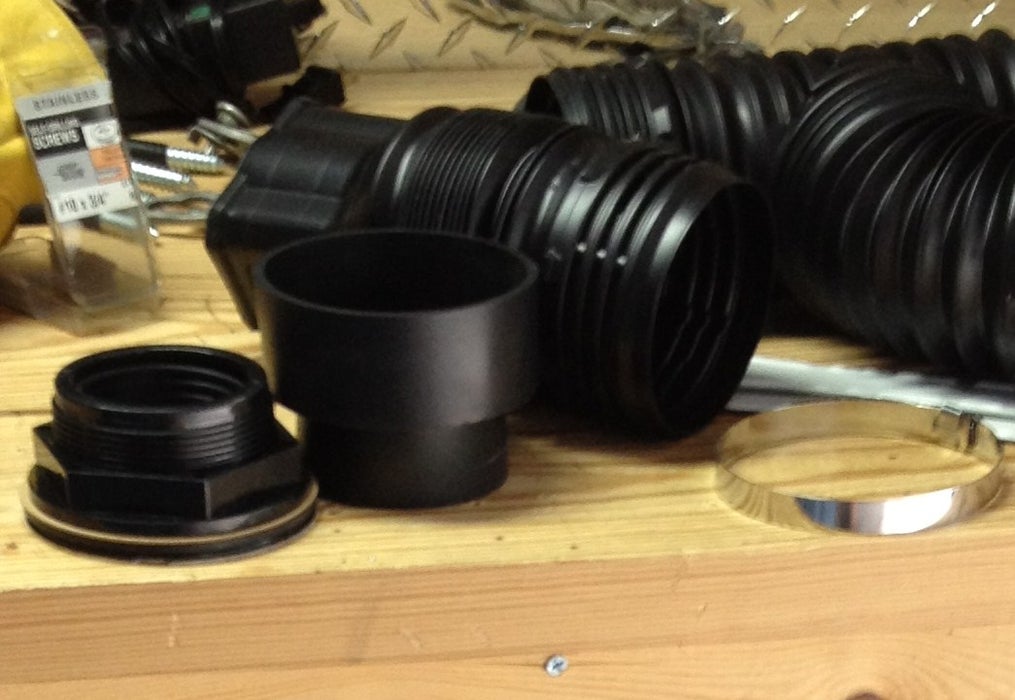
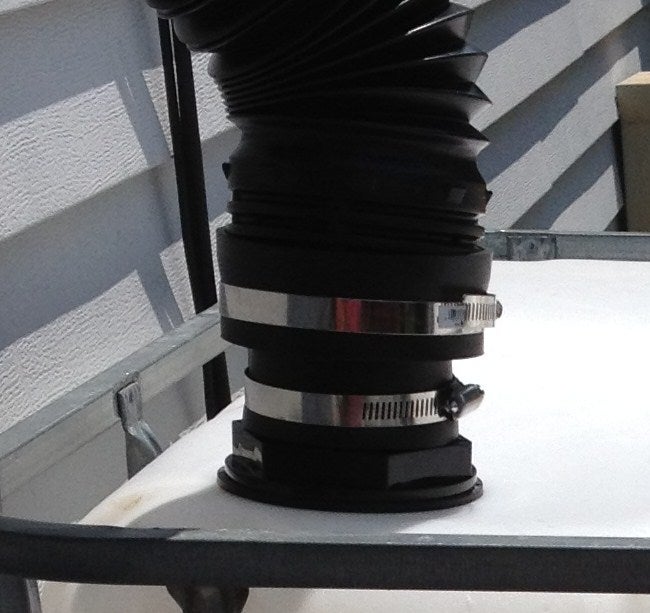
The shower drain is on the left along with the coupling to attach it to the black gutter pipe I got at the store. As you can see the pipe in the background has a square opening, meant to receive the end of a normal downspout from the house.

Step 3:

I couldn’t find a really good connection for the plastic. Most plumbing is meant to be screwed down and wouldn’t work. So, I used 3″ shower pan drain. It was a oversize screw type and I drilled a 3 1/8 hole, slipped the connection in and screwed on the retaining cap. Then I connected the downspout. The sizes were not the same, so I used a rubber connection meant for odd sized pipes. I used metal straps to hold both connections. And as a bonus, the shower drain cover acts as a large item filter for the tank.

Step 4:

I realized I needed a overflow for the water, just in case I filled the tank. (Which has happened twice in the last month!) So I added a second connection that simply goes to the other side and drains into the low ridge between my house and the neighbors, which leads to a sewer drain. So the final product is not the prettiest thing in the world, but it works great and helps to save me a little cash. All parts including the cinder blocks to support the tank were under $100. The tank is up a little to provide some water pressure for the hose. And actually, I may add two more blocks or a water pump soon, because the water pressure is still a little low.

Survival on the Cheap: Preparing for an Emergency without Losing your Savings

By Guest Blogger –  Survival Life

Being prepared for any eventuality is one of the keystones of being a survivalist. However, if you’re just starting out, it can be a little overwhelming thinking of all of the supplies you need to be ready for three days, a week, a month or even more living on your own. Being prepared doesn’t have to cost a fortune though. In fact, re-using items and finding alternative (and affordable) sources for food, clothing and other essentials goes hand-in-hand with being a prepper. It’s a more modern variation of “living off of the land.”

How to stretch your prepping dollars

If you’re looking to start building your survival stockpile, below are a few hints to help you gather everything you need without breaking the budget. (And, remember: you don’t have to buy everything at once; a better plan is to build your stockpile gradually and thoughtfully. Your ideas about what you need will evolve over time.)

Tips for preparing for an emergency on a budget

1. Learn from the couponers. Although you may be buying different items (they’re buying baby food; you’re buying beans), there’s a lot to be learned from the extreme couponing crowd. Combining coupons with store specials can net you regular savings of 30 percent or more on non-perishable food items and toiletries. Take it a step further and join the grocery and drug store reward programs and you can find things like hand sanitizer, toothpaste and a host of other items for free that you can use in your survival kit. To learn more about couponing, check out sites like the KrazyCouponLady.com.

Surplus stores, stores that sell dented cans or half lots of boxed items, can also be good places to find non-perishable food items.  Learn how to create a price binder.

2. Be a regular at estate and garage sales. Estate and garage sales are other good places to find gear and supplies. Estate sales are especially good hunting grounds, since they feature an entire house full of goods. Some sales may require that you dig around in the attic a little bit, but there are often treasures to be found at cents on the dollar. Good things to look for at such sales are water containers, camping equipment and kitchen items. Some people also find good bargains on food at such sales. (I prefer to buy food directly from the grocery or market.) If you do look at food items, be sure to check the sell-by dates.

3. Shop off-season sales. Off-season sales are another good place to find seasonal gear like camping equipment and gardening supplies at prices that are 50 percent or even 75 percent off of their original price.

4. Host your own swap meet. If you know others that are interested in the survival life, you can combine preparing your stockpile with a social night by hosting a swap meet. Have everyone bring something extra from their stockpile and let the trading begin.

Review these 70+ survival items that cost less than $5!

Being prepared for any emergency or situation doesn’t have to be expensive or all consuming. Like other aspects of life, it’s all about smart shopping and always keeping an eye out for a bargain.
About the Author
At Survival Life our mission is to provide vast array of knowledge, tactics, and skills in the survival and preparedness fields, to any and all who wish to become more prepared for whatever may come. We strive to maintain a truthful and unbiased compendium of knowledge, both in original content, product reviews and survival tips, as well as curated articles from other top survival websites. Click here to visit our site and learn more.

10 Considerations For Your Bug Out Location

If worse came to worse and the world was in chaos, where would you go?

Where will you bug out when disaster strikes?

Many people already have determined where they would go – a bug out location – a spot where they could lay low and live for a while if things got pretty bad. If you haven’t decided where you’d go during an emergency, or you already have an idea, here are a few points to consider.

1. How far away?
How far away is your bug out location going to be from your home? With some disasters it doesn’t need to be very far away. For example, a flood zone might only take up a few miles and you might be able to walk to your bug out location. Other disasters, like an economic disaster or nuclear one, might require you to get a little further away from your home.

2. What kind of shelter?
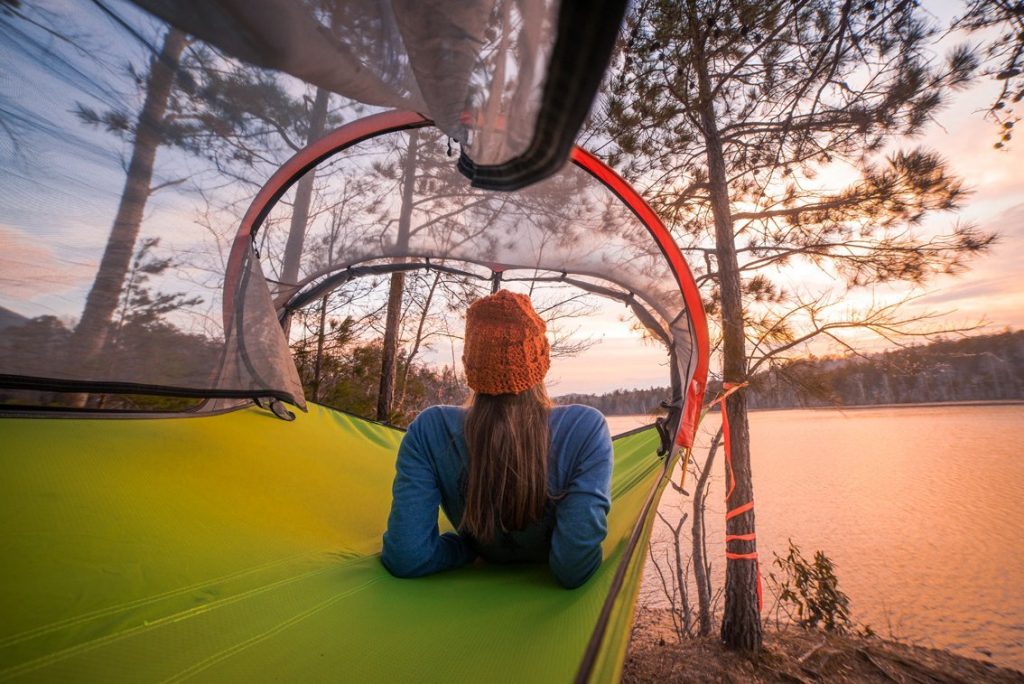
Once you get to your bug out location, what kind of shelter are you going to live in? Is there a house on the property? Are you going to be staying in a tent? The type of shelter that you have might affect how long you are able to stay in the location. If you have to go to your bug out location in the dead of winter, you might be moving if your only living in a tent.

Many people even considering purchasing land in a more remote location so they don’t have to worry about living on someone else’s property. This would allow you to build a home and place supplies there.


3. Do you have a emergency bag?
We’ve talked previously about what kind of items you’d want in an emergency bug out bag or 72-hour kit. Depending on what are you’re in, your emergency items might differ. For example, if your bug out location is right next to a river, you might want a water filter instead of large water containers.

4. Water
Speaking of water, it’s important to know where you will have access to water during an emergency. If man-made water sources aren’t working, you might need to choose a location that has it’s own natural water source. You might want to choose a location close to a lake, river, stream or natural well. Mind you, if man-made water systems are out of service, a lot of people are going to be looking for water in these locations. You’ll also need to consider how susceptible those sources are to contamination.

5. Nearby food
Depending on how long you plan on staying at your bug out location, food might be a major consideration. Are you going to have enough animal or plant life around you that you can just live off the land? Are you going to be packing in all your food? Is the ground suitable for planting?

6. Popular for other people
If you think you’ve found the perfect place for you, there might be others that think the same. While at times, preparing to defend yourself is necessary, you might have a leg up if you know how to barter and maintain a good relationship with other people who are also bugging out in the same location.

7. How are you going to get there?
Like we mentioned above, this really depends on how far away your location is from your home. If it’s close to your home, you might consider walking or riding a bike. If it’s far away, are you going to be driving? This also has an impact on your ability to prepare with food and water. If you are going to be packing in a lot of water and food, how far you have to travel might be a big decision.

8. How many people are you planning for?
Is it just going to be you? Your spouse? Your children? Friends? Extended family? Many times, people will join with a family friend to buy property and build a home on their bug out location. This is probably one of the first things you’ll need to determine because it has a huge effect on your food storage, water storage and other emergency supplies.

9. Communication
How are you going to get in contact with others? Going to bug out location doesn’t necessarily mean that you won’t need to communicate. Are you going to be too far away that you don’t get cell phone coverage? Are you going to get radio and/or TV coverage? Staying in contact with people will help you know what is going on and help you stay prepared.

10. Medical Care
Are you going to have the right supplies at your bug out location? While you might have enough food and water, what if you have a large cut and can’t heal yourself? You might consider a bug out location that is close enough to civilization that you can go to a hospital or find the right drugs that you need but is also far enough away that you can escape if you need to.

What else?
What do you think? What other considerations did you take into account when you were determining your bug out location? Please comment below and let us know. Share your knowledge!

[source]


Is Your Office Survival Ready?

Office Safety

Picture this: A building inspection officer shows up at your office and wants to know about your emergency plans—evacuation, fire extinguishers, smoke alarms, and the like. What do you tell him? Would everyone in the office be able to explain where those things were and how to use them?

Well, if you don’t know the answers to those questions, perhaps it’s time to find out.

As with other types of emergency preparedness, preparedness at the office constitutes having an emergency evacuation/lockdown plan and being prepared with emergency supplies. Office personnel should be educated on how to implement these plans and know where to find the emergency supplies and how to use them, if possible.

Evacuation plan

Know where the exit is to your office building? Good—that’s a start, but “mass stampede to the door” does not constitute a very thorough evacuation plan. Even if you are a very small company in a tiny office, it’s a good idea to think through procedures for what you would do in case of emergency. After the attacks on 9/11, an estimated 13,000 to 15,000 people successfully evacuated the World Trade Centers, and it is thought that this can be attributed to improved evacuation plans after the 1993 fire. Don’t wait for the aftermath of an emergency to get prepared—while your evacuation plan may not be to such a large scale, you should know at the very least who should go to what exit in order t get everyone out quickly and safely and how to shut off gas, water, and electricity.

The U.S. Department of Labor’s Occupational Safety and Health Administration (OSHA) provides a step-by-step guide (www.osha.gov/Publications/osha3088.pdf) on how to develop an emergency action plan for your workplace. According to the OSHA, not every business is required to have a plan, but emergencies can strike regardless of whether you’re required to have a plan or not, so every business would do well to have a plan to protect its personnel.

Emergency supplies

Basic office emergency supplies include a first-aid kit, a fire extinguisher, and a defibrillator, along with other supplies specific to your workplace (such as an eyewash station if you work with harmful chemicals, for instance). It’s also a good idea to be prepared for long-term emergency situations where employees may be trapped in the workspace for an extended period of time—Year Zero Survival Gear provides a full range of emergency kits that include food, lighting, hygiene supplies and more to sustain groups of people in these kinds of situations.

Unfortunately, emergencies don’t wait until after 5:00 to strike. Employ good preparedness  principles and have peace of mind at home, at work, and at play.

Just Like The Squirrels, It’s Time To Prepare For Winter

Just like squirrels scurry around storing acorns and other winter food sources, we should too. Squirrels collect and store nuts so they’ll have food to last through winter, have you stored your food for the winter?

squirrel

And not only food, but other essential items too, like water, fuel, wood, first aid, paper goods, candles, solar panels, batteries, seeds for next year, etc…

Think in bulk, add items from your local supermarket, several types of flour, basmati rice, short grain rice, couscous, quinoa, black beans, kidney beans, lima beans, pinto beans, chopped tomatoes, yeast, salt, sugar, spices and herbs, dried peppers and onions, masa, cornmeal, powdered milk, vinegar, coffee, and more.

Here are some of our favorite bulk long-term food storage buckets:

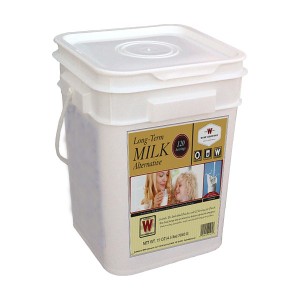
120 Serving Milk Bucket FSK120

120 Serving Milk Bucket

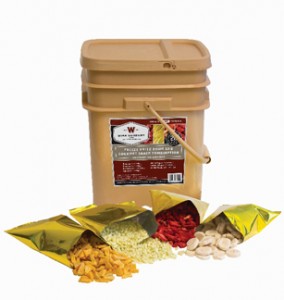
120 Serving Wise Fruit Buckets

120 Serving Wise Fruit Buckets

Millennium Energy Bar (Cherry) - 400 Calories

Millennium Energy Bars

And don’t forget to add some fire-starter materials, in case of long term utilities outage.

Every fall we get the urge to store away provisions for the coming winter. Having supplies on hand is the way to survive when you live in inclimate weather zones. So do like the squirrels and add to your winter stash of food.