32 Survival Uses For Trash Bags


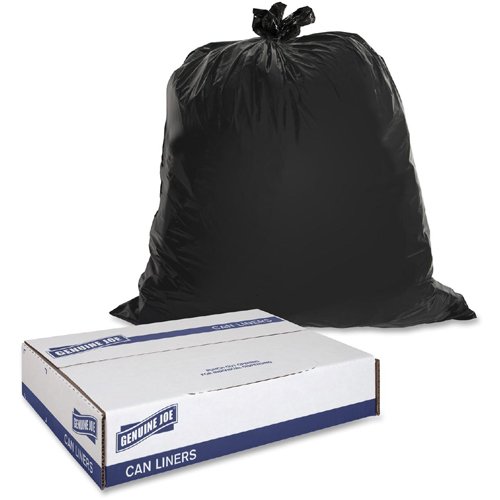
Heavy-duty plastic bags, like those meant for trash and yard debris, can be used in a surprisingly wide variety of ways to help ensure your survival during a disaster situation like an earthquake, hurricane, or even Zombie outbreak. These light-weight, extremely low cost, readily available, and incredibly versatile tools should be in every B.O.B. (Bug Out Bag)  and Emergency kit.

Trash Bags

We’ve listed a few of our favorite survival uses for plastic bags, but keep in mind that this everyday item is only limited by your imagination… and whether or not you happen to have a few on hand.


MEDICAL 

While it might be the first thing that comes to mind when you think of a trash bag or yard debris bag; a clean, unused bag can be used for a wide variety of medical purposes.

Waterproof bandages – After applying the appropriate bandage to a wound, place a layer of plastic bag over the bandage to protect it from outside moisture and contamination. Secure the protective covering properly, and remove and change the bandage and covering as needed.

Fight hypothermia – The potentially deadly effects of hypothermia can be battled by utilizing a large plastic bag as a “hot box” or additional layer to trap heat next to the body. Simply cut a hole for your head (and arms if needed), and wear the bag as a pullover. You can also simply drape the bag over your body, as you might a survival blanket.

Cold Compress – Fill with snow, ice, or cold water. Fold or tie off bag and apply as needed.

Handle medical waste – Plastic bags can be utilized as gloves for handling medical waste and contaminates such as blood, organs, vomit, and fecal matter… though we’re not sure why you’d handle the last two, unless you’re cleaning up a mess. Check the bag for punctures and/or rips BEFORE you try them on as gloves.

Tourniquet – Like many other flexible materials, large plastic bags can be used as a makeshift tourniquet. While it wont be the best thing for long term use, it can make a world of difference for the short run… remember it’s all about surviving the moment, you can worry about the long-term later.

Sling – Plastic bags can be used to support and immobilize a broken or wounded arm.


WATER

Containers come in handy when you need to collect, transport, and/or treat water, but there’s even more that you can use them for when it comes to water.

Collection/Storage – Lining a trash can, hole in the ground, or other receptacle with a clean plastic bag makes the collection of rainwater safer than simply letting it fill into a potentially contaminated container. Plastic bags can also be used as scoops for collecting water from pools, streams, and other bodies of water.

Solar Still – Fully enclose the leafy green area of a tree branch, securing the plastic bag tightly at the opening. Let it sit in the sun for a few hours as the condensation builds within the bag . Carefully remove the bag when ready, and repeat the process as needed. This method doesn’t typically result in large amounts of liquid, but every little bit counts… especially during a survival situation.

Transport – Creating a sturdy double walled bag for transporting water can be done in just a few steps. Cut or tear open the sealed end of a plastic bag so you are left with a tube. Twist or tie a knot in the center of the bag so you are left with two open ends and a shape like an hourglass. Fold one side over the other and you’re left with a double walled water carrying device.

Filter/Purify – Water isn’t any good to you if it isn’t safe to drink, but a simple plastic bag can go a long way to making water potable. Learn other important tips and tricks for water filtration and purification here: H20 (Water).

Gravity Filter – Gravity filters are simple multi-layer systems that remove the majority of contaminates, and you can easily make one at home. Double wall a plastic bag as seen in the WATER: Transportation portion of this article. Cut a small “spout” hole into the lowest point possible, without destroying the integrity of the bag too much. Reinforce the spout with a bit of duct tape so it doesn’t split when filled. Next, place a coffee filter, bandana, or similar cloth or material for filtering inside the bag and up against the spout. Then carefully pack and layer the following materials into the lower portion of the bag: 2″-3″ finely crushed charcoal, 2″ fine sand, 1″ small stones, 1″fine sand, and 1″ moss, grass, or other porous material. Gently fill the bag with water, tie a knot into the top, hang it up, and allow it to do the job.

Solar Treatment / SODIS – This can be a fairly unpredictable method for treating water, especially during cloudy or winter weather, but when done properly, it can work like a charm. The SODIS method relies on the power of solar rays to purify water; this is only helpful if larger contaminates have first been removed with basic filtration methods like the one listed above. Utilizing a large plastic bag for this method should be a last resort, as not all bags are made from food grade materials. This method is only effective when using CLEAR plastic, tinted or colored materials will not work. 

Solar Shower – Fill a darkly colored plastic bag with water, hang it above head height, let it sit in the sun for a bit to warm up, poke a couple of small holes in the bottom, and enjoy a nice warm shower.


FOOD

Collecting, capturing, and storing food can be difficult during a survival situation, but a trash bag can make the task a whole lot easier.

Collection – Whether you’re raiding the wilds, a nearby farm, or grocery store, containers come in handy… and that’s just what a trash bag is, a container. No matter what you find or where you find it, you’ll need a way to carry your collected goods.

Storage – Just like with water, lining a trash can, hole in the ground, or other receptacle with a clean plastic bag makes the storage of food much safer than placing it into a potentially contaminated or uncovered container. Plastic bags can be sealed by twisting the top and adding a bit of cordage, or simply by tying a knot in the top of the bag itself.

In addition to being a great lightweight container for food items, plastic bags can be tied and hung away from the ground and the prying hands of Zombies, other survivors, and wild animals. A well-sealed bag can offer the advantage of a longer shelf-life of some foods… as long as you store it in a cool dry place.

Trapping Set them as netting for bugs and fish, or use them as sacks to quickly and more easily bag a bird, squirrel, or other small animal that lends itself to capture.


SHELTER

From additional security to being used as shelters themselves, heavy-duty plastic bags can be utilized in a number of ways when it comes to provide protection from the elements and the undead.

Tarp Tent – Just like an emergency blanket, poncho, or tarp, a plastic bag can be used to create basic Tarp Tent style shelters and protective covers. Cutting the bag down the length of one side, and slicing it along the bottom, can double the square feet of material available for your shelter or cover. Make sure to carry a bit of paracord with you to help when securing your shelter.

Tube Tent – Tear or cut open the sealed end of a large plastic bag, duct tape the tube to another bag, slide yourself inside, and rest well. The ambient heat from your body will build and help to keep your body warm… even in wet and windy weather.

Ground Cover – This one is as simple as it sounds, but it’s important too… especially when you’re sleeping in the wild. Keeping your body away from moisture and the cold of the ground can greatly increase your chances of survival.

Window Black Out – Just because you’re home doesn’t mean you have to look like you are. Blacking out your windows is an important step to ensuring you aren’t hassled by outsiders or spotted by Zombies in a post apocalyptic world. Covering your windows with black trash bags can keep the light from getting out, and you from being seen.

Quarantine – Duct tape and plastic bags can be used to create a fairly effective quarantine area, whether at home or in the field. Simply seal off an area with the bags and duct tape, and make sure it isn’t breached. You’ll need to fully cover any potential areas of transmission, such as heating vents, windows, doorways, etc. 


GEAR/OTHER

Beyond water and food collection, medical assistance, and shelter; plastic trash bags can be utilized as a substitute for many types of gear.

Rain Poncho – The only downside to wearing a plastic bag as a rain poncho is that they don’t breathe. This means that while it will hold the rain and snow out, it will also hold your sweat in. Pay close attention to your body temperature and water-loss when wearing a non-permeable covering like this.

Gear Bag / Dry Bag– Twist the bag a few times just above the line of the gear inside. Fold the excess over top of the bag and carry it upside down. This should create a relatively water-tight seal that still allows for somewhat easy access to important gear and supplies.

Water-proof Boots/Gaiters – Applied over boots, and even bare or minimally covered feet, plastic bags make an excellent material for water-proofing and protection from the elements. They can also be wrapped around the shins or legs as makeshift gaiters for travel through swampy or other exceedingly wet areas.

Flotation Device – Filled with air and twisted shut, heavy-duty trash bags are extremely lightweight and buoyant. They can be used to assist in crossing deep water by simply being held onto, or they can be applied to a raft or other flotation device.

Sleeping Bag / Mattress – Similar to being used as a Tube Tent, large plastic bags make great sleeping bags when stuff with materials like leaves, fabric, stuffing, packing peanuts, etc. Fill the bag as full as possible and crawl in, or use it as a sleeping surface for the night. Not only will this method protect you from the cold, it will help to keep away potential contaminates as well.

Washing Machine – Placing garments into a plastic bag that has been partially filled with water and soap, can actually make a world of difference when attempting to get your clothes clean. Once everything is in there, just jostle it around, empty it out, rinse your clothing, and hang them to dry. Remember, proper hygiene can go a long way to keeping you alive.

Restroom – Sometimes the plumbing goes out, but that doesn’t mean you don’t need to use the bathroom. Placed into a drained toilet or into a 5 gallon bucket, plastic bags can make dealing with waste, a much cleaner and easier process. These can also be used to line latrines when you’re worried about contaminating a nearby water source.


OTHER MISC USES

Creating smoke for signal fires, lashing, patches for clothing and other gear, And of course… collecting and removing refuse, among about a million other uses.

Because not all trash bags are made with the intent of heavy-duty use, it’s a good idea to grab a few construction grade bags from your local hardware store or garden center. Keep a few on hand in your Bug Out Bag and E-kits and utilize them as needed… though we hope you never have to.


[source]

9 Ways To Start a Fire Without Matches

Tom Hanks Starting a Fire Without Matches

There is a primal link between man and fire. Every man should know how to start one. A manly man knows how to start one without matches. It’s an essential survival skill. You never know when you’ll find yourself in a situation where you’ll need a fire, but you don’t have matches. Maybe your single engine plane goes down while you’re flying over the Alaskan wilderness, like the kid in Hatchet. Or perhaps you’re out camping and you lose your backpack in a tussle with a bear. It need not be something as dramatic at these situations-even extremely windy or wet conditions can render matches virtually uselessly. And whether or not you ever need to call upon these skills, it’s just damn cool to know you can start a fire, whenever and wherever you are.


Friction Based Fire Making

Friction based fire making is not for the faint of heart. It’s probably the most difficult of all the non-match based methods. There are different techniques you can use to make a fire with friction, but the most important aspect is the type of wood you use for the fire board and spindle.

The spindle is the stick you’ll use to spin in order to create the friction between it and the fireboard. If you create enough friction between the spindle and the fireboard, you can create an ember that can be used to create a fire. Cottonwood, juniper, aspen, willow, cedar, cypress, and walnut make the best fire board and spindle sets.

Before you can use wood to start a friction based fire, the wood must be bone dry. If the wood isn’t dry, you’ll have to dry it out first.

The Hand Drill

The hand drill method is the most primitive, the most primal, and the most difficult to do All you need is wood, tireless hands, and some gritty determination. Therefore, it’ll put more hair on your chest than any other method. Here’s how it’s done:

Build a tinder nest. Your tinder nest will be used to create the flame you get from the spark you’re about to create. Make a tinder nest out of anything that catches fire easily, like dry grass, leaves, and bark.

Make your notch. Cut a v-shaped notch into your fire board and make a small depression adjacent to it.

Place bark underneath the notch. The bark will be used to catch an ember from the friction between the spindle and fireboard.

Start spinning. Place the spindle into the depression on your fire board. Your spindle should be about 2 feet long for this to work properly. Maintain pressure on the board and start rolling the spindle between your hands, running them quickly down the spindle. Keep doing this until an ember is formed on the fireboard.

Start a fire! Once you see a glowing ember, tap the fire board to drop you ember onto the piece of bark. Transfer the bark to your nest of tinder. Gently blow on it to start your flame.

Fire Plough

Prepare your fireboard. Cut a groove in the fireboard. This will be your track for the spindle.

Rub! Take the tip of your spindle and place it in the groove of your fireboard. Start rubbing the tip of the spindle up and down the groove.

Start a fire. Have your tinder nest at the end of the fireboard, so that you’ll plow embers into as you’re rubbing. Once you catch one, blow the nest gently and get that fire going.

Bow Drill

Starting a fire with a bow drill

The bow drill is probably the most effective friction based method to use because it’s easier to maintain the speed and pressure you need to create enough friction to start a fire. In addition to the spindle and fireboard, you’ll also need a socket and a bow.

Get a socket The socket is used to put pressure on the other end of the spindle as you’re rotating it with the bow. The socket can be a stone or another piece of wood. If you use another piece of wood, try to find a harder piece than what you’re using for the spindle. Wood with sap and oil are good as it creates a lubricant between the spindle and the socket.

Make your bow. The bow should be about as long as your arm. Use a flexible piece of wood that has a slight curve. The string of the bow can be anything. A shoelace, rope, or strip of rawhide works great. Just find something that won’t break. String up your bow and you’re ready to go.

Prepare the fireboard. Cut a v-shaped notch and create a depression adjacent to it in the fireboard. Underneath the notch, place your tinder.

String up the spindle. Catch the spindle in a loop of the bow string. Place one end of the spindle in the fireboard and apply pressure on the other end with your socket.

Start sawing. Using your bow, start sawing back and forth. You’ve basically created a rudimentary mechanical drill. The spindle should be rotating quickly. Keep sawing until you create an ember.

Make you fire. Drop the ember into the tinder nest and blow on it gently. You got yourself a fire.

Flint and Steel

Flint and Steel

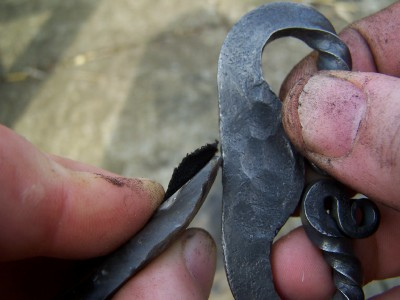
This is an old standby. It’s always a good idea to carry around a good flint and steel set with you on a camping trip. Matches can get wet and be become pretty much useless, but you can still get a spark from putting steel to a good piece of flint. Bear Grylls Fire-Starter is a good set to use.


If you’re caught without a flint and steel set, you can always improvise by using quartzite and the steel blade of your pocket knife (You are carrying your pocket knife, aren’t you?). You’ll also need char. Char is cloth that has been turned into charcoal. Char catches a spark and keeps it smoldering without bursting into flames. If you don’t’ have char, a piece of fungus or birch will do.

Grip the rock and char cloth. Take hold of the piece of rock between your thumb and forefinger. Make sure an edge is hanging out about 2 or 3 inches. Grasp the char between your thumb and the flint.

Strike! Grasp the back of the steel striker or use the back of your knife blade. Strike the steel against the flint several times. Sparks from the steel will fly off and land on the char cloth, causing a glow.

Start a fire. Fold up your char cloth into the tinder nest and gently blow on it to start a flame.

Lens Based Methods

Fire from a mangnifying glass

Photo by spacepleb

Using a lens to start a fire is an easy matchless method. Any boy who has melted green plastic army men with a magnifying glass will know how to do this. If you have by chance never melted green plastic army men, here’s how to do it.

Traditional Lenses

To create a fire, all you need is some sort of lens in order to focus sunlight on a specific spot. A magnifying glass, eyeglasses, or binocular lenses all work. If you add some water to the lens, you can intensify the beam. Angle the lens towards the sun in order to focus the beam into as small an area as possible. Put your tinder nest under this spot and you’ll soon have yourself a fire.

The only drawback to the lens based method is that it only works when you have sun. So if it’s night time or overcast, you won’t have any luck.

In addition to the typical lens method, there are three odd but effective lens based methods to start a fire as well.

Balloons and Condoms

By filling a balloon or condom with water, you can transform these ordinary objects into fire creating lenses.

Fill the condom or balloon with water and tie off the end. You’ll want to make it as spherical as possible. Don’t make the inflated balloon or condom too big or it will distort the sunlight’s focal point. Squeeze the balloon to find a shape that gives you a sharp circle of light. Try squeezing the condom in the middle to form two smaller lenses.

Condoms and balloons both have a shorter focal length than an ordinary lens. Hold them 1 to 2 inches from your tinder.

Fire from ice

Fire from ice isn’t just some dumb cliché used for high school prom themes. You can actually make fire from a piece of ice. All you need to do is form the ice into a lens shape and then use it as you would when starting a fire with any other lens. This method can be particularly handy for wintertime camping.

Get clear water. For this to work, the ice must be clear. If it’s cloudy or has other impurities, it’s not going to work. The best way to get a clear ice block is to fill up a bowl, cup, or a container made out of foil with clear lake or pond water or melted snow. Let it freeze until it forms ice. Your block should be about 2 inches thick for this to work.

Form your lens. Use your knife to shape the ice into a lens. Remember a lens shape is thicker in the middle and narrower near the edges.

Polish your lens. After you get the rough shape of a lens, finish the shaping of it by polishing it with your hands. The heat from your hands will melt the ice enough so you get a nice smooth surface.

Start a fire. Angle your ice lens towards the sun just as you would any other lens. Focus the light on your tinder nest and watch as you make a once stupid cliché come to life.

The Coke Can and Chocolate Bar

I saw this method in a YouTube video a while back ago and thought it was pretty damn cool. All you need is a soda can, a bar of chocolate, and a sunny day.

Polish the bottom of the soda can with the chocolate. Open up your bar of chocolate and start rubbing it on the bottom of the soda can. The chocolate acts as a polish and will make the bottom of the can shine like a mirror. If you don’t have chocolate with you, toothpaste also works.

Make your fire. After polishing the bottom of your can, what you have is essentially a parabolic mirror. Sunlight will reflect off the bottom of the can, forming a single focal point. It’s kind of like how a mirror telescope works.

Point the bottom of the can towards the sun. You’ll have created a highly focused ray of light aimed directly at your tinder. Place the tinder about an inch from the reflecting light’s focal point. In a few seconds you should have a flame.

While I can’t think of any time that I would be in the middle of nowhere with a can of Coke and chocolate bar, this method is still pretty cool.

Batteries and Steel Wool

Fire from steel wool and a battery

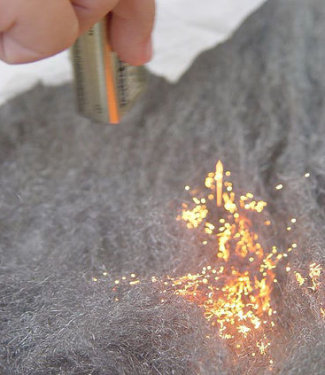
Like the chocolate and soda can method, it’s hard to imagine a situation where you won’t have matches, but you will have some batteries and some steel wool. But hey, you never know. And it’s quite easy and fun to try at home.

Stretch out the Steel Wool. You want it to be about 6 inches long and a ½ inch wide.

Rub the battery on the steel wool. Hold the steel wool in one hand and the battery in the other. Any battery will do, but 9 volt batteries work best. Rub the side of the battery with the “contacts” on the wool. The wool will begin to glow and burn. Gently blow on it.

Transfer the burning wool to your tinder nest. The wool’s flame will extinguish quickly, so don’t waste any time.

Sources:

Field and Stream

Primitive Ways


Potassium Iodide: What does it do?

In the aftermath of a nuclear emergency, radioactive Iodine can get into your body through eating, drinking or breathing.

Your thyroid gland may be seriously damaged as it absorbs this radioactive chemical. One way to protect this gland and prevent absorption is to make your thyroid “full” by taking non radioactive (KI)Potassium Iodide tablets.

The CDC recommends the following dosages upon advisories emergency officials. They may recommend taking one dose every 24 hours up to a few days.

This is especially important for pregnant woman, young adults and children.

Adults older than 40 should not take KI unless advised.

  • Adults should take 130 mg (one 130 mg tablet OR two 65 mg tablets OR two mL of solution).
  • Women who are breastfeeding should take the adult dose of 130 mg.
  • Children between 3 and 18 years of age should take 65 mg (one 65 mg tablet OR 1 mL of solution). Children who are adult size (greater than or equal to 150 pounds) should take the full adult dose, regardless of their age.
  • Infants and children between 1 month and 3 years of age should take 32 mg (½ of a 65 mg tablet OR ½ mL of solution). This dose is for both nursing and non-nursing infants and children.
  • Newborns from birth to 1 month of age should be given 16 mg (¼ of a 65 mg tablet or ¼ mL of solution). This dose is for both nursing and non-nursing newborn infants.

The CDC advises that KI “can protect only the thyroid from radioactive iodine, not other parts of the body”…and will not reverse damage that has already occurred.

We recommend the following educational site for more information: http://emergency.cdc.gov/radiation/ki.asp