Food Storage Water Security Bug Out Bags Wilderness Survival Grid Failure Off-Grid Living
YearZeroSurvival.com “Learn. Adapt. Survive.”
The Benefits of Installing a Hidden Gun Safe
In an unpredictable world, safeguarding your firearms is not only a matter of personal responsibility but also an essential step in protecting your family, home, and community. While traditional gun safes serve their purpose, the hidden gun safe is a discreet and increasingly popular alternative that offers a range of benefits. These hidden gun safes also known as concealment furniture come in many styles, sizes, shapes and colors including a hidden gun shelf, concealment mirror and even a concealment bed! Whether you’re a seasoned firearm owner or someone considering their first purchase, understanding the advantages of hidden gun safe can help you make informed decisions about firearm security.
1. Enhanced Security
One of the primary benefits of utilizing a hidden gun safe is its ability to conceal your firearms from potential threats. Unlike traditional gun safes, which are often large and conspicuous, concealment furniture is designed to blend seamlessly into your home or office. By being disguised as everyday items like mirrors, furniture, or bookshelves, these safes significantly reduce the likelihood of theft. Burglars are less likely to steal what they cannot find. After all, a hidden gun shelf looks just like any other shelf in your home or office.
Moreover, concealment furniture can protect your firearms from unauthorized access by children or guests. Accidental gun injuries are a serious concern, and a hidden safe adds an extra layer of security by keeping your weapons out of sight and out of mind.
2. Quick Access in Emergencies
One of the biggest advantages of relying on something like a hidden gun shelf to safely store your firearm is the unique advantage of providing quick access in an emergency. In high-stress situations, such as a home invasion, every second counts. Many hidden safes are designed with quick-access mechanisms, such as biometric fingerprint scanners, RFID locks, or hidden magnetic locks. These features allow you to retrieve your firearm quickly while keeping it secure from unauthorized users.
In addition to being fast to open you will be able to safely store your firearm in any room reducing the need to go to a basement or tucked away closet where a traditional safe would likely be. By strategically placing concealment furniture throughout your home, you can ensure that you always have access to your firearm when you need it most in the room where you need it, without compromising safety.
3. Preserving Aesthetic Appeal
Traditional gun safes can be bulky and difficult to integrate into a home’s decor. Hidden gun safes, on the other hand, are designed to blend into their surroundings. For example, a hidden gun shelf can be installed in any room of the home or office without altering the aesthetic integrity of your living space.
A concealment shelf, in particular, offers an innovative way to securely store firearms in rooms or offices where a traditional safe may not be practical. For instance, desks, coffee tables, or shelves designed with hidden compartments allow you to keep your firearms close at hand without disrupting the room’s functionality or design. This combination of practicality and discretion makes hidden gun safe an ideal choice for maintaining both security and style in any space.
Traditional gun safes can be bulky and difficult to integrate into a home’s decor. Hidden gun safes such as a concealment mirror, on the other hand, are designed to blend into their surroundings maintaining the aesthetic integrity of your living space. For example, this concealment mirror from Timbervaults.com looks just like any other mirror that you would see in a home or apartment; however it has a large storage compartment and offers fast access via it’s battery powered RFID lock.
For homeowners who value interior design and want to avoid the industrial look of traditional safes, concealment furniture is likely the optimal.
4. Deterrence Against Opportunistic Crimes
Criminals often look for easy targets. A hidden gun safe or hidden gun shelf can act as a powerful deterrent against opportunistic crimes. When firearms are stored in plain sight or in easily accessible locations, they become tempting targets for thieves. By keeping your firearms concealed, you reduce the risk of them falling into the wrong hands and being used in illegal activities.
Additionally, hidden safes or concealment furniture help ensure that firearms remain in your possession during an attempted robbery, providing you with the tools you need to defend your home and family if necessary.
5. Restrict Access to Guns
Hidden gun safes play a critical role in preventing unauthorized access to firearms, particularly by minors. The curiosity of children combined with the accessibility of unsecured firearms can lead to tragic accidents. A hidden gun safe or hidden gun shelf provides a secure storage option that ensures firearms are not easily found or accessed by young family members.
By incorporating advanced locking mechanisms, such as biometric scanners or RFID locks, hidden safes or concealment furniture make it nearly impossible for minors to gain access. This added security feature not only protects children but also gives parents peace of mind, knowing their firearms are stored responsibly.
Additionally, hidden gun safe or hidden gun shelves help reinforce the importance of firearm safety within the household. Teaching children about the dangers of firearms and demonstrating responsible ownership through secure storage practices creates a safer environment for everyone in the home.
Choosing Between a Traditional Gun Safe and Concealment Furniture
When deciding how to store your firearms, you might weigh the benefits of a traditional gun safe against those of concealment furniture. Traditional safes are known for their robust build and capacity to store multiple firearms and valuables securely. They are ideal for those prioritizing maximum security and require a fireproof solution.
On the other hand, concealment furniture provides a versatile and discreet storage option, especially in rooms or offices where a traditional safe may not be practical. Items such as desks, coffee tables, or a hidden gun shelf blend seamlessly into your decor while offering quick access to firearms when needed. This makes them a great choice for firearm owners looking for a balance between security, accessibility, and style. In today’s market there are several providers of concealment furniture making installation easier than ever. In addition, many DIY plans and instructions for you to craft your own concealment furniture may be found on places like Etsy, Youtube and more.
Consider your specific needs, space limitations, and the level of security required when choosing between these two options. Both offer distinct advantages and can be tailored to fit your lifestyle and home environment.
Conclusion
Installing concealment furniture is a smart and practical investment for any firearm owner. By offering enhanced security, quick access, and aesthetic appeal, hidden safes or concealment furniture provide a superior storage solution that meets the needs of modern homeowners. Whether you’re looking to protect your family, comply with legal requirements, or simply enjoy greater peace of mind, a hidden gun safe or hidden gun shelf is an excellent choice that delivers both functionality and style.
Take the time to evaluate your specific needs and explore the wide variety of hidden gun shelfs available on the market. With the right safe in place, you can ensure that your firearms remain secure, accessible, and ready for any situation.
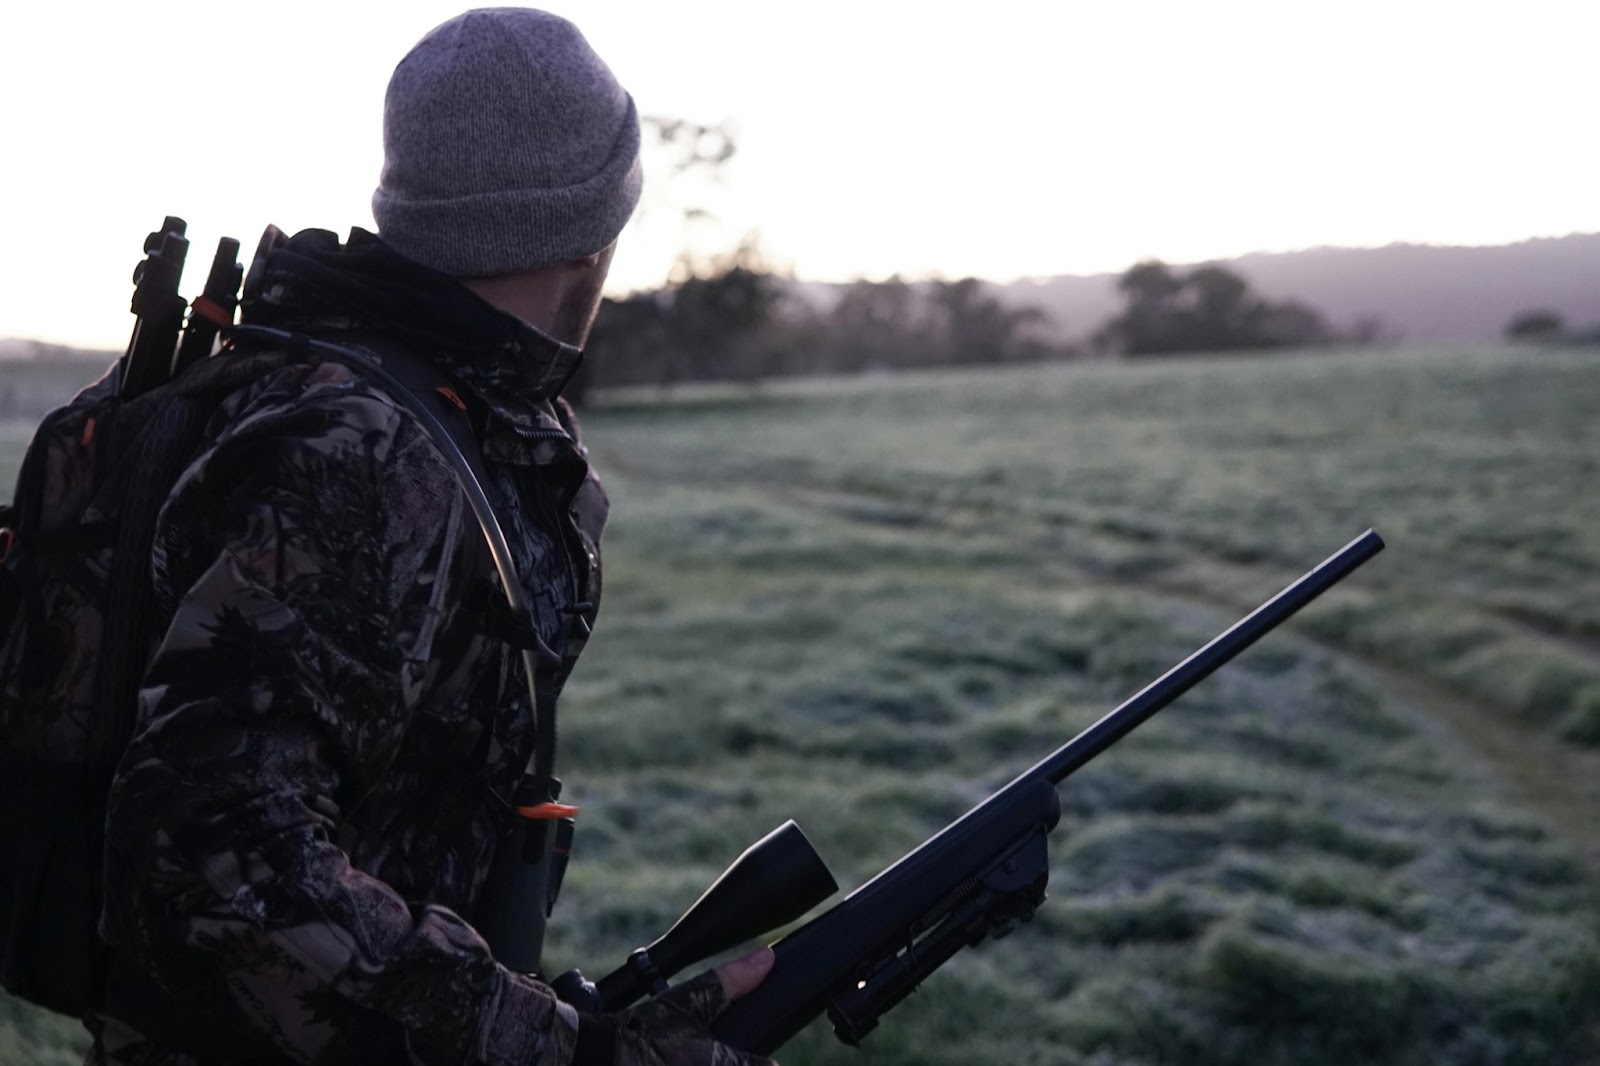
Tips On Taking Your Hunting Experience To The Next Level
You know that feeling when you’re out in the woods—just you, the crisp air, and the thrill of the hunt? There’s absolutely nothing like it. But let’s be honest: no matter how much you love it, sometimes it feels like you’re doing the same thing over and over. The same routines, the same strategies, the same outcomes. What if you could shake things up?
You wouldn’t head into the woods with dull blades or worn-out boots, so why settle for gear that doesn’t give you an edge? Your rifle or bow—whatever your weapon of choice—is your best friend out there. Make sure it’s calibrated, tuned, and paired with optics that feel like they can read your mind.
And about boots? Don’t underestimate them. A great pair will carry you further and keep you focused on the hunt instead of your aching feet. Toss in some sweat-wicking layers and rainproof outerwear, and you’re set for success. Just don’t forget your pack’s essentials—compact binoculars, a survival kit, and something to keep you on track when the woods start looking suspiciously identical.
Watch And Learn From The Wild:
Animals are predictable—until they’re not. Spend time getting to know them, really watching. When do they feed? Where do they like to wander? Are they the early-bird type or night owls?
Trail cameras are like having an extra pair of eyes that never get bored. Set them up where you think the action might be. You’ll get a peek into the secret lives of your game, and it’ll save you a whole lot of guesswork later.
Try Something That Scares You:
You’re already good at hunting, sure. But are you good at tracking faint prints through soggy ground? Or pulling off a clean shot with a bow when every nerve in your body is screaming? It’s worth figuring out.
Push yourself to learn something new. Maybe it’s bow hunting—it’s quiet, up close, personal. Or maybe you dive into long-range shooting and embrace the challenge of precision at distances that feel absurd. Either way, learning something outside your comfort zone is where the magic happens.
Hunt Somewhere You’ve Never Been:
The same patch of woods year after year? Nope, you’re better than that. Try stepping into a new kind of wilderness—high mountains, dense swamps, or even another country if you’re feeling adventurous.
Every landscape has its quirks. Some are forgiving, others are downright punishing. But figuring them out? That’s half the fun. Plus, new terrain means new game, new skills to learn, and maybe a story or two to tell when you’re back home.
Let Technology Be Your Wingman:
Now, for the fun techy things. If you’re not playing around with different types of tech goodies, you’re leaving a lot on the table. Advanced night vision tech is a game changer when you’re hunting after dark or before sunrise. It’s like suddenly having a superpower—seeing everything in the shadows, clear as day.
And then there’s GPS tools, digital maps, and trail apps. They won’t hunt for you, but they’ll make sure you don’t get turned around in some endless maze of trees. You’ll spend more time stalking your prey and less time scratching your head at crossroads.
Final Thoughts:
Hunting at the next level isn’t just about gear or skill; it’s about mindset. It’s about pushing yourself further, learning from every trip, and never taking for granted how incredible it is to be out there. Whatever you do, don’t get stuck in a rut.
Surviving Without Wisdom: The Importance of Knowledge and How to Keep Yourself In the Know
In a world where information is at our fingertips, the true challenge lies not in accessing knowledge, but in preserving it for future generations. Some of you will have the wisdom and knowledge to pass on to the next generation, while others may not. Ensuring that the valuable life lessons of today are not lost tomorrow is crucial for our collective survival and growth. Here’s how to maintain and protect your knowledge effectively.
The Fragility of Digital Knowledge
In today’s digital age, vast amounts of information are stored in electronic formats. While this offers convenience and accessibility, it also poses significant risks. Digital knowledge, including images, files, and documents, can be altered or deleted with ease, leading to the potential loss of invaluable information forever. Cyber threats, technical failures, and obsolescence of storage mediums can all contribute to this fragility.
Traditional Methods of Knowledge Preservation
Historically, knowledge has been preserved through written texts, inscriptions on stone, and oral traditions. These methods have stood the test of time, ensuring that crucial information was passed down through generations. While modern society may view these methods as archaic, they provide a reliable backup to digital formats.
The Importance of Offline Logs
To safeguard against the loss of digital knowledge, it is essential to keep your own offline logs. These can take various forms, including handwritten notes, printed documents, and physical books. Here’s why offline logs are vital:
1. Permanence: Physical records are not susceptible to hacking, power outages, or data corruption.
2. Accessibility: Offline logs can be accessed without the need for electronic devices, making them invaluable during emergencies.
3. Authenticity: Physical copies are less likely to be altered without detection, ensuring the integrity of the information.
Strategies for Maintaining Offline Logs
1. Handwritten Journals: Keep a daily or weekly journal of important knowledge, skills, and experiences. Use durable materials to ensure longevity.
2. Printed Documents: Print important digital documents and store them in a safe, organized manner. Consider using acid-free paper and archival-quality ink.
3. Books and Manuals: Invest in physical books on topics of interest and essential survival and medical skills. These resources can serve as reliable references in times of need.
4. Stone or Metal Inscriptions: For extremely critical information, consider engraving it on durable materials like stone or metal. This ancient method has proven effective over millennia.
Passing Knowledge to the Next Generation
1. Teaching and Mentoring: Engage in verbal transmission of knowledge through teaching and mentoring. Sharing your wisdom in person can leave a lasting impact on younger generations.
2. Community Workshops: Create and participate in community workshops focused on essential skills and knowledge. These gatherings can foster a culture of learning and preservation.
3. Family Traditions: Incorporate educational activities into family traditions. Storytelling, hands-on projects, and collaborative learning can instill valuable knowledge and skills.
In a rapidly changing world, the preservation and transmission of knowledge are paramount for survival and progress. By recognizing the vulnerabilities of digital knowledge and adopting robust offline practices, we can ensure that the wisdom of today is not lost but instead enriched and passed down to future generations. Remember, the key to enduring wisdom lies in a balanced approach that embraces both modern technology and time-honored traditions.
Building Your First Hunting AR-15: A Step-By-Step Guide
Crafting a hunting AR-15 from scratch presents a deeply engaging endeavor, offering a sense of accomplishment for firearms enthusiasts. This hands-on project can hone technical skills and allow for personalization, which ensures the final build meets the specific needs and preferences of the hunter. This process culminates in a uniquely tailored, high-performance hunting tool that embodies precision and reliability.
AR-15 M4 Rifle 300 Blackout
While numerous components and variations exist, this guide will cover the essential steps, providing a solid foundation for your first build. Read on to learn more.
Understanding The Basics
Before diving into the assembly process, it’s crucial to familiarize yourself with the AR-15’s basic components and functionality. The AR-15 platform is renowned for its modularity, allowing for various customizations tailored to hunting needs. Some key elements include the lower receiver, upper receiver, barrel, stock, and handguard, each playing a pivotal role in the firearm’s performance.
On the other hand, if you’re seeking quality parts and expert guidance, it’s best to check out reputable online resources or visit BearCreekArsenal.com and similar options for more information. These resources can offer a diverse selection of AR-15 components and accessories, ideal for custom building a hunting rifle that meets specific requirements.
Planning Your Build
Embarking on your AR-15 hunting build requires thoughtful planning. This initial phase lays the groundwork for a rifle that perfectly aligns with your hunting aspirations. To plan your build properly, consider the following tips:
1. Choosing the Right Caliber
The choice of caliber is paramount in a hunting AR-15. Popular options include .223 Remington for smaller game and the more powerful .308 Winchester or 6.5 Creedmoor for larger game. Also, consider the game you intend to hunt and local regulations when selecting your caliber.
2. Selecting Components
To ensure a favorable building experience, choosing the right components is crucial. Some essential components include:
Lower Receiver: As the foundation of your AR-15, it’s crucial to select a lower receiver that’s compatible with your desired caliber and made of high-quality materials.
Upper Receiver and Barrel: These components are critical for accuracy. A longer barrel can offer increased accuracy over distance, which is beneficial for hunting.
Stock: Choose a comfortable, adjustable stock that can be tailored to fit your body and shooting style.
Handguard: Opt for a handguard that provides sufficient space for accessories while ensuring comfort and heat resistance during extended use.
Optics and Sights: High-quality optics can greatly enhance your hunting experience by improving accuracy and range.
Following these planning tips ensures you build your first hunting AR-15 properly and safely.
Assembling The Lower Receiver
The lower receiver houses the trigger assembly, magazine well, and stock attachment point. Begin assembling this component by securing the lower receiver in a vise. Install the magazine catch, trigger assembly, and safety selector following the manufacturer’s instructions. Precision and attention to detail are crucial in this step to ensure the functionality and safety of your firearm.
Installing The Trigger Group
The trigger group critically influences your AR-15’s accuracy and responsiveness. Carefully install the trigger, hammer, and associated springs. Conduct a function test to ensure the trigger assembly operates smoothly and safely.
Attaching The Stock
The stock is attached to the rear of the lower receiver. Depending on the stock type, installation might involve sliding it onto the buffer tube or securing it with screws. Ensure the stock is firmly attached and wobble-free to provide a stable shooting platform.
Assembling The Upper Receiver
The upper receiver assembly involves several key steps:
Installing the Barrel: Secure the upper receiver in a vise and carefully install the barrel, ensuring it’s properly aligned and torqued to the manufacturer’s specifications.
Attaching the Handguard: After the barrel is installed, attach the handguard. This component should provide a comfortable grip and ample space for mounting accessories.
Mounting the Optics: Choose a scope or sighting system suitable for your hunting needs and mount it securely to the upper receiver.
Assembling the upper receiver is a crucial milestone, combining precision and craftsmanship to create the rifle’s core. This step can bring you closer to the field-ready firearm.
Final Assembly And Safety Check
With the upper and lower receivers complete, the final step is to join them together. This is typically done by aligning the pivot pins and pushing them into place, securing the two halves of the rifle.
Once assembled, conduct a comprehensive safety check. Verify that all components are securely installed and that the firearm operates as expected. Performing a function test under safe conditions is advisable to ensure reliability.
Conclusion
Building your first hunting AR-15 can be a complex but gratifying experience. By keeping the information mentioned above in mind, you can create a customized rifle that meets your specific hunting needs. Remember, patience and attention to detail are key to building a safe and effective hunting firearm. Whether you’re a seasoned gunsmith or a first-time builder, the journey of creating your own AR-15 can offer both challenges and rewards.
Fascinating Honey Facts: Unveiling the Sweet Secrets of Nature’s Golden Nectar
In the ancient annals of human history lies an intriguing tale of discovery—a story that intertwines the creation of one of the world’s first coins with the symbol of a bee. Honey, a golden elixir known for its remarkable properties, holds secrets that span millennia. But beyond its sweetness, honey boasts a tapestry of curiosities and benefits that weave through our past and present.
Join us on a journey through a compendium of astonishing honey facts, from its origin as a currency symbol to its role in preserving the bodies of emperors. Delve into the science-backed revelations about honey’s enzymatic prowess, its contributions to human sustenance, and the heroic feats of bees that transcend their short lifespans.
1. The Bee Symbolism in Ancient Currency
Early civilizations stamped bee symbols on coins, signifying wealth and productivity. According to historical records, the image of a bee graced some of the world’s earliest monetary systems, reflecting the intrinsic value placed on these industrious insects.
2. Honey’s Enzymatic Wonders
Honey is more than just a sweet treat. Studies published in the Journal of Agricultural and Food Chemistry confirm that honey contains live enzymes, enhancing its nutritional profile. However, contact with metal spoons can deactivate these enzymes, making wooden or plastic spoons preferable for honey consumption.
3. Cognitive Benefits of Honey
Recent research published in the Journal of Neuroscience highlights honey’s impact on brain function. The natural substance found in honey can potentially aid in improving cognitive abilities and memory retention.
4. Honey: A Sustaining Superfood
Renowned for its nutritional richness, honey stands as one of the few foods that can sustain human life alone. Packed with essential nutrients, enzymes, and antioxidants, honey has historically served as a crucial source of sustenance for various cultures.
5. Bees: Unsung Heroes of Survival
Bees, with their modest lifespan of less than 40 days, play a monumental role in preserving ecosystems and preventing famine. Historical accounts from Africa attest to how bees’ honey production saved communities from starvation during lean periods.
6. Propolis: Nature’s Potent Antibiotic
Propolis, a resinous substance produced by bees, is rich in potent antibacterial properties. Scientific studies published in the International Journal of Biological Macromolecules underline propolis’s efficacy as a natural antibiotic, offering promising implications in medical research.
7. Timeless Shelf Life of Honey
Contrary to most food items, honey is known for its indefinite shelf life. Archaeological discoveries of honey in ancient tombs validate its remarkable preservation quality without an expiration date.
8. Honey in Ancient Rituals and Traditions
The historical significance of honey transcends mere sustenance. Across cultures, honey played a role in rituals and practices, including the embalming of emperors’ bodies, giving rise to beliefs in its preservative properties.
9. Origins of “Honeymoon”
The term “honeymoon” traces its etymology to the tradition of newlyweds consuming honey for fertility and prosperity, echoing ancient beliefs in honey’s symbolic importance.
10. Bee’s Lifetime Contribution
In a lifetime, a single bee tirelessly visits over a thousand flowers, producing less than a teaspoon of honey. Despite their brief existence, bees contribute immeasurably to the environment and human survival.
In essence, the universe of honey and its surrounding bee culture encapsulates a treasure trove of wonders and practicalities, enriching human history and our understanding of nature’s miracles.
Thank you, precious bees, for bestowing upon us the golden elixir that is honey—a testament to your tireless efforts and invaluable contributions to our world’s sustenance.
Various historical records and scholarly publications
Apocalypse in Orbit: The Catastrophic Consequences of Global Satellite Communication Failure
Imagine a world plunged into darkness, not by an earthly catastrophe but by the silent demise of our orbital sentinels. Satellites, those guardians of modern communication, navigation, and surveillance, silently drift above us, connecting the world in an intricate web of technology. Yet, what if this network suddenly vanished? What if, by some twist of fate, all satellite communications failed or were obliterated?
With the popularity of movies like “Leave The World Behind” that highlight cyber attacks and downed internet and grid scenarios, in this article, we’ll explore the harrowing scenario of a total collapse of satellite communications. We’ll delve into the immense repercussions on global economies, everyday life, and critical sectors, backed by data and statistics from reputable sources. Join us in uncovering the potential apocalyptic aftermath if these orbital lifelines were severed.
The Backbone of Global Connectivity
Satellites orbiting the Earth act as the backbone of our modern, interconnected world. According to the Union of Concerned Scientists, as of 2022, there were over 3,372 satellites orbiting our planet, facilitating crucial functions such as GPS navigation, weather forecasting, internet connectivity, and telecommunications.
Economic Chaos:
A report by the Satellite Industry Association estimates that the satellite industry generates over $277 billion in revenue annually. An abrupt cessation of satellite services would devastate global economies. Financial markets heavily rely on real-time communication and data transmission via satellites. The loss of this infrastructure would disrupt stock exchanges, international trade, and banking systems, potentially triggering economic recessions and widespread financial instability.
Navigational Nightmare:
Navigation systems, like GPS, have become ingrained in our daily lives. Without satellite signals, transportation systems—airlines, maritime vessels, and even everyday commuters—would be severely impaired. A study conducted by the Royal Academy of Engineering emphasizes that the sudden absence of GPS could lead to transportation gridlock, increased accidents, and logistical nightmares, impacting both commercial and personal travel.
Impact on Emergency Services and Security:
Emergency services heavily rely on satellite communications for rapid response and coordination. Disruption of these vital links could hamper disaster relief efforts, endangering lives during natural disasters or crises. Additionally, national security systems and military operations worldwide depend on satellite technology for surveillance, communication, and intelligence gathering. A failure in this domain could compromise defense capabilities, leaving nations vulnerable to potential threats.
Environmental Monitoring and Scientific Research:
Satellites play a pivotal role in environmental monitoring and scientific research. From tracking climate patterns to observing changes in the Earth’s surface, these tools provide essential data for understanding and addressing environmental challenges. The loss of these capabilities would hinder disaster prediction, impede scientific advancements, and hinder our ability to address global issues.
The potential fallout from the failure or destruction of satellite communications is daunting. It extends beyond mere inconvenience to potentially catastrophic consequences across numerous facets of our interconnected world. The statistics and analyses presented in this article underscore the critical importance of safeguarding our orbital infrastructure against such cataclysmic scenarios.
As we marvel at the wonders of space technology, let us also acknowledge its fragility and the immense responsibility to protect and preserve these systems that underpin our modern civilization.
Sources:
Union of Concerned Scientists: “UCS Satellite Database”
Satellite Industry Association: “State of the Satellite Industry Report”
Royal Academy of Engineering: “Global Navigation Space Systems: Reliance and Vulnerabilities”
Various scholarly papers, industry reports, and reputable news sources.
The world without satellites is not a hypothetical scenario to be taken lightly. It’s a stark reminder of the pivotal role these artificial celestial objects play in our daily lives, urging us to safeguard them and ensure a robust and resilient space infrastructure for generations to come.
How to Prepare Now
Surviving a disaster involving the failure or destruction of satellite communications would require adapting to a world suddenly cut off from vital technological infrastructure. While challenging, several strategies might enhance one’s chances of navigating such a scenario:
Emergency Preparedness:
Create an emergency kit with essential supplies such as non-perishable food, water, first aid supplies, and necessary medications. Equip yourself with tools for basic survival, like flashlights, batteries, a manual can opener, and a portable radio to stay updated on local news.
Navigation Alternatives:
Learn traditional navigation methods like using a compass, reading maps, and identifying landmarks. Additionally, consider investing in alternative GPS systems that function independently of satellites, such as inertial navigation systems or old-fashioned paper maps.
Communication Strategies:
Establish alternative communication methods with loved ones and emergency services. This might include designated meeting points, setting up a neighborhood communication network, or utilizing radio communication devices that don’t rely on satellites.
Self-Reliance and Skills Development:
Cultivate self-sufficiency skills like gardening, basic medical training, and resource management. Acquiring skills such as foraging, water purification, and basic repair and maintenance can be invaluable in a technology-disrupted world.
Community Building and Collaboration:
Foster a sense of community and collaboration within your neighborhood or local area. Forming alliances and working together can help share resources, knowledge, and support during times of crisis.
Preserving Knowledge and Documentation:
Maintain hard copies of essential information like medical records, personal identification documents, and important contact numbers. Preserve critical knowledge and expertise within communities to ensure survival without relying solely on digital resources.
Adaptation and Flexibility:
Embrace adaptability and flexibility in adjusting to a world without satellite technology. This might involve finding creative solutions to everyday challenges, adapting to changes in transportation, and embracing manual methods for various tasks.
Long-Term Sustainability:
Focus on long-term sustainability by exploring renewable energy sources, learning about local food sources, and understanding how to minimize waste and conserve resources.
Remember, the goal during such a crisis is not just individual survival but also fostering resilience and cooperation within communities. The ability to adapt, collaborate, and innovate in the face of adversity becomes crucial for navigating a world stripped of satellite communications.
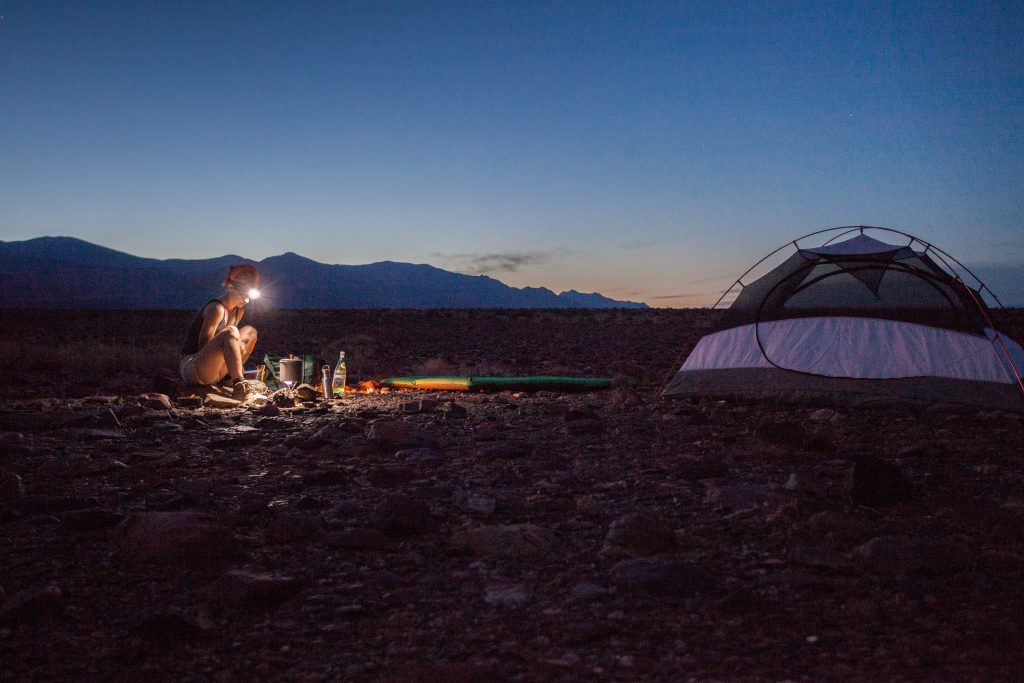
A Guide to Testing Your Survival and Camping Skills in a Safe Way
Before you head into the wilderness and test out your survival skills for real, you should first make sure that you’re at the appropriate skill level for this. This means that you should test your survival and camping skills in the safest way possible. Here’s a guide that can help you to do just that.
· Find a Great Campsite
Rather than wild camping in a location that might not be wholly safe and that’s completely exposed to poor weather conditions and wildlife, you should first consider camping in a supported place where you can get help if you need it.
By using a campsite as your base, others will be alerted to any issues quickly, and you’ll have a comfortable space to return to each evening after a day of exploring the wild. This can be a great option for those who are heading out into nature for the first time and who might be nervous about the experience.
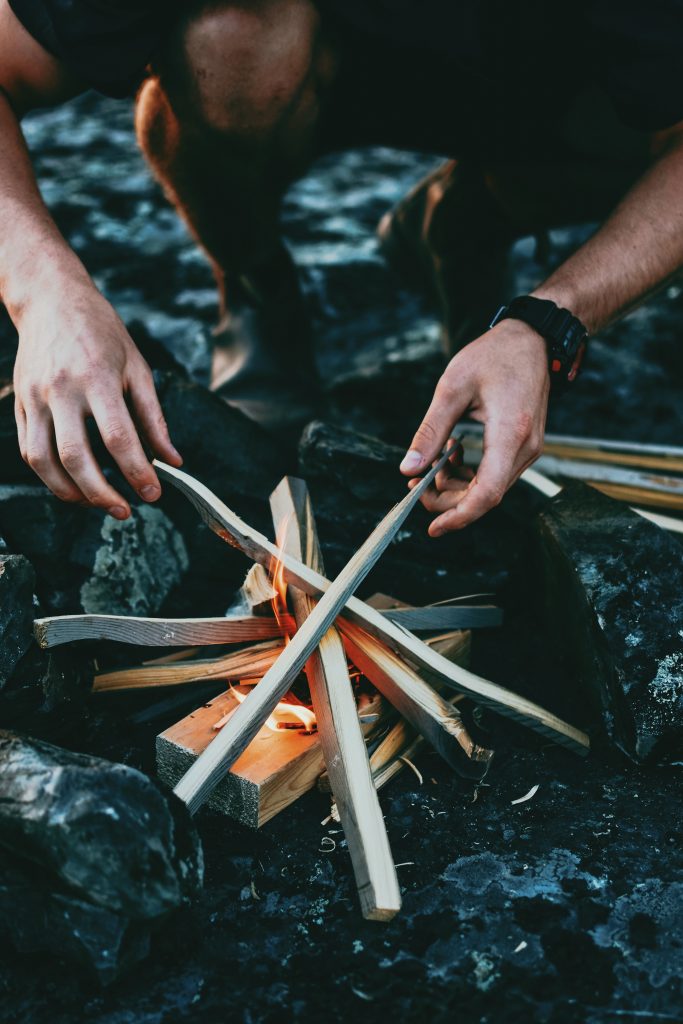
Although you might think that any equipment that you use is there to protect you, it can also harm you, especially if you don’t know how to use it. This means that you should always read the instructions of any equipment that you purchase and study tutorials online.
You should also practice with this equipment in a secure environment before heading outside with your tools. This is especially the case when it comes to sharp equipment, such as weapons such as knives that can be used for self-defense, hunting, and stripping away foliage. If you’re unsure how to handle this tool, you should stop using it immediately until you do.
· Go on a Survival Skills Course
When you’re trying to hone your survival and camping skills, you might also look into courses where a trained expert can help to teach you the basics. This will give you the chance to pick up some tips that you might not otherwise have known and enhance the knowledge that you already have.
These courses might be over the course of a day or a weekend, or perhaps longer, with a session or so every week. This might also give you the chance to ask any questions that you have and to iron out any issues that you’re having with survival skills.
· Go With Others
If this is your first time going on a survival trip into the wilderness, you should think about taking at least one other person on the trip with you. This means that there will always be someone to call for help and give you first aid in the event of an emergency, as well as someone to discuss any problems with.
If you don’t go with someone, you should make sure that someone knows where you are at all times and that you keep communication channels open with people back home.

 Food Storage
 Water Security
 Bug Out Bags
 Wilderness Survival
 Grid Failure
 Off-Grid Living