Bushcraft Blade Geometry: Scandi vs. Flat Grind for Long-Term Wilderness Survival

When you’re three weeks into a solo wilderness trip and your knife is the only tool standing between you and a shelter, the grind geometry matters more than brand names or steel type. The debate between Scandi and flat grinds isn’t academic—it’s about which geometry will still be functional after processing 50 pounds of firewood, carving trap components, and field-dressing game when you’re miles from the nearest sharpening stone.

reliable bushcraft tool

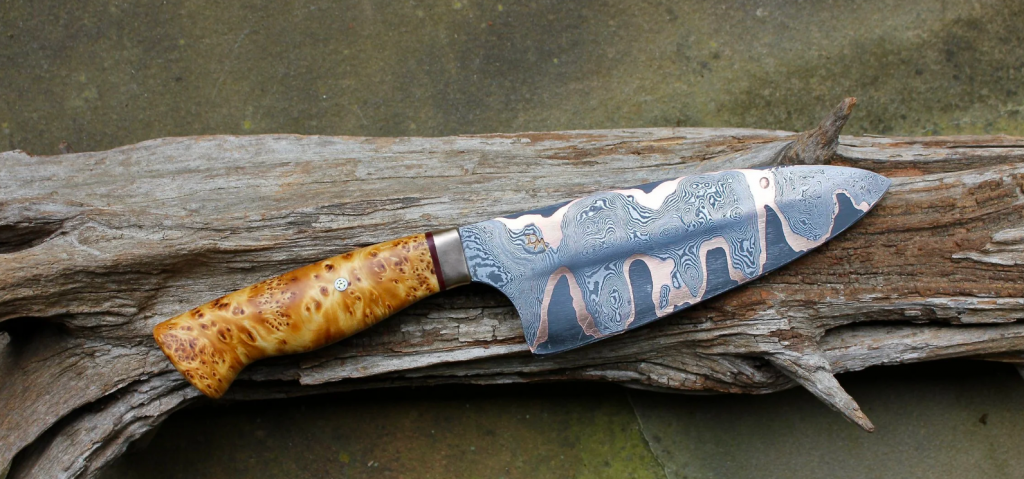
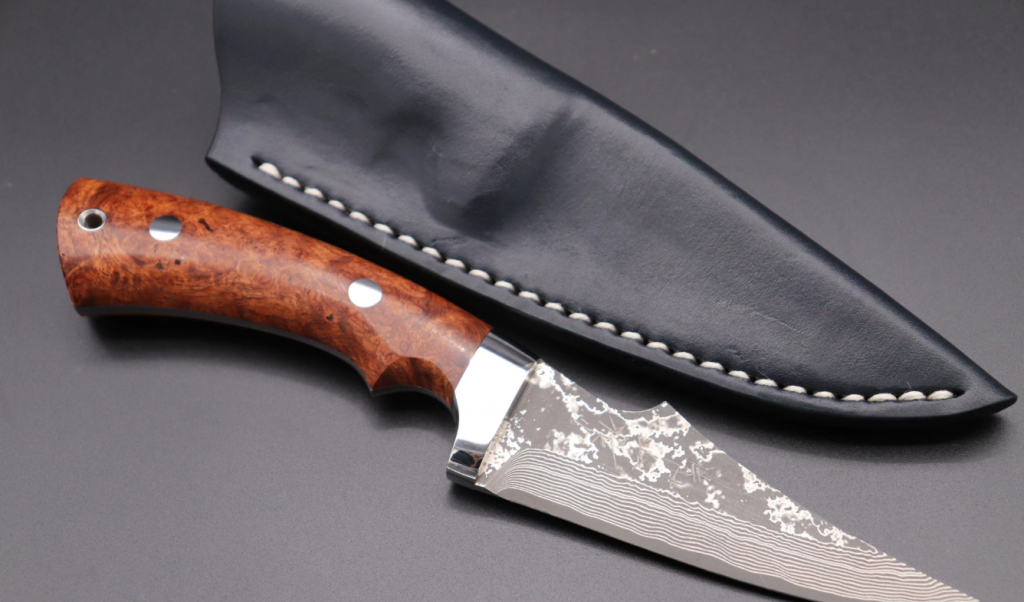
While Scandi and flat grinds each offer distinct advantages in wilderness scenarios, the foundation of any reliable bushcraft tool begins with material selection and craftsmanship. Premium blade steels like M390 or Damascus, combined with ergonomic handle materials such as Micarta, define the durability threshold for extended field use. Noblie’s collection of custom knives exemplifies this marriage of metallurgical precision and bespoke artistry, where each grind geometry is executed through handcrafted attention to edge stability. For survivalists evaluating long-term blade performance, the synergy between steel composition and grind type often outweighs geometry alone.

What Makes Blade Geometry Critical in Extended Wilderness Scenarios?

Blade geometry determines how your knife cuts, how long it holds an edge under repetitive tasks, and whether you can maintain it with field-available resources. In long-term survival, a knife that requires specialized sharpening equipment becomes a liability. The grind affects three critical performance factors: edge stability during batoning, control during precision carving, and field maintainability.

  • Scandi grind: Features a single bevel that extends from the spine to the edge, typically at 22-25 degrees total.
  • Flat grind: Tapers from the spine in a straight plane to the edge, usually with a secondary micro-bevel at 20-30 degrees.

This structural difference creates fundamentally different performance profiles in wilderness applications.

How Did We Arrive at These Two Dominant Geometries?

Bushcraft knives weren’t always designed with these specific grinds. Fifty years ago, most outdoor knives featured full convex grinds or thick saber grinds—geometries borrowed from military combat knives and hunting blades. These designs prioritized durability over cutting efficiency, resulting in knives that were nearly indestructible but required excessive force for basic woodcraft tasks.

During the 1970s and 1980s, Scandinavian knife makers refined the single-bevel Scandi grind specifically for northern forest work. Simultaneously, American custom makers experimented with hollow grinds for bushcraft—a design that proved disastrous. Hollow grinds created wickedly sharp edges but failed catastrophically during batoning, with edges chipping or rolling after minimal lateral stress.

The flat grind emerged as a compromise, offering better edge stability than hollow grinds while maintaining reasonable cutting performance. Modern CNC manufacturing made consistent flat grinds economically viable. Today’s Scandi and flat grinds represent the evolutionary endpoint of decades of field testing.

Scandi Grind: The Woodcraft Specialist

The Scandi grind excels in three specific wilderness tasks: controlled wood carving, feather stick production, and field sharpening. The single bevel acts as a self-guiding cutting plane—when you’re carving a bow drill spindle or shaping trap triggers, the bevel naturally follows the wood grain, requiring minimal correction.

  • Feather sticks: In field tests, experienced users produce functional feather sticks 30-40% faster with Scandi grinds compared to flat grinds of equivalent sharpness.
  • Maintenance: You can sharpen the entire edge on a single flat stone, maintaining the original bevel angle through tactile feedback alone. You can restore a working edge using a river stone or concrete block.

The primary compromise: Scandi grinds sacrifice edge durability during heavy lateral stress. The zero-grind edge is more prone to rolling or microchipping when batoning through knotty hardwood.

Flat Grind: The Versatile Workhorse

Flat grinds with secondary bevels deliver superior edge retention during high-stress tasks. The micro-bevel creates a reinforced edge structure that withstands batoning, prying, and bone contact without deformation.

  • Durability: Flat grinds maintain functional sharpness through approximately 40% more batoning cycles than Scandi grinds.
  • Versatility: This geometry handles game processing more effectively. The reinforced edge structure prevents the rolling that plagues Scandi grinds during these operations.
  • General Tasks: For cutting cordage, processing roots, or preparing food, flat grinds offer more predictable performance across diverse materials.

The trade-off: Field sharpening requires maintaining two distinct angles, which is significantly more difficult without proper equipment. Most users struggle to maintain consistent bevel angles freehand.

Performance Comparison: Real-World Wilderness Tasks

Task

Scandi Grind Performance

Flat Grind Performance

Winner

Feather stick production

Produces thin, consistent curls with 30% less effort

Requires more force; tendency to dig in

Scandi

Batoning (softwood)

Edge holds through 200-250 splits

Edge holds through 350-400 splits

Flat

Batoning (hardwood)

Edge rolling common after 50-75 splits

Minimal deformation; 150+ splits

Flat

Precision carving

Superior control; 40% faster completion

Requires constant angle correction

Scandi

Game processing

Edge rolling during joint separation

Consistent performance; handles bone contact

Flat

Field sharpening

Restore edge in 10-15 min with crude stone

Extremely difficult to maintain proper geometry

Scandi

The Maintenance Reality: What Happens After 30 Days in the Bush

After a month of daily use, performance depends entirely on maintenance. A Scandi grind can be kept functional indefinitely with primitive materials because you are matching one angle against a flat surface.

A flat grind with a micro-bevel requires maintaining two precise angles without visual reference. After several field sharpenings with improvised stones, most users inadvertently convert their flat grind into a convex grind with an inconsistent edge angle. This makes flat grinds less suitable for extended trips where professional sharpening isn’t accessible.

When Scandi Grinds Fail: The Hardwood Reality

Noblie Custom Knives

The strongest argument against Scandi grinds comes from users working in hardwood forests (oak, hickory, maple). In these environments, the zero-grind edge experiences rapid degradation. Batoning through 3-inch oak branches can roll a Scandi edge after 30-40 splits, while a flat grind handles 100+ splits before requiring attention.

Three Critical Mistakes That Destroy Blade Performance

  1. Batoning with the blade tip: Using the tip for splitting creates extreme lateral stress on the thinnest part of the edge. Always position wood contact in the middle third of the blade.
  2. Using the same sharpening angle for both: Scandi grinds require matching the existing bevel (approx. 12° per side). Applying a standard 20° angle creates a micro-bevel that ruins the Scandi’s self-guiding advantage.
  3. Storing knives in leather sheaths in humid environments: Leather absorbs moisture. After a week in rainy conditions, you’ll find surface rust that requires aggressive removal, degrading your edge geometry over time.

Specialized Considerations: Climate and Task-Specific Selection

  • Cold/Sub-freezing: Wood becomes harder; a flat grind’s reinforced edge is essential.
  • Tropical/Wet: Wood is green and fibrous; a Scandi’s aggressive geometry is more efficient.
  • Trapping/Woodcraft: Scandi grinds provide a 25-30% speed advantage in component fabrication.
  • Hunting/Survival: Flat grinds are critical for processing large game and hide work.

The Hybrid Approach: Why Custom Geometry Matters

Custom makers like Noblie Custom Knives offer hybrid geometries. A flat grind with a wide secondary bevel (5-6mm) provides durability while maintaining tactile sharpening feedback. Alternatively, a Scandi grind with a micro-convex edge adds durability without sacrificing the self-guiding action.

“The biggest mistake I see is users selecting blade geometry based on what works for weekend camping, then expecting it to perform during month-long wilderness immersion. A geometry that’s ‘good enough’ for three days becomes a critical limitation at three weeks.”

Technical Deep Dive: Edge Geometry and Material Removal Mechanics

  • Scandi: Acts as a wedge that propagates a split ahead of the edge. The 22-25 degree angle is optimized for wood fiber separation.
  • Flat: Uses a two-stage cutting action. The secondary bevel shares the load during high-stress tasks, preventing edge failure.
  • Thickness: Noblie typically specs 4-4.5mm thickness—thick enough for batoning support, thin enough for efficient carving.

Making the Selection: Matching Geometry to Your Wilderness Profile

  • Choose Scandi if: 60%+ of your time is spent on precision woodcraft and you are confident in freehand sharpening.
  • Choose Flat if: You process large game, work in hardwood environments, or want a more forgiving edge for heavy-duty tasks.
  • The Pro Strategy: For long-term living, own both. A primary flat grind for heavy work and a smaller Scandi blade for precision tasks.

“Students consistently perform precision tasks 35-40% faster with Scandi grinds, but they also damage Scandi edges more frequently during their first season. For instructors and experienced users, Scandi is optimal. For developing skills, flat grinds are more forgiving.”

A flat grind you can sharpen reliably outperforms a Scandi grind you can’t maintain. Both geometries are proven: Scandinavian countries have centuries of Scandi use, while American mountain men validated flat grinds. The difference between adequate and optimal geometry becomes apparent after your first week in the wilderness.

The Amazing Benefits of Baking Soda: Natural Remedies, Cleaning, and Everyday Uses

Baking soda, also known as sodium bicarbonate, has been a trusted household staple for generations. From natural health remedies to powerful cleaning solutions, this affordable white powder proves its versatility time and time again.

If you’ve ever wondered, “What is baking soda good for?”, the answer is: almost everything!

In this guide, we’ll explore the top benefits of baking soda—from oral care and skin treatments to cleaning hacks and odor control.

baking soda + benefits

Health & Personal Care Uses of Baking Soda

1. Baking Soda + Teeth: Natural Whitening & Fresh Breath

One of the most popular uses of baking soda is in oral care. When used in moderation, baking soda gently polishes teeth, helping to remove surface stains for a whiter smile. It also neutralizes acids in the mouth, which helps freshen breath and fight bacteria.
 Tip: Mix a small amount of baking soda with water to create a natural toothpaste, but avoid daily use to prevent enamel wear.

2. Baking Soda + Water: Natural Heartburn Relief

For generations, people have relied on baking soda water as a natural antacid. When mixed with water, baking soda neutralizes stomach acid, providing fast relief from heartburn and indigestion.
 Tip: Stir ½ teaspoon of baking soda into a glass of water for quick relief (always consult a doctor if you have frequent heartburn).

3. Baking Soda + Skin: Exfoliate & Soothe Irritation

Baking soda’s gentle texture makes it an effective skin exfoliator. It removes dead skin cells, leaving your skin smooth and refreshed. It also has mild anti-inflammatory properties, making it useful for calming rashes, irritation, or even a sunburn soak.
 Tip: Mix baking soda with water to create a paste and gently massage onto skin, then rinse.

4. Baking Soda + Bug Bite: Calms Itch & Swelling

Instead of reaching for chemical creams, a baking soda paste can soothe bug bites, stings, and minor skin irritations. It reduces itching, redness, and swelling naturally.
 Tip: Mix 1 tablespoon of baking soda with a few drops of water and apply directly to the bite.

5. Baking Soda + Hair: Removes Product Buildup

Over time, shampoos, conditioners, and styling products can weigh hair down. Baking soda acts as a natural clarifier, helping to remove residue and restore shine.
 Tip: Add 1 teaspoon of baking soda to your shampoo once a week for a refreshing cleanse.


Household Uses of Baking Soda

6. Baking Soda + Lemon: Natural Deodorizer & Cleanser

This powerful duo is a natural cleaning solution. Baking soda scrubs away grime while lemon juice cuts through grease and leaves a fresh scent. It’s safe, non-toxic, and eco-friendly—perfect for kitchens and bathrooms.
 Tip: Sprinkle baking soda on surfaces, then scrub with half a lemon for a sparkling finish.

7. Baking Soda + Fridge: Neutralizes Odors

A classic trick is keeping an open box of baking soda in the refrigerator or freezer to absorb food odors. This simple solution keeps your fridge smelling fresh and prevents strong smells from spreading.
 Tip: Replace the box every 30–60 days for maximum effectiveness.

8. Baking Soda + Laundry: Boosts Detergent Power

Adding baking soda to laundry helps neutralize odors, brighten whites, and soften fabrics. It balances the pH of water, allowing detergent to work more effectively.
 Tip: Add ½ cup of baking soda to your regular laundry load for fresher clothes.

9. Baking Soda + Carpets: Freshens & Deodorizes

Carpets can trap odors from pets, spills, or everyday use. Baking soda is a safe, chemical-free way to refresh carpet fibers.
 Tip: Sprinkle baking soda evenly on carpet, let sit for 15 minutes, then vacuum.

10. Baking Soda + Drains: Clears Odors Naturally

Instead of harsh chemical cleaners, baking soda paired with vinegar can clear minor clogs and eliminate odors in drains.
 Tip: Pour ½ cup of baking soda down the drain, followed by ½ cup vinegar. Let fizz for 10 minutes, then flush with hot water.


scoop of baking soda

Why Baking Soda Belongs in Every Home

From natural health remedies to powerful household cleaning, baking soda is truly a multi-purpose powerhouse. It’s affordable, eco-friendly, and safe for the whole family—making it a must-have in every kitchen, bathroom, and cleaning kit.

Quick Recap of Baking Soda Benefits:

  • Whitens teeth & freshens breath
  • Relieves heartburn naturally
  • Exfoliates & soothes skin
  • Calms bug bites & irritation
  • Removes buildup from hair
  • Deodorizes the fridge, laundry & carpets
  • Cleans surfaces & clears drains

Whether you’re looking for natural home remedies, eco-friendly cleaning solutions, or affordable personal care hacks, baking soda is the ultimate all-in-one solution.

Survival Simplicity: The Benefits of Peasant Bread in Everyday Life & Emergency Situations

In a world where convenience often overshadows simplicity, there’s something profoundly satisfying about a recipe that’s humble, hearty, and built to last. Enter Peasant Bread, a no-knead, no-fuss loaf that’s as forgiving as it is versatile. Whether you’re stretching your pantry between store runs or preparing for an off-grid survival situation, this rustic bread delivers dependable nourishment using just five ingredients.

bread for survival

Photo by Mike Kenneally on Unsplash

🍞 What Is Peasant Bread?

Peasant bread is a simple, old-world recipe that requires no fancy equipment or advanced baking skills. It originated as the everyday bread of farmers and villagers, meant to be filling, affordable, and easy to make. The recipe relies on the natural rise of yeast, warm water, and time to create a soft, flavorful loaf with a crisp crust. It’s perfect for both modern kitchens and minimalist living.

🧂 The Benefits of Peasant Bread

1. Minimal Ingredients, Maximum Return

With just flour, salt, sugar, yeast, and water, peasant bread can be made with pantry staples that store well and are inexpensive. No eggs, no milk, and no oil required (aside from a little butter or oil for baking).

2. No Kneading Required

Unlike traditional bread recipes that require arm strength or a stand mixer, this dough simply needs to be stirred and left alone to rise. That makes it ideal for those with limited time, tools, or energy.

3. Nutritious & Filling

Bread provides essential carbohydrates, the body’s main energy source. In survival situations, where calories matter, this bread can provide the energy needed for physical tasks, mental clarity, and warmth.

4. Adaptable to Add-ins

You can enrich the bread with dried herbs, garlic powder, oats, or seeds to increase nutritional value and variety. In everyday or survival use, this flexibility helps reduce food fatigue.

5. Long Shelf Life

Once baked, the bread keeps well for several days. If sliced and dried, it can be turned into croutons, breadcrumbs, or rusks, all of which extend its use in lean times.

🔥 Why Peasant Bread Is a Survival Superfood

In a survival situation—whether you’re off-grid, bugging out, or riding out a storm; food preparation becomes more about function than luxury. Peasant bread offers several key advantages:

✅ Easy to Make Over a Fire or Camp Stove

You don’t need an electric oven to bake this. A covered Dutch oven over coals or even a cast iron skillet with a lid can do the trick. With a little ingenuity, this bread can be made anywhere you have heat.

✅ Shelf-Stable Ingredients

The ingredients don’t require refrigeration and can be stored for months or years when properly sealed. That makes them ideal for emergency kits or food stockpiles.

✅ A Source of Mental Comfort

Familiar smells and textures, like the scent of bread baking, can offer emotional support during stressful times. Comfort food has real psychological benefits, especially in uncertain conditions.

✅ Barter Value

In a long-term survival scenario, homemade bread can become a valuable item for barter. Warm, fresh bread is universally appreciated and could be traded for other goods or services.

🥖 Peasant Bread Recipe (Survival Edition)

Ingredients:

  • 3 cups all-purpose flour (or whole wheat for added fiber)
  • 1.5 teaspoons salt
  • 1.5 teaspoons sugar
  • 1.5 teaspoons yeast (active dry)
  • 1.5 cups lukewarm water

Instructions:

  1. Mix dry ingredients in a bowl.
  2. Add water and stir until a sticky dough forms.
  3. Cover and let rise for 2 hours in a warm area (near a heat source or wrapped in a towel).
  4. Use two forks or hands to gently pull dough from sides and form a loose ball.
  5. Coat dough with a tablespoon of oil or melted butter and transfer to a buttered or oiled pan.
  6. Let rise for another hour.
  7. Bake at 375°F (190°C) for 45 minutes or until golden brown. If using a fire or camp oven, cover and rotate for even heat.
  8. Remove from pan and let cool on a rack or clean surface.

🧭 Final Thoughts

Peasant bread isn’t just a recipe; it’s a reminder of the resilience and resourcefulness of generations past. Whether you’re baking it in your kitchen for a cozy dinner or crafting it by campfire flame in the wild, this loaf offers sustenance, simplicity, and a taste of home.

In an age of uncertainty, knowing how to make your own bread from scratch is more than just a charming skill; it’s a step toward self-reliance.

#SurvivalBread #PeasantBread #OffGridCooking #PrepperFood #SimpleLiving #HomesteadLife #NoKneadBread #DIYBread #SourdoughAlternative #FoodSecurity

Peasant Bread Recipe

The Benefits of Installing a Hidden Gun Safe

In an unpredictable world, safeguarding your firearms is not only a matter of personal responsibility but also an essential step in protecting your family, home, and community. While traditional gun safes serve their purpose, the hidden gun safe is a discreet and increasingly popular alternative that offers a range of benefits. These hidden gun safes also known as concealment furniture come in many styles, sizes, shapes and colors including a hidden gun shelf, concealment mirror and even a concealment bed! Whether you’re a seasoned firearm owner or someone considering their first purchase, understanding the advantages of hidden gun safe can help you make informed decisions about firearm security.

advantages of hidden gun safe

1. Enhanced Security

One of the primary benefits of utilizing a hidden gun safe is its ability to conceal your firearms from potential threats. Unlike traditional gun safes, which are often large and conspicuous, concealment furniture is designed to blend seamlessly into your home or office. By being disguised as everyday items like mirrors, furniture, or bookshelves, these safes significantly reduce the likelihood of theft. Burglars are less likely to steal what they cannot find. After all, a hidden gun shelf looks just like any other shelf in your home or office.

Moreover, concealment furniture can protect your firearms from unauthorized access by children or guests. Accidental gun injuries are a serious concern, and a hidden safe adds an extra layer of security by keeping your weapons out of sight and out of mind.

2. Quick Access in Emergencies

One of the biggest advantages of relying on something like a hidden gun shelf to safely store your firearm is the unique advantage of providing quick access in an emergency. In high-stress situations, such as a home invasion, every second counts. Many hidden safes are designed with quick-access mechanisms, such as biometric fingerprint scanners, RFID locks, or hidden magnetic locks. These features allow you to retrieve your firearm quickly while keeping it secure from unauthorized users.

In addition to being fast to open you will be able to safely store your firearm in any room reducing the need to go to a basement or tucked away closet where a traditional safe would likely be. By strategically placing concealment furniture throughout your home, you can ensure that you always have access to your firearm when you need it most in the room where you need it, without compromising safety.

3. Preserving Aesthetic Appeal

Traditional gun safes can be bulky and difficult to integrate into a home’s decor. Hidden gun safes, on the other hand, are designed to blend into their surroundings. For example, a hidden gun shelf can be installed in any room of the home or office without altering the aesthetic integrity of your living space.

A concealment shelf, in particular, offers an innovative way to securely store firearms in rooms or offices where a traditional safe may not be practical. For instance, desks, coffee tables, or shelves designed with hidden compartments allow you to keep your firearms close at hand without disrupting the room’s functionality or design. This combination of practicality and discretion makes hidden gun safe an ideal choice for maintaining both security and style in any space.

Traditional gun safes can be bulky and difficult to integrate into a home’s decor. Hidden gun safes such as a concealment mirror, on the other hand, are designed to blend into their surroundings maintaining the aesthetic integrity of your living space. For example, this concealment mirror from Timbervaults.com looks just like any other mirror that you would see in a home or apartment; however it has a large storage compartment and offers fast access via it’s battery powered RFID lock.

For homeowners who value interior design and want to avoid the industrial look of traditional safes, concealment furniture is likely the optimal.

4. Deterrence Against Opportunistic Crimes

Criminals often look for easy targets. A hidden gun safe or hidden gun shelf can act as a powerful deterrent against opportunistic crimes. When firearms are stored in plain sight or in easily accessible locations, they become tempting targets for thieves. By keeping your firearms concealed, you reduce the risk of them falling into the wrong hands and being used in illegal activities.

Additionally, hidden safes or concealment furniture help ensure that firearms remain in your possession during an attempted robbery, providing you with the tools you need to defend your home and family if necessary.

5. Restrict Access to Guns

Hidden gun safes play a critical role in preventing unauthorized access to firearms, particularly by minors. The curiosity of children combined with the accessibility of unsecured firearms can lead to tragic accidents. A hidden gun safe or hidden gun shelf provides a secure storage option that ensures firearms are not easily found or accessed by young family members.

By incorporating advanced locking mechanisms, such as biometric scanners or RFID locks, hidden safes or concealment furniture make it nearly impossible for minors to gain access. This added security feature not only protects children but also gives parents peace of mind, knowing their firearms are stored responsibly.

Additionally, hidden gun safe or hidden gun shelves help reinforce the importance of firearm safety within the household. Teaching children about the dangers of firearms and demonstrating responsible ownership through secure storage practices creates a safer environment for everyone in the home.

Choosing Between a Traditional Gun Safe and Concealment Furniture

Choosing Between a Traditional Gun Safe and Concealment Furniture

When deciding how to store your firearms, you might weigh the benefits of a traditional gun safe against those of concealment furniture. Traditional safes are known for their robust build and capacity to store multiple firearms and valuables securely. They are ideal for those prioritizing maximum security and require a fireproof solution.

On the other hand, concealment furniture provides a versatile and discreet storage option, especially in rooms or offices where a traditional safe may not be practical. Items such as desks, coffee tables, or a hidden gun shelf blend seamlessly into your decor while offering quick access to firearms when needed. This makes them a great choice for firearm owners looking for a balance between security, accessibility, and style. In today’s market there are several providers of concealment furniture making installation easier than ever. In addition, many DIY plans and instructions for you to craft your own concealment furniture may be found on places like Etsy, Youtube and more.

Consider your specific needs, space limitations, and the level of security required when choosing between these two options. Both offer distinct advantages and can be tailored to fit your lifestyle and home environment.

Conclusion

Installing concealment furniture is a smart and practical investment for any firearm owner. By offering enhanced security, quick access, and aesthetic appeal, hidden safes or concealment furniture provide a superior storage solution that meets the needs of modern homeowners. Whether you’re looking to protect your family, comply with legal requirements, or simply enjoy greater peace of mind, a hidden gun safe or hidden gun shelf is an excellent choice that delivers both functionality and style.

Take the time to evaluate your specific needs and explore the wide variety of hidden gun shelfs available on the market. With the right safe in place, you can ensure that your firearms remain secure, accessible, and ready for any situation.

Tips On Taking Your Hunting Experience To The Next Level

You know that feeling when you’re out in the woods—just you, the crisp air, and the thrill of the hunt? There’s absolutely nothing like it. But let’s be honest: no matter how much you love it, sometimes it feels like you’re doing the same thing over and over. The same routines, the same strategies, the same outcomes. What if you could shake things up?

Via Pexels

Via Pexels

Invest In Gear That Works As Hard As You Do:

You wouldn’t head into the woods with dull blades or worn-out boots, so why settle for gear that doesn’t give you an edge? Your rifle or bow—whatever your weapon of choice—is your best friend out there. Make sure it’s calibrated, tuned, and paired with optics that feel like they can read your mind.

And about boots? Don’t underestimate them. A great pair will carry you further and keep you focused on the hunt instead of your aching feet. Toss in some sweat-wicking layers and rainproof outerwear, and you’re set for success. Just don’t forget your pack’s essentials—compact binoculars, a survival kit, and something to keep you on track when the woods start looking suspiciously identical.

Watch And Learn From The Wild:

Animals are predictable—until they’re not. Spend time getting to know them, really watching. When do they feed? Where do they like to wander? Are they the early-bird type or night owls?

Trail cameras are like having an extra pair of eyes that never get bored. Set them up where you think the action might be. You’ll get a peek into the secret lives of your game, and it’ll save you a whole lot of guesswork later.

Try Something That Scares You:

You’re already good at hunting, sure. But are you good at tracking faint prints through soggy ground? Or pulling off a clean shot with a bow when every nerve in your body is screaming? It’s worth figuring out.

Push yourself to learn something new. Maybe it’s bow hunting—it’s quiet, up close, personal. Or maybe you dive into long-range shooting and embrace the challenge of precision at distances that feel absurd. Either way, learning something outside your comfort zone is where the magic happens.

Hunt Somewhere You’ve Never Been:

The same patch of woods year after year? Nope, you’re better than that. Try stepping into a new kind of wilderness—high mountains, dense swamps, or even another country if you’re feeling adventurous.

Every landscape has its quirks. Some are forgiving, others are downright punishing. But figuring them out? That’s half the fun. Plus, new terrain means new game, new skills to learn, and maybe a story or two to tell when you’re back home.

Let Technology Be Your Wingman:

Now, for the fun techy things. If you’re not playing around with different types of tech goodies, you’re leaving a lot on the table. Advanced night vision tech is a game changer when you’re hunting after dark or before sunrise. It’s like suddenly having a superpower—seeing everything in the shadows, clear as day.

And then there’s GPS tools, digital maps, and trail apps. They won’t hunt for you, but they’ll make sure you don’t get turned around in some endless maze of trees. You’ll spend more time stalking your prey and less time scratching your head at crossroads.

Final Thoughts:

Hunting at the next level isn’t just about gear or skill; it’s about mindset. It’s about pushing yourself further, learning from every trip, and never taking for granted how incredible it is to be out there. Whatever you do, don’t get stuck in a rut.

Surviving Without Wisdom: The Importance of Knowledge and How to Keep Yourself In the Know 

In a world where information is at our fingertips, the true challenge lies not in accessing knowledge, but in preserving it for future generations. Some of you will have the wisdom and knowledge to pass on to the next generation, while others may not. Ensuring that the valuable life lessons of today are not lost tomorrow is crucial for our collective survival and growth. Here’s how to maintain and protect your knowledge effectively.

The Importance of Knowledge and How to Keep Yourself In the Know 

The Fragility of Digital Knowledge

In today’s digital age, vast amounts of information are stored in electronic formats. While this offers convenience and accessibility, it also poses significant risks. Digital knowledge, including images, files, and documents, can be altered or deleted with ease, leading to the potential loss of invaluable information forever. Cyber threats, technical failures, and obsolescence of storage mediums can all contribute to this fragility.

Traditional Methods of Knowledge Preservation

Historically, knowledge has been preserved through written texts, inscriptions on stone, and oral traditions. These methods have stood the test of time, ensuring that crucial information was passed down through generations. While modern society may view these methods as archaic, they provide a reliable backup to digital formats.

Historically, knowledge has been preserved through written texts, inscriptions on stone, and oral traditions.

The Importance of Offline Logs

To safeguard against the loss of digital knowledge, it is essential to keep your own offline logs. These can take various forms, including handwritten notes, printed documents, and physical books. Here’s why offline logs are vital:

1. Permanence: Physical records are not susceptible to hacking, power outages, or data corruption.

2. Accessibility: Offline logs can be accessed without the need for electronic devices, making them invaluable during emergencies.

3. Authenticity: Physical copies are less likely to be altered without detection, ensuring the integrity of the information.

physical books on topics of interest and essential survival and medical skills

Strategies for Maintaining Offline Logs

1. Handwritten Journals: Keep a daily or weekly journal of important knowledge, skills, and experiences. Use durable materials to ensure longevity.

2. Printed Documents: Print important digital documents and store them in a safe, organized manner. Consider using acid-free paper and archival-quality ink.

3. Books and Manuals: Invest in physical books on topics of interest and essential survival and medical skills. These resources can serve as reliable references in times of need.

4. Stone or Metal Inscriptions: For extremely critical information, consider engraving it on durable materials like stone or metal. This ancient method has proven effective over millennia.

Passing Knowledge to the Next Generation

1. Teaching and Mentoring: Engage in verbal transmission of knowledge through teaching and mentoring. Sharing your wisdom in person can leave a lasting impact on younger generations.

2. Community Workshops: Create and participate in community workshops focused on essential skills and knowledge. These gatherings can foster a culture of learning and preservation.

3. Family Traditions: Incorporate educational activities into family traditions. Storytelling, hands-on projects, and collaborative learning can instill valuable knowledge and skills.

In a rapidly changing world, the preservation and transmission of knowledge are paramount for survival and progress. By recognizing the vulnerabilities of digital knowledge and adopting robust offline practices, we can ensure that the wisdom of today is not lost but instead enriched and passed down to future generations. Remember, the key to enduring wisdom lies in a balanced approach that embraces both modern technology and time-honored traditions.

Building Your First Hunting AR-15: A Step-By-Step Guide

Crafting a hunting AR-15 from scratch presents a deeply engaging endeavor, offering a sense of accomplishment for firearms enthusiasts. This hands-on project can hone technical skills and allow for personalization, which ensures the final build meets the specific needs and preferences of the hunter. This process culminates in a uniquely tailored, high-performance hunting tool that embodies precision and reliability.

Building Your First Hunting AR-15: A Step-By-Step Guide
AR-15 M4 Rifle 300 Blackout

While numerous components and variations exist, this guide will cover the essential steps, providing a solid foundation for your first build. Read on to learn more. 

Understanding The Basics

Before diving into the assembly process, it’s crucial to familiarize yourself with the AR-15’s basic components and functionality. The AR-15 platform is renowned for its modularity, allowing for various customizations tailored to hunting needs. Some key elements include the lower receiver, upper receiver, barrel, stock, and handguard, each playing a pivotal role in the firearm’s performance.

On the other hand, if you’re seeking quality parts and expert guidance, it’s best to check out reputable online resources or visit BearCreekArsenal.com and similar options for more information. These resources can offer a diverse selection of AR-15 components and accessories, ideal for custom building a hunting rifle that meets specific requirements.

Planning Your Build

Embarking on your AR-15 hunting build requires thoughtful planning. This initial phase lays the groundwork for a rifle that perfectly aligns with your hunting aspirations. To plan your build properly, consider the following tips:

1. Choosing the Right Caliber

        The choice of caliber is paramount in a hunting AR-15. Popular options include .223 Remington for smaller game and the more powerful .308 Winchester or 6.5 Creedmoor for larger game. Also, consider the game you intend to hunt and local regulations when selecting your caliber.

        2. Selecting Components

        To ensure a favorable building experience, choosing the right components is crucial. Some essential components include: 

        • Lower Receiver: As the foundation of your AR-15, it’s crucial to select a lower receiver that’s compatible with your desired caliber and made of high-quality materials.
        • Upper Receiver and Barrel: These components are critical for accuracy. A longer barrel can offer increased accuracy over distance, which is beneficial for hunting
        • Stock: Choose a comfortable, adjustable stock that can be tailored to fit your body and shooting style.
        • Handguard: Opt for a handguard that provides sufficient space for accessories while ensuring comfort and heat resistance during extended use.
        • Optics and Sights: High-quality optics can greatly enhance your hunting experience by improving accuracy and range.

        Following these planning tips ensures you build your first hunting AR-15 properly and safely.

        Assembling The Lower Receiver 

        The lower receiver houses the trigger assembly, magazine well, and stock attachment point. Begin assembling this component by securing the lower receiver in a vise. Install the magazine catch, trigger assembly, and safety selector following the manufacturer’s instructions. Precision and attention to detail are crucial in this step to ensure the functionality and safety of your firearm.

        Installing The Trigger Group  

        The trigger group critically influences your AR-15’s accuracy and responsiveness. Carefully install the trigger, hammer, and associated springs. Conduct a function test to ensure the trigger assembly operates smoothly and safely.

        Attaching The Stock 

        The stock is attached to the rear of the lower receiver. Depending on the stock type, installation might involve sliding it onto the buffer tube or securing it with screws. Ensure the stock is firmly attached and wobble-free to provide a stable shooting platform.

        Assembling The Upper Receiver 

        The upper receiver assembly involves several key steps: 

        • Installing the Barrel: Secure the upper receiver in a vise and carefully install the barrel, ensuring it’s properly aligned and torqued to the manufacturer’s specifications.
        • Attaching the Handguard: After the barrel is installed, attach the handguard. This component should provide a comfortable grip and ample space for mounting accessories.
        • Mounting the Optics: Choose a scope or sighting system suitable for your hunting needs and mount it securely to the upper receiver.

        Assembling the upper receiver is a crucial milestone, combining precision and craftsmanship to create the rifle’s core. This step can bring you closer to the field-ready firearm.

        Final Assembly And Safety Check

        With the upper and lower receivers complete, the final step is to join them together. This is typically done by aligning the pivot pins and pushing them into place, securing the two halves of the rifle.

        Once assembled, conduct a comprehensive safety check. Verify that all components are securely installed and that the firearm operates as expected. Performing a function test under safe conditions is advisable to ensure reliability.

        Conclusion

        Building your first hunting AR-15 can be a complex but gratifying experience. By keeping the information mentioned above in mind, you can create a customized rifle that meets your specific hunting needs. Remember, patience and attention to detail are key to building a safe and effective hunting firearm. Whether you’re a seasoned gunsmith or a first-time builder, the journey of creating your own AR-15 can offer both challenges and rewards.

        Fascinating Honey Facts: Unveiling the Sweet Secrets of Nature’s Golden Nectar

        In the ancient annals of human history lies an intriguing tale of discovery—a story that intertwines the creation of one of the world’s first coins with the symbol of a bee. Honey, a golden elixir known for its remarkable properties, holds secrets that span millennia. But beyond its sweetness, honey boasts a tapestry of curiosities and benefits that weave through our past and present.

        10 Fascinating Facts about Honey

        Join us on a journey through a compendium of astonishing honey facts, from its origin as a currency symbol to its role in preserving the bodies of emperors. Delve into the science-backed revelations about honey’s enzymatic prowess, its contributions to human sustenance, and the heroic feats of bees that transcend their short lifespans.

        1. The Bee Symbolism in Ancient Currency

        Early civilizations stamped bee symbols on coins, signifying wealth and productivity. According to historical records, the image of a bee graced some of the world’s earliest monetary systems, reflecting the intrinsic value placed on these industrious insects.

        2. Honey’s Enzymatic Wonders

        Honey is more than just a sweet treat. Studies published in the Journal of Agricultural and Food Chemistry confirm that honey contains live enzymes, enhancing its nutritional profile. However, contact with metal spoons can deactivate these enzymes, making wooden or plastic spoons preferable for honey consumption.

        Honey: A Sustaining Superfood

        3. Cognitive Benefits of Honey

        Recent research published in the Journal of Neuroscience highlights honey’s impact on brain function. The natural substance found in honey can potentially aid in improving cognitive abilities and memory retention.

        4. Honey: A Sustaining Superfood

        Renowned for its nutritional richness, honey stands as one of the few foods that can sustain human life alone. Packed with essential nutrients, enzymes, and antioxidants, honey has historically served as a crucial source of sustenance for various cultures.

        5. Bees: Unsung Heroes of Survival

        Bees, with their modest lifespan of less than 40 days, play a monumental role in preserving ecosystems and preventing famine. Historical accounts from Africa attest to how bees’ honey production saved communities from starvation during lean periods.

        Propolis: Nature's Potent Antibiotic

        6. Propolis: Nature’s Potent Antibiotic

        Propolis, a resinous substance produced by bees, is rich in potent antibacterial properties. Scientific studies published in the International Journal of Biological Macromolecules underline propolis’s efficacy as a natural antibiotic, offering promising implications in medical research.

        7. Timeless Shelf Life of Honey

        Contrary to most food items, honey is known for its indefinite shelf life. Archaeological discoveries of honey in ancient tombs validate its remarkable preservation quality without an expiration date.

        8. Honey in Ancient Rituals and Traditions

        The historical significance of honey transcends mere sustenance. Across cultures, honey played a role in rituals and practices, including the embalming of emperors’ bodies, giving rise to beliefs in its preservative properties.

        9. Origins of “Honeymoon”

        The term “honeymoon” traces its etymology to the tradition of newlyweds consuming honey for fertility and prosperity, echoing ancient beliefs in honey’s symbolic importance.

        10. Bee’s Lifetime Contribution

        In a lifetime, a single bee tirelessly visits over a thousand flowers, producing less than a teaspoon of honey. Despite their brief existence, bees contribute immeasurably to the environment and human survival.

        Across cultures, honey played a role in rituals and practices.

        In essence, the universe of honey and its surrounding bee culture encapsulates a treasure trove of wonders and practicalities, enriching human history and our understanding of nature’s miracles.

        Thank you, precious bees, for bestowing upon us the golden elixir that is honey—a testament to your tireless efforts and invaluable contributions to our world’s sustenance.

        Sources: