
I have to say almost anyone could actually DO this. With basic modifications depending on your downspout or gutters, this is perfect. Easy DIY Rain Water Collection system. For a more advanced version click here.
Step 1: Parts and Tools
Parts:
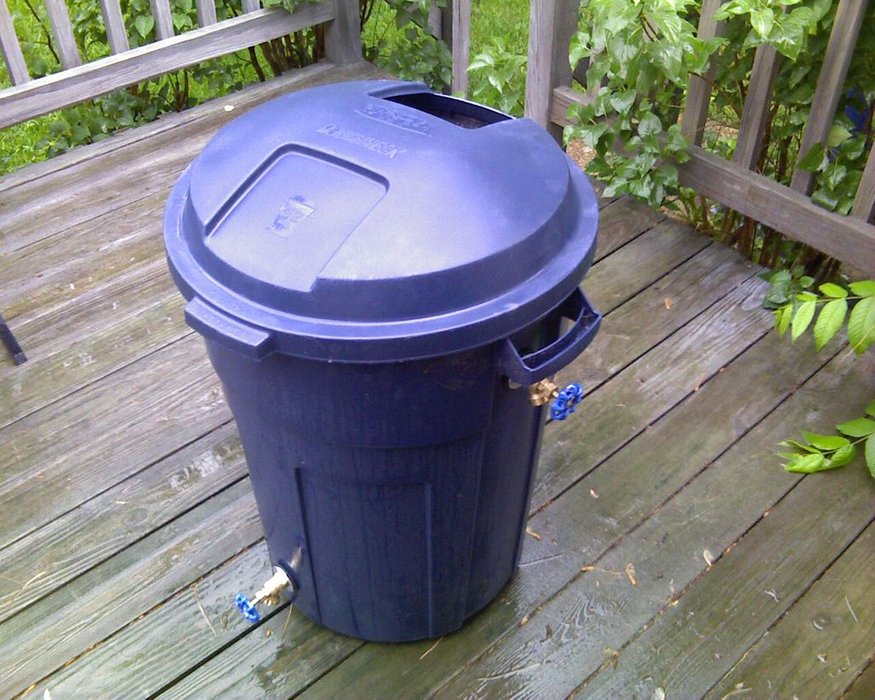
1 32 Gallon Rubbermaid Roughneck trashcan – From my garage
1 roll of window screen – On hand from fixing the patio door last summer
1 90 foot hose – $15.00
1 Nozzle set – $3.00
1 set of 3 conduit locknuts – $0.99
2 1/2 inch boiler drains – $9.48
4 flat metal washers – $2.10
4 rubber washers – $5.32
Total with tax – $38.22
Tools:
Utility knife
Scissors
Staple Gun
Pliers
Screwdriver
Utility knife
Scissors
Staple Gun
Pliers
Screwdriver
Step 2: Attaching the faucets
1. Begin by using the utility knife to cut a hole in the trash can for the faucet several inches from the bottom of the can. The rubber washers will keep any of your harvested rain water from leaking out of your rain barrel, but be careful not to make the hole too big.
2. Thread the metal washer onto the faucet first then the rubber washer. The rubber washer should be sandwiched between the metal washer and the side of the trash can.
3. Place the faucet through the hole you cut and put another rubber washer on the inside of the trash can.
4. Use the pliers to help screw the locknut on tightly. The tighter you get it screwed on the less likely you are to have leaks.
5. Repeat this process for the second faucet several inches form the top of the trash can. While a second faucet probably isn’t absolutely necessary it can act as an overflow valve.

Step 3: Attaching the screen
The screen is important. It will keep debris out of your rain barrel. It will also keep mosquitoes from being able to get in and lay eggs in your water.1. Lay the screen over the top of the trash can.
2. Begin stapling the screen to the top of the trash can. Be sure the can is clean inside before you staple it closed.
3. Use the scissors to trim off the excess screen.
2. Begin stapling the screen to the top of the trash can. Be sure the can is clean inside before you staple it closed.
3. Use the scissors to trim off the excess screen.

Step 4: Making the lid
I don’t suppose a lid is strictly necessary, but I think it makes it look a little better, and it will keep debris from piling up on top of your rain barrel. Using the utility knife cut out an opening in the lid of the trash can. This will be the intake for the downspout from your gutters. Put the lid on over the screen and your rain barrel is complete.

Step 5:
The last step is installing your rain barrel.1. Begin by cutting your down spout to the desired height. I used a utility knife, but I suppose a drimel tool would work too. You may need to move a couple of the brackets that hold the down spout to the wall. Just unscrew them and move them where you want them.
2. Reattach the curvy but at the bottom of the down spout and set your rain barrel underneath. I attached a hose to the faucet at the bottom of the barrel and ran it around the side of the house to the front where I need it, but you could just as easily skip the hose all together and save yourself $15.00.
2. Reattach the curvy but at the bottom of the down spout and set your rain barrel underneath. I attached a hose to the faucet at the bottom of the barrel and ran it around the side of the house to the front where I need it, but you could just as easily skip the hose all together and save yourself $15.00.
[source] Roughneck Rain Barrel.