Hunting With a Crossbow for Beginners

For the people who are interested in hunting, a crossbow can be a good weapon for beginners. A crossbow is a kind of ranged weapon that uses elastic to launch a missile, in this case, a projectile that can hit your target and kill it. Just like all the other kinds of hunting weapons, a crossbow can be accurate and suitable for hunting. It can be fun using this hunting weapon for people who are just beginning to engage in this activity. You can learn more here by reading along. In this article, we shall discuss some things beginners need to know about the use of crossbows and how to choose the accompanying projectiles for a better hunting experience.
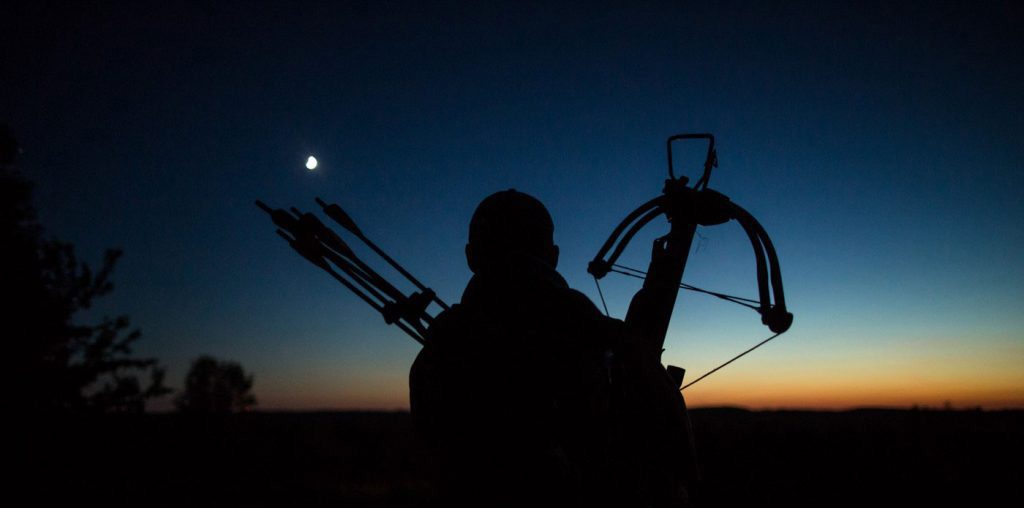
Crossbow for beginners - Year Zero Survival Blog

Here are some of the hunting tips you need to know when using a crossbow as a beginner:

Crossbow Configurations

The fact that many companies manufacture crossbows means that you may be confused about what to choose. However, with some basic knowledge of some features of crossbows, you would be better off. Crossbows come with a stock and a bow. These fit together to form the whole weapon, the crossbow. The difference in many types of crossbows is in the style of a bow that will be attached to the stock. In this regard, there are three designs, which are the Reverse Draw, the Compound, and the Recurve.

Consider crossbow draw weights

This is a very important factor that one should consider when buying a crossbow as a beginner. This refers to the number of pounds it will take you to draw back the string into the cocked position. This ranges from 90 to 260 lbs and should play a very important role in the speed of the arrow after it has been released from the crossbow. With this feature, one needs to consider their strength and know the amount of poundage they can comfortably draw back on the crossbow.

The limb configuration and the length of the power stroke are other factors that can determine the speed of the arrow. If your draw weight is great, your bow becomes more unforgiving. As such, your shooting errors will be many. You will also increase the wear and tear of the components of the bow.

Know the crossbow arrow speeds

The crossbow arrow speed is a very important aspect that can help beginners become better hunters. Modern crossbows come with arrow speeds that range from 265 to 400 fps. You see, the faster the arrow speed, the further and the flatter you can shoot it. With this in mind, you should be able to take the big game with ease. However, it is good to note that bowhunting requires one to be as close to their target animal as possible. Regardless of the arrow speeds of your crossbow, you may not always achieve your goal. Archery is not a long-range sport and one needs to know this while they buy a suitable crossbow. This way, you will not be disappointed. And in any case, as a beginner, you should develop your skills by using the basic crossbow before you can buy the more powerful weapons.

What are the benefits of crossbow hunting?

This is one thing you need to know as a beginner so that as you engage in this activity, you can be encouraged at the same time. There is a wide range of benefits that come with crossbow hunting. These are:Crossbow hunting is good for wildlife management. One good thing with crossbow hunting is that it encourages wildlife population control and management. For the areas that are overpopulated with animals, such as game parks, game reserves, and even forests, crossbow hunting will help in controlling the population of the animals. Consequently, there will be a healthy growth of the wildlife population.

Good for recreation purposes. This is a good recreational activity that beginners in hunting can engage in. You can utilize your free time in this adventure and help relax your mind as you try to look for targets and hit them. It is also a good chance for you to socialize with other people who engage in the same activity. You will get to learn from each other. This is a good way to grow your hunting skills and hunting engagements.

In conclusion, one must be aware of the rules and regulations of hunting in their countries, States or Counties. Regardless of the fun and the adventure that comes with crossbow hunting, you could easily get yourself into jail if you do not follow the regulations laid down in your country. You need to know all there is to know about hunting certain animals in a particular jurisdiction. This way, you should enjoy your crossbow-hunting expeditions as a beginner.

5 Reasons Why Biology Homework Is Essential For Your Survivability

As a student, you need to view homework as more than just a way to improve your grades in school. Learning should not be centered around the four walls of a classroom. When you have the right attitude toward learning, and toward your biology homework, you will learn skills that are essential for survival in different situations. You see, biology as a science studies life forms. It dwells on everything regarding life from the single cell organisms to multi-cell organisms. Freelance writers who write about biology can testify to this fact that knowledge of biology is key to survival.

5 Reasons Why Interest In Biology Can Save Your Life

1. In Case You Get Frostbite

Frostbite can happen when you stay in cold regions for an extended period. Whether you’re there by choice or by force, knowledge of biology can help you survive. While a mild case of frostbite will not cause any lasting damage, a more serious case can lead to a number of severe symptoms. Some of these include blistering, loss of feeling, cold sensitive, and hypothermia all of which can lead to death. The worst mistake you can make at a time like this is using friction to warm the part of your body that is affected. This can damage your tissue.

2. In Case Of A Heart Attack

While heart attacks are more likely to happen to people who are more advanced in age, youths still have a slight risk of having a heart attack. When the body can no longer pump blood to the heart efficiently, the heart muscles suffer a deficit in oxygen and die. From a biology textbook or articles written by freelance writers, you can learn the symptoms of a heart attack and seek out professional help. Taking an aspirin tablet as soon as you notice the symptoms can reduce the risk of clot formation. If you’re not the one having the heart attack and the patient is not responding, attempt cardiopulmonary resuscitation with your hands.

3. In Case You Suffer Burns

There are several circumstances that can lead to burns. Whatever the case may be, knowing about the human body will help you get or provide instant relief before experts get there. Most people think the best way to relieve a burn is with ice. This is only going to damage the burnt skin more. The best thing to do in such a situation is to use a sterile dressing to cover the affected skin and wait for the medical team to arrive.

4. In Case Of Convulsions

If someone around you suffers a convulsion, you can quickly check the internet for an article about how to provide first aid. There are many articles by freelance writers about this emergency. A convulsion is also called a seizure and it’s a situation where a person suffers rhythmic movements of the muscles that cannot be controlled. It happens when the brain receives abnormal electrical impulses. While these seizures can stop without any first aid, you can help the victim by assisting them to lay down in a comfortable position. It’s common to see people put objects in their mouths but this should be avoided. Just remove harmful objects from the environment and wait for a medical professional.

5. In Case Of A Traumatic Head Injury

You can suffer a traumatic head injury when you hit your head hard. If you don’t get medical attention as soon as it happens, you will be at risk of brain damage. The first thing to do would be to call for professional help. If you’re not the one who got injured, you can assist the victim by checking if their airways are blocked. If the person is not conscious, perform CPR.

There are many other ways to care for yourself or someone else during a medical emergency. Learning about how the human body works during biology lectures or from freelance writers will teach you more survival techniques in cases of emergency.

Sebastian Miller is a former Calling Lake School science teacher. After 4 years of teaching, he decided to become a freelance writer. In Sebastian’s opinion, math is the core of all science and his goal is to enlighten as many schoolers as possible through writing. 


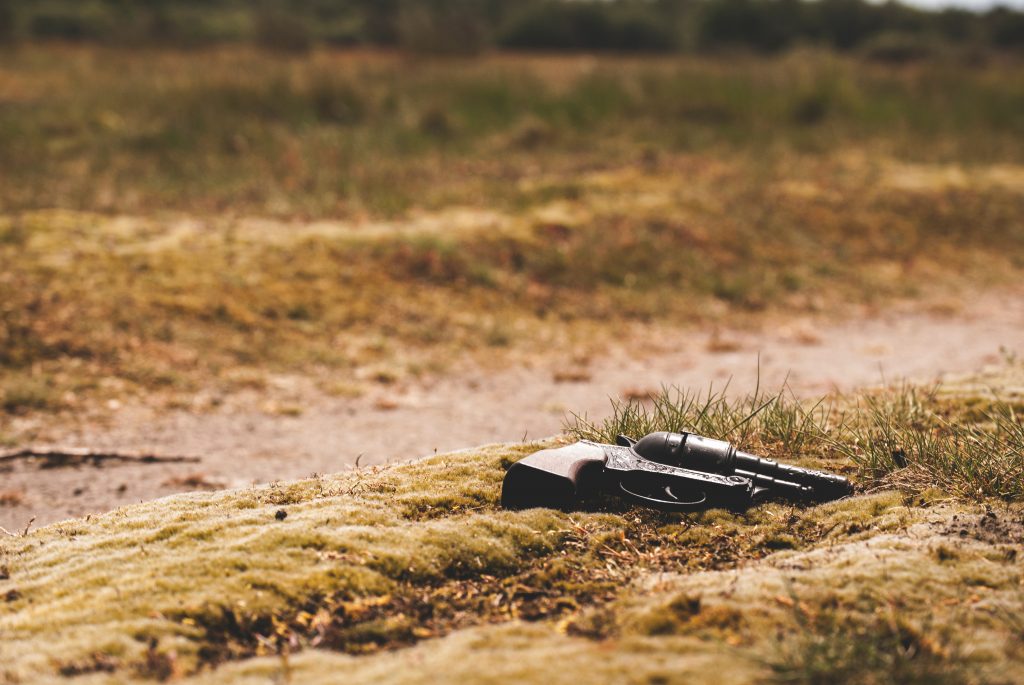
The Top 5 Survival Pistols of 2019

Are you or intending to face a situation where your life at stake? If yes, a survival pistol is a must-have if you can afford to acquire one. If you are in the market of a new top-quality survival pistol, you are definitely at the right place. Here, you are going to see a list for the best survival pistols available today to help you make an informed buy.  But just before we have a look at a list for the best survival pistols available today, you should check this Handgun Caliber Comparison Chart and Guide.

Top 5 Survival Pistols

Now, let’s see the top-notch survival pistols of 2019.

1. Walther P99 AS

This pistol originates from Germany and was released to the market for the first time in the early 1990s. It’s a high-quality pistol, and although some people find its grip awkward and slippery at first, it’ll feel comfortable and firm with time when you get used to it. It has minimal vertical movements when in use, thanks to the horizontal serrations at the front, as the palm swell averts side to side movement and offers a better grip. It has a caliber of 9 by 19 Parabellum and weighs just 720g when unloaded while the muzzle velocity ranges from 300-460m/s. The entire pistol is 180mm long and has a barrel length of 102 mm and a magazine capacity of 16 rounds and 50-meter sighing range.

2. Beretta PX4 Storm

Beretta PX4 Storm originates from Italy and is a semi-automatic pistol. Just like Walther P99 AS,  It has a caliber of 9 by 19 Parabellum, but it’s a little bit heavier, weighing 780 g to 800g when empty.  The pistol is relatively compact as it’s 193mm long and the length of the barrel is 102mm. It shoots at a speed of 360m/s while its magazine can hold up to 17 rounds of ammunition. It features Double-action and single-action trigger modes, with the external hammer changing the trigger pull to single action from double action when cocked back.

3. Heckler and Koch USP

Heckler and Koch USP is another semi-automatic pistol from Germany. It has a 9 by 19 Parabellum caliber and weighs 720g when empty and 805g when loaded. The entire pistol is 194mm long and its barrel is 108mm long. A bullet from this pistol travels at a speed of 350m/s and the magazine can hold up to 15 rounds of ammunition. You can shoot at something that’s 25 yards away with relative ease.

4.    FN Five-SeveN

FN Five-SeveN is a semi-automatic pistol from Belgium. It has a 5.7 by 28 mm caliber and weighs 618g when empty and 744g when loaded. So, of the four that we’ve listed here, it is so far the lightest. The entire pistol is 208mm long, and its barrel is 122mm long. A bullet leaves the muzzle of this pistol at a velocity of 650m/s and you can load up to 20 rounds of ammunition in the pistol’s magazine at a go. Being single-action pistol, its internal hammer fully cocks when you rack around the chamber slide. It offers accurate shooting to an object that’s 50m away, although its range of effective fire is up to 100m.

5.    Smith and Wesson M&P

Smith and Wesson M&P originates from the USA and features an extended stainless-steel chassis. Besides, the semi-automatic pistol has a high grip to barrel bore axis ratio faster aim recovery and to prevent much vertical movements. Its caliber is 9 mm by 19mm long and the overall weight of the pistol is 680g when empty.   The length of the entire pistol is 108mm and a bullet is released from the pistol’s muzzle at a velocity of 370m/s.

Best pistols for survival

Most likely, the pistol you choose has a significant influence on your survival chances in a risky situation. Therefore, you should take time and consult widely, as you’ve done by reading this article, before acquiring one to ensure that you have the best.

How to Sharpen Serrated Edge Knives-Serrated Knife Sharpening

Today I thought I would talk about a little problem that many folks that carry and/or use knives in their homes seem to have all over the country. That little problem is serrated knives. We all own them in one form or another like a serrated survival pocket knife or serrated bread knife or even a serrated carving knife. There is an issue that arises for many people that own serrated knives. That issue is how to properly sharpen a serrated knife? The question of the ages for the modern knife owner. In this post, I am going to address this issue and when I am done with it you will know how to sharpen your serrated knives.

How to Sharpen Serrated Edge Knives

For the most part, your serrated kitchen or pocket knife will stay sharp longer than your straight edge pocket or kitchen knives will and they will even cut when the serrations are getting dull. As the scallops and teeth of a serrated knife get dull the quality of the cuts that you once got will slowly degrade into tearing, pulling and shredding of the item that you are cutting. When this tearing/shredding effect starts to happen then it is time to sharpen your knives.

For many people the chore of sharpening knives is time-consuming and for many, it is a daunting chore. The fact of the matter is that sharpening serrated knives for many is more problematic than sharpening standard straight edges. Proper care and maintenance of serrated knives will keep those scallops cutting cleanly for a long time. Have no doubt though; these serrated knives do need a greater level of experience to sharpen properly. Another thing to consider is that serrated knife blades take longer to sharpen than their plain edged counterparts.

As I said earlier serrated knives can and do stay sharper longer than plain edged knives and because of this it will take longer for a serrated blade to become dull, and this is even true for combination bladed pocket and kitchen knives. The “teeth” of a serrated blade “bite” or start the cutting process first and then the scallops of the blade follow through to complete the cut. The “teeth” take most of the cutting pressure and the scallops take the least amount of cutting pressure. Because the scallops take the least amount of cutting pressure they stay sharper longer.

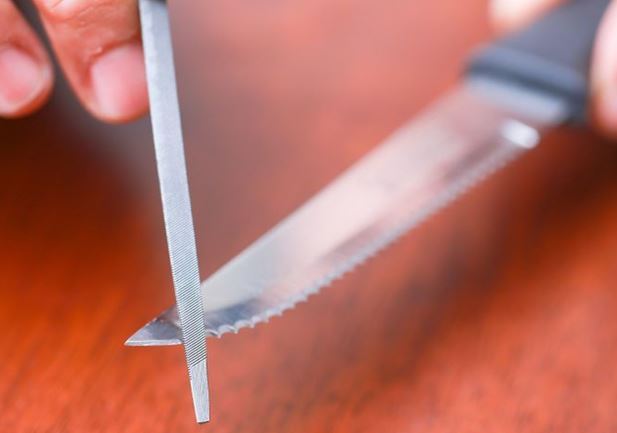
Now let’s talk about how to sharpen your serrated knives. In order to do this, you will need to obtain the correct type of sharpener designed for sharpening these types of blades. There are many on the market made by many manufacturers that are specific to the chore. Some are good, and in my humble opinion, some are just plain old bad. Some of the types of serrated knife sharpeners are the “draw through” type. (I personally do not care for “draw” or “pull” through sharpeners)Then there are the sharpening rods that come both in standard and tapered versions and made of different materials from carbide to diamond coated. There are specialized serrated sharpening stones that are textured to accept the scallops of serrated knives. Many of the sharpening rods or sticks come in a triangular shape to work on the scallops between the teeth of the knife. The “rat tail” type of file or sharpener is tapered in order to naturally fit the diameter of the scallops of the blade. The one thing to keep in mind when wanting to sharpen serrated knives is that as with sharpening plain edges you will have to take the same considerations with serrated knife edges and that means that you will need to choose the correct sharpener and what materials you want that sharpener to be made of.

Many of the sharpeners that you would use to sharpen a serrated knife can be used to sharpen plain edged knives as well and you can get pocket-sized sharpeners for serrated knives and combo edged knives to carry with you for daily honing and sharpening of your daily carry knife.

When it is time to sharpen your knife whether it is a plain edge or a serrated edge one of the things to keep in mind is the angle that you will use to sharpen your knife. It does not make any difference what type of sharpener you use, keep the angle in mind. Most of the time when sharpening combo edged blades the serrated portion of the blade in the majority of cases will be of the same angle as the plain edged section of the blade. This means that when sharpening the serrated section of a combo edge it should be kept at the same angle as the plain edge section of the blade as well. Now there are many sharpeners out there that are referred to as “guided” sharpeners like the Lansky Sharpening Systems. This type of system will maintain the proper edge angle as you sharpen your knives and you can get stones or diamonds that are triangular in shape to sharpen your serrations at the correct angle with the Lansky System too!

Many people that I have met and many people that call themselves “professional knife sharpeners” for a living have sharpened serrated knives by either drawing the back/flat side of the knife across a bench stone, and in many cases I have seen them sharpened by drawing the back/flat side of the serrated knife across a sanding belt. This is not the correct way to sharpen this kind of knife. I order to sharpen the scalloped part of a serrated knife you can use the serrated sharpening stone or diamond from something like the Lansky System and work it into the scallops in a perpendicular movement to the cutting edge one scallop at a time. You can also do the same thing using one of the many diamond or ceramic files or tapered “rat tail” files and move them in the same perpendicular fashion to the cutting edge of the scallops.

Remember, you have to take your time and sharpen one scallop and one tooth at a time before moving to the next one. When you are done you should be able to feel a “burr” on the flat side of the knife. Many will tell you to lightly grind that burr off. I do not do this and I tell others not to do this. I have a small piece of 2X4 wood and I then lightly draw the serrated blade across a corner of the 2X4 to remove the burr this is also the way many people who sharpen Japanese kitchen knives do it as well. You can also take a hand held ceramic rod and start at the top of the rod and work your way down to remove the burr and polish the flat of the blade. When you “grind” you are removing metal and when you use a ceramic rod you are taking much, much less metal from the blade. I do it this way for the longevity of the blade.

Here is another way to sharpen a serrated knife really quick that I use all the time. Take corrugated sharpening steel and then take your serrated knife and start at the bottom of the steel at the handguard and take the very tip of the serrated knife and stroke the blade across and up the steel holding the blade at your chosen angle. Don’t just put the flat of the blade flat on the steel. Put the flat to the steel flat and then raise it up to your desired angle. If you know what 20 degrees looks like when sharpening on a flat stone then you should know what 20 degrees look like against the sharpening steel. Then after 10, 20, 30 reverse strokes up the steel the burr will be raised on the flat of the blade and I lop it off on the 2X4 and then a few strokes on the ceramic rod to polish the flat and I am good to go!


Secret Uses For Common Household Items

Secret Uses For Common Household Items

[source]


101 Uses for Paracord [infographic]

There’s a good reason why you don’t bring a lot of things with you when you go on an outdoor adventure. You may need a pillow for a more comfortable rest at night inside your tent, or a rope ladder to climb some treacherous terrains. But you don’t bring all of what you think you might need when camping or trekking or whatever you do in an adventure. If you did, you would be carrying your whole house with you.
This is where a modest piece of equipment comes in. A paracord looks like it won’t be much, but it can actually do so much. A paracord, which means a parachute cord, is basically a lifesaver. You need a shoelace? Use a paracord. Your leather watch strap ripped? A paracord will hold it together. You suddenly need to rappel? Paracord can be your lifeline. Aside from the obvious uses—such as tying an object to something or using it as a rope—there are a lot more that you can do with a paracord. You don’t have to be trekking in the countryside or camping in the wild to have a use for it. You can find that even in an urban setting, a paracord can be crucial to you.
Learn how to use a paracord in so many different ways in the infographic below.
infographic 101 Uses for Paracord

3 Types of Weapons You’ll Definitely Want in the Apocalypse

Scientists have worked out that after just three months of an apocalypse, things would be looking pretty dim for humanity, with only 300 people left alive. This data doesn’t seem to take into account, however, the preparedness of a large group of the population in regards to weaponry. Survival weapons are a necessity, especially when it comes to prepping for an apocalyptic disaster that could force you to alter the way you protect and defend what’s yours. Depending on the situation you find yourself in, you will likely want to have a variety of weapons on hand to defend yourself and your family as well as hunting and gathering food and other necessities.

End of days. How to survive post SHTF.

Machetes & Knives Provide Practicality 

If you are properly trained to use a knife, it can be a great way to not only protect yourself but to cut through thick, dense forests and also hunt animals that you can use for food. You will likely need a reliable knife that’s easy to handle, strong, and razor sharp. As you will use it for various purposes, such as self-defense and hunting, it can be a good idea to invest in a multi-tool that has a knife feature included on it instead of one single knife. That is, however, unless you plan on going for a machete. This weapon is best-suited for areas where you will need to clear brush as well as for survival skills such as cutting wood and even defending yourself against smaller predators like wolves and mountain lions.


Pepper Spray Guns for Safety & Tracking

Pepper spray is powerful enough to be used against most bears, meaning that it certainly is powerful enough to take down anybody in your immediate vicinity who is trying to do you harm. Pepper guns are great as they take on the shape of a gun, making these devices easy to carry around. Instead of shooting ammo, however, it uses pepper spray to disarm your enemy or attacker, either human or animal. The Mace Brand Pepper Spray Gun is a great option in this case it is works two-fold by allowing you to deliver a powerful kick of pepper to your assailant while also allowing you to track the perpetrator. The 10% OC Pepper Formula features a UV Dye that will trail behind whoever you shot it with to ensure you can either track it to hunt it and use as food or avoid if it is someone you don’t want around you or your family.

Using Guns for Tough Situations

They’re loud and sometimes heavy to carry around, generally making them less-than-ideal for survival situations. However, guns can be a great asset in an apocalypse that requires you to defend yourself from predators or other dangers, as they provide you with the power you might need to fend off unwanted visitors that other weapons don’t provide. To defend yourself from animals, it is best to have some sort of animal repellent such as a bear spray on hand for your first line of defense. Your next best bet will be a holster pistol that you can carry around on your waist. And, if the situation calls for it, you can upgrade to a rifle or shotgun that allows you to scope out dangers from a distance.

Ensuring the Safety of Your Family

The best way to ensure the safety of your family during an apocalyptic event is to prepare them beforehand. Educate them on the risks involved and teach them how to defend and care for themselves. Have a solid communication plan in place and ensure you are equipped with all of the necessary gear you need to survive whatever might happen, even if it means stocking up on a few defense weapons.

Sounds Fishy: An Often Overlooked Bug-Out Bag Item That I Always Add

I’m always intrigued by what people argue about when trying to decide what to put in their bug out bag or survival kit. You know…. fire starters, water filters, food rations, I need not say more. We all picture survival scenarios that we try to be prepared for. Maybe one of those is being stranded in the woods or lost near a stream or lake.

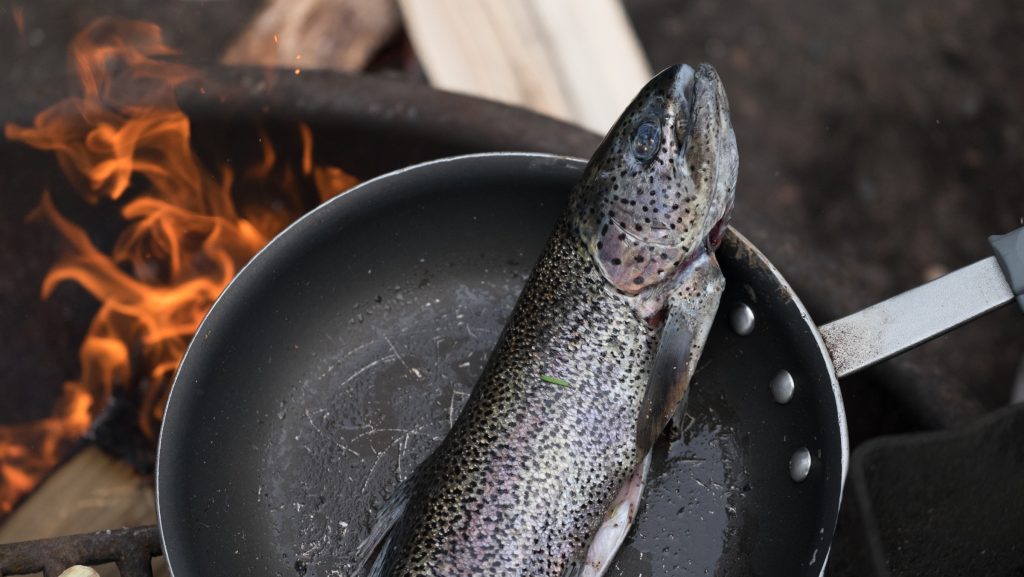
Freshly caught trout cooking in a skillet over an open flame

So here is a question…..Do you have any actual fishing lures and line in your kit? I’m not talking about a bit of string, a few hooks and a sinker. I’m talking about maybe a small 150 yd spool of super high tech fishing line. Maybe you have paracord in your kit but think you have nothing but time to strip one of the 8 strands out of it and use it for lashing or fishing line. Why waste your time and precious resources? The latest technology can give you the diameter of old 4 lb test with the strength of 40 lb test using super braids made out of exotic fabric like trademarked “Spectra” lines. Snares, bed and shelter lashing, trip lines, temporary sutures, and yes fishing, the possibilities are endless and ready to use.

So you have some compact line, what kind of lures could you carry for let’s say a salt, fresh or fly fishing situation? Opinions are close but vary on the top 10 lures in the world for these types of fishing. Most would agree on our sample of a short list of some of the best lures ever invented because all and many more are time tested and proven fish catchers. Do your own research if you wish but consider the possibility of including one or two lures from each category to your well thought out survival kit.

add-lures-to-bugout-bag

Here’s a list of just a few lures to save you some time…..

Fresh water:

Heddon Torpedo, Red Devil or Daredevil Spoon, Rapala Floating Minnow, Panther Martin, Hula Popper, Mepps Aglia Spinner, and of course the famous versions of the rubber worm!

Salt Water:

Diamond Jig, Gold spoon, artificial shrimp or DOA shrimp, Mirrolure twitch baits, Bucktail jigs and Johnsons Silver Minnow

Fly fishing manufactured lures:

Hares Ear Nymph, Adams Dry Fly- which some consider the most effective, Woolly Bugger, and one of the new modern favorites…The green “mop fly” (That’s’ right, a fantastic lure made from the tiny microfiber fingers in a floor mop. Talk about survival…make your own!  It resembles the parachute inch worm which fall from trees and the trout and other fish go nuts.)

We hope this article gets you thinking of the few extra inches of space you could add to your survival kit and of course many arguments can be made of all the amazing lures we haven’t even begun to mention. That is the real point of the article…just to get you thinking and preparing!