How To Build Your Own Solar Thermal Panel From Recycled Trash

The guys at the Sietch have a great little idea here, making their own solar thermal collector with spare parts and trash readily available in any scrap yard  worldwide. This would be good if the SHTF and we had to live off the grid. Enjoy. Let us know if you build your own.

Materials needed:

Water
2 buckets
Drill (with both drill bits and screw bits)
Some scissors
A saw (a simple hand saw will do)
Some wood
A pane of glass.
The back of a small refrigerator.
12 feet of air pump hose used in fish tanks
Backing material (we used an old door mat)
A box of wood screws
Aluminum Foil
Role of duct tape
Angle Cutter (or hack saw)
Time: This project took about 3 hours of constructions time. It took a couple weeks to find all the parts.

Now onto the project. The first thing we did was collect all of the parts.
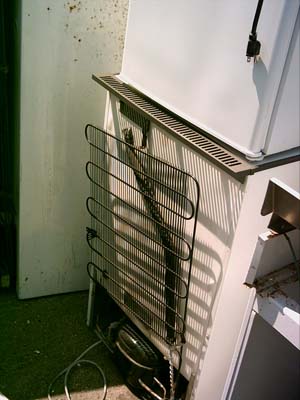
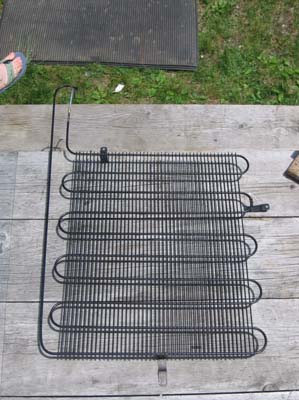
Our local dump has a coolant removal program that has refrigerators and dehumidifiers that they remove old freon from. With this in mind I found the perfect heat collector. The back of a fridge is basically a heat dispersal system, with a slight modification is can be used to collect large amounts of heat.

Make sure that the freon, or other coolant has been removed, and cut the grill off at the base, near the large coolant holder.
There was an old couch that had been run over by one of the large dump plows, the inside wood was the perfect size for the frame.

I found a pane of glass and an old rubber door mat that made the perfect backing and front.
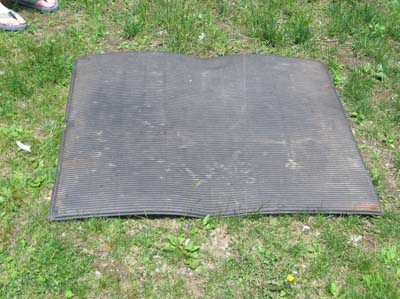
The glass was a real find, and may be the only part of the panel that may need to be purchased. Make sure your glass is big enough to fit over your collector and have enough room to attach it to the frame.

The door mat was HUGE, so I had to cut it in half. Funny thing seems there was a lot of nasty black goo, and a metal sheet in the middle. Who knew. Remove the metal plate (or cut it in half as well) and leave the goo.
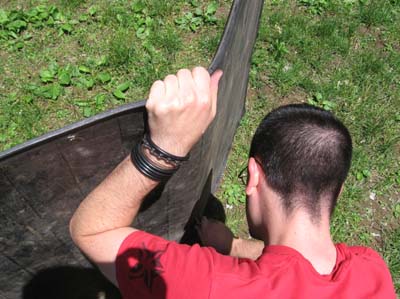
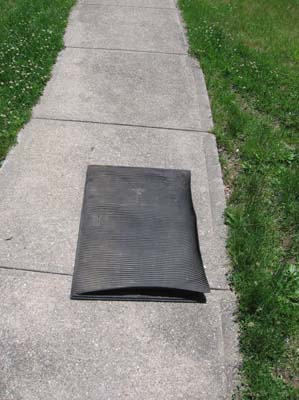
Once The backing was cut to size, it was time to start building the frame.
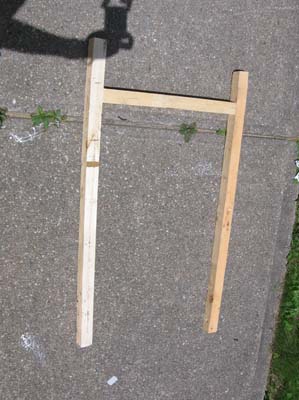
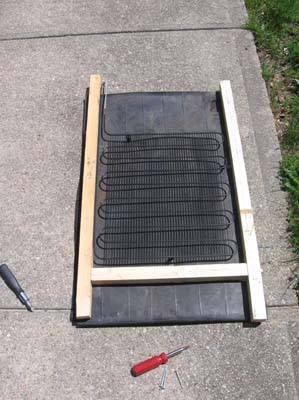
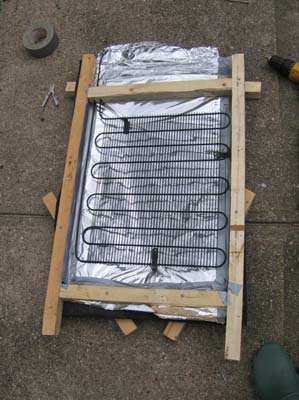
As you can see I sort of built the frame around the collector, leaving enough backing to hold it all together.

The frame is held on by building a similar frame on the back and driving large wood screws through the front frame, the backing and into the back frame.

I added some foil to the backing. The reason for this is that counter to what you would think, you do not want the backing to warm up. You only want the collector to absorb heat (it was so nice of the fridge company to paint it black for us). The foil will take any sun that was not absorbed by the collector on the first pass and bounce it back over the collector for another try at absorption. The glass cover will keep all the heat inside the panel for further absorption.

Light can pass through glass, but heat can not.
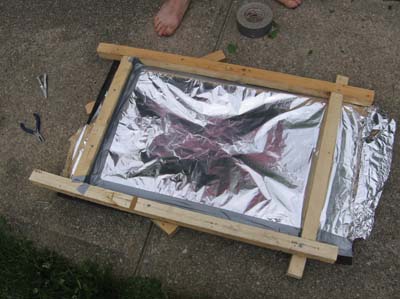
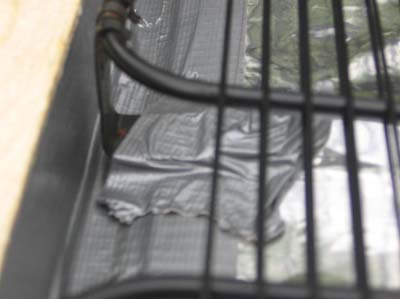
Notice how duct tape was used on the inside to seal all cracks, you could use caulk but I didn’t have any so I used the cheapest option. It worked well, and held the foil in place.
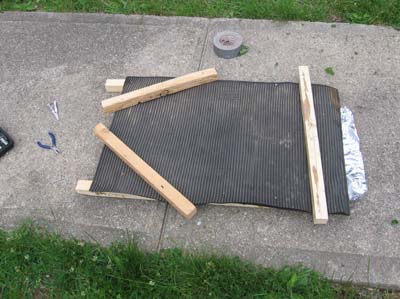
Next we cut some notches for the entry and return ports to the collector.
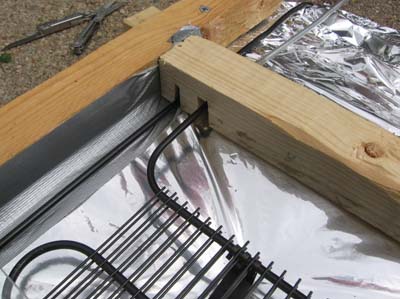
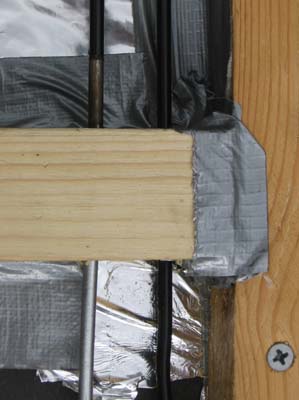
Note again the use of duct tape to seal cracks.

I got some air pump hose from the local fish store and attached them to the end of the entry and return ports.

The duct tape was applied to make sure it was a tight fit, it was later removed as it was not needed.

Next we attached the collector to the backing, using the mounting brackets that came on the fridge and some duct tape. If you wanted you could use some screws and wood, but I found the tape and the natural tension of the construction to be enough to hold it in place.
Lastly we attach the glass to the top. This serves to trap all the infrared radiation from the sun inside our panel where our collector will absorb it. Again light can pass through glass, but heat can not.
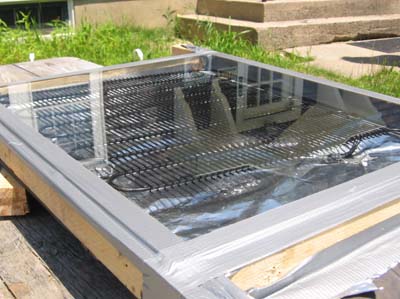
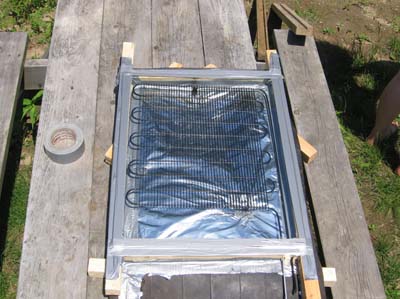
As you can see simple duct tape is enough to hold it on. I would recommend using some sort of mounting bracket however as after a couple days in the sun the tape started to droop allowing the glass to slide off. A few screws would solve this, but I am cheap so I just put new tape on.

Set your panel up at an angle so that it catches the most sun.

Here is the gross part, put one end of the hose into your bucket of cold water, and make sure it is at the bottom of the bucket, next grab the return hose and start sucking. That’s right, unfortunately you have to prime the panel by getting some water into it. This can be done without getting water in your mouth, but inevitably I sucked just a little too hard and ended up with a mouth full of nasty water. I would recommend having a friend do this part. 🙂

Set your cold water bucket (source) up higher than your warm water bucket (return) and the whole thing will gravity siphon. Due to the design of this collector (both ports return to the same location on the panel) it will not thermo siphon. For that to happen I would need to cut the long return pipe and have it exit at the top of the panel.

A word of warning, this panel works VERY WELL. We tested it on a very sunny day and within seconds the water coming out of the panel was hot enough TO SCALD. I burned my fingers. This very hot water is only formed when the water inside the panel is allowed to sit for about a minute without moving. If the water is moving (do to the gravity siphon) the water exiting the return pipe is about 110 degrees, and while hot, will not burn you.

The water does not flow through the panel very fast (as the pipes are very small) but that is sort of a good thing as it allows the water to heat up a lot on its journey through the collector. It does take a while to heat up a 5 gallon bucket of water, I ended up building an insulated return bucket that was all black and sealed on the top except for the port where the water tube enters. This kept the returned hot water hot long enough to be of use.

I let this guy run for a couple of hours one hot sunny day and heated up a five gallon bucket of cold water (measured at 70 degrees F) to over 110 degrees F. The temp that day was about 76 degrees F. If the water is allowed to sit in the panel for several minutes and then forced out (by blowing in one of the hoses) the water was measure at 170 degrees F. All in all we are much happier with the performance (and cost) of this panel. It performs much better than the previous one.

Our next modifications to this design will be to alter the return port so that it will thermo siphon, in this way the return hose can be fed into the source bucket and the water will continually circulate in the panel getting hotter and hotter. We have also talked about adding mirrors to the panel to concentrate more heat. Our goal is to boil water. This entire project cost less than five dollars, as I already had the screws, and the duct tape. The only thing I purchased was the air hose, which cost $3.76.

Enjoy the hot water.

[source]

Live Off The Grid In Your Own Upcycled Shipping Container Home

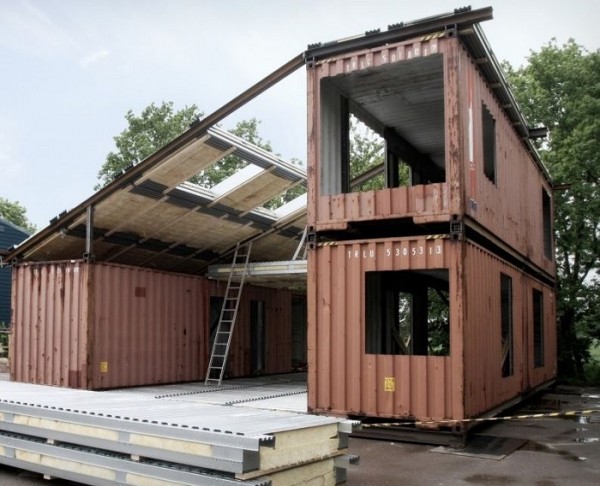
Upcycled Resource Conscious Architecture that can be exported to any place in the world. It is more than architecture; It is a sustainable product. This home would be perfect for many of those that would prefer to live off the grid, be self sufficient and use recycled materials.

upcycle-house-container-home upcycle-house-container-home-1 upcycle-house-container-home-2

To see the entire project of this Sustainable prefab house built with shipping containers. [source]

Old shipping containers used as the structural framework for the WFH- Huse. This is not just recycling; This is upcycling!

In Short:

• The WFH concept is a patented modular building system, based on a design principle, using 40 feet high standard modules as

structural system.

• The structure can be adapted to local challenges such as climatic or earthquake issues.

• The first prefabricated housing system that meets the demands in the international environment-building-standard, Active House.

• The structure can be configured to meet many different purposes, multi storey, townhouses, cluster houses or individual villas.

• Top class indoor climate, low energy consumption and environmentally sound materials.

• Very short construction-period.

• Demountable for recycling or relocation.

• Online customization-tools give clients the possibility to decide their own version of the house concerning layout, size, facade, interior etc. The configuration happens within a predefined framework that will ensure high architectural value and quality of materials.

• Cost competitive in comparison with other green houses.

• Building-components are prefabricated and on site construction can be limited. The design allows for high-quality industrial production in large numbers and distribution using standard container transport.

Facts:

• 180 square meters.

•Energy class, which is 50% lower than the standard requirements for new housing constructions in Denmark.

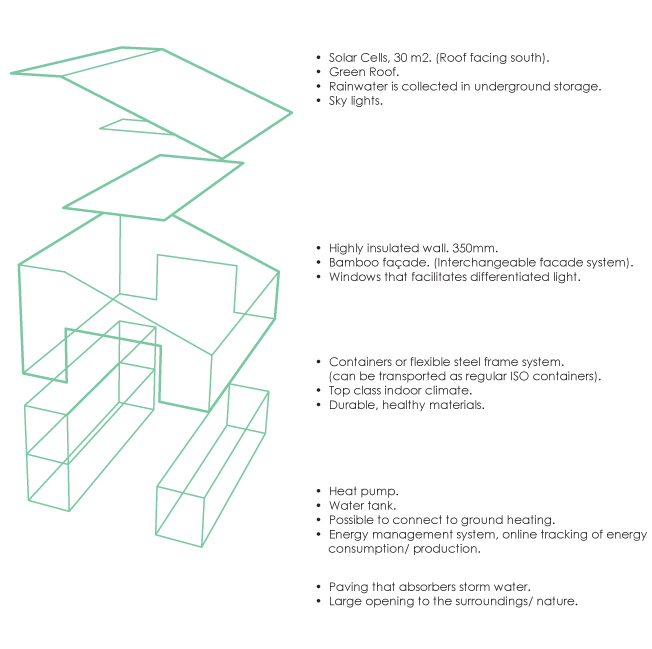
• Photovoltaic cells are integrated – area is flexible, but to fulfill the standards above min. 20 m2 solar cells for power production are needed.

With an area of 30 m2 or above a normal household using energy efficient appliances will be self-sufficient with power on an annual basis.

• Green roof solutions that are optimized for rainwater harvesting for use for toilet flushing, washing and cleaning.

• Customized façade solutions.

Design

The design is based on Nordic values. Not only according to architecture, but also design objects. These values are defined as:

Flexibility.

• Build for people, human values. – Good daylight conditions, different types of light.

• Reliable (long term) solutions. – Healthy materials, recyclable materials, design for disassembly strategies.

• Materials that age gracefully.

• Access to nature, greenery.

• Minimalistic look.

• Playfulness.

Sustainable global housing

The WFH concept is a modular concept, based on a design principle, using 40 feet high cube standard modules as structural system. The structure can be adapted to local challenges such as climatic or earthquake issues. Online customization-tools give clients the possibility to decide their own version of the house concerning layout, size, facade, interior etc. The configuration happens within a predefined framework that will ensure high architectural value and quality of materials. Building-components are prefabricated and on site construction can be limited.

FLEX space

The FLEX space is the heart of the house. It contains the living room, kitchen and can be used for multiple purposes. Parts of the room are double height, creating perfect lighting conditions. The rest of the space is one story height, defined by the landing that creates access to the spaces on the second floor. In each end of the FLEX space there is access to the surroundings and daylight. The boundary between inside and outside disappears, when the doors open. This is a fundamental part of the design; to be able to open let nature in. It is a consequence of having varying requirements for inside temperature and definitions of what domestic functions takes place inside and outside.

Geometry

The geometry of the FLEX space is defined by the two rows of modules, and can easily be modified to specific wishes regarding size. The FLEX space has a number of possible solutions for subdivisions. Both on one plan or two plans. It can also be one big space, creating a lot of light and openness. The kitchen elements are built into the wall (into the technical module). It creates more floor space and also makes connection to water and plumbing easy. The kitchen can also be extended with at freestanding element, defining the work area of the kitchen. From the FLEX space there is access to all spaces. This eliminates square meters used for logistics. It is possible to make larger openings from the FLEX space into the rooms, again creating flexible solutions within the same system.

The work area of the kitchen

From the FLEX space there is access to all spaces. This eliminates square meters used for logistics. It is possible to make larger openings from the FLEX space into the rooms, again creating flexible solutions within the same system.

Bedrooms

The size of the bedrooms is defined by the half of a module (15m2). There are four bedrooms, and they can be used for multiple purposes: A parent’s bedroom, kid’s bedroom, workspace etc. Three of the rooms have windows on two facades, creating a mixed light. It is possible to remove the wall, or part of it, facing the FLEX space. This adds flexibility to the layout and shows the structural systems ability to adapt do different needs.

Landing

The landing creates access to the second floor, but can also be used as a space for play, relaxation or work. It gives the inhabitant the possibility to draw back, but still enjoy the company of people in the house. You are in the FLEX space, but because you are on the first floor you are drawn back from the action. It is an ideal place for a quiet retreat and still being able to observe what is going on in the house.

To see the entire project of this Sustainable prefab house built with shipping containers. [source]

Could you see yourself living in one?

Making Your Own Vegetable And Nut Oils

The operation is equally simple. I think the most complicated part was mounting the expeller on a sturdy platform which could then be clamped securely to the kitchen counter.

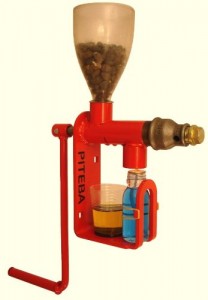
Nut and Seed Oil Expeller / Oil Press

Nut and Seed Oil Expeller/Press

This operation uses quite a bit of cranking force at times and needs to be very securely mounted. It’s not difficult to operate (any 10 year old boy could do it) but it does take a bit of muscle, similar to hand grinding wheat for flour. I made a funnel out of a water bottle which fits the opening of the expeller perfectly and I ran a piece of clear tubing from the oil drip down from the expeller to where I set a bottle to collect the oil. At this point I was able to begin making oil and after lighting the heating lamp and filling the funnel with canola seed I was cranking away and my oil jar was filling rapidly. I wouldn’t want to set out to make several gallons of oil in an afternoon but the first time I tried it I made a quart of oil during a half hour phone conversation so it is not a real difficult or time consuming project.

You can use the oil directly from the expeller or you can let it set in a jar in a warm place overnight so the particulates can settle to the bottom and then pour or siphon the top portion of the oil which is nice and clear. I prefer to leave the sludge in with the nut oils as it gives the oil a stronger flavor and more substance but it’s nice to have a “normal” bottle of canola oil for every day cooking use.

I found the oil quality to be far better than anything I had ever tried before, which was not a surprise because anything made fresh seems to be better than what you get at the store. The oil is quite a bit darker than the oil from the store, but I found this is because it hasn’t been bleached or chemically treated – one more reason in my opinion to make it myself.

I was really interested in finding out what other types of oil I could make with this since the manufacturer says it can be used to make just about any oil you can think of. I’ve tested every oil producing seed and nut I could get my hands on and so far have had nothing but smashing success.

Some of my favorites are:

  • Walnut oil – The leftover walnut meal is wonderful in bread
  • Sunflower oil
  • Almond oil
  • Flax (linseed) oil
  • Coconut oil
  • Canola oil

Each oil has unique expelling needs as well as looks and tastes different, but all are wonderful. All leave you with an abundance of leftover seed meal which can be used as a high quality animal feed protein supplement or are excellent used in the kitchen in breads or on oatmeal.

Canola meal, which I tend to have a lot of, is not very tasty so I use it as a protein supplement for my animals. It’s around 40% protein and chickens, goats and pigs all seem to love it. It can also be used as a high quality natural fertilizer for the garden.

The manufacturer of the expeller can be found at www.piteba.com. The website has a lot of information on different oilseeds and detailed instructions for using the expeller.

[source]

20 Easy Post-Apocalypse Life Hacks Any Survivor Can Do

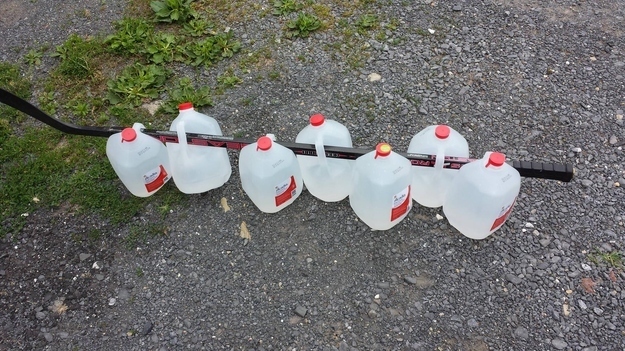
1. Only make one trip back from the community well.

Use a hockey stick (or an old-fashioned regular stick) to loop sanitized milk jugs through. Sling over shoulders and you’ve enough drinking water to last your hut over a week!

Source: reddit.com

2. For when the economy recovers, hide money in a phone case.

Most likely a desperate and futile gesture, but pop the back of your cell phone case off and hide a twenty spot in there, just in case.

Source: reddit.com

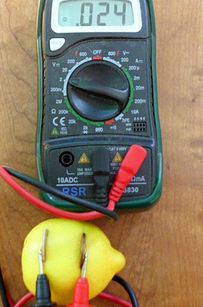
3. Turn lemons into lemonade or electricity. Your choice.

Just because the world ended doesn’t mean you have to stop playing Candy Crush. Get detailed instructions here.

4. Before braving the bee hive for wax, try this.

Once you exhaust Grandma’s supply of scented candles, try your nephew’s crayons before cobbling together a beekeeper suit.

Source: imgur.com

5. Okay, NOW cobble together a homemade bee suit.

Troy used an old A/C casing, duct tape, and gardening gloves, but feel free to get creative!

Source: reddit.com

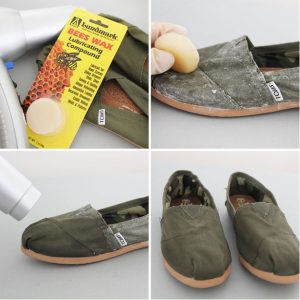
6. THEN brave the bees to keep water (or blood) off your shoes.

Shoes are a precious commodity in the wasteland of America so keep them in good condition with these step-by-step instructions.

Source: brit.co

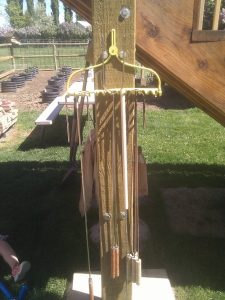
7. Convert a rake handle to organize farm implements and weapons.

Just because the world is in chaos, doesn’t mean your tools have to be.

Source: reddit.com

8. Finally, a use for Nacho Cheese flavored Doritos.

Because no matter how hungry you are, they’ll never taste as good as Cool Ranch.

Source: reddit.com

9. Make a fashionably functional bracelet out of paracord.

Created with 10 feet of the versatile rope using this cobra stitch, the colors can also serve to show which gang you owe allegiance too.

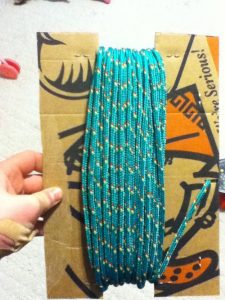
10. Then store the remainder on an old pizza box because no one likes tangled cords.

A few cuts with a pair of scissors (or a knife if society has degraded far enough that scissors are a precious luxury) and you’ve got an Earth friendly rope holder.

Source: reddit.com

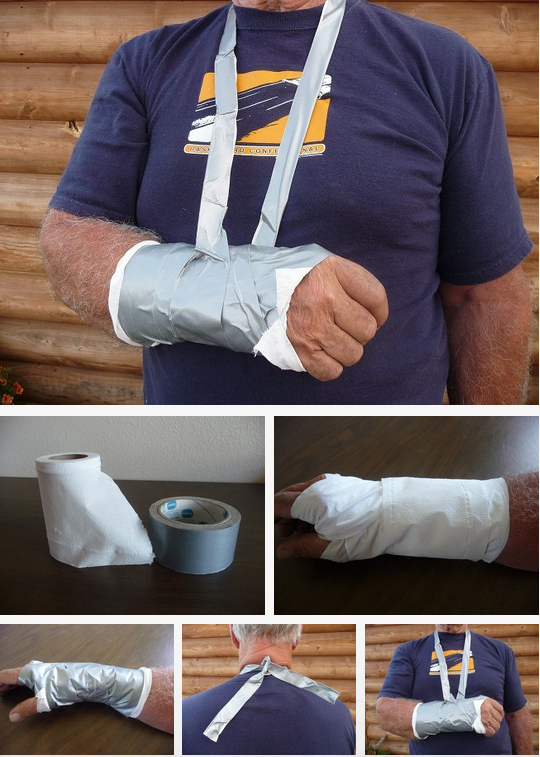
11. Set broken bones with toilet paper and duct tape.

Once you’ve set the bone, use these instructions to hold it in place until it heals.

12. Or open that pesky jar, rusted shut after a decade.

Forget bottle caps! With its infinite uses, duct tape is the new currency.

Source: reddit.com

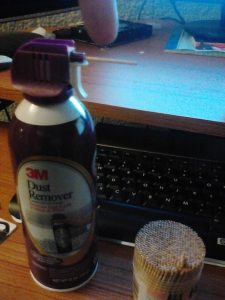
13. Kill time, and mutant cockroaches, with a toothpick gun.

It’s all fun and games until someone loses an eye. Then it’s a power play making you dictator for life.

Source: reddit.com

14. Slather up with baby oil to delay inevitable frostbite.

While not as good as gloves or just staying inside until spring, baby oil adds a thin layer of protection from the elements to keep you from chafing while foraging for supplies.

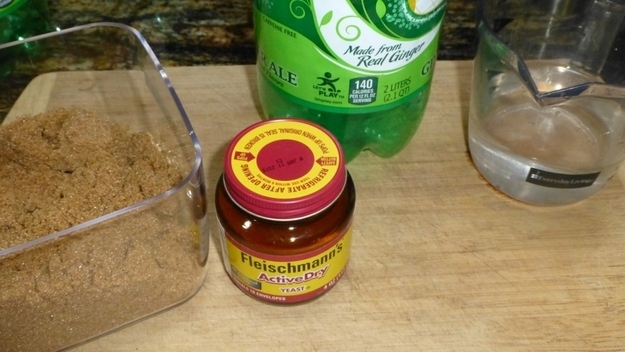
15. Keep West Nile and the plague at bay with a homemade mosquito trap.

Speaking of spring, use brown sugar, yeast, hot water, and an empty two-liter to make a tempting mosquito deathtrap. Instructions here!

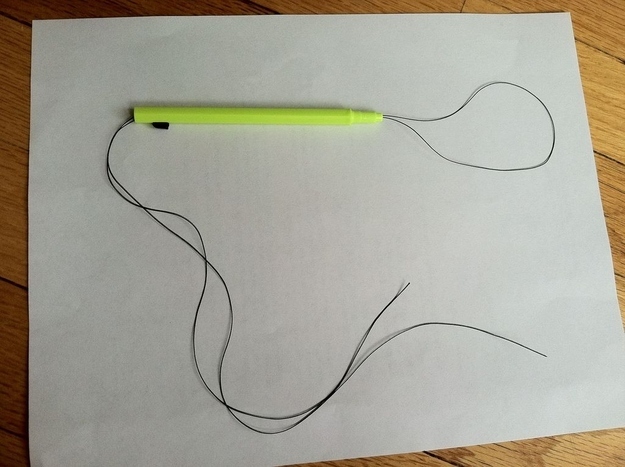
16. Lasso those pesky ticks with an old pen and thread.

Mosquitos aren’t the only summer threat. An old mechanical pencil and some fishing line or thick thread can safely remove them. Not today, Lyme disease!

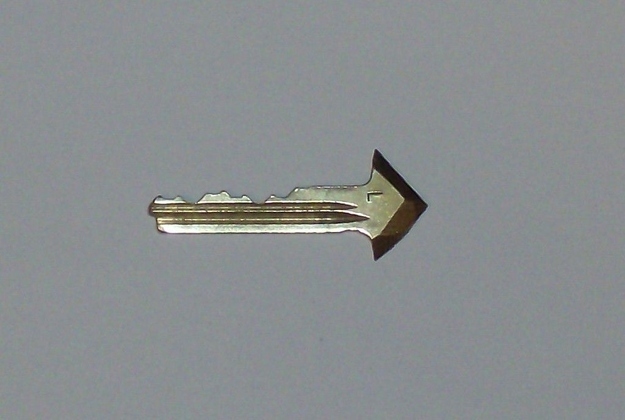
17. Convert keys into arrowheads, a far more effective home deterrent.

Requiring more finesse than the toothpick canon but tremendously more effective. Follow the tutorial here and then make some dowel rod arrows to attach them too.

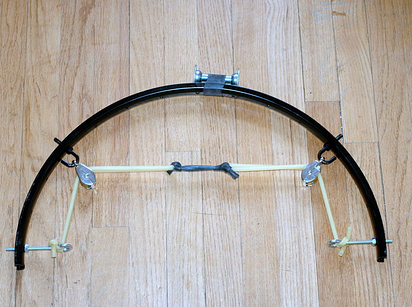
18. Then make a bow from an old bicycle.

Using this guide to turn bicycle parts, a rubber hose, and a few odds and ends into a safeguard for your turf.

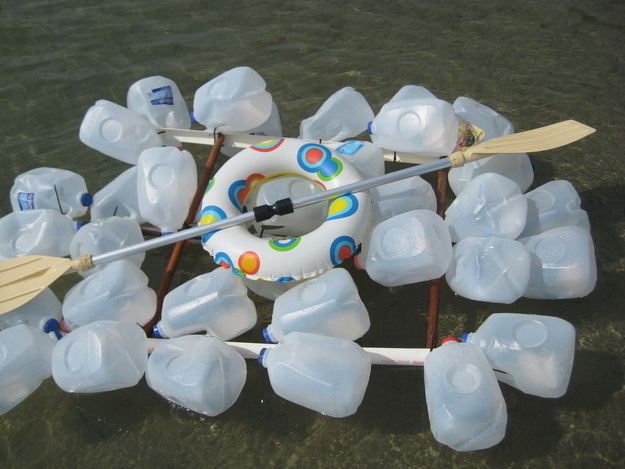
19. Or upcycle empty milk jugs to start a new life

Get the hell out of Dodge, literally. Using PVC pipe, wooden rods, and empty milk cartons, sail off into the wild blue yonder using these step-by-step instructions.

20. Pop a top and catch a fish while you’re on the water.

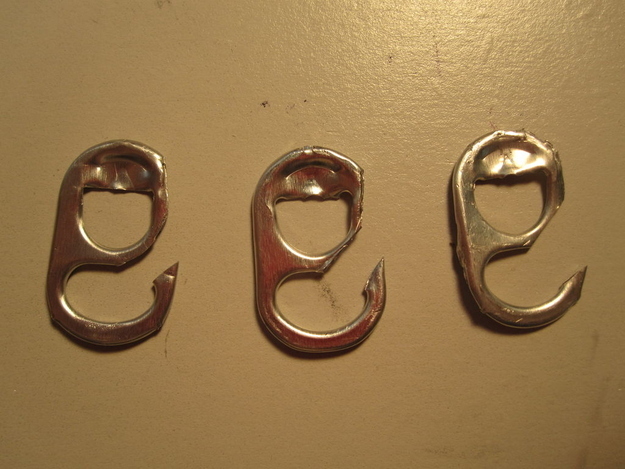
While you float west, where surely everything is better and not a toxic wasteland (right?), snap off the end of a pop top and loop some thread through the hook for a fast fishing lure.

Article source: click here

What’s The Difference Between Freeze Dried & Dehydrated Foods?

 
Freeze dry fresh foods for longer storageFreeze dried foods are flash frozen and then dried.
Freeze drying removes the water, not the flavor. So freeze dried foods retain virtually all their fresh food taste, vitamins and nutritional content.  Weighs less than fresh. Freeze dried foods have 98% of their water removed. This significantly reduces the food’s weight, making it easier to handle and less costly to transport. For example, 3kg of chicken weighs only 1kg after freeze drying, and rapidly rehydrates back to its original weight. Freeze drying is generally more expensive then dehydrating. To create freeze dried food, the food item is first flash frozen and then low level heat is applied inside a vacuum chamber. Doing this dehydrates the food item and results in a dried product. After that the food item is packed for long-term storage. Freeze drying retains the color, texture, shape, flavor, and nutrition of the food item.
 
 
Dehydrated Foods are top-quality foods, that have been picked at their ripeness, cleansed and trimmed to leave only the best parts.These choice foods are then dehydrated, where 98% of their moisture is removed. This is done by a highly sophisticated drying process. They are then packed in heavy-duty enameled cans, and sealed with a special inert atmosphere to ensure the longest possible storage life.


Because their bulk and weight have been greatly reduced, dehydrated foods are more compact and convenient for storing and require very little space. They offer quick mobility in the event of an evacuation alert. For example, one case of regular canned food weighs approximately 24 pounds. The same item of dehydrated foods would weigh from 36 to 45 ounces, and would be packed in just one #10 can. Dehydrated foods have approximately double the yield of regular canned foods even though their cost is much lower.

Most of us already eat dehydrated foods daily. Foods like pasta, cereal, beans, cake and baking mixes, as well as many fast foods. In dehydrating foods, water is slowly removed by cooking it out of the food item, without cooking the food itself.


You can see how the Freeze drying process works:

Freeze drying is a process which is suitable for a wide variety of industrial products. These include agrochemicals, pharmaceutical intermediates, biological products, foods and flavorings.

The purpose of freeze drying is to remove a solvent (usually water) from dissolved or dispersed solids. It is an excellent method for preserving materials that are unstable in the presence of water. In addition, freeze drying can be used to separate and recover volatile substances and to purify materials.

The freeze drying process is particularly suitable for products which are sensitive to heat, subject to oxidation, or shear sensitive.

Once freeze dried, food products have the following benefits:
  • Appearance – Freeze dried foods maintain their original shape and texture, unlike air dried foods which shrink and shrivel due to high temperature processing. Just add water and in minutes the food rehydrates to its original form.
  • Taste – Tastes as good as fresh. Freeze drying removes the water, not the flavor. So freeze dried foods retain virtually all their fresh food taste, vitamins and nutritional content.
  • Weight – Weighs less than fresh. Freeze dried foods have 98% of their water removed. This significantly reduces the food’s weight, making it easier to handle and less costly to transport. For example, 3kg of chicken weighs only 1kg after freeze drying, and rapidly rehydrates back to its original weight.
  • longest possible storage life – Freeze dried foods can be stored for months or years at room temperature without deterioration or spoilage.
  • Low Storage Costs – Because it can be stored at room temperature, freeze dried food does not require costly cold or chilled storage facilities, making it much cheaper to store.

More long term food storage…


Three R’s of Survival

These three R’s are just as important to survival as they are in everyday life.

#Recycle #Reuse #Repurpose

The 3 R's of Survival

In times of emergency and survival, you will have to be creative with your supplies and make do with whatever you can find and use to live and survive.

We will not be given the option to change our wasteful ways and find the most suitable ‘green’ way of living in a survival crisis. Every day items we take for granted will be unavailable and we need to ask ourselves what can be use to replace them. Thinking outside thebox will be a must.

So remember these 3 R’s of survival, Repurpose, Reuse, Recycle. Be prepared.


Be Ready when disaster strikes, prep for the unknown at Year Zero Survival