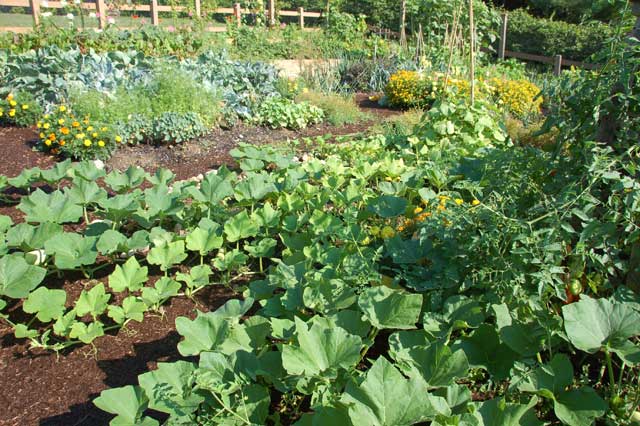
How to Get the Most Calories per Foot Out of Your Homestead Garden

In order to provide high-quality food for your entire family throughout the year using your garden, you have to plan well. If you grow the majority of your food at your homestead garden, this guide will help you in achieving a successful and plentiful produce. With the correct planning and use of the garden; you may yield a big amount of calories per foot to ensure food sufficiency at your home.
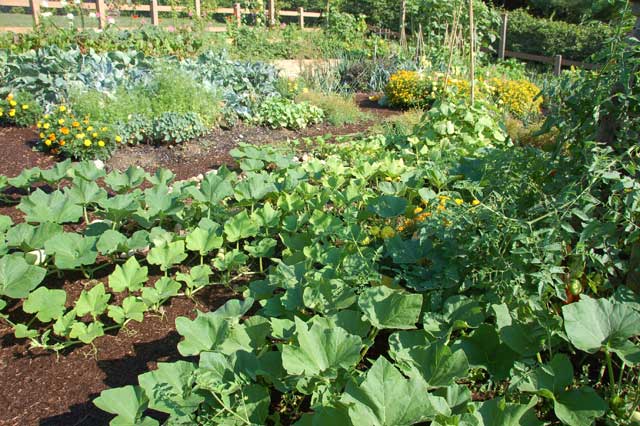
How to Have a Successful Yield

You need to take the following activities into consideration if you want to get enough supply from your garden.

  • Establish your goals and work towards them.

You may start by making a list of the foods which you and your family prefer while also noting the quantities. You may use a chart to make your plan better. It will guide you on how much of each of the food crops you need to grow. This also helps you to organize the garden.

  • Choose an appropriate gardening method.

It is advisable to choose an appropriate method for your gardening. The following is a list of gardening methods which will help you in yielding a great amount of calories. You may choose any that suits the nature of your garden.

  • Deep soil preparation
  • Intensive planting
  • Composting
  • Companion planting
  • Growing crops which offer sufficient calories from a small area
  • Use open-pollinated seeds
  • Growing crops for grains and carbon
  • Choosing the right food crops to grow

The following are examples of great food crops that will do well in your homestead garden with brief explanations about their benefits.

  1. Potatoes

Potatoes are a good source of both proteins and carbohydrates. They provide more carbohydrates per square foot than any other common vegetables. Potatoes also yield more protein per square foot than all other vegetables, except for beans. They can be stored for many months without any need for electricity or processing which adds to their benefits.

  1. Beans

Legumes such as beans, peas, cow-peas and lentils are nutritious, rich in protein and easy to grow. They can be stored for long periods during winter without need for electricity or processing. Different legume species do well in different conditions. It is recommended to grow many different species for a better calorie per foot yield.

  1. Corn

Corn is the most perfect grain for growing and processing on a small scale garden. The harvesting process is easy and they do not require threshing. Fresh corn is rich in vitamins C, B1 and B5. It also contains plenty of dietary fiber, manganese and phosphorous.

Sweet corn provides delicious and fresh cobs during summer and a crop of dent corn provides you corn flour.

  1. Squash

Squash are another great source of carbohydrates, vitamins C and A as well as antioxidants (carotenoids). They thrive well in most gardens.

Final Words

Staple crops are very ideal if you rely on your homestead garden to feed your family. The best staple food crops for ensuring food self-sufficiency are easy to harvest and store. They return great yields and are calorie-dense to offer your entire family the food energy they need each day.

About the Author

Jack Neely is a fitness expert, survivalist, and world traveler. He’s been in several life or death situations, and he’s making an effort to spread his knowledge around the web to help others survive these situations as well. He’s also on the content team at The Tactical Guru.

5 Prep Tips to Keep Your Family Safe from a Wildfire

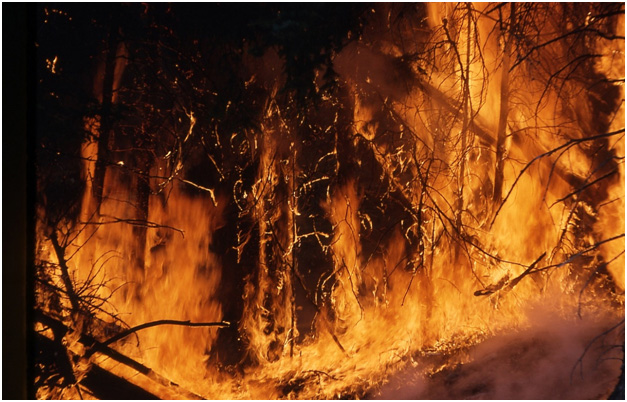
Wildfires

Image from Skeeze via Pixabay

It doesn’t matter how small the likelihood of a wildfire is for your area–when it hits, you want to be ready. So even if you think the chances of a wildfire in your area are moderate to low, know that it’s better to spend a bit of extra time now preparing yourself and your family than to be thrown into a state of panic should a wildfire ever hit.


  1. Keep Up with Regular Home Maintenance


There are a few chores you can do regularly to help lessen the effects of a wildfire on your home. Minimize the amount of debris around your property by cleaning the roof and gutters, raking away leaves and dead limbs, mowing your grass, and making sure your trees and shrubs are pruned regularly.


  1. Stay Informed


Educate yourself on the fire conditions in your area and stay in the know on breaking weather news. Watch the news regularly, check the weather online, or download a weather app for your phone. Turn on notifications for your weather app so you’ll know of any risk of a wildfire in an instant. Ask your child’s caretaker or school about their disaster plans so you can rest assured that your child will be in good hands if disaster ever strikes.


  1. Compile Your Emergency Supply Kit


Build your family’s emergency supply kit and include items like a compass, clean drinking water, nonperishable foods, a flashlight, a battery-powered radio, and copies of important documents.


It’s also wise to document all of your belongings and keep a copy of this list in your kit. This will come in handy for insurance claims or for receiving aid from charitable organizations. Include descriptions and photos of furniture, appliances, electronics, and other valuable belongings. Collect any relevant serial numbers or receipts.


  1. Create a Plan


In a time of crisis, clear communication can be the best tool in your toolkit. That’s why you should make it a priority to talk to your family about what you’ll do in case of a wildfire. Practice designated evacuation routes. Discuss what actions should be taken if a family member is separated from the group. Make sure children (and adults!) have necessary emergency numbers memorized.


  1. Know Where You Stand with Insurance


Fire damage can be a tricky topic when it comes to insurance coverage, so it’s better to know your plan’s limitations ahead of time. Insurance may not cover certain landscaping costs following a fire, or may only cover a certain percentage of damaged personal items. You may even want to increase your coverage depending on your area’s level of risk for wildfires. Check with your agent to see what your coverage entails.


It may sound like a bit of a hassle to prepare yourself and your family for a wildfire even when one may never hit, but don’t underestimate the power of having a plan of action during a moment of crisis. It’s better to make plans now and never have to use them than to come up short should disaster strike. Prepare now and you’ll be glad you kept your family’s safety in mind.


Bradley Davis is a retired firefighter and SoCal resident. He has seen is fair share of natural disasters and knows all too well the damage they can cause when people in their paths aren’t prepared. He created DisasterWeb.net to share his emergency preparedness knowledge and to offer the many emergency planning and natural disaster-related resources he has compiled from his online research. When he isn’t adding new information to his site, Bradley enjoys relaxing on the beach with his wife.


30 Things To Include In Your Camping & Wilderness Survival Pack

This is a great starter list for packing a camping or hiking bag. Many of the items cross over to a survival bug-out bag as well.

Top 30 Essential Tips For Your Camping & Wilderness Survival

Source: GroomNStyle | 30 Things To Include In Your Survival Pack


DIY – Make your own Survival Garden – Patriot Direct

When designing a survival garden, it’s essential to understand what seeds to get and what to skip — and it’s just as important to

Great article for understanding the proper balance of plants you will need to grow to survive. One must take into account calories and nutritional values that you would need to sustain yourself.

Source: DIY – Make your own Survival Garden – Patriot Direct


Do you know what basics you need to survive an Apocalypse?

Do you know what you need in an Apocalypse? Emergency Survival Checklist
This infographic shows you what to have handy:

What You


Why Prepare?

There are real benefits to being prepared.

  • Being prepared can reduce fear, anxiety, and losses that accompany disasters. Communities, families, and individuals should know what to do in the event of a fi and where to seek shelter during a tornado. They should be ready to evacuate their homes and take refuge in public shelters and know how to care for their basic medical needs.
  • People also can reduce the impact of disasters (flood proofing, elevating a home or moving a home out of harm’s way, and securing items that could shake loose in an earthquake) and sometimes avoid the danger completely.

The need to prepare is real.

  • Disasters disrupt hundreds of thousands of lives every year. Each disaster has lasting effects, both to people and property.
  • If a disaster occurs in your community, local government and disaster-relief organizations will try to help you, but you need to be ready as well. Local responders may not be able to reach you immediately, or they may need to focus their efforts elsewhere.
  • You should know how to respond to severe weather or any disaster that could occur in your area—hurricanes, earthquakes, extreme cold, flooding, or terrorism.
  • You should also be ready to be self-suffi cient for at least three days. This may mean providing for your own shelter, first aid, food, water, and sanitation.

Using this guide makes preparation practical. > Are You Ready? Why Prepare.


Making Your Own Vegetable And Nut Oils

The operation is equally simple. I think the most complicated part was mounting the expeller on a sturdy platform which could then be clamped securely to the kitchen counter.

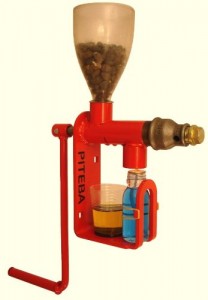
Nut and Seed Oil Expeller / Oil Press

Nut and Seed Oil Expeller/Press

This operation uses quite a bit of cranking force at times and needs to be very securely mounted. It’s not difficult to operate (any 10 year old boy could do it) but it does take a bit of muscle, similar to hand grinding wheat for flour. I made a funnel out of a water bottle which fits the opening of the expeller perfectly and I ran a piece of clear tubing from the oil drip down from the expeller to where I set a bottle to collect the oil. At this point I was able to begin making oil and after lighting the heating lamp and filling the funnel with canola seed I was cranking away and my oil jar was filling rapidly. I wouldn’t want to set out to make several gallons of oil in an afternoon but the first time I tried it I made a quart of oil during a half hour phone conversation so it is not a real difficult or time consuming project.

You can use the oil directly from the expeller or you can let it set in a jar in a warm place overnight so the particulates can settle to the bottom and then pour or siphon the top portion of the oil which is nice and clear. I prefer to leave the sludge in with the nut oils as it gives the oil a stronger flavor and more substance but it’s nice to have a “normal” bottle of canola oil for every day cooking use.

I found the oil quality to be far better than anything I had ever tried before, which was not a surprise because anything made fresh seems to be better than what you get at the store. The oil is quite a bit darker than the oil from the store, but I found this is because it hasn’t been bleached or chemically treated – one more reason in my opinion to make it myself.

I was really interested in finding out what other types of oil I could make with this since the manufacturer says it can be used to make just about any oil you can think of. I’ve tested every oil producing seed and nut I could get my hands on and so far have had nothing but smashing success.

Some of my favorites are:

  • Walnut oil – The leftover walnut meal is wonderful in bread
  • Sunflower oil
  • Almond oil
  • Flax (linseed) oil
  • Coconut oil
  • Canola oil

Each oil has unique expelling needs as well as looks and tastes different, but all are wonderful. All leave you with an abundance of leftover seed meal which can be used as a high quality animal feed protein supplement or are excellent used in the kitchen in breads or on oatmeal.

Canola meal, which I tend to have a lot of, is not very tasty so I use it as a protein supplement for my animals. It’s around 40% protein and chickens, goats and pigs all seem to love it. It can also be used as a high quality natural fertilizer for the garden.

The manufacturer of the expeller can be found at www.piteba.com. The website has a lot of information on different oilseeds and detailed instructions for using the expeller.

[source]

What’s The Difference Between Freeze Dried & Dehydrated Foods?

 
Freeze dry fresh foods for longer storageFreeze dried foods are flash frozen and then dried.
Freeze drying removes the water, not the flavor. So freeze dried foods retain virtually all their fresh food taste, vitamins and nutritional content.  Weighs less than fresh. Freeze dried foods have 98% of their water removed. This significantly reduces the food’s weight, making it easier to handle and less costly to transport. For example, 3kg of chicken weighs only 1kg after freeze drying, and rapidly rehydrates back to its original weight. Freeze drying is generally more expensive then dehydrating. To create freeze dried food, the food item is first flash frozen and then low level heat is applied inside a vacuum chamber. Doing this dehydrates the food item and results in a dried product. After that the food item is packed for long-term storage. Freeze drying retains the color, texture, shape, flavor, and nutrition of the food item.
 
 
Dehydrated Foods are top-quality foods, that have been picked at their ripeness, cleansed and trimmed to leave only the best parts.These choice foods are then dehydrated, where 98% of their moisture is removed. This is done by a highly sophisticated drying process. They are then packed in heavy-duty enameled cans, and sealed with a special inert atmosphere to ensure the longest possible storage life.


Because their bulk and weight have been greatly reduced, dehydrated foods are more compact and convenient for storing and require very little space. They offer quick mobility in the event of an evacuation alert. For example, one case of regular canned food weighs approximately 24 pounds. The same item of dehydrated foods would weigh from 36 to 45 ounces, and would be packed in just one #10 can. Dehydrated foods have approximately double the yield of regular canned foods even though their cost is much lower.

Most of us already eat dehydrated foods daily. Foods like pasta, cereal, beans, cake and baking mixes, as well as many fast foods. In dehydrating foods, water is slowly removed by cooking it out of the food item, without cooking the food itself.


You can see how the Freeze drying process works:

Freeze drying is a process which is suitable for a wide variety of industrial products. These include agrochemicals, pharmaceutical intermediates, biological products, foods and flavorings.

The purpose of freeze drying is to remove a solvent (usually water) from dissolved or dispersed solids. It is an excellent method for preserving materials that are unstable in the presence of water. In addition, freeze drying can be used to separate and recover volatile substances and to purify materials.

The freeze drying process is particularly suitable for products which are sensitive to heat, subject to oxidation, or shear sensitive.

Once freeze dried, food products have the following benefits:
  • Appearance – Freeze dried foods maintain their original shape and texture, unlike air dried foods which shrink and shrivel due to high temperature processing. Just add water and in minutes the food rehydrates to its original form.
  • Taste – Tastes as good as fresh. Freeze drying removes the water, not the flavor. So freeze dried foods retain virtually all their fresh food taste, vitamins and nutritional content.
  • Weight – Weighs less than fresh. Freeze dried foods have 98% of their water removed. This significantly reduces the food’s weight, making it easier to handle and less costly to transport. For example, 3kg of chicken weighs only 1kg after freeze drying, and rapidly rehydrates back to its original weight.
  • longest possible storage life – Freeze dried foods can be stored for months or years at room temperature without deterioration or spoilage.
  • Low Storage Costs – Because it can be stored at room temperature, freeze dried food does not require costly cold or chilled storage facilities, making it much cheaper to store.

More long term food storage…