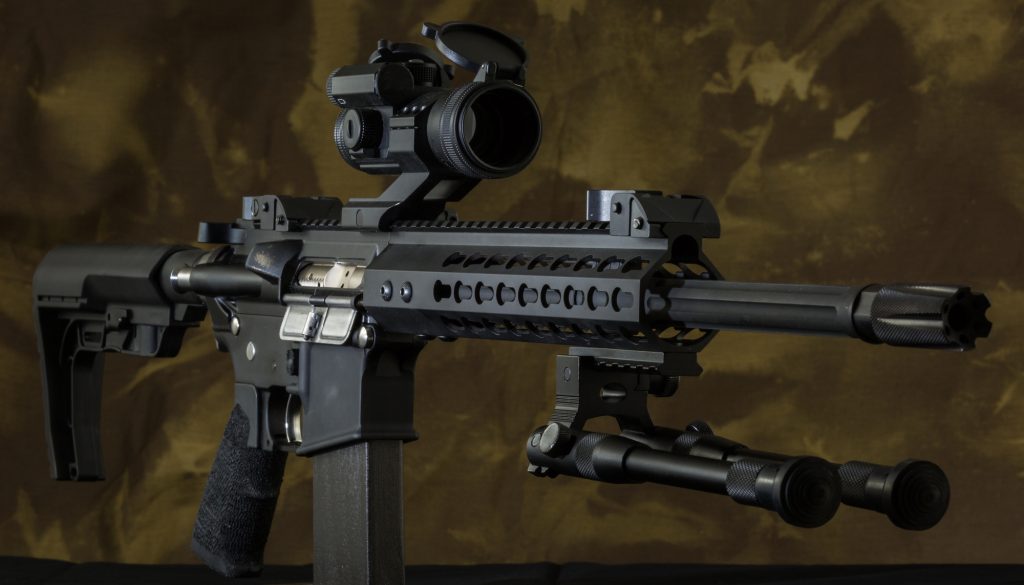
Saving Lives: Learn How to Obtain Drinkable Water in an Emergency Situation

We have all heard of the dangers of dehydration, and it is important to know how to obtain drinkable water in an emergency situation. Water is essential for survival, and having access to it during a crisis can be the difference between life and death.

In this blog article, we will explore the sources of water during an emergency and how to make it safe to drink. We will also look at how to store water and how to clean containers for water storage.

Introduction to Water Shortages

Water shortages can be caused by any number of things, such as natural disasters, droughts, or contamination of water sources. In some cases, entire cities can be affected by water shortages. This can have a significant effect on the health and wellbeing of the population, as access to clean drinking water is essential for human survival.

Water shortages can also lead to famine and disease, as clean drinking water is necessary for food production and the prevention of communicable diseases.

The World Health Organization (WHO) estimates that more than 2 billion people lack access to safe drinking water. This is a major health issue, as access to clean water is essential for human health and survival. In addition, water shortages can lead to shortages in food production, which can lead to famine and malnutrition.

It is essential to be prepared for a water shortage in an emergency situation. Knowing how to obtain drinkable water in an emergency situation can save lives.

Signs of Dehydration

Dehydration occurs when the body does not have enough water. It is important to recognize the signs of dehydration so that you can take steps to obtain drinkable water in an emergency situation. Symptoms of dehydration include:

  • Dry mouth
  • Fatigue
  • Dizziness
  • Headache -Dark-colored urine -Decreased urination -Dry skin -Irritability

If you or someone you know is experiencing any of these symptoms, it is important to take steps to obtain drinkable water in an emergency situation as soon as possible.

Sources of Water in an Emergency Situation

In an emergency situation, it is important to know where to find sources of drinkable water. Some of the most common sources of water include:

  • Rainwater
  • Streams
  • Rivers
  • Lakes
  • Ponds
  • Wells
  • Tap water
  • Bottled water

It is important to remember that not all of these sources of water will be safe to drink. It is essential to take steps to make the water safe before drinking it.

How to Purify Water in an Emergency Situation

In an emergency situation, it is essential to purify any water before drinking it to make sure that it is safe. There are several methods for purifying water, including boiling, using iodine tablets, and using filters.

Boiling Water to Make it Safe

Boiling is one of the most effective ways to make water safe to drink. To boil water, you need to heat it to a rolling boil for at least one minute. This will kill any harmful bacteria in the water. It is important to remember that boiling water does not remove chemicals from the water, so if there are any hazardous chemicals in the water, you should not drink it.

Using Iodine Tablets to Purify Water

Iodine tablets are a good option for purifying water in an emergency situation. Iodine tablets are small tablets that contain iodine, which is used to kill any harmful bacteria in the water. It is important to follow the instructions on the package carefully when using iodine tablets.

Using Filters to Purify Water

Using a filter is another way to purify water in an emergency situation. Filters use a physical barrier to remove contaminants from the water. Filters come in many shapes and sizes, from small portable filters to large family-sized filters. It is important to make sure that the filter you are using is effective at removing contaminants from the water.

How to Store Water

In an emergency situation, it is important to know how to store water so that it remains safe to drink. It is important to use clean containers for water storage. Plastic containers are the best option for storing water, as they are lightweight and easy to transport. It is also important to make sure that the containers are completely sealed and that the water is stored in a cool, dark place.

Cleaning Containers for Water Storage

It is important to clean containers for water storage to make sure that the water is safe to drink. To clean containers, you should first rinse them with warm water and then scrub them with a brush.

You can also use a small amount of bleach or vinegar to disinfect the containers. It is important to make sure that the containers are completely dry before adding the water.

Conclusion

In conclusion, it is essential to know how to obtain drinkable water in an emergency situation. Knowing where to find sources of water and how to make it safe to drink will save lives in an emergency situation.

It is also important to remember to store the water in clean containers and to keep the containers sealed and in a cool, dark place. Knowing how to obtain drinkable water in an emergency situation can mean the difference between life and death.

Now that you know how to obtain drinkable water in an emergency situation, make sure to share this information with your friends and family.

About the Author

My name is Robert and those that know me know that I like to research and to always be prepared the best I can for whatever life brings my way.  My website was born out of putting those two things together. I am married with 3 children, a dog, 2 hamsters, 3 fish, and a gecko.  We have many life adventures.

Thanks for reading,

Robert

https://notscaredalwaysprepared.com

How Has The Flashlight Changed Over Time?

A flashlight is undoubtedly a vital device that provides a light beam to use in different situations. When you think of using a flashlight, you could find your way in the dark or search for a missing item.

Nowadays, there are so many kinds of flashlights that choosing one could be overwhelming. 

If you’re wondering, ‘how has the flashlight changed over time? Here is an outline of the history of flashlights.

How Has The Flashlight Changed Over Time

Like many modern inventions, the invention of the flashlight cannot be credited to a single person. It has evolved so much that each version has more features than its predecessor.

Yet, several different kinds of flashlights were invented for various purposes and are still in widespread use. Here is a look at the beginning of flashlights up until now.

1898

In the 1890s, the founder of the company Eveready, Conrad Hubert, lit up New York City with the help of dry cell batteries and his invention – the electric flashlight. 

It is believed to be the start of flashlight use, and Hubert acquired the patent for the first Eveready flashlight in 1898.

1902

The Eveready trademark started to appear at the end cap of flashlights. For durability, consistency, and affordability, companies made high-quality metal filaments for their incandescent lights. Flashlights started to become more popular than ever.

1910

Eveready developed their tungsten filament bulb, further improving their position in the flashlight market.

1922

Many kinds of flashlights emerged in various styles, including standing lanterns, cylindrical, flood lights, and pocket-sized versions. There were about 10 million flashlight users at this time.

1926

Eveready introduced the first flashlight, allowing the flexibility of hanging up wherever required. The company added a ring to the end of the flashlights so they could be easily accessible during an emergency.

It made the flashlight even more popular with improved convenience and flexibility.

1935

William H. Byler invented black light, which uses ultraviolet rays that are invisible to the human eye. They require fluorescent-colored items to emit a bright glow visible to the human eye.

Blacklight flashlights proved immensely helpful in finding hidden evidence at crime scenes. They were also helpful in anti-theft protection applications.

1937

Eveready introduced the first-ever pre-focused bulb. The pre-focused bulb and reflector were more efficient and required less power to produce the same amount of light as its predecessor.

1961

James R. Board and Gary Pittman invented the first light-emitting diode (LED) while they were working on developing semiconductors. In 1962, Texas Instruments started selling the first LED to IBM as a replacement for tungsten bulbs used in punch-card readers.

However, LEDs have yet to be used in flashlights.

1966

This year saw the introduction of thermoplastic molded flashlights. It allowed the company ‘Energizer’ to make lights in several different sizes and shapes, making flashlights more efficient, affordable, and portable.

1967

This year saw the introduction of the first rechargeable flashlight. It allowed users to use a flashlight without entirely depending on batteries.

1968

Energizer introduced the first fluorescent lantern that proved more efficient and long-lasting than conventional filament bulbs.

1970

Energizer introduced the first water-resistant flashlight. It was very helpful in emergencies, especially in saving people’s lives in situations that involve water, such as floods, thunderstorms, and hurricanes.

1979

The first Maglight flashlight was introduced. It was a high-quality, durable flashlight and is considered the everyday premium flashlight.

1986

The first flashlight toy was introduced so children could have their own without playing with emergency flashlights.

The late 1990s

LED flashlights were introduced, which emitted a stronger light and lasted longer than their predecessors. LED lights were also more efficient than incandescent light bulbs.

2016

The company ‘Power Practical’ introduced a flashlight called Spark that worked as a lighter and flashlight. It acts as a flashlight or lantern and is rechargeable with a battery that can last a minimum of four hours.

2018

The company ‘Adaptalux’ invented a small flashlight called GLOW. It is a combined device with a lamp, lantern, and magnet features. It can turn into a night light, candle, alarm clock, or lava lamp.

Introduction Of LED Flashlights 

The LED was made suitable for flashlights after 40 years of its invention in 1999. LED flashlights were a significant introduction to the flashlight industry. An LED bulb is brighter and more efficient than incandescent or fluorescent lights.

Every Watt fed into an LED emits a brightness of about 100 lumens. An incandescent bulb requires 10 Watts of power to produce the same light. It shows how efficient LED bulbs are.

Different Types Of Flashlights

Many different types of flashlights come in various shapes, sizes, and functionalities. Here are a few popular types of flashlights.

  • Everyday flashlights or EDC flashlights
  • Tactical flashlights
  • Rechargeable flashlights
  • Waterproof flashlights
  • Mobile flashlights
  • Headlights
  • Penlights
  • Keychain flashlights

There are several other unique types of flashlights with some amazing features that I heard of from Outlighter’s tweets. It also provides the use of some amazing flashlights. 

Conclusion

The flashlight has changed immensely over time. This change has enabled the flashlight to become more efficient and brighter and come with additional features.

Frequently Asked Questions

Who Made The First Flashlight?

Conrad Hubert, the founder of the company Eveready, lit up New York City with the help of dry cell batteries and his invention – the electric flashlight, in 1989.

What Did The First Flashlight Look Like?

The first flashlight was hand-made from fiber tubes and crude paper. It has a bulb and a brass reflector.

SODIS – And How to Use the Sun to Disinfect Water

Solar water disinfection, also known as SODIS, is a simple and effective way to purify contaminated drinking water. All you need is a transparent plastic bottle and some sunlight.

To use SODIS, fill the bottle with contaminated water and expose it to full sunlight for at least six hours. The sun’s UV-A radiation (wavelength 320-400nm) and the increased water temperature work together to kill harmful bacteria and viruses in the water. If the water temperature reaches 50°C or higher, the disinfection process is three times faster.

Mason jars can also be used for solar water disinfection, though plastic bottles may be easier to find and lighter to carry in a survival situation.

It’s important to note that SODIS is just one method of water purification and it’s always a good idea to have multiple methods at your disposal in case of an emergency.


The Ultimate Guide to Long-Term Food Storage: Tips and Tricks for Preserving Your Food Supply

Guide to storing food for a long yime

Having a reliable supply of food is essential for survival, but how do you ensure that your food will last for the long term? In this guide, we’ll provide you with the tips and tricks you need to properly store your food for the long haul.

First and foremost, it’s important to choose the right foods for long-term storage. Non-perishable items such as grains, dried beans, and canned goods are great choices. You should also consider purchasing a food dehydrator, which allows you to preserve fruits, vegetables, and meats for extended periods of time.

Proper packaging is also crucial for long-term food storage. Use airtight containers to prevent contamination and extend the shelf life of your food. Vacuum-sealing is another effective way to remove excess air and prevent spoilage.

When it comes to storing your food, location is key. Choose a cool, dry place with stable temperatures to prevent the growth of mold and bacteria. A basement or cellar is a great option, as is a pantry or storage room with ample shelving.

In addition to these tips, it’s also important to rotate your food supply on a regular basis. This ensures that you are using the oldest items first and prevents waste.

By following these guidelines, you can ensure that your food supply will last for the long term and provide you with the sustenance you need in any situation.


10 Benefits of Following the Year Zero Survival Website for Emergency Preparedness

Are you looking for a comprehensive resource on emergency preparedness and survival? Look no further than yearzerosurvial.com! This website is a one-stop shop for information, advice, and resources on how to prepare for a variety of potential disasters.

Whether you are interested in natural disasters, economic collapse, or social unrest, yearzerosurvival.com has you covered.

Here are 10 benefits of following this website:

  1. Expert advice on how to prepare for a variety of potential disasters, including natural disasters, economic collapse, and social unrest.
  2. The latest developments in emergency preparedness and survival gear, including food, water, shelter, and medical supplies.
  3. A community of like-minded individuals who share your interests in emergency preparedness and survival.
  4. Valuable skills and knowledge that can help you and your loved ones stay safe and healthy in the face of a crisis.
  5. Tips and tricks for surviving in the wilderness, including how to find food, water, and shelter in unfamiliar environments.
  6. Advice on how to stay calm and focused in a high-stress situation, and how to make smart decisions that can help you and your family survive.
  7. Information on how to create an emergency plan that will help you and your loved ones stay safe and stay in touch in the event of a disaster.
  8. Expert advice on how to stay informed and stay connected during an emergency, including how to access emergency services and how to communicate with others.
  9. Information on the psychological and emotional effects of a disaster, and how to cope with the stress and trauma that can come with a crisis.
  10. A wealth of resources, including articles, videos, and expert interviews, that can help you stay informed and prepared for any emergency.
disaster prep

Don’t wait until it’s too late to start preparing for a potential disaster.

Follow yearzerosurvival.com today and gain valuable knowledge and skills that can help you and your loved ones stay safe in the face of a crisis. Sign up for the website’s newsletter to receive regular updates and stay informed about the latest developments in emergency preparedness and survival.

How To Prep For Living Through A Nuclear Attack

If you are a prepper, you will probably know that a nuclear attack is the most challenging survival situation. You cannot evacuate because exposure to radioactive material is life-threatening. The worst part is that risks abound indoors too, so no place is actually safe after an explosion. But proper preparation can help you deal with the hazards and survive despite the daunting risks. Awareness is the key to survival, and planning takes you a step ahead. Let us share some tips to prep for living through a nuclear attack.

How To Prep For Living Through A Nuclear Attack

Make a family disaster plan

The world is going through uncertain times, and no place is safe. A nuclear strike may happen anywhere, so it is vital to be ready. Think beyond the conventional disaster preparedness plan because the threat of radioactivity is worse than you think. Gather as much information as possible, and pass it on to your family members. Remember that the best way to stay safe is to coop indoors. Ensure that everyone does it if disaster strikes. Also, create an evacuation plan to follow once it is safe to come out.

Build a survival kit

Like a disaster plan, every family must have a survival kit as it can be a lifesaver in a nuclear crisis. The basics are the same as you will require food, water, medicines, daily essentials, and communication gear under lockdown. But you must also invest in gas masks and hazmat suits if you suspect an impending nuclear attack. You can check a hazmat suit buyer’s guide to pick a reliable option. Stocking up on Potassium Iodide is important as it offers protection against thyroid cancer risk from exposure to iodine-131 found in radioactive fallout.

Maintain distance

Another survival tip you can rely on to stay safe after a nuclear attack is maintaining as much distance as possible from the fallout particles. Moving to an underground area such as the basement of your home or office building is the best way to stay safe. You can also stay in a room without windows and openings as thick walls, bricks, and concrete can maximize protection against radioactive particles. Remember to dispose of your clothing first as it may have deadly particles. Stick to packaged water and tinned food as tap water and fresh produce will definitely be contaminated.

Evacuate when possible

Evacuation should be your top priority because living in an area exposed to nuclear radiation is dangerous. But leaving the fallout shelter for a couple of weeks after radioactive fallout is the last thing you should do. Wait for the authorities to announce when it is safe to leave, and do it at the earliest. Have your bug-out bags ready and evacuate at the earliest. It is best to carry cash and your ID documents because you may not get a chance to return in the foreseeable future.

Living through a nuclear attack is not a matter of chance, but it depends on how well you are prepared to handle the disaster. Follow these tips to keep yourself and your loved ones safe through the worst.

The Best Methods for Managing Back Pain

Back pain is a common issue that may affect anyone at some point in life – it’s no secret that it seems to be an issue for most people more often than not. However, the good news is that back pain can be managed effectively, and there are many ways to do so.

If you’re in pain, this article may come as an unexpected relief; it will detail some of the best ways of managing back pain and provide information on the different remedying products available so you can find the appropriate match for your individual needs.

You will also find tips on what not to do when it comes to managing back pain and information on medical supports used to combat chronic back problems, such as sciatica, herniated discs, and degenerative disc disease. In any case, if you want to know more about how to beat your back pain and the most effective products used for relief, continue reading the rest of this dedicated guide.

The Best Methods for Managing Back Pain

Seek Medical Advice

Before you take any action for a bad back, you must seek advice from a medical professional. They may prescribe pain killers, provide information on exercises to stretch out your back, or offer details on corrective support equipment, such as insoles and many others. Medical supports are highly effective and widely available online, such as on sites like podobrace.co.uk.

Have Good Posture

Posture is key to maintaining the integrity of your back and spine. Being seated in a chair with poor posture can lead to health problems, which is especially true for back pain. Therefore, you must pay attention to your posture while sitting and standing.

While it may be difficult when you’re experiencing pain, you must maintain proper posture while working or standing, as doing so will help prevent additional injuries from occurring.

Use Heating Pads and Ice Packs

Heat and cold therapy are effective tools for managing back pain. The heat helps to relax tense muscles, while cold therapy aids in enhancing muscle tone. Both of these therapies help reduce stress on your spinal cord.

Exercise Regularly with a Low-Impact Routine

Exercise Regularly with a Low-Impact Routine

Exercising regularly is one of the most effective ways of managing back pain. Not only will it help keep your spine healthy, but it will also positively impact your general well-being as exercise helps boost lung capacity and blood circulation. Moreover, exercise should be done at least three times per week for at least 30 minutes per session.

Conclusion

To sum it up, back pain is a common issue, and many people will experience it at some point in their lives. Still, however common back pain may be, that doesn’t mean that you should ignore it, as it can get much worse if you do.

Lastly, if you’re reading this and have chronic back pain or a bad back, please seek medical advice first, then consider trying some of the methods outlined above to manage your pain and prevent the condition from worsening or reoccurring in the future.

What Is The Shortest Effective Barrel Length For An AR-15

In this piece, we’re going to take a pass at addressing the question: what’s the shortest effective barrel length for an AR15? To do so, we’ll start with a little bit of general ballistic science to get some basic concepts under our feet. From there, some specific commentary on the operating mechanism of the AR platform, specifically the gas system, is important.

effective Barrel Length

But first, let’s define effective. Here, we mean an effective barrel length as one that can be used in an AR with which you can reasonably expect to engage human-sized targets out to about 300 yards with some skill involved.

Ballistic Science 101

When a bullet is fired, the burning powder builds pressure behind the bullet, pushing it forward through the barrel, where the bullet roughly seals against the rifling, accelerating as it travels down the barrel.

In general terms, greater barrel length means more velocity, which, in turn, means less bullet drop and greater accuracy. Of course, there’s a limit to this: a six-foot barrel would not net you many gains in velocity, but it would make the rifle extremely unwieldy, something like an old-timey Punt gun, which was a bow-mounted shotgun people used to hunt ducks.

AR15 Gas Systems

Regardless of barrel length, the AR15 is a direct gas impingement gun, requiring a gas tube that runs parallel to this barrel. To have the gun cycle as a semi-automatic firearm rather than a bolt action one, you’ll need to have a function gas system. These days, gas systems come in several more or less standard lengths.

Pistol length gas systems are the shortest, and they’re about 4” long. A carbine length system is 7” long. Further, a midsize gas system is 9” long and the longest, rifle systems are 12” long. These, as you’ll see soon, correspond to several barrel lengths, and with accompanying pros and cons.

Six Inch Barrels

About the shortest barrel that you can hope to have normal function in an AR is a 6” barrel. These will have substantial accuracy problems because of a short sight radius as well as the fact that the bullet will not get up to normal velocity, resulting in a bullet drop. These will function with a pistol-length gas system and might work for extremely close quarters work, but be careful as you’ll have your hands awfully close to the muzzle at all times.

 the shortest barrel that you can hope to have normal function in an AR is a 6” barrel.

Ten To Twelve Inch Barrels

With a little bit longer barrel comes a little more velocity: with a carbine gas system, these short ARs can gain some serious accuracy over the extremely short models, but you’ll still notice that bullet drop will start sooner than you’d like.

This is a common length of AR for folks in special forces who know that their mission will take them indoors, as this is a compact weapon that still can reach out to about 200 yards with a little bit of practice. Overall, these are the first reasonable option we think is out there if you want accuracy past room-clearing distances.

Thirteen to Sixteen Inch Barrels

This is, in some regards, the Goldilocks zone for AR barrel lengths, as we’ll develop in the next section. Paired with a Carbine length gas system, rifles with barrels of this length give up very little in terms of velocity when compared to longer barrels but are a little more compact than longer weapons. Additionally, the carbine gas system, balanced with an appropriate buffer spring and weight, are exceptionally soft recoiling weapons, which makes follow-up shots a lot easier.

the Goldilocks zone for AR barrel lengths

Twenty Inch Barrels

About the longest barrel you’re likely to see on an AR platform rifle is 20.” These give the greatest possible velocity out of standard 5.56mm ammunition, without being too bulky for people to use in adaptable mission settings. Barrels of this length are less common now but are a good choice for folks who want to stretch the legs of the platform. With a rifle-length gas system, they’re also exceptionally reliable weapons as well, as this is basically the design as it was first developed in the 1950s.

So, What’s the Best Barrel Length?

As with most things in the firearms world, the answer is: what’s your purpose?

If you want the best possible ballistics, then a 20” barrel with a rifle-length gas system is the way to go. Even though these are long and a little heavier than what’s common these days, most accuracy-focused setups will have longer barrels to get additional velocity and a longer sight radius for iron sights.  The M16A1, as issued in Vietnam, came with a barrel of this length and it performed well for troops for years.

Of course, some people don’t want the best ballistics, and they are looking for a handy gun to use in home defense. To that end, a Short-Barreled-Rifle might well be the most effective: a 10” barrel with a pistol length gas system can be highly effective in close quarters and they’re super handy. If it were up to us, we’d also put a suppressor on it to tame the unholy muzzle blast that comes from all of the unburnt powder and unused energy from short barrels.

For most folks, something in between works well. Enter the M4, the standard service rifle in the hands of several million people in the armed forces all over the world. With a 14.5” barrel and a carbine length gas system, the M4 can reach out to about 300 yards with no issue but is also handy enough to be pressed into room-clearing duty in, say, Fallujah. This is what we go with most of the time on our personal rifles.

With all of that said, and government paperwork aside, you don’t really have to choose. It’s entirely possible to have a single lower receiver, a few buffer springs, and a set of uppers that you can change out in seconds depending on your mission requirement. That’s one of the brilliant things about the AR 15 design, and we personally own several different barrel lengths for different tasks.