Committed to providing you and your family with the best survival knowledge, skills and equipment.
Survival Supply Caches: A Brief Introduction
During emergencies and disasters, having the ability to leave your home while still having easy access to the most important supplies is necessary. This makes it essential to have a good survival supply cache complete with all the supplies that you need in any emergency situation. With a survival cache around, you will have easy access to supplies that you can’t carry or store inside a bug-out bag.
Why Do You Need a
Survival Supply Cache?
A survival supply cache can be defined as a
well-hidden stash or stockpile of survival items or supplies. It contains a
collection of additional supplies that you want to reserve or hide only to access
them at the exact moment that you need them. There are several reasons why you
need to use survival caches.
One reason is that it ensures that all your survival supplies will not just be in a single location. It allows you to spread the supplies in unique and concealed spots. With this, you can lower your risk of losing all your supplies in case one site is compromised because of a disaster or emergency.
Another reason why a survival supply cache is
necessary is that it helps support a bug out. Putting it in a strategic
location can offer additional supplies together with your bug-out route. This
is beneficial as it makes your survival backpack weigh less while still giving
you the chance to restock critical bug-out supplies and gears, including ammo,
water, and foods.
Having the cache around will also prevent you
from losing the entirety of your survival stash in case someone reaches that
spot when you are not around. You just have to make sure that you create your
survival supply cache considering all important factors. One factor to consider
in creating the cache is the specific container that you will use.
Your goal is to find a container that is strong enough that it can keep all the supplies inside fully protected from the harshest elements. It is also necessary to think about the ideal places or spots to hide the cache and the best methods to bury and hide it. Also, make sure to create a cache that adapts well to your specific geographical location. Note that various environments also need a different set of practices for creating the cache.
Of course, you also need to determine the key
supplies that you should add to the cache. Decide on the specific number of
items that you should store in the cache, too.
Survival Cache
Supplies
So what should you put inside your survival
cache? Here are just some of the most vital supplies:
Medical Supplies – There is no
need to build a cache filled with all the medical supplies that you can think
of. You just have to cover the essentials, like the ones needed to provide
first aid. Among the medical supplies you can include in the cache are
sterilizers, bandages, as well as basic over-the-counter medicines that can
raise your chance of surviving a disaster.
Note that during disasters, there is a high risk of dealing with a short supply of medicines. This might cause even those basic infections to become deadly, so it is best to prepare for it. Aside from having medical supplies, it also helps to have a dental emergency kit inside the cache.
Fire Starter – You need a
fire starter in case you have to spend several days away from your home. It is
even considered as the ultimate survival tool. With that in mind, do not forget
to fill your survival cache with lighters, strikers, and waterproof matches.
Artificial Light – This is
necessary during night and low-light survival situations. Store a quality
flashlight and a set of batteries inside your cache. It also helps to have some
candles inside. Other sources of artificial lights that can help you during
survival situations are gas lanterns and fuel.
Ammo and Guns – Note that
situations requiring you to open up your cache are usually those that require
you to prioritize your own defense or protection. This is why you should also
consider having ammo and guns inside your chosen container. The good thing
about tucking ammo and guns inside the cache is that it can prevent you from
worrying about firearm confiscation.
Food – Of course, you
also need a good supply of food during survival situations so it helps to have
some of them stored in your cache. Storing some food in the cache can help
ensure that you will still have an adequate supply of it in case your primary
food supply becomes inaccessible or gets stolen. Make sure that the supply is
enough until you have a new source of food secured.
Water – There should
also be a water filter bottle, which is a space-friendly supply in case you
live close to a source of water, like a lake or stream. It also helps to pack
some bottled water.
Utility Items – Your survival
supply cache should also contain some utility items. Some examples of these
items are sharp knives, multi-tool, duct tape, 550 cords, and steel pot
designed to cook food. The knives and cords are ideal items to put in the bin
or box’s odd corners.
The cooking pot is also a wise addition to your
cache because it can provide space where you can put some gears. The multi-tool
is a big help in overcoming the most challenging and realistic scenarios that
might happen during a disaster or emergency.
Where to Hide
your Survival Supply Cache?
Note that your survival supply cache should be
created and hidden in a way that you can use and access it in case you can’t
reach your bug-out bag or when it is stolen. One of the best places to hide it
is along the road where you can reach your bug-out location. It should be a
secluded place to avoid drawing attention when you are trying to get it.
You may also put the cache inside your home. Make
sure that it is hidden from view. This is a big help in case your home gets
looted, allowing you to have ready supplies to hunker down. Also, take note
that you can just choose to bury the cache inside a hole. You may then
camouflage it.
Another way to keep the cache concealed is to
spray paint its container in a way that it blends with the trees or foliage.
You can then conceal it behind vines, inside a hollowed tree, or any other
place that only you can see and access.
Conclusion
Your survival supply cache serves as a supplement to your survival or
bug-out bag. It is meant to give you almost all the supplies you need during a
survival situation when you can’t access the primary source of your essentials.
With the cache around, you have a higher chance of surviving any emergency.
How to Prep for Your Survival
Surviving in this harsh world takes courage, resilience and shrewdness. As Nikita Khrushchev once said, “If you live among wolves you have to act like a wolf.” If you’re keen to thrive in this modern era, it’s important to equip yourself with vital survival skills that can stand the test of time.
It’s important to practice some essential life skills if you truly desire prepping for survival. Sadly, most people desire to learn new skills but they procrastinate. We are all guilty of taking a raincheck on important things, rather opting to engage in entertaining activities such as watching films. However, learning is a continuous process that shouldn’t end after completing formal education. As Mahatma Gandhi once said, “learn as if you were to live forever.” If you’re interested in learning a skill, simply start practicing it. Some crucial skills that might help include:
Starting a fire
Shooting game
Performing basic first aid
Playing your favorite instrument
2. Have sufficient food and water supply
Food and water are essential elements of human survival. When you’re prepping for survival, ensure that you have plenty of food and water in stock. Your supply should last you for at least one month. Try to get a balanced diet consisting of the three macros (proteins, fats and carbohydrates). Also learn how to prepare and store food properly. To ensure that your water is free of impurities, study how to decant and purify water. If push comes to shove, practice the art of rationing your meagre food supply to prevent it from running out too quickly.
3. Equip yourself with defensive gear
Society today has evolved from a supportive social pillar into an egocentric community. Urban living is often governed by the rule of the jungle: every man for himself and God for us all. Surviving in this harsh environment will require you to hone some defensive skills. Learn how to defend yourself from dangerous people who might try to harm you deliberately. For instance, you can learn karate or join a boxing class. In addition, it might help to purchase a few survival gear to keep yourself safe in ugly situations. Invest in a good survival kit that will come in handy when an unexpected natural calamity, war or doomsday event happens.
4. Have a medicine reserve
If you take medication on a regular basis, then you definitely need to have a medicine reserve. Diabetics, epileptics and patients with heart conditions must take medicine every day. However, if pharmaceutical firm workers or drug distributors decide to strike, there would be a severe shortage of essential medicines across the country. Such an unfortunate scenario would create a temporary drug deficiency – and patients who lack a medicine reserve would be hit first. Therefore, ensure you have a small reserve of medication you take frequently. It should be enough to last two weeks or more.
Precaution is better than cure. These insightful tips will help you to prepare sufficiently for survival.
Is the End Closer than We Thought? The Latest Apocalyptic Predictions
Scientists calculate that the Earth is a whopping 4.54 billion years old, causing many to wonder when it will come to an end. And, while you might recall the infamous 2012 end of the world prediction by the Mayans, there are some newer theories and predictions out there regarding the future that are worth knowing about. From a psychic’s controversial predictions to a higher-tech apocalyptic future, here are some of the latest end of the world theories and how to survive them.
A computer program predicts the end
Developed in 1973 by MIT researchers, the computer program World One was originally created to simulate global sustainability, though has offered much more when it comes to apocalyptic predictions of the future. In fact, it predicts that the world will collapse in the year 2040, with 2020 being the “first disaster milestone” due to environmental conditions. Because of the environmental conditions, experts of the Club of Rome say that such a future may be preventable if resource consumption is dramatically decreased by high consuming nations like China and the United States.
When it comes to surviving, however, there are many ways that humans can individually attempt to lessen environmental damage. For example, leading more sustainable lives through reducing plastic, going zero-waste, and cleaning the planet can all help to preserve the environment and prevent further damage.
A psychic’s wisdom
Perhaps one of the most well-known psychics in history, Baba Vanga of Bulgaria has made several predictions throughout the years and is said to have successfully predicted monumental events such as the 9/11 attacks, the 2004 Thailand tsunami, and Brexit. In the near future, she has also predicted that President Trump will fall ill with a disease, and that Vladamir Putin will survive an assassination attempt.
However, the notable blind psychic has also predicted the end of the world to take place in the year 5079 in the 51st century – though without any context at all as to how or why making it near impossible to know if there is a way to survive. While Baba Vanga’s predictions are said to be correct 85% of the time, many may remain skeptical about her visions – especially when it comes to the end.
Baba Vanga passed away in August of 1996 and predicted events well beyond her time. While impressive by any psychics standards, getting a second opinion from another psychic can bring a more modern and greater insight on an apocalyptic prediction, thus allowing you to prepare accordingly for survival. As a doomsday prepper or just a survival enthusiast, a quick search for psychic readers near me can easily help you to find someone who can help in giving those much needed answers, personal insight, advice and peace of mind on the controversial subject of the end of the world.
An AI apocalypse
While robots taking over the world has been a popular theory in regards to the apocalypse for years, the latest in technological innovation has kept the specific predictions of the theory new each year. With that said, recent predictions seem to lean heavily towards an artificial intelligence takeover. Often used to help humanity in forms of Siri, Alexa, cybersecurity, and even self-driving cars, a potential artificial intelligence apocalyptic event remains an ever-present threat to humans.
Whether it comes in the form of bots generating impactful fake news, or something bigger – like a robot takeover, a report done by 26 experts concluded that an AI takeover is something to fear due to its possibility of becoming a reality. In fact, AI is already outsmarting humans, such as when it won against pro video game players of the popular game DOTA 2. While many try to avoid AI in their day to day lives by disabling smart assistants like Alexa or turning off their microphones out of fear of misuse, others may try to keep an AI apocalypse at bay by taking a break from electronics completely or by learning to hack. And, in the event that an AI apocalypse does happen, creating a new language and ditching electronics altogether may become prime survival techniques.
While nobody knows the true date or form that an apocalypse will present itself, many are sure that it’s bound to happen someday. With many predictions over time, the latest ones present ideas such as a technology takeover, environmental destruction, or just a simple date with no context at all.
17 Life Hacks Camping Tips that Will Save You Time and Money
Camping trips take a lot of organizing.
Storage space, unpredictable weather, and food supplies are
just some of the things you have to consider when preparing a trip to the great
outdoors.
This list of 17 life hack camping tips from GuideCool will tell you exactly what materials you need and how to put them together for the best trip possible.
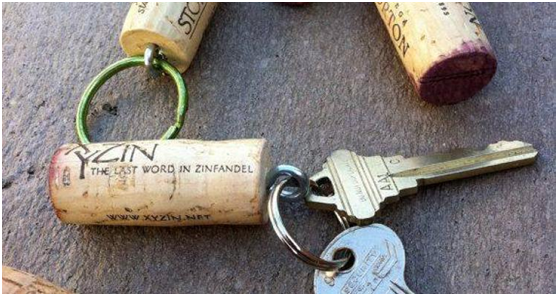
Camping Hack #1 – Keep Your Keys Safe with Cork
If you plan on being near the water on your camping trip
then get on board with this simple but effective trick.
Gone are the days of watching your keys fall to the bottom
of the lake.
Plus, attaching an old wine bottle cork to your key ring
takes less than a minute.
What Do You need?
A screw eye
A cork
How Do You Do It?
Simply twist the screw eye into the cork. Then attach your key-ring and you’ve got a buoyant set of keys.
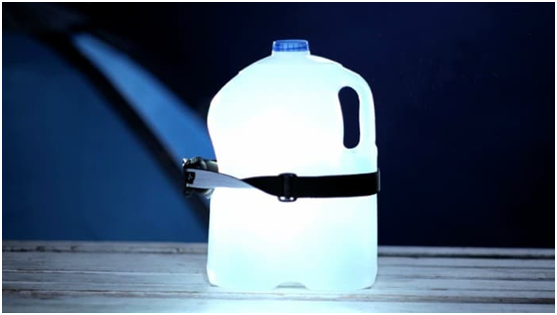
Camping Hack #2 – Light up Your Tent with a Water Bottle Lantern
A water bottle lantern will easily light up your camping tent or camping area with minimal fuss.
What Do You Need?
A head torch
A water bottle
Clear tape
How Do You Do It?
Firstly make sure the water bottle is full of water. Then
point the torch into the bottle.
Once you have the best angle that gives you the lightest, attach the torch to the bottle with clear tape.
Camping Hack #3 – Use a Bowl Speaker to Increase the Volume of Your Music
Most camping fans listen to music or podcasts through our
phones from time to time, but the sound is never loud enough for a group.
Luckily, this simple hack changes that.
What Do You Need?
Smartphone
Camping Bowl
How Do You Do It?
Place your phone with the music or podcast playing into the
bowl.
The key here is to point the phone’s
speaker towards the bottom of the bowl.
The sound waves then reverberate around the bowl as it acts as a speaker, filling the air with sound.
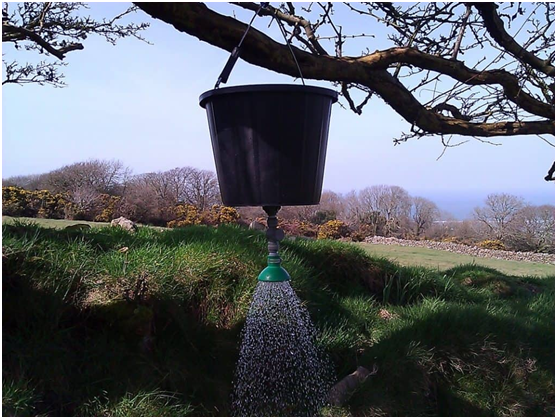
Camping Hack #4 – Use a Watering Can Shower to Wash off the Day’s Activities
Smelling fresh and staying clean on a camping trip can be
tricky, especially if you spend a few nights in the wild.
However, this homemade shower means the beauty of adventure
doesn’t have to mean sacrificing hygiene.
Watering cans can take up valuable packing space, so it’s
a good idea to use them for storage while they aren’t being
used.
Packing them up with your bathroom products or
plastic-wrapped foods like pasta works perfectly.
What Do You Need?
A good-sized watering can
Bungee Cord
How Do You Do It?
Fill the watering can full of water and put it out in the
sun.
You can even leave it by your camp in the morning before you
head out for the day.
When you get back your warm shower will be ready.
Your challenge is to find a place to hang the watering can
at an angle so it pours the water evenly.
Loop the bungee cord through the handle. Then find a tree
branch above head height to attach it to.
As the water slows down, simply move the bungee further along the handle to create an angle so the water keeps on flowing.
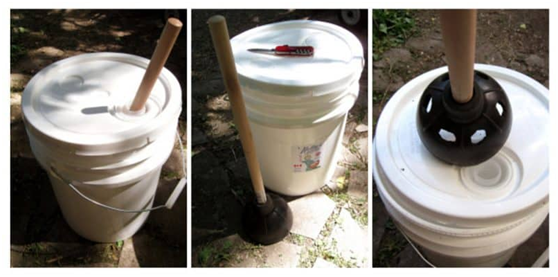
Camping Hack #5 – Keep Your Clothes Fresh with a DIY Washing Machine
Camping trips are almost always full of activities. And, while long hikes and kayak trips down river create amazing memories, they also create dirty clothes.
Luckily, this simple washing machine will have your t-shirts
and shorts feeling home washed in no time.
What Do You Need?
A standard bathroom plunger
Water Container (Size varies on storage space)
Knife
How Do You Do It?
The water container can be of any size.
Big18 liter water buckets are perfect because the water
really gets to move around.
However, standard plastic washing up basins also works well.
It all depends on how much space you have for storage.
Once you have the container, fill it up halfway with water
and some laundry detergent. (Baking Soda is a great camping substitute for
detergent).
Let your clothes soak for 10 minutes while you prepare the
plunger.
Using the knife, cut six evenly spaced holes in the plunger.
They should be the size of the top of your thumb. About half
an inch around.
Then start sloshing around the water with your plunger washing machine! The average item of clothing takes about 10 minutes to clean.
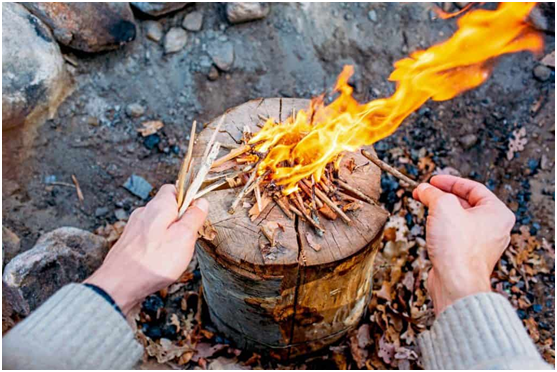
Camping Hack #6 – Eat Like a King (Even if it’s wet) on this Swedish Fire Stove
The Scandinavians know their fair share about surviving outdoors. This Swedish Fire Stove can be premade and then used if the weather takes a turn for the worst.
What Do You Need?
Six logs of wood
Strong Wire
Wood Shavings
Fire Lighters
How Do You Do It?
You can either buy the wood before you go or go out looking
for it once you’re at your campsite.
Either way, you will need six logs of a similar height.
Place the logs together so they make a circle and bound them
with wire.
The key here is to leave enough space in the center of the
logs to place your firelighters and wood shavings.
Mix the firelighters and wood shavings together before you
push them into the center of the six logs. This way, when you come to light
them you won’t have any trouble starting a flame.
You can also store the fire starter mix away from the logs
until you use them together.
Once the flame is lit you can expect your stove to be ready
in around 30 minutes. During this time you may need to gently blow into the
logs to stoke the fire.
The logs will start burning within the center and create an enclosed heat perfect for cooking on. So just place your pot or pan on top of your stove and enjoy your meal!
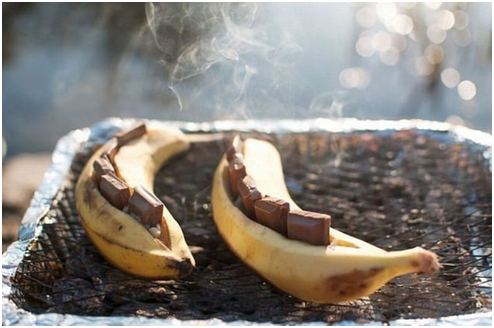
Camping Hack #7 – Satisfy Your Sweet Tooth with this Banana + Mars Bar Dessert
After a long day in the woods, there’s
nothing better than a sweet bite of this campsite dessert. Plus, the banana
offers a great source of magnesium to help with muscle recovery.
What Do You Need?
Bananas
Tin Foil
Mars Bars
How Do You Do It?
Make a cut in the banana from the top to the bottom. Do not
cut all the way through.
Slice the Mars Bar into slivers. Then push the slivers
inside the banana.
Wrap the Mars Bar filled banana in tin foil and then place into the fire. Try not to eat in 2 seconds!
Camping Hack #8 – Save time and Boost Energy with Pre-made Oats
Oats are an amazing carbohydrate packed full of B-vitamins
that help to metabolize your energy so you can keep going way past lunchtime.
It can be tiresome preparing them every day, however, so
follow this guide for a tasty and convenient breakfast.
What Do You Need?
A Ziplock Bag or Jar
Rolled oats
Your favorite dried berries and fruit
Your favorite nuts and/or seeds
A dollop of honey
How Do You Do It?
There are two options. You can either make a large batch and
store it all in one container, or make separate daily rations.
In both cases, you mix at a ratio of:
1 cup of rolled oats
Half a handful of berries/Fruit
Half a handful of Nuts/Seeds
A teaspoon of Honey In the morning, add two cups of water for every cup of mix. Heat gently and stir until your desired consistency is reached.
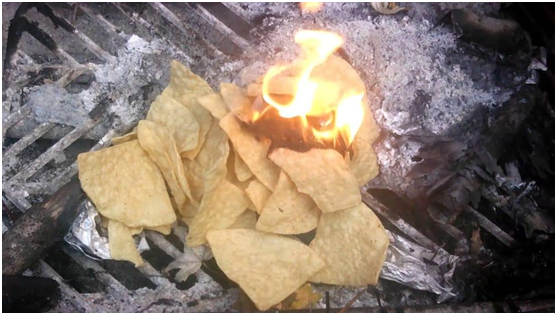
Camping Hack #9 – Take Corn Chips for Food and Fire
Corn chips are cheap and, like all good camping hacks, are
useful in more than one way.
We all know they are great for a trail snack on a long hike,
but actually they make a decent backup for firelighters as well.
What Do You Need?
Corn Chips of any variety
How do You Do It?
The eating part is pretty straightforward, obviously. And
actually so is the fire part.
Corn chips will burn a little slower than matches if you put a flame to them. Perfect for using inside your Swedish Wood Stove or tucked under some kindling in a traditional fire.
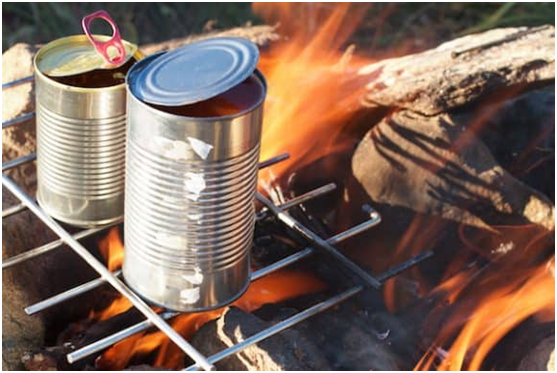
Camping Hack #10 – Throw Your Beans in the Fire, Get in the Cowboy Spirit
This little camping hack dates way back to the American
frontier, because cowboys didn’t much like washing plates
either.
A tin of beans will go straight in the fire and start
bubbling when they’re ready.
What Do You Need?
An open fire
How Do You Do It?
Peirce the top of the can with a knife. This gives the heat
inside the can somewhere to go and stops the contents inside from burning.
It also acts as a whistle to let you know when they’re
boiling.
Place your can of beans on the edge of the fire and wait.
Also, remember to use a wet cloth or a pair of tongs when you take the can back out of the fire.
Camping Hack #11 – Pack Vinegar for the Ultimate Multi-Purpose Cleaner
Vinegar is one of those special substances that can do
everything.
First and foremost it’s a great cleaner because of
its acidity.
It’s perfect for camping because it’s
non-toxic, so you can freely clean with it without having to worry about your
effect on the surrounding environment.
The same cannot be said about most generic cleaning agents.
What do You Need?
White vinegar is best for cleaning because it doesn’t
have much of a smell.
Darker vinegars still work great but if you don’t
like the smell of vinegar you may want to avoid them.
How Do You Do It?
If your cool box or any cooking equipment starts to smell,
empty it out and soak it in undiluted vinegar.
After an hour or so wash it out with water and the bad smell
will be gone.
If you have a propane lantern you can soak the wicks in vinegar for half a day and expect your lantern to burn brighter and longer that evening.
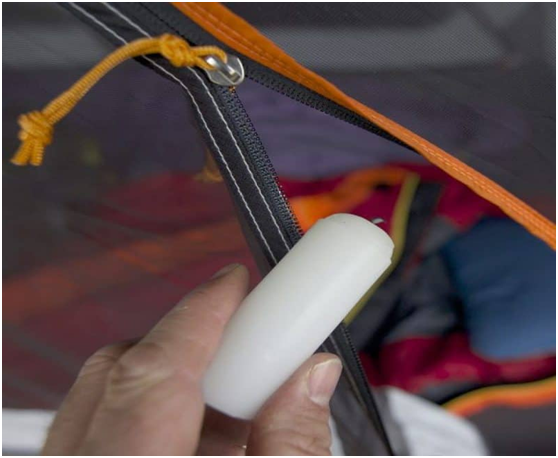
Camping Hack #12 – Use Candle Wax to Un-Jam Zips
There are few more irritating things than a jammed up
sleeping bag zip.
Apart from maybe a jammed up tent zip.
The process of delicately trying to move the zip without
breaking either your sleeping bag or tent door can be a painful one.
Luckily, that spare candle you packed can get rid of this
problem forever.
What Do You Need?
Any candle, preferably unscented. You want the wax to be as
pure as possible.
How Do You Do It?
Gently rub the wax onto the jammed area.
Then gently move the zip up and down. The wax will act as a lubricant and help you to slide the zip to safety. Do not use too much wax initially. This can lead to the wax itself jamming the zip.
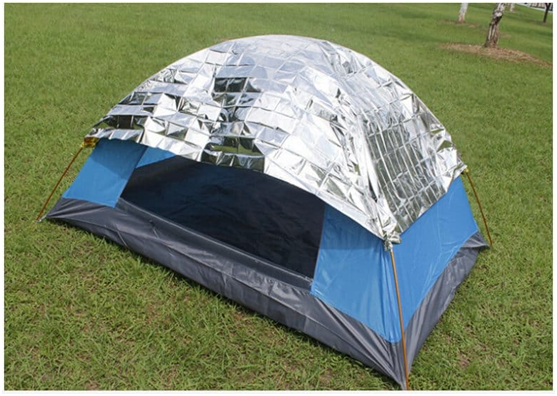
Camping Hack #13 – Stop Stifling Hot Mornings with an Emergency Blanket
Waking up in a hot, sticky tent can take the fun right out
of camping.
There is a really simple way of making life a lot more
bearable when the sun beats down through the trees, or if you’re
staying in an open campsite.
What Do You Need?
An emergency blanket (Foil Wrapped)
Reflective blanket
How Do You Do It?
Place the blanket over the tent where you expect the sun to
hit in the morning.
You can use more than one although consider the weight and
how it may affect your tent’s structure.
Well placed, the reflective blanket will keep the sun at bay until you’re good and ready to start your day.
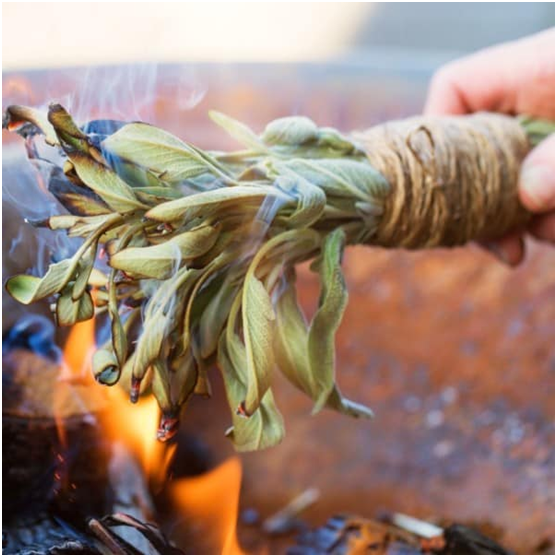
Camping Hack #14 – Keep the Mosquitoes Away by Burning Sage
Burning sage is an effective and natural alternative to
keeping mosquitoes away from your campsite.
The plant has also been found to clear almost all bacteria
from the air, creating a much cleaner and hygienic living area.
What Do You Need?
Sage leaves. Bundles of sage are available to buy online for
less than $4.
How Do You Do It?
Light the sage and blow gently so it begins to smoke.
Then place your bundle near to where you are sitting so the smoke wards off any mosquitoes.
Camping Hack #15 – Stop the itching from bug bites with household items
It’s never fun getting bitten by a
mosquito, especially when you forgot to pack a soothing gel and the itchy pain
won’t go away.
Interestingly, there are loads of household items that will
help to soothe the irritation. Below is a list of the most effective ones.
What Do You Need?
Vapour Rub – The Eucalyptus extract helps
to soothe.
Aspirin – Salicylic Acid is an
anti-inflammatory
Thousand Island Dressing – This really works! How? It’s
just one of life’s big mysteries.
How Do You Do It?
Crush the aspirin down with water to make a paste and then
cover the bite.
The vapor rub and dressing can be gently applied to the area.
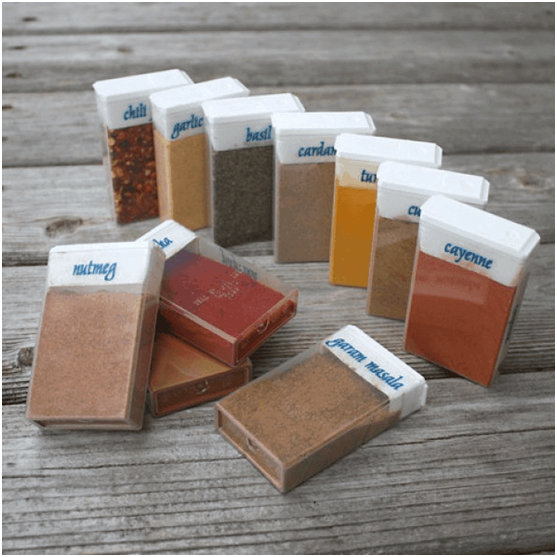
Camping Hack #16 – Store Your Seasoning in Tic Tac Boxes and Make Your Campfire Food Taste Great
Slow cooking on a campfire is one of the best ways to eat
food.
So it makes a lot of sense to bring your favorite spices and
seasoning with you.
The problem is that they often come in odd-shaped bottles
and are prone to spill.
That’s why those refreshing little mints
provide excellent storage cases for travel-size seasoning supplies.
What Do You Need?
Empty tic tac boxes
A marker pen for labels
Elastic band
How Do You Do It?
Fill the little boxes with your chosen delights and label
them.
Store them by tying them together with an elastic band.
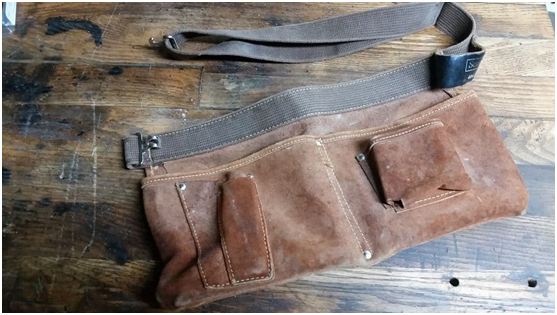
Camping Hack #17 – Use an Old Tool Belt to Keep your Camping Essentials Organized
It’s so easy to forget where you put the
torch when you need to leave the tent at midnight.
An old tool belt is a brilliant camping hack when it comes
to storing your essential items.
Plus, it’s a reusable item that’s
just been sitting in the garage collecting dust in its many useful pockets.
What Do You Need?
A multi-pocketed tool belt.
How Do You Do It?
Make a list of the items you think you will need the most
during your trip.
That will depend on the type of trip, but in most
environments, you’re going to want a torch, a knife and
some rope tucked into the conveniently place pockets of your new storage
system.
Conclusion
Little improvements to your camping experience can make a
huge difference to your enjoyment and safety in the great outdoors.
Preparation is everything.
We hope these 17 Lifehack camping tips will set you up for a
great trip and remember to share them with other people on the trail.
Bio
I am Jacob, the man behind GuideCool. I’m an incredibly enthusiastic (my friends would say nigh-on fanatical!) outdoors person and spend a lot of my time either in the mountains or planning my next trip. And my wife? She is passionate about seeing new places, meeting the people who live there, and immersing herself in another culture. We create GuideCool to share our travel life with others. I hope you enjoy our 17 life hacks camping tips.
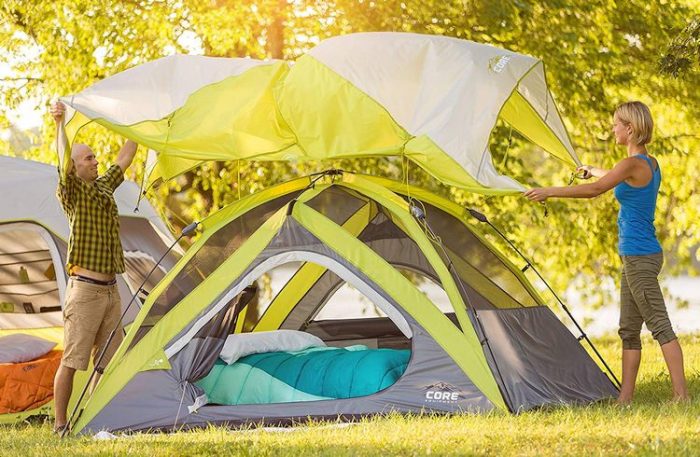
How To Choose The Best Instant Tent For Camping
Instant tents take the hassle out of camping due to how easy they are to carry around and set up. However, with a few different types available, it can be tough picking one for yourself. In this article, we’re going to help you make the right choice when it comes to instant tents, and cover all the basics that you need to know.
Instant Tents – What Are The Benefits?
Ease of Use
Instant tents are just what they sound like – they can be pitched in no time at all, thanks to the fact that there are poles already attached to the body. Hence, even first-timers can set up camp without anyone’s aid or having to read through a manual.
Price
An instant tent for camping can vary in price from cheap to very expensive, depending on the brand and the size. As a result, you can find several that fit your budget.
Time-Saving
Imagine there’s a storm approaching and you need to set up a shelter as soon as possible. With regular tents, there’s a high probability of you getting soaked before you’re done pitching them. If you’ve got an instant tent, on the other hand, you’ll be done in less than a minute!
Freestanding
This means that you’re able to pitch an instant tent on any terrain without needing to stake it down. As a result, you can always adjust the position if necessary. However, when winds are particularly strong, it may be a good idea to go ahead and pin the tent down with stakes.
What Size Is Right For You?
Instant tents come in both large and small sizes. If you go camping with friends or family, then it might be better to go with the former. However, that isn’t the only reason to go for a larger tent. If you’ve got claustrophobia, for instance, the extra space can help you feel more comfortable.
The only drawbacks with larger tents are that they tend to be pricier and can be harder to carry around.
Which Type Of Instant Tent Should You Pick?
There are two main types of instant tents to choose from – cabin and dome. Let’s take a look at each:
Cabin Tents
These come in either square or rectangular shapes (hence the name) and are usually able to house anywhere from 6 to 12 people. In addition, cabin tents usually have tall ceilings, allowing people to walk around without having to hunch. In addition, the roof is made out of mesh materials, which means that you can stargaze at night.
Typically, cabin tents come fixed with strong poles that can stand their own against the roughest winds. On the flip side, cabin tents do come with a couple of downsides. First of all, they’re quite heavy to carry around. Secondly, they can’t be repaired easily if something breaks. Due to the size, it may be difficult for just one person to pitch a cabin tent without help.
Dome Tents
These are much smaller than cabin tents, meaning that you can’t walk around in them comfortably. However, there are quite a few pros to having these type of tents. For starters, they can be set up in a minute or so, while cabin tents take longer. Plus they’re lighter as well, while still being able to withstand rough winds. Furthermore, they just require one person to set up.
At the same time, there are a couple of negatives, like being unable to take them apart to make it easier to carry. In addition, you have to keep it fixed in the ground while it dries.
Instant Tents With Screened Porches
You’ll come across instant tents that contain screened porches. These are ideal for summer and spring camping because you can let in some sunlight without having to open up any flaps. Hence, you don’t need to worry about bugs getting inside the tent.
Are Fast Pitch And Instant Tents The Same?
Even though the names sound similar, fastpitch tents are not the same as instant tents. In fact, there are quite a few differences between the two. The biggest is that the fastpitch is faster to set up. This is due to the fact that the poles are pre-assembled inside the body, unlike instant tents. In addition, most fastpitch tent models come equipped with a hub as well.
In Summary
Instant tents can make campers’ lives much easier, considering all that they offer. To begin with, they’re very quick and easy to set up – so much so that even amateurs can make do without any instructions. In addition, they are freestanding and come in a variety of price ranges and sizes.
The two types – cabin and dome are suited for different scenarios. The former is more suited for larger groups while the latter is perfect for the single camper.
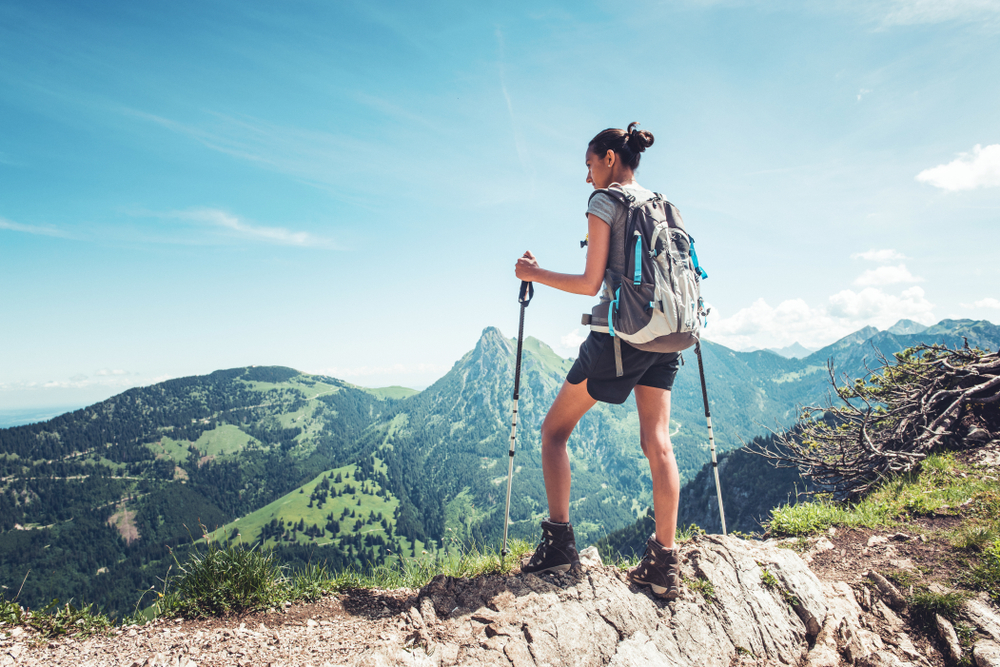
5 Essential Tips on Surviving Your First Hiking Trip
Hiking
is literally not a walk in the park. It involves walking on trails of various
terrains, elevations, and steepness. Given the right weather conditions and
preparations, even a couch potato can successfully complete or even enjoy a
hike.
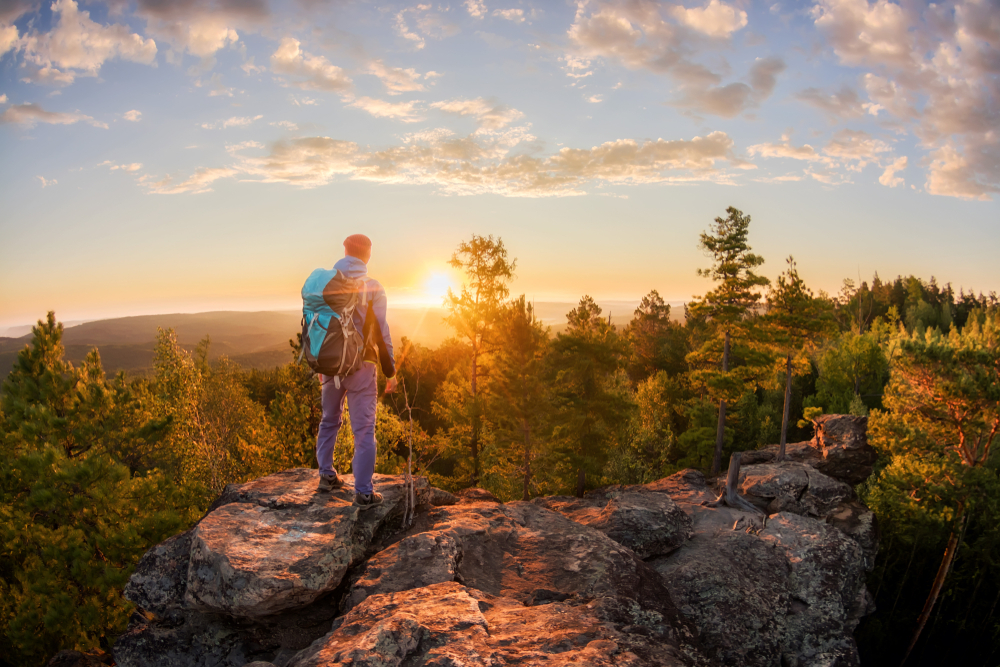
The
beauty and tranquility that can be offered by Mother Nature is usually a great
way to dilute the stress of the daily grind. However, there are certain
considerations that you must keep in mind to reduce untoward incidents––and
have as much fun as you possibly can.
If you are a novice hiker, you might be at a loss on how to go about it. The list below shares what’s essential for your very first hike––in order of importance.
1. Choose a Trail that is Suited to Your Fitness Level
The
best way to increase your chances of surviving any endeavor is to carefully
plan ahead. Hence, if you wish to make your first hiking trip memorable in the
right way, you must choose a trail that suits your current fitness level.
Given
that most hikers post great photos of their adventures, it can be easy to
underestimate the trail level if you just rely on “Instagrammable” views. Here
are some of the things that you should take note of when you do your trail
research:
Trail
difficulty and trail type
Trail
length
Elevation
gain
Hiker
reviews
Best months to go
Once you start your hike, make sure that you don’t rush into it. Pacing is vital to a successful hike. You are not in a competition—you are here to enjoy what’s around yo
2. Prepare an Appropriate Hiking Pack
The contents of your hiking pack will depend on the weather and the season you’re currently in. Outdoorcommand has a number of buyer’s guides to help you choose which gears are best suited for your upcoming adventure. Here are the bare essentials that must you must bring with you in any hike:
Daypack: 20L to 35L capacity should be enough, though you can go for bigger ones if you eventually plan to level up.
Water Bottle or Hydration Pack: The general rule is 500mL of water for every hour of hiking.
Trail Food: Go for food items that don’t need cooking, such as dried fruits, energy bars, biscuits, and nuts.
Headlamp or Flashlight: You may not plan on night hiking, but you never know when it would come handy.
Multi-tool or Knife: These will always prove to be useful at one point or another.
Navigation Device: This can be a compass, a map, or a GPS device. The trail may be well-labeled, but it’s better to be prepared.
First Aid Kit: Include antihistamines, antiseptics, bandages, pain killers, and tweezers, just to name a few.
Extra Clothes: Weather conditions can be unpredictable, so you’re better off bringing some extra clothes.
3. Wear the Right Clothes
It
might be tempting to choose stylish clothes just to look good on your photos, but
you will be sorry if you wear the wrong clothes and footwear to your hike. For
clothes, go for moisture-wicking fabrics and wool (for cold weather hikes) as
these materials dry quickly.
You should also bring sun protection accessories such as hats and sunglasses if you are hiking in the heat. Make sure that you do your research on the best hiking clothes for men and women so that you’re well-protected when hiking day comes.
4. Fuel and Hydrate Adequately
The importance of hydrating before, during, and after the hike cannot be stressed enough. Additionally, snacks can also keep you going when you’re already feeling weak. Make sure that you also pack a “victory snack,” or the snack that you will eat at the end of the hike. This will serve as your reward for a job well done.
5. Follow Outdoor Etiquette
“Leave
No Trace” is probably the most widely known outdoor etiquette in existence. It
just simply means that you should clean up after yourself, and leave the trails
exactly as you found it––or even better than you found it, if you chanced upon
it in bad condition.
Be
considerate of other people and the wildlife that live in the area. As the
saying goes, “Take nothing but pictures, leave nothing but footprints.”
Conclusion
Even
if it might take a lot of physical effort, hiking can be a tremendously
rewarding experience. The key to surviving hikes is to ensure that you know
exactly what you are getting yourself into. If you are fully prepared for the
challenges of the trails, you’d surely enjoy your first hiking trip.