related products
There are no products in this group.

A Survival Cache is essentially a hidden storage for important survival gear/supplies that you can go to in the event that your home has been destroyed or you’re unable to get home for whatever reason. Caching your supplies is a highly recommended action for several reasons. Just as squirrels bury their nuts before winter to provide food in spring, you too can learn something from nature. Here are a few good reasons for caching:
If the crisis persists for a long period of time, you’re likely to have looters and raiders going from house to house, demanding your supplies or your life. Historically they’ll only kill you if you put up a fight and really you should just give them what they want (unless you’re prepared to take them on). Another alternative to protecting your self from looters is to just hide your supplies in your own home. Don’t bother storing your food in the obvious places (like the kitchen) it will be the first place they look. If they can’t find it, they’ll just go to the next house.

The best way to hide your food is to bury it. You’ll need airtight containers, I suggest 5 gallon buckets and you’ll need to plan ahead. Bury your supplies at night so nobody will see you, and bury your supplies next to memorable object (not in the middle of a field). You could make a map to remember where you hid everything but it’s recommended you just remember the information and keep it in your head (it’s much safer there). Bury your caches next to signs or next to other memorable object so you don’t lose them. It goes without saying but try to get the ground to look normal after you’ve buried the supplies.
A safe trick is to keep a small amount of food in the kitchen or some obvious place, so that if and when the looters come by they can just take what they want and be on their way. If you want to make sure they don’t come back… poison the food! You’ve got to be creative. Hide your food in the walls, the floors, and odd locations around the house. Try not to advertise your supplies and don’t make a point of telling people that you have a year supply of food. Word gets around fast so don’t be surprised if get a lot of knocking on the door when shit hits the fan. You’ll be better off telling people you have nothing.
[source]
There are hundreds of different DIY passive solar air collector plans floating around, but I’m focusing on a few that incorporate recycled aluminum pop, beer or juice cans as the “solar absorber“.
These DIY pop can solar panels are inspired by Cansolair – a commercially-produced product invented by a man from Newfoundland, Canada.
Passive solar air heating is considered the most cost-effective renewable energy – utilizing the energy from the sun by capturing it with an absorbing medium. There are plenty of online sites dedicated to passive solar applications, but you can get the basics via Wikipedia.
Passive solar heating intrigues me. It’s the only “free” heating source that I can think of. If it worked at night, it would be perfect.
 Crowd Sourcing a Design
I intend to build one of these at some point and my research has turned up several designs and methods of construction – from very well executed to the afternoon “garage experiment”.
After spending several hours sorting through many pages of Google results, I’ve narrowed it down to a selection of results that’s representative of the designs, methods and materials DIYers are experimenting with – from good to bad.
A couple of these show up repeatedly in just about any Google search related to pop or beer can heaters (the Red Garage Project for example). I’ve included what I feel are the best designs that merit a look and some interesting ideas that you could adapt for your own purposes.
I know mine will incorporate the best ideas taken from the designs highlighted below.
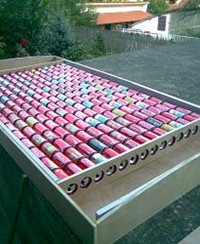 1. Solar Panel out of Aluminum Cans (by Malden P)
This design most closely resembles the commercial product sold by Cansolair. The site has very good pictures and step by step details to build a full-size passive solar heater.
Rating: Excellent Design. Definitely worth a look
2. Beer Can Solar Heater (by bornonazero)
This is a similar (and very well executed) design originally presented as a pictures-only You Tube video. There’s also an updated video with a bit of descriptive narration added.
Rating: Definitely worth a look.
3. Greg’s Pop-Can Solar Space Heating Collector (Greg West)
This design on “Build it Solar” is excellent. The PDF download is very detailed with good pictures. It features aluminum plenums in a box made of polyiso rigid insulation and has a flat face of Twinwall polycarbonate glazing. Lot’s of good ideas in this one.
Rating: Well worth the download (3MB PDF).
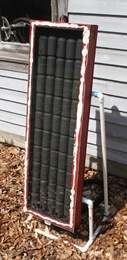 4. The Ubiquitous Red Garage Project (Hemmings Blog)
This version pops up in a lot of searches which is really frustrating because it’s not a good design and it probably turns more people off the idea than it inspires. I have no idea why so many sites linked to it or posted about it.
The design has efficiency deficiencies like no plenums – meaning the air doesn’t pass through the cans – which is kinda the point, and what produces most of the heat.
On the plus side, he built a second, larger version and I have togive him props for recycling a patio door for the glazing.
Rating: Take a pass or give it a quick scan and move on.
This one is a bit crude in the approach, but it would be fast and easy to do. However, I’m not so keen on the idea of superheating Styrofoam and pumping the resulting off gasses into my home.
 The best takeaway from this one is two unique methods to make the holes in the can bottoms:
• using a blow torch (which would be pretty much instant)
• using a belt sander, which takes out the full bottom cleanly.
If you needed to MacGyver one of these in an emergency, then this would get you there. If you’re going for a longer-term installation, keep looking.
Rating: Have a quick look just to say you did.
 6. Brian’s Pop Can Solar Heater
This one is kind of in the middle of the pack – the functional design looks to be sound, but it loses points on the fit and finish.
If I’m going to invest the time and energy in building one of these, I want it to look good and be reasonably sure it will stand up to the extreme conditions it will be subjected to.
Brian does provide some performance data that shows what kind of results you could expect (in Alabama).
Rating: Look it over for ideas to use.
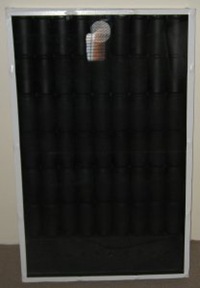 7. Moonshine Solar
These small-scale window units are a little different and I’m really drawn to them. The designer started with few randomly placed cans in a housing and has since revised the design twice, incorporating some of the conventions common to the more sophisticated designs.
I like the idea of having a portable “room heater” as opposed to – full-sized panel mounted on the side of the house for several reasons.
• Less cost to build
• No installation required
• Portability
My partner and I both work at home, but our offices are in different areas of the house – a couple of portable “space heaters” would be more likely to keep us comfortable than a single large one located in the only practical location, which is a long way from my office.
Rating: Definitely worth a look [Update: It seems the website for Moonshine Solar has been taken down since I was doing my research. Still, an idea that’s worth consideration.]
Passive solar heaters make sense and are an excellent DIY project that should pay for itself in a year or two. There are a lot of good ideas in examples above but the main points to consider carefully would be:
The pop can heater is just one of many types of passive solar heating installations. I’ll explore other designs in the coming months.
[source]
A report released today by the US Geological Survey (USGS) today shows that Americans are sucking dry the aquifers that irrigate their crops and supply their drinking water. Between 1900 and 2008, the US lost 1,000 cubic kilometers (240 cubic miles) of groundwater. That’s twice the volume of the water in Lake Erie.

It gets worse. The rate of groundwater depletion is accelerating, according to the study of 40 major US aquifers. Between 1900 and 2008, the US lost an average of 9.2 cubic kilometers of groundwater annually as the growth of cities and industrial agriculture tapped underground reserves. But between 2000 and 2008, groundwater depletion jumped 171% to an average of 25 cubic kilometers a year. In just those nine years, the amount of water pumped from the Ogallala aquifer, which supplies a large swath of the US, was equivalent to 32% of the water that was depleted from the Ogallala during the entire 20th century.
“Although groundwater depletion is rarely assessed and poorly documented, it is becoming recognized as an increasingly serious global problem that threatens sustainability of water supplies,” the USGS scientists wrote.
Climate change likely contributed to the spike as droughts reduce rainfall and snowmelt. In California, for instance, a falloff in Sierra Nevada mountain snow that supplies water to the state’s multibillion-dollar agriculture industry led to increased pumping of groundwater in the Central Valley.
And in a scary feedback loop, sinking aquifers are contributing, albeit only slightly, to a rise in sea levels. Much of the agricultural water pumped from aquifers ends up as runoff transported by streams and rivers into the ocean. (Depleted aquifers also result in the land sinking relative to ocean levels.) “Groundwater depletion in the US in the years 2000-2008 can explain more than 2% of the observed global sea-level rise during that period,” the study states.
If the groundwater pumping ceases, rainfall will slowly recharge aquifers, though that process can take hundreds or thousands of years. That time is likely to increase as climate change results in a drier, drought-stricken world.
[source]
I found a very affordable way to store rice, beans, flour, noodles and any other food item (my dry stock food is stored in 15 of them). This is also a great way to store any paper products or paper towels, matches, and anything else that has to be kept dry, away from heat, and bug proof.
Go to a bakery in your area (groceries stores, bread bakers or cake bakers), and ask for their icing or dough pales with lids. Generally, they are more than willing to give them to you for FREE. Ask them when they get their shipments in, and find out when they empty the buckets. Make sure to find out when they throw the buckets in the trash. For me, I go in no later than Thursday, because they throw the buckets out on Friday and Saturday.
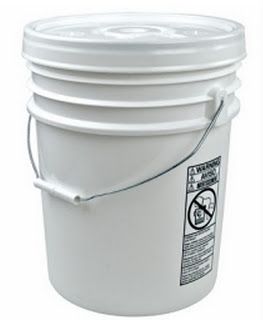
Be sure to clean the buckets out with a little bleach. You can then use them to store food, fuel disks, tooth paste and floss. I even made first aid kits out of two of the buckets.
You can stack them easily, label them with a marker, and lift them with ease. The buckets take up just a little space, and protect my emergency food and supplies.
There was a lot of interest in building these, so I found these instructions. There are many ways to build something like this. I encourage you to change this design, make it better, and figure out what works best for you as there are different rod designs based on fishing technique.
These are mostly made of PVC pipe. I picked up 10 foot lengths of 1/2 inch PVC and 3/4 inch PVC for about $1.50 each. You can make several of these fishing rods with that much PVC pipe.
First, I used a hacksaw to cut pieces of both the 1/2 inch PVC and 3/4 inch PVC that were 10 inches long. Why 10 inches? No particular reason, you can make them whatever size you want.

I used some sandpaper to smooth the edges that I had sawed and to remove the markings from the outside of the PVC pipes.

You’ll need a 3/4 inch slip cap, a 1/2 inch slip cap, a 3/4 to 1/2 threaded connector (female/male), and a 1/2 to 1/2 inch threaded connector (female/female). These fittings cost around $0.60 each.

I didn’t need to use any adhesive to get the pieces to stick together. You’ll want to be able to remove the slip caps later on anyway, since you’ll be putting you’re fishing tackle into the handles.
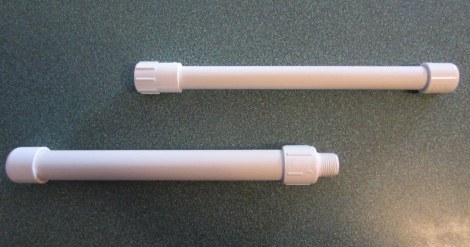
I drilled 3 holes all the way through the 1/2 inch PVC pipe with a 3/32 inch drill bit.

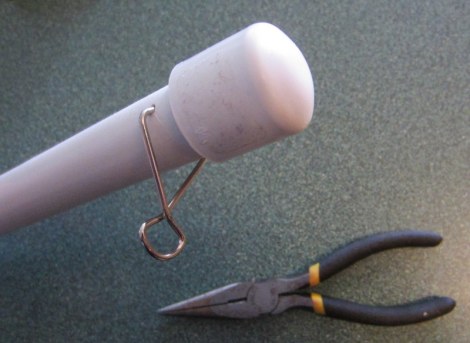
I used pieces from medium sized binder clips to make the eyelets of the fishing rod.

Remove the silver parts and use pliers to bend them until they look like the one on the right.

Then, clip it into the holes that you drilled through the 1/2 inch PVC. You’ll need to do this three times.
We opted to use a premade ice fishing reel because it would have been difficult for our kids to build an improvised reel. However, I’ll show you a quick way to make one after I show you how we attached these. We paid $2.96 each for the reels.
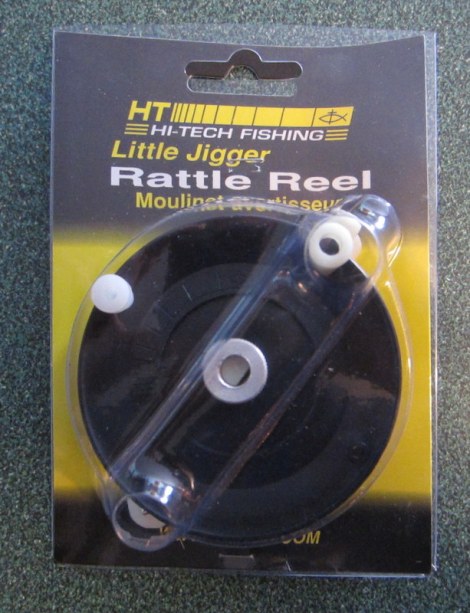
We disassembled the reels and used the white plastic piece on the left as a guide for where to drill the holes into the 3/4 inch PVC pipe.

I used the same 3/32 inch drill bit from before to make the holes and then screwed the white plastic piece into the 3/4 inch PVC.

Then, you simply screw the two pieces together and you’ve got yourself a fishing rod! Don’t forget that the slip caps come off of each end, leaving you with plenty of room for storage in both sides.

This improvised reel is made from a spool of fishing line and a few pieces of hardware. I drilled a hole into the 3/4 inch PVC with a 7/64 inch drill bit. To secure it to the rod, I simply put a screw through the center of the spool and used a washer to make it more stable. Be sure not to tighten things too much or the reel won’t spin.
I put an eye screw into the 1/2 inch PVC to act as a guide for the fishing line and threaded a bolt into the plastic part of the spool to act as a handle for the reel.
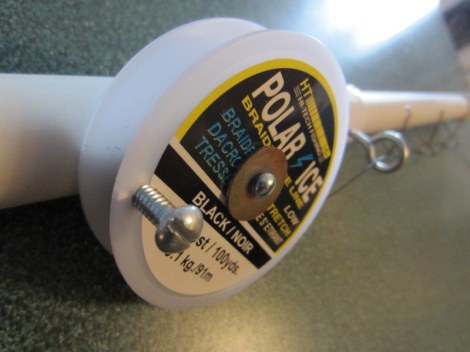
The improvised reel works okay, but the action is not as smooth as the premade one. However, it is a little bit smaller and doesn’t cost as much.
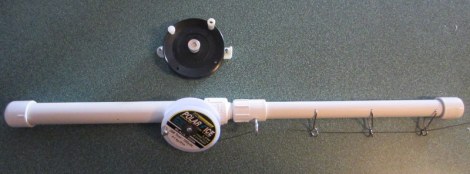
It breaks down nicely for storage. I cut some pieces from an old bike tire inner tube to band the two halves together.
All of the external pieces are removable and can be stored inside the handle with exception of the reel itself.
So, there you have it! Go have some fun and let me know how it turns out.
