The modern age has made it so it’s easier than ever to learn how to survive in the wilderness. Every day, new ways to create tools that are needed to survive in the wilderness are developed, and the internet has made it so anyone can access guides to recreate them if they know where to look. Many new gadgets and devices have also been made to help make camping trips and outdoor adventures safer and easier, but there is probably no better technological advancement than the mobile phone itself.
In the past few years, we’ve seen the mobile industry rise to incredible proportions. Some estimates say that the introduction of affordable mobile devices in developing countries might push internet usage past 3 billion by the end of the year. With mobile usage at an all-time high, we’ve seen many new apps come out for every niche possible, including survival guides.
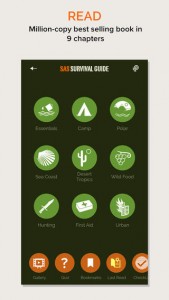
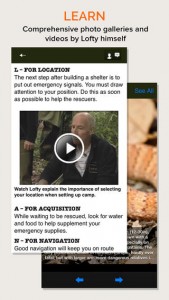
Of course, with the wealth of survival apps out there, some still shine above the others. John “Lofty” Wiseman’s SAS Survival Guide is perhaps one of the most comprehensive of these apps. Having been one of the most definitive guides for over 20 years, the SAS Survival Guide puts together the best of the elite training techniques of Britain’s fighting force, the survival guide has now been launched in a mobile app.
Other than allowing you to learn various survival skills through your phone, the app also helps you make sure that you’re never caught unawares, allowing full usage even when offline. This is great news, especially if you’re relying on your mobile phone in the wilderness, as Kim Shadbolt of Pocket Fruity writes in a blog post, using 3G to access the internet can be quite unreliable – not to mention that it drains your battery faster. “3G is good, but can be a bit temperamental depending on where you are, what network you’re on and how much data allowance you have,” the blog post reads.
The app contains videos of everything from how to tie knots to how to read animal tracks, as well as galleries of detailed images of medicinal and poisonous plants and animals that you might encounter in the wilderness. A sun compass, survival checklist, and even a More code signaling device are also available on the app. The only downside? While it’s available on both iOS and Android, the app costs $5.99. With so much content, however, it’s a great investment, especially if you’re taking wilderness survival seriously.