

Know What To Do In Case Of A Weather-Related Emergency
Weather Emergency Safety Tips
Know what to do in case of a weather-related emergency.
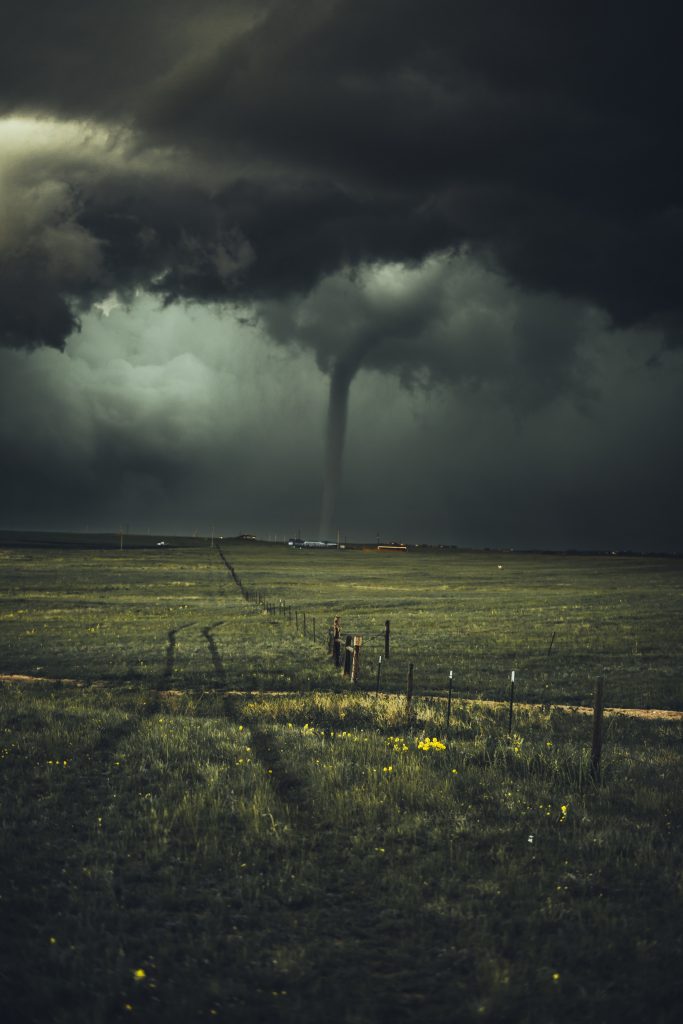
Emergency preparedness and natural disasters.
-
Plan Ahead
Your home or work routines can be disrupted with little or no warning by natural disasters, fires or other catastrophic events. It’s important that you and your family are prepared as help may not always be available.
-
If you or your loved ones are faced with a weather-based emergency, determine the safest course of action and stay informed through radio, TV, internet or whatever is availalbe. Before an emergency you can prepare an emergency kit with at least 72 hours worth of food and water, make sure your car has a kit as well.
-
Home and Car Emergency Kit
Your home and car should have kits in case of an emergency.
-
Earthquakes
If you are in an area prone to earthquakes, identify potential hazards and earthquake proof your home by securing heavy furinture. If you are indoors:
- Stop
- Drop
- Hold On
If you are outdoors, move to a clear area or a safe building. When in the car, stay in the car. After the quake is over carefully assess damage and don’t enter buildings until you know it’s safe.
-
Floods
If the waters are high, make sure you and your family stay dry. Secure your appliances and turn off utlities like electricity. If you live in an area where flooding is common, you might want to invest in flood insurance. If you are driving, never driving through a standing pool of water. If you have to evacuate, return home only when authorities say it’s safe. Check for gas leaks, food spoilage and be aware of other hazards when returning home.
-
Hurricanes
Before a hurricane, have a shelter in place and avoid traveling during flood, thunderstorm or tornado warnings. If you live in a high-rise, take shelter below the 10th floor. Hurricane season is June-November. If you are in an area at risk for hurricanes secure your property and consider investing in flood insurance. During a hurricane, evacuate when told to do so or if you are unable to evacuate go to an interior room and lie low. After a hurricane, assess the damage and be careful of post-emergency hazards like flooding, knocked-down eletrical wires and fire.
-
Tornadoes
Tornado season is March-June and there have been tornadoes reported in 48 continental states. Before a tornado hits practice emergency plans and have a shelter in place. Avoid traveling during thunrderstorm, flood or tornado warnings. If a tornado does hit, lie low in an interior room at a low level such as a basement or a bathroom. If you’re driving, drive at a right angle to the tornado’s path and if you’re outside lie in a ditch or a flat, low area. After the tornado passes, let others know you’re ok, stay tuned for storm watches and warnings.
- Other Emergencies
What’s The Best Tactical Tomahawk?
The tomahawk is an impressive weapon and tool. When people think of the tomahawk, they think only of something that can be thrown, or used to kill, but a tactical tomahawk (also known as a tactical axe, military tomahawk, or army tomahawk) can do so much more than that. For those in a survival situation, it can be the difference between life and death.
Yes, it can be used as a weapon, but it can be used to chop wood, to dig a pit and more. Even today, soldiers in Afghanistan use the tactical axes as both a weapon and a tool.
Let’s delve in deeper to what a tactical tomahawk truly is.
History of the Tactical Tomahawk
The tomahawk, of course, has its start with the First Nations people of the United States and Canada. The tomahawk was first created by the Algonquian Indians. These early tomahawks were just stones attached to wooden handles, secured with strips of rawhide. The tomahawk was essentially a tactical tomahawk, used for chopping, cutting and hunting. When Europeans arrived in North America, they introduced the metal blade, which altered how the tomahawk was made.
It has helped to improve the lifestyle of the native people, especially with hunting because the blade would not break as easily. With the new metal, tomahawks had a hammer or spike on the other side of the blade, so that the tomahawk could be used in an increased number of situations. In addition, the pipe was sometimes attached, allowing for smoking with the tomahawk.
Today, the military tomahawk has changed greatly and was used by the US forces in the Vietnam War. These were known as Vietnam tomahawks (military tomahawks) and were used in combat. The American Tomahawk Company now makes tactical tomahawks for the U.S. Army, which have been used in both Iraq and Afghanistan for hand-to-hand combat and as tools. Even law enforcement are using tomahawks now.
Features Of A Tactical Tomahawk
The features of a tactical tomahawk will not vary too much. The tactical axe will be made of a light-weight material, but be very strong and durable. The handle will feature finger grooves, making it easy to hold and use. The tomahawk will not be too long, but will be long enough that it can be used as an axe or hatchet, a weapon, and a tool that can be used in survival situations.
 Tactical tomahawks can be used as:
1. Pry-bars
2. Hammer
3. Shovel
4. Axe
5. Hatchet
Best Tomahawk Buyer’s Guide
If you are going to buy a tactical tomahawk, then you need to keep in mind that there are three different types of tomahawks. Knowing which type of tomahawk you need will make the purchase of the tomahawk much easier for you.
1. Throwing tomahawk: The stereotypical tomahawk is the one you can throw. This one is used by those competing in tomahawk competitions, and it is the one that is used for hunting and self-defense. If you use it in self-defense, keep in mind that the weapon you throw can then be used against you. These tomahawks are balanced perfectly and are meant to be thrown. As a result, they tend to not be as strong as other tomahawks.
2. Combat tomahawk (or combat axe): This tomahawk is not meant for throwing, but for combat and the military. These army tomahawks are lighter because the tomahawk needs to be swung quickly and easily.
3. Tactical tomahawk (survival tomahawk): If you want a tomahawk that can be used for a variety of purposes, then you naturally need to get a tactical tomahawk.
This tomahawk is meant to be used as a multi-purpose tool that can range from smashing a window or breaking a door, to opening up a crate or for hand-to-hand combat.
Best Budget Tomahawk
If you want to get a tomahawk that is affordable, but will work great for you like a tactical tomahawk, then the SOG Specialty Knives and Tools Tactical Tomahawk is exactly what you need. This tool can be used for a number of different situations, including removing obstacles, extracting something, cutting wood or hunting. As a survival tool, this is an excellent option.
Made with a glass-reinforced nylon handle, which can stand up to nearly anything, it is topped off with 2.75 inches of stainless steel that is used for the axe head. The stainless steel option will ensure that you don’t have to worry about the tomahawk rusting on you if you are using it in a survival situation outside.
The handle is made of ballistic polymer, which can stand up to nearly anything. No matter what you are doing with the tomahawk axe, it is probably going to stand up to the worst of it, allowing you to handle easily whatever the world throws at you in a survival situation.
In all, it measures in at 15.75 inches long and weighs only 24 ounces. It makes it lightweight, but still highly durable. It is so durable that SOG even gives it a lifetime warranty.
Tactical Tomahawk Reviews
Right now, we only have one survival tomahawk review complete. Be sure to visit the website soon and take advantage of the complete comparison guide. For now, watch the clip about the SOG Tomahawk.
Video Review of the SOG Tomahawk
Best High-End Tomahawk
If you are looking for a high-end tomahawk, then you need to check out the Gerber Downrange Tomahawk. It’s priced at $250, and this tomahawk is made in the United States and comes with a hammer-head and pry-bar design. It allows you to use it to hammer things into the ground to create a shelter, but to also pry pieces of wood off a tree for the kindling. Made with a G-10 handle with a 420HC steel body, it also comes with a mobile sheath that makes it easier to carry with you.
As the manufacturer says, the axe head will cut through walls and rope, while the hammer will smash through locks, door-knobs and hinges. The pry-bar is designed for maximum leverage, and the grip is designed so that it is easy to open whatever you need to. An excellent tomahawk of a tactical nature that comes with a higher cost but is well worth it.
How To Build Your Own Solar Thermal Panel From Recycled Trash
The guys at the Sietch have a great little idea here, making their own solar thermal collector with spare parts and trash readily available in any scrap yard worldwide. This would be good if the SHTF and we had to live off the grid. Enjoy. Let us know if you build your own.
Materials needed:
Water
2 buckets
Drill (with both drill bits and screw bits)
Some scissors
A saw (a simple hand saw will do)
Some wood
A pane of glass.
The back of a small refrigerator.
12 feet of air pump hose used in fish tanks
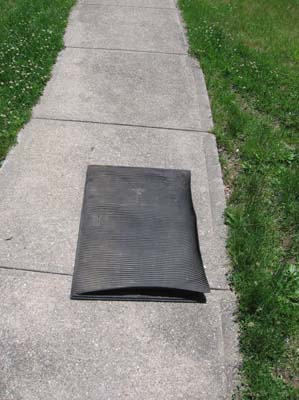
Backing material (we used an old door mat)
A box of wood screws
Aluminum Foil
Role of duct tape
Angle Cutter (or hack saw)
Time: This project took about 3 hours of constructions time. It took a couple weeks to find all the parts.
Now onto the project. The first thing we did was collect all of the parts.
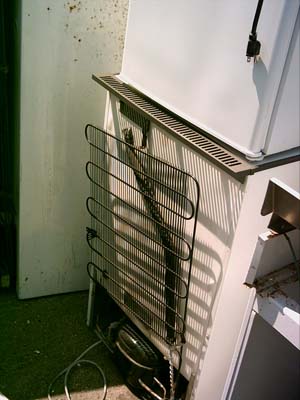
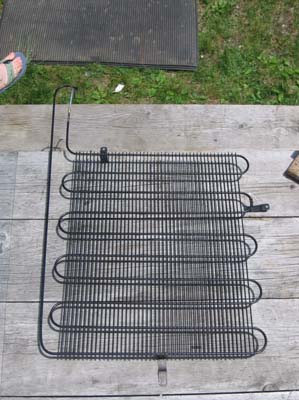
Our local dump has a coolant removal program that has refrigerators and dehumidifiers that they remove old freon from. With this in mind I found the perfect heat collector. The back of a fridge is basically a heat dispersal system, with a slight modification is can be used to collect large amounts of heat.
Make sure that the freon, or other coolant has been removed, and cut the grill off at the base, near the large coolant holder.
There was an old couch that had been run over by one of the large dump plows, the inside wood was the perfect size for the frame.

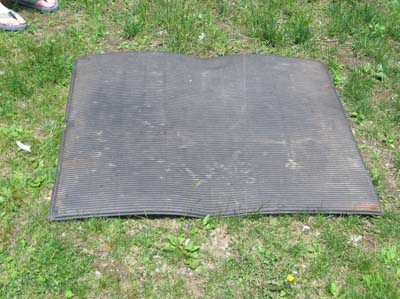
I found a pane of glass and an old rubber door mat that made the perfect backing and front.
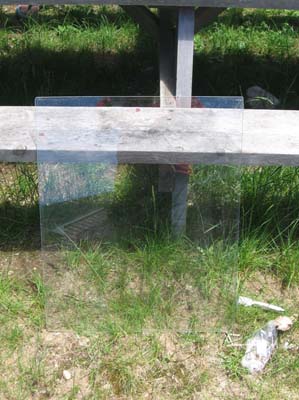
The glass was a real find, and may be the only part of the panel that may need to be purchased. Make sure your glass is big enough to fit over your collector and have enough room to attach it to the frame.
The door mat was HUGE, so I had to cut it in half. Funny thing seems there was a lot of nasty black goo, and a metal sheet in the middle. Who knew. Remove the metal plate (or cut it in half as well) and leave the goo.
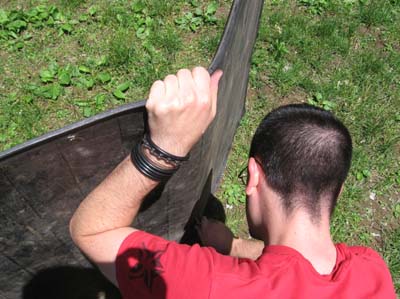
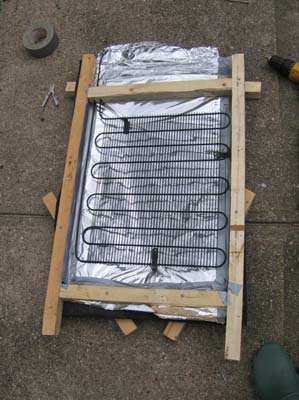
Once The backing was cut to size, it was time to start building the frame.
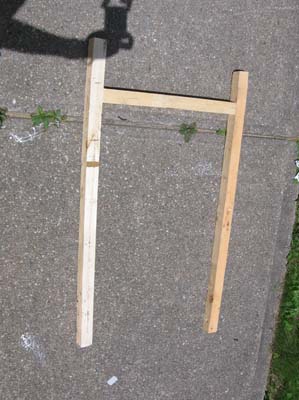
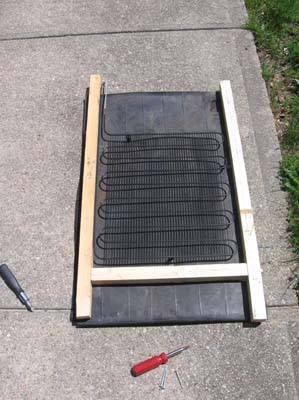
As you can see I sort of built the frame around the collector, leaving enough backing to hold it all together.
The frame is held on by building a similar frame on the back and driving large wood screws through the front frame, the backing and into the back frame.
I added some foil to the backing. The reason for this is that counter to what you would think, you do not want the backing to warm up. You only want the collector to absorb heat (it was so nice of the fridge company to paint it black for us). The foil will take any sun that was not absorbed by the collector on the first pass and bounce it back over the collector for another try at absorption. The glass cover will keep all the heat inside the panel for further absorption.
Light can pass through glass, but heat can not.
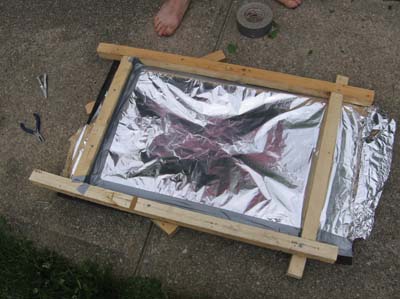
Notice how duct tape was used on the inside to seal all cracks, you could use caulk but I didn’t have any so I used the cheapest option. It worked well, and held the foil in place.

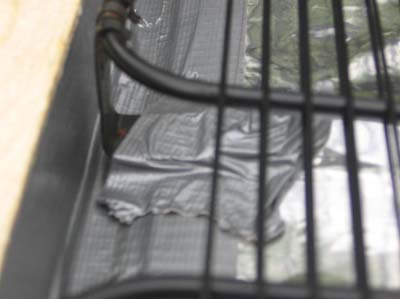
Next we cut some notches for the entry and return ports to the collector.
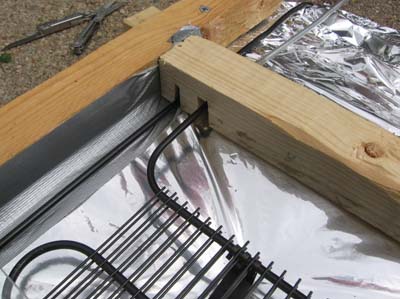
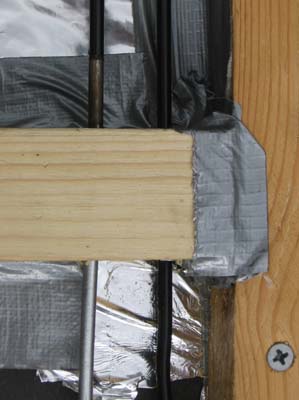
Note again the use of duct tape to seal cracks.
I got some air pump hose from the local fish store and attached them to the end of the entry and return ports.


The duct tape was applied to make sure it was a tight fit, it was later removed as it was not needed.
Next we attached the collector to the backing, using the mounting brackets that came on the fridge and some duct tape. If you wanted you could use some screws and wood, but I found the tape and the natural tension of the construction to be enough to hold it in place.
Lastly we attach the glass to the top. This serves to trap all the infrared radiation from the sun inside our panel where our collector will absorb it. Again light can pass through glass, but heat can not.
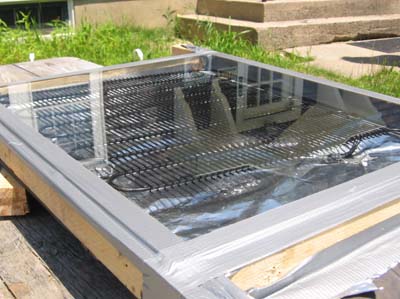
As you can see simple duct tape is enough to hold it on. I would recommend using some sort of mounting bracket however as after a couple days in the sun the tape started to droop allowing the glass to slide off. A few screws would solve this, but I am cheap so I just put new tape on.
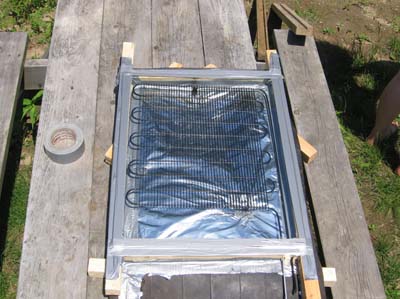
Set your panel up at an angle so that it catches the most sun.

Here is the gross part, put one end of the hose into your bucket of cold water, and make sure it is at the bottom of the bucket, next grab the return hose and start sucking. That’s right, unfortunately you have to prime the panel by getting some water into it. This can be done without getting water in your mouth, but inevitably I sucked just a little too hard and ended up with a mouth full of nasty water. I would recommend having a friend do this part. 🙂
Set your cold water bucket (source) up higher than your warm water bucket (return) and the whole thing will gravity siphon. Due to the design of this collector (both ports return to the same location on the panel) it will not thermo siphon. For that to happen I would need to cut the long return pipe and have it exit at the top of the panel.
A word of warning, this panel works VERY WELL. We tested it on a very sunny day and within seconds the water coming out of the panel was hot enough TO SCALD. I burned my fingers. This very hot water is only formed when the water inside the panel is allowed to sit for about a minute without moving. If the water is moving (do to the gravity siphon) the water exiting the return pipe is about 110 degrees, and while hot, will not burn you.
The water does not flow through the panel very fast (as the pipes are very small) but that is sort of a good thing as it allows the water to heat up a lot on its journey through the collector. It does take a while to heat up a 5 gallon bucket of water, I ended up building an insulated return bucket that was all black and sealed on the top except for the port where the water tube enters. This kept the returned hot water hot long enough to be of use.
I let this guy run for a couple of hours one hot sunny day and heated up a five gallon bucket of cold water (measured at 70 degrees F) to over 110 degrees F. The temp that day was about 76 degrees F. If the water is allowed to sit in the panel for several minutes and then forced out (by blowing in one of the hoses) the water was measure at 170 degrees F. All in all we are much happier with the performance (and cost) of this panel. It performs much better than the previous one.
Our next modifications to this design will be to alter the return port so that it will thermo siphon, in this way the return hose can be fed into the source bucket and the water will continually circulate in the panel getting hotter and hotter. We have also talked about adding mirrors to the panel to concentrate more heat. Our goal is to boil water. This entire project cost less than five dollars, as I already had the screws, and the duct tape. The only thing I purchased was the air hose, which cost $3.76.
Enjoy the hot water.
[source]
Learn How to Tie 12 Useful Knots with This Visual Guide
If the only knot you know involves tying your shoes, then this infographic provides clear, step-by-step instructions on tying some of the most useful knots out there. This is a great little chart to keep around for reference and it explains the best uses for each knot.
Do you know of some great uses for these knots that aren’t mentioned? Let us know in the comments!

[source]
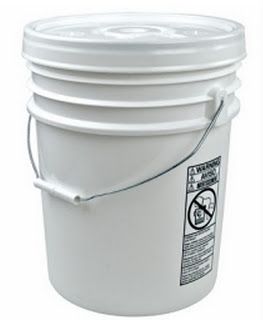
5 Gallon Bucket Storage Tip
Here’s a handy tip when you are stockpiling your survival and prepper supplies, store charcoal in 5 gallon buckets.
- 1 Bag of Charcoal Briquettes will make it possible for you to cook 1 Meal a Day for a whole month.
- 5 Gallon Bucket with lid.
- (Optional) Add a bottle of starter fluid and some matches/fire starter to each bucket.
It’s a great storage item to have on hand during any crisis. Now you’re ready!
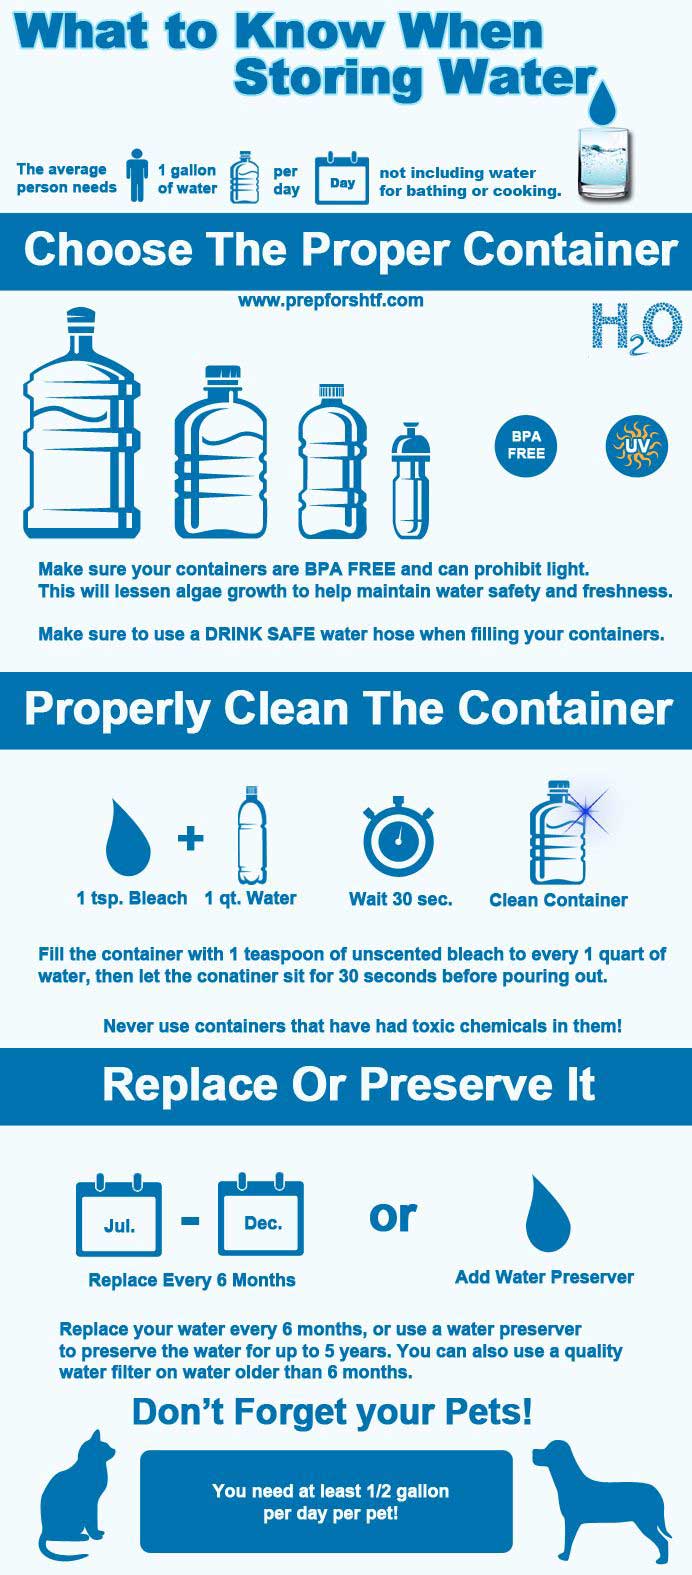
What To Know When Storing Water
This is a handy infographic on what you should know when storing water. Print, save or share this for future use. Knowledge is the first step in prepping for survival.
Essentials For Any Adventure
NAVIGATION
The first category for these essentials is going to be navigation. You may not think you will need this if you are going some place that you think you know. This thinking could be very dangerous should you get disoriented or lost. With modern technology many people use handheld GPS to navigate. These are excellent tools to use for general navigation and being able to backtrack or get back to a specific location. I generally use a basic GPS when I am out or even use the app Trimble Outdoors Navigator for short local trips. I really like GPS but if you are going to use it I strongly recommend carrying extra batteries. Even if you are using electronic navigation you should always carry a map and compass as a backup. This is important because batteries can die and electronics can fail. When you do carry a map and compass you will want to keep it in a waterproof container or bag to keep it dry.
FIRST AID
The next item you will want to carry on you is first aid supplies. In this kit you will want to keep all the basics for minor injuries and for more serious injuries or activity specific items. In this kit you will also want to keep extra medication if you are on any life sustaining medications. If you would get lost you do not want to be without things such as insulin for a diabetic or an inhaler if you have asthma. You will want to keep these items in their original containers. If you have to use anything in this kit you will want to replace it before your next trip.
PROPER CLOTHING
The next thing you need is protection from the elements. Typically you want to be prepared for the extremes for the season you are going out in. Dressing in layers will help you to be prepared for highs and lows in temperatures. You will also want to be prepared for things such as rain, snow, or keeping the sun off of you. Sunscreen is very important in the summer to keep yourself from getting too much sun light and possibly getting sun poisoning.
ILLUMINATION
Having some kind of light for illumination will be another major concern. I always carry at least a flash light and extra batteries on me when I go out. Even if you plan on being home before dark the situation could be out of your control and change that. Being left in the dark is a major problem for trying to remain safe. A flashlight can also give you a little bit of piece of mind if you were to get stuck out in the dark. This can be used to watch where you are walking, checking out a small cave to use for shelter, or even just for being able to read your map.
FIRE
Keeping several items on you that you can use to start a fire is also very important. I normally like to keep 2-3 options with me for starting a fire. This can be as simple as keeping a lighter, some waterproof matches, and a flint and steel with you. If you were to get lost or stuck in the woods fire is very important for several reasons. It can keep you warm, help you to purify water, and also to keep animals away. Fire is very important and is one thing you definitely don’t want to be without. You will also want to practice starting a fire with these items every once in a while. A flint and steel is worthless if you don’t know how to use it efficiently.
TOOLS
The main tool you should carry at a bare minimum is a sharp and reliable knife. There are ways to make tools even a knife in the outdoors but you would be amazed at the importance of having a knife. Other tools such as a multi-tool, duct tape, and activity specific tools are always good to have on you. For example if you are out on a mountain bike having the tools to do minor repairs can save you if you get a flat tire or broken part on the trail. These tools can change based on what you are doing but at a minimum I would keep a knife on me at all times.

WATER AND FOOD
Having some water and some extra food is also very important. Water is something you can only live for about two days without. Having water with you and also a way to procure more if needed is very important. It is normally recommended that you have two liters of water per person per day. Food is slightly less important since you can live longer without it, but you do need calories to fuel your body when you are active. I usually keep at least a small snack with me even on short trips.
SHELTER
Shelter is another very important item to have on you or being able to make. The shelter you take with you will depend on the activity you are doing. If you are planning on staying overnight you will probably already have some kind of shelter. In all other situations carrying a small emergency sleeping sac or emergency blanket would be a good idea. In an emergency a space blanket will give you something to try to keep body heat in or to stay dry.
SIGNALING
Some sort of signaling device is important since it can help you be rescued sooner. This could simply consist of a signalling mirror or emergency whistle. The mirrors will allow you to signal to someone at a distance but could be less effective if there is a lack of sun or light sources. An emergency whistle is going to allow you to make noise and the sound will typically carry a distance to allow rescuers to know where you are at. SPOT Personal Trackers can also lead rescuers to your location if something were to happen and it works like a GPS.
PLAN
The last thing I would add to this list is a plan. Letting someone know where you are going, what area you will be in, and what your plans are is always a great idea. If someone knows when to expect you and you don’t return they will know something is wrong. This will allow people to start looking for you sooner in an emergency, and let them know where to start looking for you.
This list is not set in stone and will need to be tweaked for the specific situation and activity you are going to partake in. I also have not listed these items in the order of importance, but this is because I want you to remember that all of these items are very important when venturing into the outdoors. Later we will go into each category in more detail. I hope you enjoyed the post and will remember these essentials on your next adventure.
[source] Essentials for any Adventure – OffHiking.Com. Continue reading