Staying Safe in an Earthquake – How to Be Prepared

Nobody wants to confront a major natural disaster. Yet some disasters – hurricanes, blizzards, and tornadoes, to name a few – come with warning signs, allowing for minor preparation and escape.

Earthquakes, on the other hand, happen immediately and with no warning. They are so all-consuming and widespread that you cannot jump in the car and escape them.

If you are in the impact zone, you will be affected. But the degree to which you are affected can be minimized. It all depends on how prepared you are for the quake. Preparation does take some time, but you will reap the benefits many times over in the event of a major earthquake.

What Is a Quake Like?

Ordinary life immediately precedes an earthquake. You are washing the dishes, watching TV, doing homework, or putting on a helmet for a bike ride. Then you feel that initial jolt.

You may not realize it at first, thinking that it is something else – that someone dropped something heavy. Then you become aware of the noises, of chandeliers rattling, the house frame squeaking, glasses dropping and breaking, car alarms going off.

If you are indoors, items that are not secured – books, TVs, glassware, and lamps – will topple and fall. Hanging items will begin to swing. As these things are falling, you become aware that you might just become the victim of one of these falling things.

If you are outdoors, trees sway and water sloshes out of swimming pools.

The first jerk is followed by several more back-and-forth jerks. You may find it hard to stand.

Even though most earthquakes last only seconds – rarely more than thirty seconds – it will feel like forever.

Right after the shaking stops, the noise continues: dogs barking, people shouting, alarms ringing. Milder aftershocks continue for minutes or hours. Your electricity has probably gone out. Water may not be safe to drink, or water mains may be broken. Gas lines may erupt.

You have just experienced an earthquake measuring 7.0 or greater on the Richter scale.1

Predicting Quakes

Unfortunately, no one can predict earthquakes. According to the U.S. Geological Survey (USGS), no scientists have ever predicted a major earthquake, nor are any scientists expected to be able to do so in the foreseeable future.

The best that scientists can do is produce tables that calculate the probability that an earthquake may occur. The milder the earthquake, the greater the probability that it will occur within the next 30 years. More severe quakes measuring 7.0 or higher on the Richter scale – those truly life-altering, disastrous quakes – are less probable to happen.

For example, because Southern California already experiences quakes between 5 and 6 on the Richter scale about four times per year, there is a 100 percent chance of another quake of similar strength happening within the next 30 years. However, because major magnitude-7.5 quakes have happened about once every 87 years, Southern California has only a 36 percent chance of another one happening in the next 30 years.2

Be Ready: Making an Earthquake Preparedness Kit

To help make your recovery from an earthquake safer and more comfortable, you should stock up your home with a set of essential preparedness items. Keep these items stored in a clean, dry place.3

Essential Items

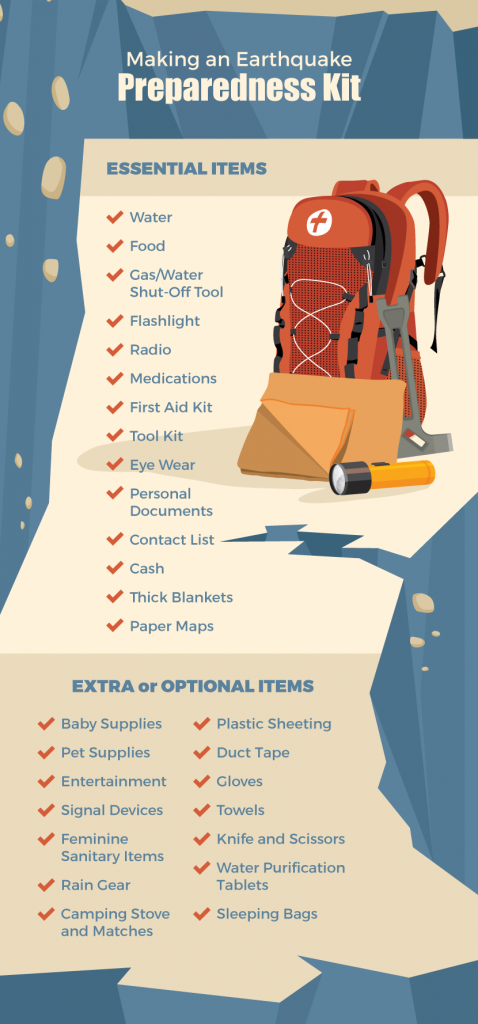
  • Water: One gallon per person for every day. Provide for a two-week supply of water.
  • Food: Non-perishable items such as canned food or dry camping food that can be reconstituted with water. Be sure to have a can opener as well.
  • Gas/Water Shutoff Tool: This specialized wrench fits gas and water shutoff valves and can be purchased at your local home improvement or hardware store.
  • Flashlight: Have both battery-powered and crank flashlights. Keep a full set of fresh batteries on hand, too.
  • Radio: Purchase a hand-crank radio.
  • Medications: These are essential daily prescription items that are needed to maintain regular health.
  • First-Aid Kit: Basic kit that has gauze, adhesive bandages, antiseptic, aspirin or ibuprofen, and heat packs.
  • Tool Kit: Small tool kit with screwdrivers, pliers, and a hammer. If you wish, you may substitute a multipurpose tool.
  • Eyewear: Extra glasses, contact lenses, and solution.
  • Personal Documents: Assemble a fireproof lockbox with prescription slips, home and car titles, birth certificates, passports, and all insurance policies, including homeowner’s insurance policy.
  • Contact List: Written spreadsheet or other type of list of phone numbers and addresses of relatives, close associates, local hospitals, and police and fire stations.
  • Cash: Several hundred dollars in small bills.
  • Thick Blankets
  • Paper Maps: Detailed maps of your local area.

Extra or Optional Items

  • Baby Supplies: Bottles, formula, diapers, food.
  • Pet Supplies: Food, ID, collar, carrier.
  • Entertainment: Books, cards, board games.
  • Signal Devices: Whistle, air horn, flares.
  • Feminine Sanitary Items
  • Rain Gear
  • Camping Stove: Stove with extra propane canisters and waterproof matches.
  • Plastic Sheeting
  • Duct Tape
  • Gloves
  • Towels
  • Knife and Scissors
  • Water Purification: Tablets or bleach.
  • Sleeping Bags

How to Make Your Home Safer in Case the Big One Strikes

Chances are good that your home is not prepared for an earthquake. While your house may seem solid and safe, it is likely not ready for the rigors of a magnitude-7.0 earthquake. Undertake these projects now for a safer home:4

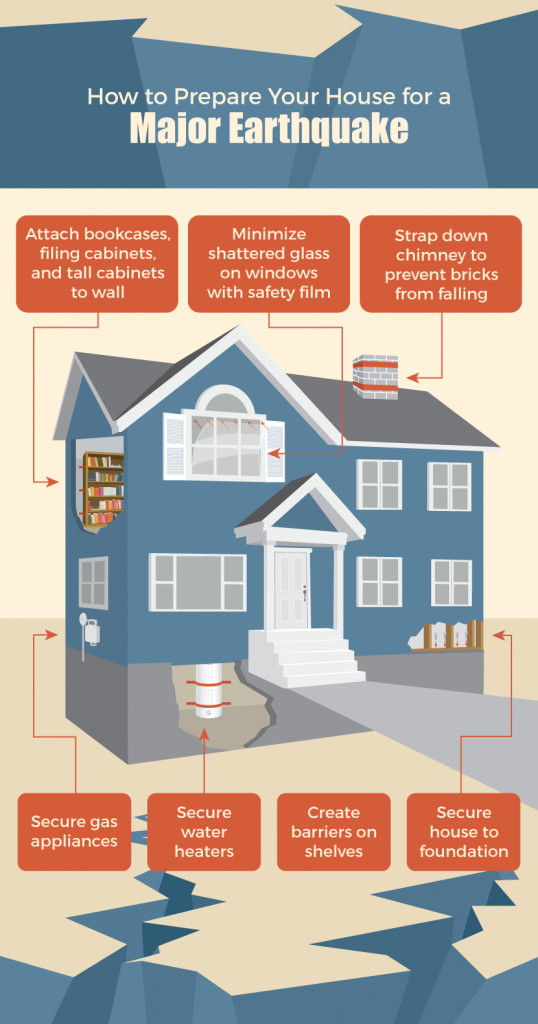
Secure Water Heaters

Secure heaters to walls with metal straps. These bands can be purchased as part of a kit, available at home improvement stores.

Attach Bookcases, Filing Cabinets, and Tall Cabinets to Wall

Affix any kind of furniture that can tip over to a wall stud, using a metal L-brace or a nylon strap.

Create Barriers on Shelves

Attach ledge barriers along the edges of shelves to prevent items from sliding off and falling.

Secure Gas Appliances

Attach flexible connections to allow appliances to shift without breaking their lines. As with the water heater, attach large gas appliances to the nearest wall.

Minimize Shattered Glass on Windows

Install clear or shaded safety film on windows. This will prevent glass from scattering across the floor.

Secure House to Foundation

Consult a contractor to install anchor bolts between the house framing and the foundation.

Strap Down Chimney

Attach reinforcing bars or metal straps to the chimney to prevent it from snapping and breaking off in the event of an earthquake.

During and After an Earthquake: Keeping Yourself and Your Family Safe

During The Quake5

DO:

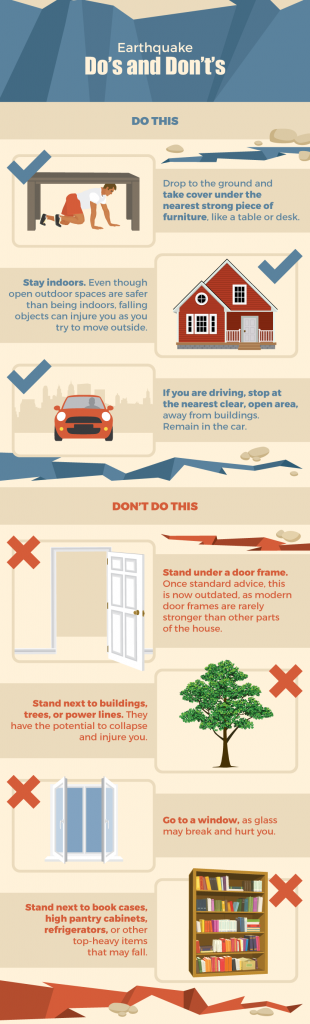
  • Drop to the ground and take cover under the nearest strong piece of furniture, like a table or desk.
  • Stay indoors. Even though open outdoor spaces are safer than being indoors, falling objects can injure you as you try to move outside.
  • If you are driving, stop at the nearest clear, open area, away from buildings. Remain in the car.

DO NOT:

  • Stand under a door frame. Once standard advice, this is now outdated, as modern door frames are rarely stronger than other parts of the house.
  • Stand next to buildings, trees, or power lines, which could collapse and injure you.
  • Go to a window, as glass may break and hurt you.
  • Stand next to book cases, high pantry cabinets, refrigerators, or other top-heavy items that may fall.

After The Quake

Even though the earthquake may last only seconds, the aftermath may go on for days or weeks to come. Follow these fifteen steps, in this order:

  1. Wait for the aftershocks to end.
  2. Check yourself for injuries first before assisting others.
  3. Put on shoes to protect yourself against broken glass.
  4. Check for fires and extinguish them immediately.
  5. Shut off natural gas and water lines.
  6. Move yourself and your family to the nearest open area.
  7. Open windows to ventilate your home.
  8. Check your house for structural damage.
  9. Begin gathering water from the water heater release valve, ice cube trays, and toilet tanks.
  10. Check sewer lines for damage before flushing the toilet.
  11. Inspect the chimney for cracks that may indicate potential collapse.
  12. Keep the freezer closed for as long as possible to retain the cold.
  13. Set up charcoal grill outside for cooking.
  14. Stay at home if at all possible. Roads will be impassable.
  15. Check your emergency radio for information.

Earthquakes are devastating events. Fortunately, you and your family can remain safe by following basic safety plans.


Source: Fix.com Blog

Sources:

  1. How Long Earthquakes Last – http://quake.utah.edu/regional-info/earthquake-faq
  2. Earthquake Probability – https://pubs.usgs.gov/fs/2015/3009/pdf/fs2015-3009.pdf
  3. Red Cross Earthquake Preparedness Kit – http://www.redcross.org/get-help/prepare-for-emergencies/be-red-cross-ready/get-a-kit
  4. 6. Prepare House for Earthquake – http://www.military.com/money/home-ownership/maintaining-your-home/tips-to-make-home-earthquake-ready.html
  5. Quake: Do This / Do Not Do This – http://www.nationalgeographic.com/environment/natural-disasters/earthquake-safety-tips/

Why It’s Important To Add A First Aid Kit To Your Survival Preps

Why It’s Important To Add A First Aid Kit To Your Survival Preps

You would think that everyone would understand the obvious, adding a first aid kit to your survival planning and preps. But like many things this is one survival item often overlooked.

Whether it’s a natural disaster, car crash or a zombie outbreak, medical treatment will always be needed in an emergency situation.

We suggest that you consider having at least 3 different types of first aid kits:

While kit contents will vary, your basic kit should include at least the following:

  • Bandages
  • Antibiotic ointment
  • Gauze pads
  • Iodine or similar prep pads
  • Alcohol prep pads
  • Butterfly bandages
  • Antibiotic ointment
  • Medical adhesive tape
  • Aspirin and/or non-aspirin pain relievers

The intermediate kit will include more of each of the above items, plus the following:

  • Larger adhesive bandages
  • Smelling salts or ammonia inhalants
  • Ace-type bandages for strains and sprains
  • Several sizes of sterile pads
  • Rolls of gauze
  • Antiseptic towlets
  • Thermometer
  • Snake bite poison extractor
  • Tweezers
  • Safety pins
  • Moleskin
  • Rubber (latex) gloves
  • Burn medication
  • Anti-itch treatment
  • Sun screen
  • Diarrhea medication
  • Eye drops
  • Basic first aid instructions

Your more extensive deluxe medical kit can be expected to include not only the above, but some or all of the following:

  • Special bandages, such as conforming, trauma and field dressings
  • Rubbing alcohol for sterilization
  • Hydrogen peroxide
  • Betadine
  • Scissors
  • Forceps
  • Scalpels
  • Hemostats
  • Sterile sutures, in several sizes
  • Wound probe
  • Mouth-to-mouth shield
  • Instant hot pack
  • Instant cold pack
  • Prep pads
  • Eye pads
  • Sponges
  • Cotton balls
  • Burn treatments
  • Dental tools
  • Splint materials
  • In-depth first aid/surgical guide
  • Cold medication
  • Decongestant
  • Antihistamine
  • Colloidal silver

If you need access to prescription medicines, you should consider stocking up on them now and adding these:

  • Broad spectrum antibiotic
  • Antibiotics for sinus infections, strep throat and other common “flu” ailments
  • Pain killers
  • Super Glue –  a way to deal with lacerations (a fairly common injury) other than just “band-aids.”
  •  Surgical stapler
  • Tampons and maxi pads as a way to apply pressure and control bleeding from a more serious injury.
  • Duct tape

Also, adding a medical encyclopedia with detail and instructions for basic surgical and other medical procedures would be good to have on hand. You might even invest in taking a First Aid training course at your local Junior College or continuing education center.

Year Zero Survival has a great selection of survival first aid kits for the home, car, and workplace.  Now is the time to act, be prepared.

Home Emergency & Disaster Safety Resource List

be ready for major storms and disasters

Weather can change dramatically and often quite suddenly too, causing severe destruction, injuries, and even fatalities. In the last few years especially, we have been witnessing increasingly violent weather phenomena. Fortunately, today’s improved weather services are often able to warn us of impending natural disasters well before they occur. This advance warning allows people to prepare themselves and their homes so that they can come out alive and safe.

In some cases, the best means of defense is to evacuate the area. This is often done when the scale of the disaster seems too tremendous to cope with. However, at other times people may not be able to evacuate, or during lesser emergencies, they may choose to stay at home and wait it out. In the latter situation, being properly prepared is essential. This means that at least some stages of preparation should be done well in advance, even before there is any warning about a natural disaster.

How to prepare your home from a number of natural disasters including tornadoes, hurricanes, earthquakes and more.

A key part of disaster safety is having a sufficient amount of supplies, as well as an emergency kit. A basic version is usually built to sustain each member of the household for a minimum of three days. The purpose of this is that people can very easily be trapped within a building without any signs of help for quite some time. A disaster kit typically includes a bountiful supply of water for drinking and cleaning, along with non-perishable canned or packaged foods, a can opener, a first aid kit, flashlights and batteries, cell phones and chargers, emergency phone numbers, and a radio. Other useful items to have are prescription medications, supplies for infants and pets, cash, matches, and personal hygiene items.

By creating this kit and packing it ahead of time, emergency preparation becomes much easier and quicker when a natural disaster is announced. It is equally important to have a predetermined action plan so that each person in the house knows exactly what to do when a disaster strikes. Without a proper action plan, people often tend to first panic, and then act illogically, which may put them directly in the path of danger. Examples of emergency plans include fire drills or deciding on an emergency meeting spot. At least two people in the household should be trained in CPR and know how to deliver first aid in case of medical emergencies. Learn more about home preparedness during natural disasters with some of these helpful resources.

Floods

Hurricanes

Tornadoes

Earthquakes

Heat Waves

Fires

Severe Thunderstorms

Winter Storms & Blizzards

General Disaster Preparedness

[source]

32 Survival Uses For Trash Bags


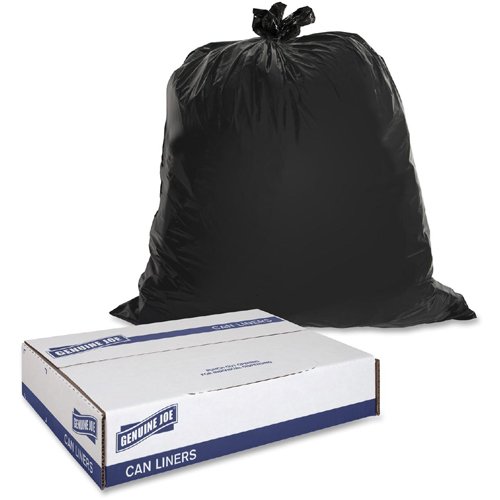
Heavy-duty plastic bags, like those meant for trash and yard debris, can be used in a surprisingly wide variety of ways to help ensure your survival during a disaster situation like an earthquake, hurricane, or even Zombie outbreak. These light-weight, extremely low cost, readily available, and incredibly versatile tools should be in every B.O.B. (Bug Out Bag)  and Emergency kit.

Trash Bags

We’ve listed a few of our favorite survival uses for plastic bags, but keep in mind that this everyday item is only limited by your imagination… and whether or not you happen to have a few on hand.


MEDICAL 

While it might be the first thing that comes to mind when you think of a trash bag or yard debris bag; a clean, unused bag can be used for a wide variety of medical purposes.

Waterproof bandages – After applying the appropriate bandage to a wound, place a layer of plastic bag over the bandage to protect it from outside moisture and contamination. Secure the protective covering properly, and remove and change the bandage and covering as needed.

Fight hypothermia – The potentially deadly effects of hypothermia can be battled by utilizing a large plastic bag as a “hot box” or additional layer to trap heat next to the body. Simply cut a hole for your head (and arms if needed), and wear the bag as a pullover. You can also simply drape the bag over your body, as you might a survival blanket.

Cold Compress – Fill with snow, ice, or cold water. Fold or tie off bag and apply as needed.

Handle medical waste – Plastic bags can be utilized as gloves for handling medical waste and contaminates such as blood, organs, vomit, and fecal matter… though we’re not sure why you’d handle the last two, unless you’re cleaning up a mess. Check the bag for punctures and/or rips BEFORE you try them on as gloves.

Tourniquet – Like many other flexible materials, large plastic bags can be used as a makeshift tourniquet. While it wont be the best thing for long term use, it can make a world of difference for the short run… remember it’s all about surviving the moment, you can worry about the long-term later.

Sling – Plastic bags can be used to support and immobilize a broken or wounded arm.


WATER

Containers come in handy when you need to collect, transport, and/or treat water, but there’s even more that you can use them for when it comes to water.

Collection/Storage – Lining a trash can, hole in the ground, or other receptacle with a clean plastic bag makes the collection of rainwater safer than simply letting it fill into a potentially contaminated container. Plastic bags can also be used as scoops for collecting water from pools, streams, and other bodies of water.

Solar Still – Fully enclose the leafy green area of a tree branch, securing the plastic bag tightly at the opening. Let it sit in the sun for a few hours as the condensation builds within the bag . Carefully remove the bag when ready, and repeat the process as needed. This method doesn’t typically result in large amounts of liquid, but every little bit counts… especially during a survival situation.

Transport – Creating a sturdy double walled bag for transporting water can be done in just a few steps. Cut or tear open the sealed end of a plastic bag so you are left with a tube. Twist or tie a knot in the center of the bag so you are left with two open ends and a shape like an hourglass. Fold one side over the other and you’re left with a double walled water carrying device.

Filter/Purify – Water isn’t any good to you if it isn’t safe to drink, but a simple plastic bag can go a long way to making water potable. Learn other important tips and tricks for water filtration and purification here: H20 (Water).

Gravity Filter – Gravity filters are simple multi-layer systems that remove the majority of contaminates, and you can easily make one at home. Double wall a plastic bag as seen in the WATER: Transportation portion of this article. Cut a small “spout” hole into the lowest point possible, without destroying the integrity of the bag too much. Reinforce the spout with a bit of duct tape so it doesn’t split when filled. Next, place a coffee filter, bandana, or similar cloth or material for filtering inside the bag and up against the spout. Then carefully pack and layer the following materials into the lower portion of the bag: 2″-3″ finely crushed charcoal, 2″ fine sand, 1″ small stones, 1″fine sand, and 1″ moss, grass, or other porous material. Gently fill the bag with water, tie a knot into the top, hang it up, and allow it to do the job.

Solar Treatment / SODIS – This can be a fairly unpredictable method for treating water, especially during cloudy or winter weather, but when done properly, it can work like a charm. The SODIS method relies on the power of solar rays to purify water; this is only helpful if larger contaminates have first been removed with basic filtration methods like the one listed above. Utilizing a large plastic bag for this method should be a last resort, as not all bags are made from food grade materials. This method is only effective when using CLEAR plastic, tinted or colored materials will not work. 

Solar Shower – Fill a darkly colored plastic bag with water, hang it above head height, let it sit in the sun for a bit to warm up, poke a couple of small holes in the bottom, and enjoy a nice warm shower.


FOOD

Collecting, capturing, and storing food can be difficult during a survival situation, but a trash bag can make the task a whole lot easier.

Collection – Whether you’re raiding the wilds, a nearby farm, or grocery store, containers come in handy… and that’s just what a trash bag is, a container. No matter what you find or where you find it, you’ll need a way to carry your collected goods.

Storage – Just like with water, lining a trash can, hole in the ground, or other receptacle with a clean plastic bag makes the storage of food much safer than placing it into a potentially contaminated or uncovered container. Plastic bags can be sealed by twisting the top and adding a bit of cordage, or simply by tying a knot in the top of the bag itself.

In addition to being a great lightweight container for food items, plastic bags can be tied and hung away from the ground and the prying hands of Zombies, other survivors, and wild animals. A well-sealed bag can offer the advantage of a longer shelf-life of some foods… as long as you store it in a cool dry place.

Trapping Set them as netting for bugs and fish, or use them as sacks to quickly and more easily bag a bird, squirrel, or other small animal that lends itself to capture.


SHELTER

From additional security to being used as shelters themselves, heavy-duty plastic bags can be utilized in a number of ways when it comes to provide protection from the elements and the undead.

Tarp Tent – Just like an emergency blanket, poncho, or tarp, a plastic bag can be used to create basic Tarp Tent style shelters and protective covers. Cutting the bag down the length of one side, and slicing it along the bottom, can double the square feet of material available for your shelter or cover. Make sure to carry a bit of paracord with you to help when securing your shelter.

Tube Tent – Tear or cut open the sealed end of a large plastic bag, duct tape the tube to another bag, slide yourself inside, and rest well. The ambient heat from your body will build and help to keep your body warm… even in wet and windy weather.

Ground Cover – This one is as simple as it sounds, but it’s important too… especially when you’re sleeping in the wild. Keeping your body away from moisture and the cold of the ground can greatly increase your chances of survival.

Window Black Out – Just because you’re home doesn’t mean you have to look like you are. Blacking out your windows is an important step to ensuring you aren’t hassled by outsiders or spotted by Zombies in a post apocalyptic world. Covering your windows with black trash bags can keep the light from getting out, and you from being seen.

Quarantine – Duct tape and plastic bags can be used to create a fairly effective quarantine area, whether at home or in the field. Simply seal off an area with the bags and duct tape, and make sure it isn’t breached. You’ll need to fully cover any potential areas of transmission, such as heating vents, windows, doorways, etc. 


GEAR/OTHER

Beyond water and food collection, medical assistance, and shelter; plastic trash bags can be utilized as a substitute for many types of gear.

Rain Poncho – The only downside to wearing a plastic bag as a rain poncho is that they don’t breathe. This means that while it will hold the rain and snow out, it will also hold your sweat in. Pay close attention to your body temperature and water-loss when wearing a non-permeable covering like this.

Gear Bag / Dry Bag– Twist the bag a few times just above the line of the gear inside. Fold the excess over top of the bag and carry it upside down. This should create a relatively water-tight seal that still allows for somewhat easy access to important gear and supplies.

Water-proof Boots/Gaiters – Applied over boots, and even bare or minimally covered feet, plastic bags make an excellent material for water-proofing and protection from the elements. They can also be wrapped around the shins or legs as makeshift gaiters for travel through swampy or other exceedingly wet areas.

Flotation Device – Filled with air and twisted shut, heavy-duty trash bags are extremely lightweight and buoyant. They can be used to assist in crossing deep water by simply being held onto, or they can be applied to a raft or other flotation device.

Sleeping Bag / Mattress – Similar to being used as a Tube Tent, large plastic bags make great sleeping bags when stuff with materials like leaves, fabric, stuffing, packing peanuts, etc. Fill the bag as full as possible and crawl in, or use it as a sleeping surface for the night. Not only will this method protect you from the cold, it will help to keep away potential contaminates as well.

Washing Machine – Placing garments into a plastic bag that has been partially filled with water and soap, can actually make a world of difference when attempting to get your clothes clean. Once everything is in there, just jostle it around, empty it out, rinse your clothing, and hang them to dry. Remember, proper hygiene can go a long way to keeping you alive.

Restroom – Sometimes the plumbing goes out, but that doesn’t mean you don’t need to use the bathroom. Placed into a drained toilet or into a 5 gallon bucket, plastic bags can make dealing with waste, a much cleaner and easier process. These can also be used to line latrines when you’re worried about contaminating a nearby water source.


OTHER MISC USES

Creating smoke for signal fires, lashing, patches for clothing and other gear, And of course… collecting and removing refuse, among about a million other uses.

Because not all trash bags are made with the intent of heavy-duty use, it’s a good idea to grab a few construction grade bags from your local hardware store or garden center. Keep a few on hand in your Bug Out Bag and E-kits and utilize them as needed… though we hope you never have to.


[source]

Hurricane Irma Disaster – A Huge Damage to the Economy

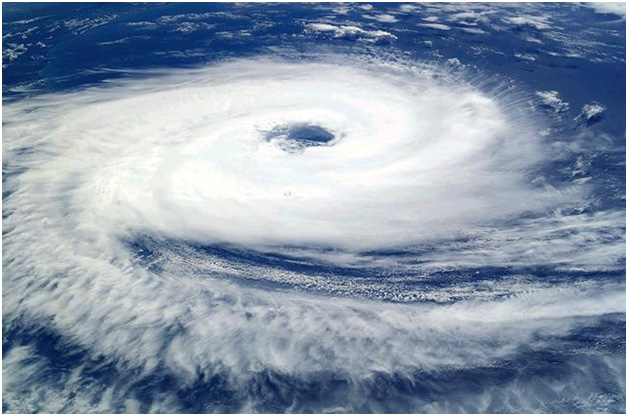
RMA is the name of a category 5 hurricane, one of the worst hurricanes formed in the Atlantic Ocean in 2017. The last horrible hurricane of such intensity, experienced by the U.S in 2005, was when Katrina shook its coastal areas.

Hurricane Irma Damages

It started on the 30th of August 2017 and raged at 185 miles/per hour for 37 hours. It is recorded to be the longest and fiercest hurricane of the Atlantic Ocean.

Irma originated in the deep tropics near the islands of Cape Verde and quickly intensified.

Regions Affected by Hurricane Irma:

The most catastrophic damage caused by Irma as a category 5 hurricane was experienced by the following regions:

  • Barbuda
  • Saint Martin
  • Anguilla
  • Virgin Islands
  • Saint Barthelemy

Impact of the Tropical Hurricane Irma

Overall Damage of this hurricane is calculated at more than $30 billion in 11 days. Some of the Catastrophes are mentioned below along with regions:

  • Florida: 3 million Floridan lost the power supply. And more than 6.5 million people migrated.
  • Irma caused a massive destruction in the Caribbean.
  • Hurricane Irma wreaked havoc in British and American Virgin Islands.
  • The ST Martin, Islands on the Dutch half, Island of Barbuda were devastated.
  • Puerto Rico was safe from the direct encounter, but still suffered from electricity and power shortage.

For more detailed facts and figures, check very comprehensive infographic produced by HuntingMark.com.

HuntingMark
 

Irma Broke the Records:


This tropical hurricane broke many global records:

  1. This was the first storm with wind speed of 185 miles/HR in the Atlantic Ocean, and it remained for more than a day. (1 day and 17 hours to be exact).
  2. It broke the records of low pressure, that is, 914 millibars.
  3. 7th September was the most active day for the Atlantic hurricanes on record.
  4. Storm Irma raged as 5th category storm for 3 days turning into the 4th category.
  5. This hurricane turned into a category 2 storm and finally dissipated on the evening 12th of September.

A Survivalists Guide To Body Armor

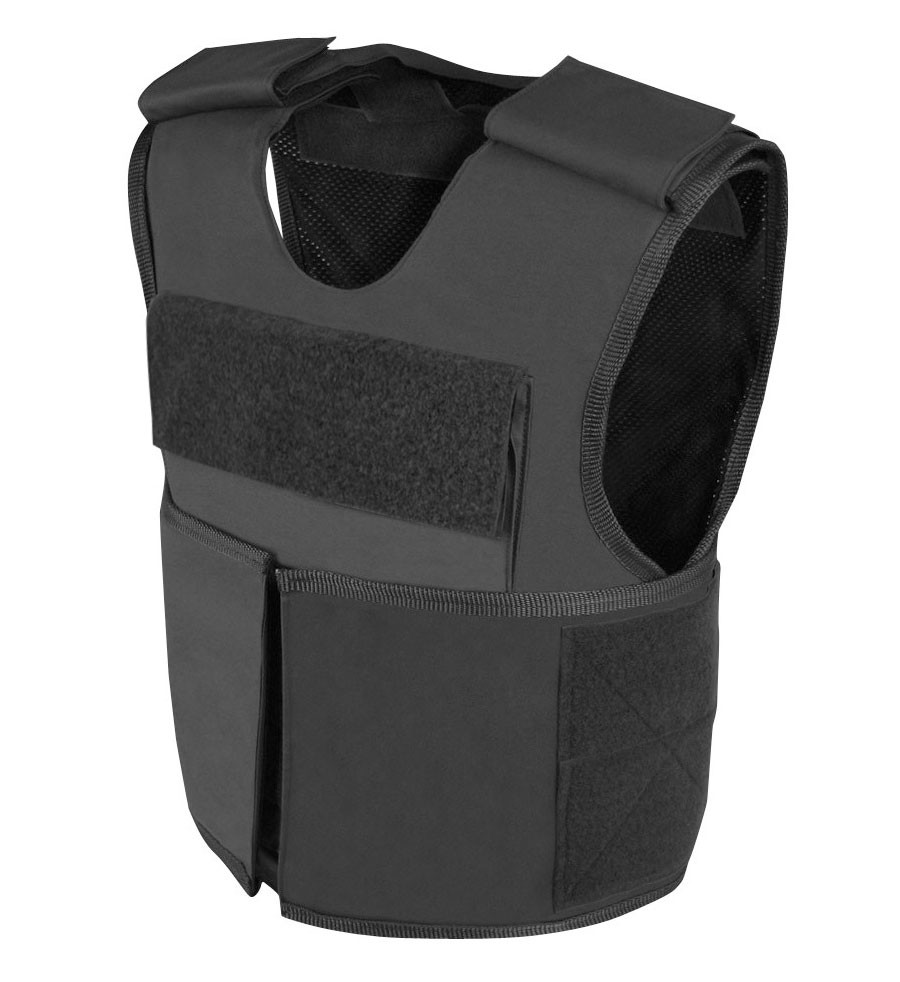
Owning body armor these days makes a lot of sense for civilians as well as professionals in the security industry. With crime statistics through the roof in recent years, frequent terrorist attacks, violent protests and demonstrations – more and more people are viewing the purchase of a tactical vest as a sound investment.

It’s hard to put into words just how important body armor is, but let’s just say – it can be the difference between life and death in a number of scenarios. Still, many survivalists are quick to buy different type of guns and ammo, but overlook protective vests. However, it’s really this simple – if you own a gun or plan on owning a gun, you should also have a bulletproof vest in your house.

It’s a common trait of all survivalist to plan ahead, to be prepared. Equipping yourself with adequate protection helps you stay safe in specific circumstances. You need to understand how body armor works, what it can and cannot do for you against different threats, and how to select the best one for you.

Types and Styles of Body Armor

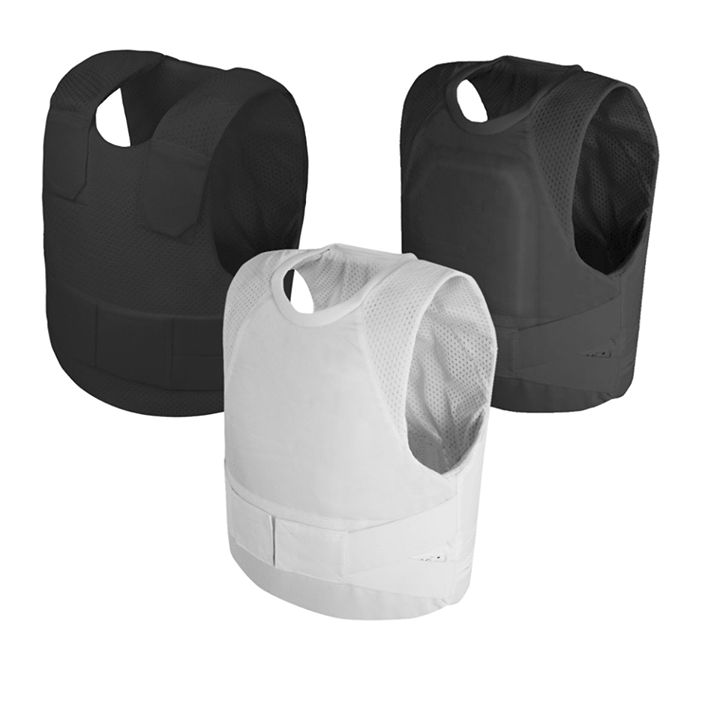
While there are 6 levels of protection in ballistic armor, there are three forms of armor platforms: covert,overt armor and tactical overt.

Covert armor is worn under the clothing and can be easily concealed. It is lightweight and flexible, making it idea for prolonged use. Recent advancements in the development of body armor have allowed the use of breathable materials that improve heat transfer, making it more comfortable for the wearer.

Overt armor’s main function is to protect the wearer and can also be used to intimidate the opposition. It comes in a variety of colors, styles and levels, although it is usually used when a high threat level exists. Overt armor is typically bulkier and heavier than covert and it conveys a sense of authority. Apart from offering more protection, its other main benefit is that it’s easy and quick to put on and take off.

Tactical armor is worn in a situation that is associated with a high degree of risks that prove too much for soft armor to handle. This means that it is likely for armor-piercing rounds to be used. This type of system relies on a combination of overt armor fitted with additional SAPI (hard ceramic) plates and panels that cover the neck, arms, thighs and groin area for maximum safety.

Levels of protection

Body Armor is rated at different levels based on the NIJ standards. Because the protection of the armor increases with the level, so does its weight and the cost. Ballistic body armor is rated by the Department of Justice against different round calibers. Basic soft body armor does not stop penetration from sharp objects and weapons, but it will stop thick-bladed stabs and offers protection against slashing attacks. These makes them suitable to wear in places, where there are large gatherings of people (protests, marches, during riots, etc.) as in close quarters – people often use concealable but deadly weapons, such as knives, broken bottles, screw drivers or other piercing objects to cause harm.

Survivalists who want to ensure they receive maximum protection can go for a combination of ballistic and stab proof systems that are available for purchase online but they are more expensive. In terms of bullets – pistol bullets are easier to stop than rifle bullets, because they are slower. This type of combined protection gives the best chances of surviving in risky situations, such as riots or a scenario, where you might need to travel from point A to point B while facing attacks and poor weather conditions.

Basic levels, such as Level IIA. (Level I is not in use anymore) through IIIA are considered soft body armor types and don’t always offer sufficient protection in high-tension situations, while Level IV provides the fullest protection against pistol and melee weapons but is bulkier and heavier on the wearer.

Do some research and compare the different options on body armor available online. Make sure you measure correctly and select a vest that fits well, is lightweight and comfortable apart from offering a high level of protection – these are just a few of the ground rules that every survivalist should stick to when shopping for body armor.

Forget Farm To Fork – Urban Foraging: The Ultimate in Local Eating

Many of us have grown accustomed to making a list of foods we want, then heading to the grocery store to buy them. Others have embraced the trend of community-supported agriculture by signing up for shares or participating in community gardens. And then there are the daring folks who march out into urban environments to scope out their next meal.

People who are unfamiliar with the practice of urban foraging may view it as the work of a few unconventional individuals, but in reality, people have been foraging since the beginning of civilization. Today, the practice is enjoying a worldwide resurgence. Even the restaurant scene has gotten in on the action, as more and more chefs incorporate foraged foods into their menus to produce unique and sustainable fare.1

Foraging may also aid national efforts to reduce hunger. University of California, Berkeley, researchers are experimenting with a program that maps edible plants in low-income neighborhoods to empower local residents to find food near their homes.2 Many foragers also donate some or all of their finds to local food pantries.

If you want to know more kitchen tips, you better visit this site.

The basic concept behind urban foraging is simple: search for and gather fresh food in urban spaces.3 Practitioners embrace foraging as a way to reconnect with the natural world, obtain free food, reduce their eco-footprint, diversify their diets, and learn to look at urban spaces in new ways. Not to be confused with dumpster diving, foraging focuses on obtaining fresh food straight from the source – whether from trees, bushes, edible weeds, or other plants found in parks, abandoned lots, and local neighborhoods.4

Ever felt curious about seeking out your own food in your local environment but held back because you didn’t know where to start? Consider this your cheat sheet for entering the wild world of urban foraging.

Know What’s Safe to Eat

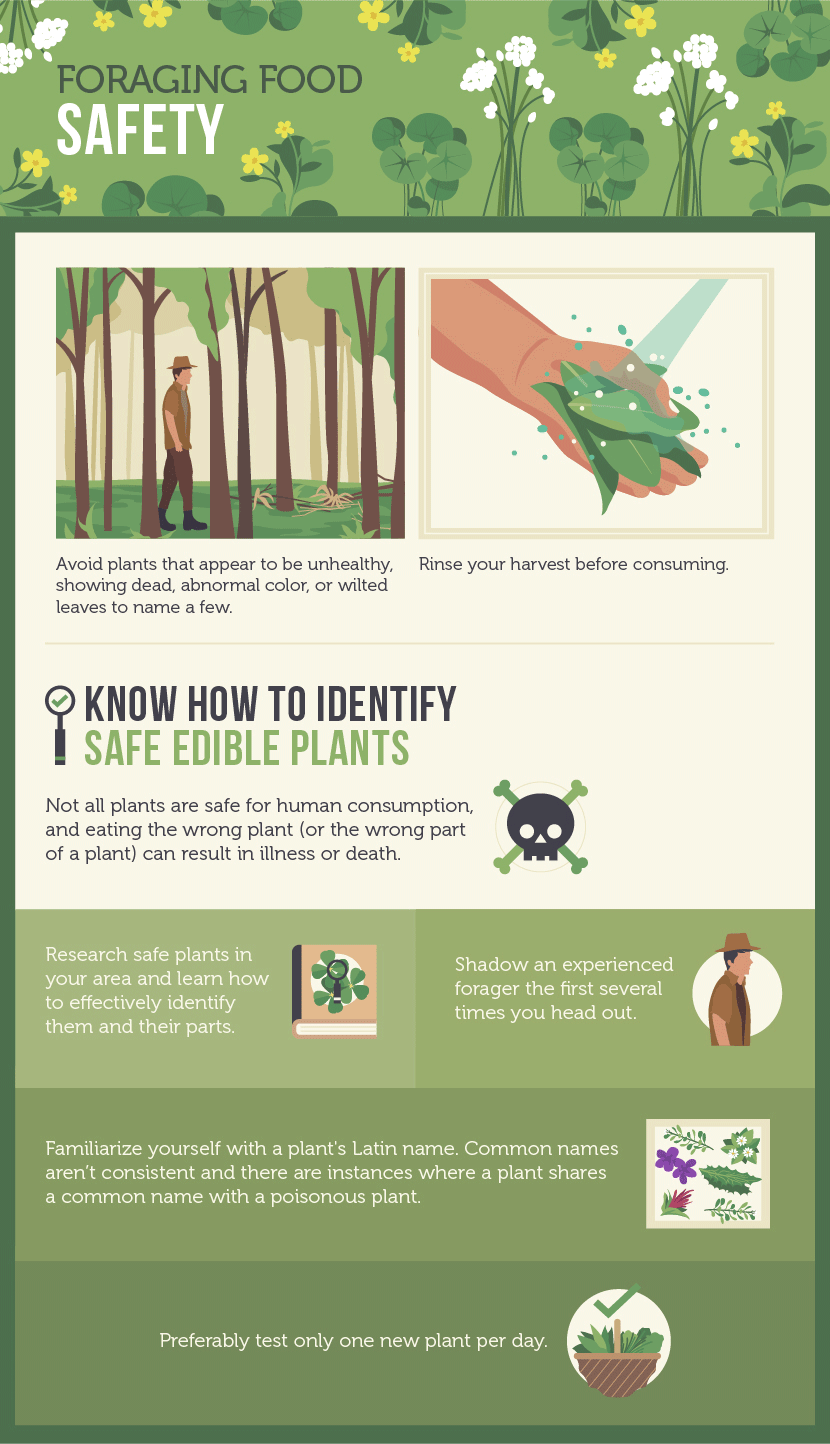
This point really can’t be stressed enough. Not all plants are safe for human consumption, and eating the wrong plant (or the wrong part of an otherwise-safe plant) can result in illness or even death.5That’s why it’s critical to research safe plants in your area and learn how to effectively identify them and their parts. It’s particularly helpful to shadow an experienced forager the first several times you head out so you can learn from their know-how. Regardless of whether you forage solo or with a friend, never eat a plant unless you can identify it with absolute certainty.

A Guide to Urban Foraging: Plants to Look For

While you research the plants native to your area, it can be helpful to familiarize yourself with their Latin names. Common names aren’t consistent across the board, and there are even instances where a plant shares a common name with a poisonous plant. Write down the Latin names of the plants you’re searching for on a particular day, and then bring along a field guide for proper identification.6

Scout Different Locations

A Guide to Urban Foraging: Where to Look

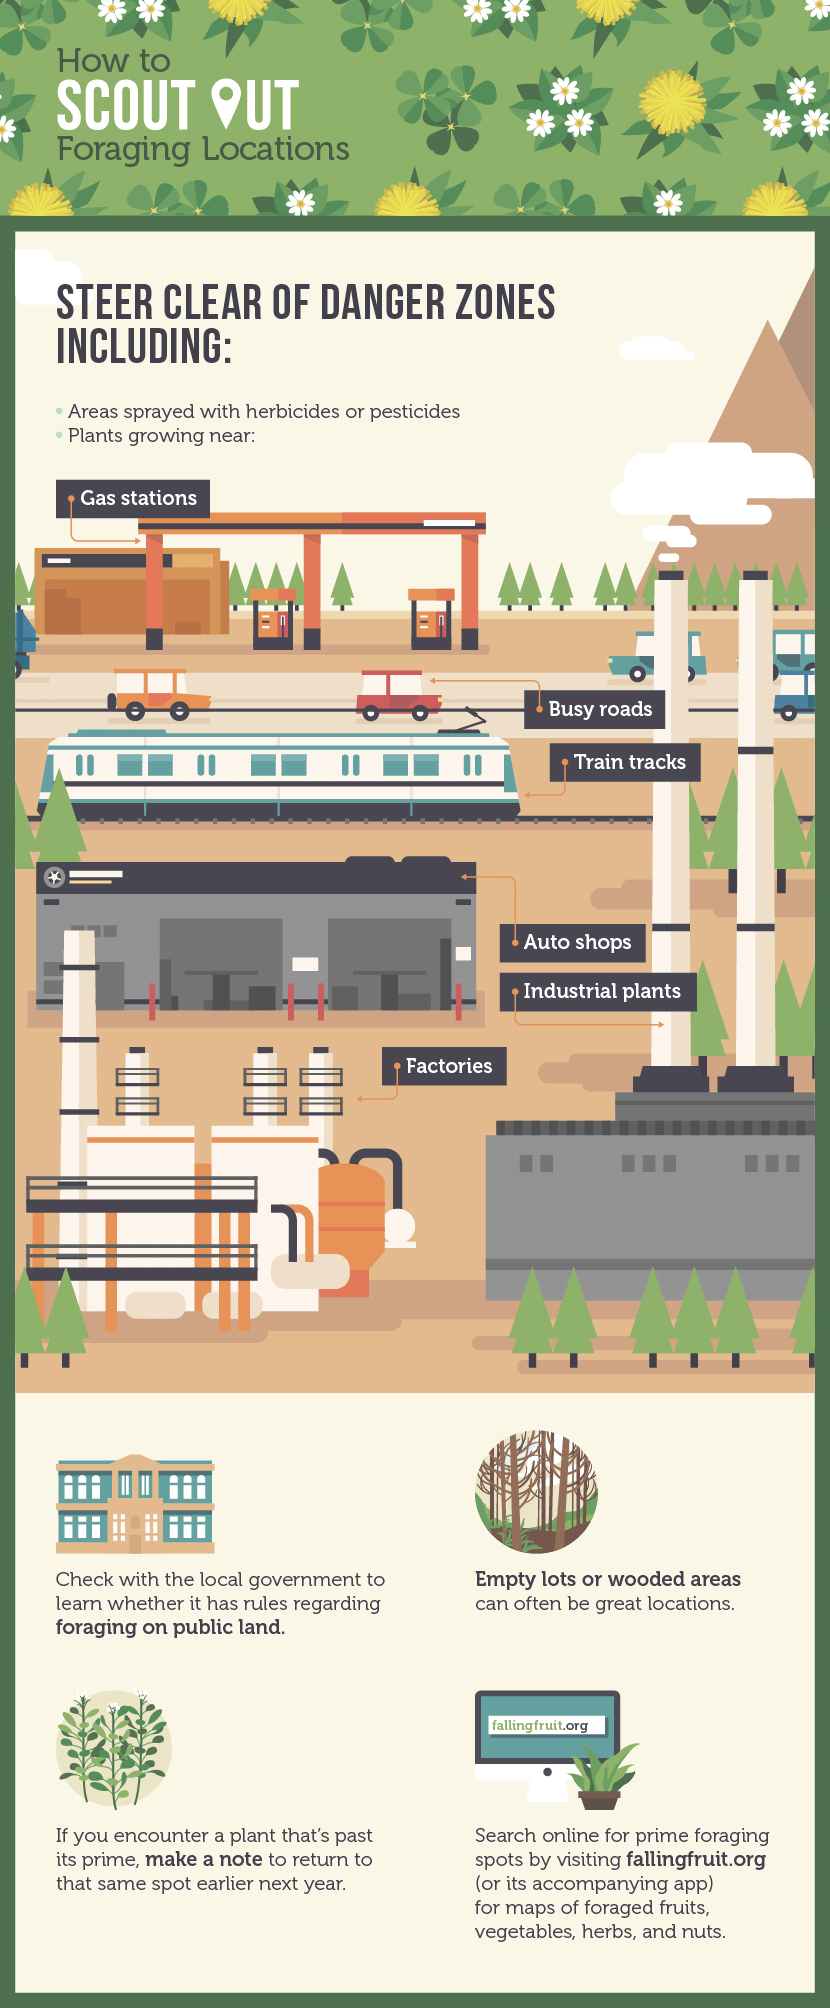
Before picking anything, do some research to figure out where foraging is and is not allowed in your area. In particular, check with local government for any rules regarding foraging on public land.7 If you have your eye on plants that reside on private property, always ask permission before foraging. (If nobody’s home, consider leaving a note with your contact information.8 ) Take note of what grows where and when; foraging is a seasonal enterprise.9 If you encounter a plant that’s past its prime, make a note to return to that same spot earlier next year.

Modern foragers can also use the Internet to identify prime foraging spots. Head to fallingfruit.org, which allows foragers from across the globe to share the locations of found fruits, vegetables, herbs, and nuts, to the tune of more than 800,000 entries from 50 countries.10 The searchable map is free to use online and the founders have also created an app for both Android and Apple.

Check out more fitness stuff here

No matter how you identify possible foraging locations, it’s important to investigate whether the area has been sprayed with herbicides or pesticides, or is located near an industrial area. Avoid plants from these areas, because they’re likely to be contaminated with chemicals that aren’t good for you. In general, try to avoid plants growing near busy roads or train tracks, or in soil that is contaminated with lead (such as at the site of a demolished house). It’s also best to steer clear of auto shops, gas stations, and factories.11 In contrast, empty lots or wooded areas can often be great sources for forage-friendly foods.12

Be Prepared

If you’re setting out to forage, it’s helpful to wear sturdy shoes and bring along some gardening gloves, a spade, a field guide to local plants, and a couple of reusable bags to transport your loot.13 Come prepared with knowledge about the best way to harvest plants so they’ll stay fresh until you get home.14

Respect Some Basic Rules

Part of reconnecting with the land includes developing an appreciation for all the ways nature sustains us – and it’s important to demonstrate that appreciation by treating the earth with respect. Keep the following rules in mind wherever and whenever you forage.

  • If you come across a small patch of a plant species, don’t pick all of the plants. Instead, leave several behind so the species can continue to grow in that location.15
  • Do not to take more than you can use: One of the goals of foraging is to eliminate, not contribute to, food waste.16 On a similar note, don’t harvest the whole plant if you’re only going to use a specific part, such as the leaves.
  • No matter what, don’t harvest or dig up the roots of a threatened species.17 Feel free to remove invasive species from an area, as they’re not doing the local ecosystem any good.

Use Common Sense When it Comes to Food Safety

A Guide to Urban Foraging: How to Forage for Food

If you’re wondering about the safety of foraged foods from urban areas, take solace in this: One study conducted in Boston found that foraged foods were no more dangerous to eat than conventional produce. And in some cases, they actually contained more micronutrients.18

Of course, this is just one study from one city. But common sense can help protect you from major food safety hazards. Know how to identify safe plants, scout locations according to the guidelines above, avoid plants that appear to be unhealthy, and thoroughly rinse your harvest before consuming. By practicing these basic tenets and trusting your gut, you’ll maximize your chances of foraging in a healthy way.19

Even as you digest all the serious pointers outlined above, keep in mind that foraging is ultimately meant to be exciting and fun. (Consider it the adult version of a scavenger hunt.) So get out there with your field guide and marvel at all the food nature provides – even in the concrete jungle.


Source: Fix.com Blog

Sources:

  1. http://experience.usatoday.com/food-and-wine/story/news-festivals-events/food/2014/01/27/foraging-chefs-dishes-trend/4817825/
  2. http://grist.org/food/can-urban-foraging-actually-feed-poor-people/
  3. https://canberraurbanforaging.wordpress.com/about/
  4. http://www.urbanfarmonline.com/sustainable-living/eat-local/5-rules-for-urban-food-foraging.aspx
  5. http://www.urbanfarmonline.com/sustainable-living/eat-local/5-rules-for-urban-food-foraging.aspx
  6. http://www.huffingtonpost.com/2013/06/02/foraging-tips-dos-and-donts_n_3367633.html
  7. http://www.urbanfarmonline.com/sustainable-living/eat-local/foraging-tips.aspx
  8. http://www.urbanfarmonline.com/sustainable-living/eat-local/5-rules-for-urban-food-foraging.aspx
  9. http://kwgn.com/2015/09/17/foraging-app-created-by-boulder-men-helps-you-find-all-the-free-food-around-you-2/
  10. http://www.shareable.net/blog/how-to-be-an-urban-fruit-forager
  11. http://www.chicagomag.com/Chicago-Magazine/August-2011/Urban-Foraging-Tips-How-to-Find-Your-Dinner-in-Chicagos-Wild/
  12. http://www.npr.org/2011/04/18/135412640/foraging-the-weeds-for-wild-healthy-greens
  13. http://www.chicagomag.com/Chicago-Magazine/August-2011/Urban-Foraging-Tips-How-to-Find-Your-Dinner-in-Chicagos-Wild/
  14. http://www.urbanfarmonline.com/sustainable-living/eat-local/foraging-tips.aspx
  15. http://netnebraska.org/article/news/nettles-milkweed-and-dandelion-its-whats-dinner-some-urban-nebraskans
  16. http://www.huffingtonpost.com/2013/06/02/foraging-tips-dos-and-donts_n_3367633.html
  17. http://www.urbanfarmonline.com/sustainable-living/eat-local/5-rules-for-urban-food-foraging.aspx
  18. http://www.mnn.com/food/healthy-eating/blogs/urban-foraged-food-found-safe-eat-boston
  19. http://www.npr.org/2011/04/18/135412640/foraging-the-weeds-for-wild-healthy-greens


Self-Watering Seed Starter – DIY

DIY Gardening Tip

Reuse old bottles to make this clever seed starter! A great way to start off your seeds now and be ready to plant soon.