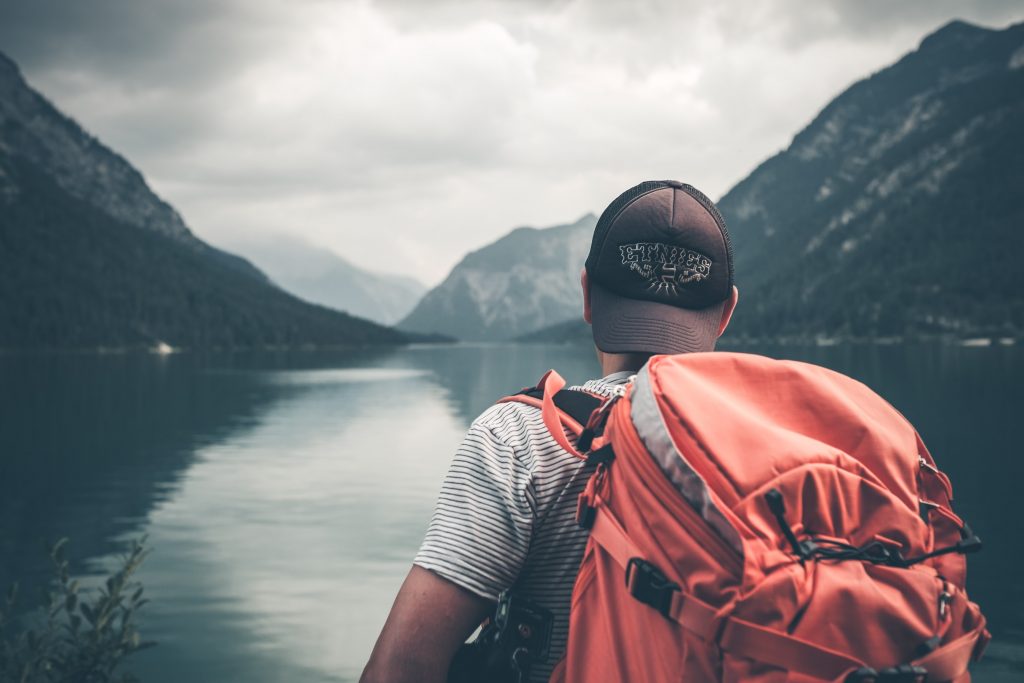
Prepare for the most testing trek of your lifetime – an ice
stroll on the solidified Zanskar River, an encounter for the valiant hearted
and daredevil while you trek the Himalayas, its magnificence flabbergasting
your and panting for additional!
Why Zanskar?
Wind up encountering the adrenaline surge in one of the most
looked for after treks on the planet, splendidly excellent yet incredibly
testing, unique, rare experience, before long turning into a prevailing fashion
among explorers and experience sweethearts from nation and the world the same.
Chadar Trek on Frozen Zanskar River
The trek is about ingenuity and survival – of figuring out how
to get by in the cruel landscapes at below zero temperatures, interfacing with
local people and understanding their method for living, particularly in one of
the most inhabitable areas on the planet, while you trek over an emotional
crevasse with solidified cascades on the solidified trail of Zanskar spread
over out like a “Chadar” (thus the name) that demonstrations like a
mirror for the sky. After all there aren’t a significant number of such
restrictive experience interests where you get the chance to share in the base
rush of snoozing caverns, pondering over blasting blazes in frosty temperatures
with most unquestionably the ever-present feeling of risk, yet enduring
everything – making it the “Do before you pass on” venture!
Course
The excursion begins from Leh, where one leaves for Tilat Sumdo, the main achievement in the Chadar Trek. From Titat Sumdo the trek encourages till Shingra Kogma and from that point the longest piece of the trek from Shingra Koma to Tibb and further on Trek from Tibb to Nerak and outdoors in Nerak town. At that point there is Lingshed to Tsarak Dho to Padum and back. The course is brimming with ice sheets, solidified cascades, nature’s marvels – An uncommon locating and unique experience.
Temperatures
Temperatures on the trek fluctuate from – 10° in the day to –
30° in the night relying upon radiant and shady atmosphere. While the
temperature is essential to observe, one needs to remember battling the solid
breezes.
You have to altogether investigate the apparel required, for it
is fundamental to shield yourself from such extraordinary temperatures.
Likewise one needs to receive a couple of wellness schedules before taking the
outing, for it tends to be a hazardous call and you should be fit and arranged
for doing combating the cruel climate conditions and different issues like
elevation infection and so on so the medical problem winds up fundamental. You
should most likely run 3 to 4 km in 30 minutes or walk consistently in 10º
slope for in any event 45 minutes In request to get ready for Chadar, while one
should investigate tips and FAQs for getting knowledgeable with respect to how
one should approach the Trek.
Absolute necessities
You have to make a nitty gritty rundown of the Must haves for
an excursion – while you get together all the portable bags be it the trek
embellishments and rigging, attire things, a medicinal unit, additional money,
and significant archives among others.
Step by step instructions to Reach
The best way to reach Ladakh during winters is via air, so you
can decide on the customary flights from Delhi to Leh by Jet Airways, Air India
and Go Air and so forth and remember to book your tickets well ahead of time.
The airborne view is just the best start one can have before the visit
Dos and Don’ts
Plan up with a day or two close by, if there should arise an
occurrence of any unanticipated common deterrents or losses.
Ensure you don’t litter and keep the earth clean.
Adhere to the exhorted dress and rigging reasonable for the
excursion to keep away from any pointless impediments. Likewise keep up just
the vital things for ideal development and let go of any unnecessary things
that may trouble the heap of portable items.
Try not to attempt any unsafe undertakings, as the area is
hazardous and delicate. Adhere to your movement gathering, take up master help
and warning before you take up the outing and adhere to directions and rules
cautiously.
Try not to expend liquor, as it gets dried out the body quick
and may turn unfavorable in such temperatures and locales.
It is with the disclosure of this uncanny course that initially
came to be the help of the Zanskaris, for it was their best way to go for a
vocation in the hours of extraordinary winters, which has now host to numerous
an experience sweethearts and trekkers from over the world! One can settle on
movement gatherings, or travel organizations that offer the trek – either with
arranged schedules or tweaked visits, whichever you pick. Likewise, one ought
to carefully pursue the rules for the visit, as prompted by the specialists.
So apparatus up for the most out of control excursion of your
life – do your examination, get fit and livened up, stock your rigging and get
moving to encounter a definitive trek of the Himalayas!
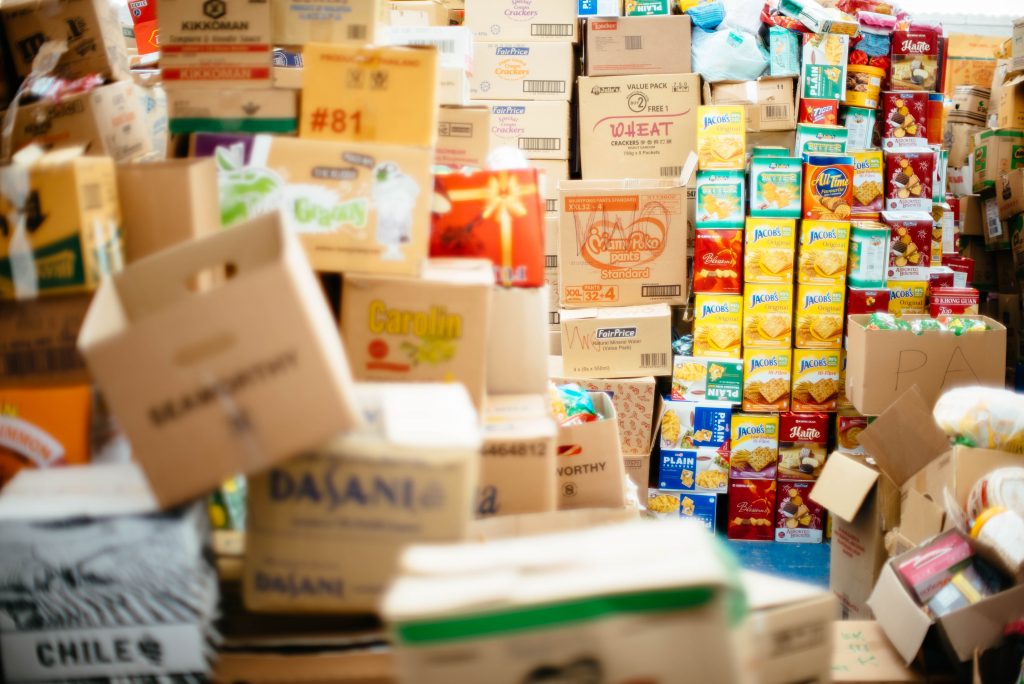
Keep in mind, if something terrible happens, food stores are
not going to operate as usual, and you are going to figuring out how to find
your supplies.
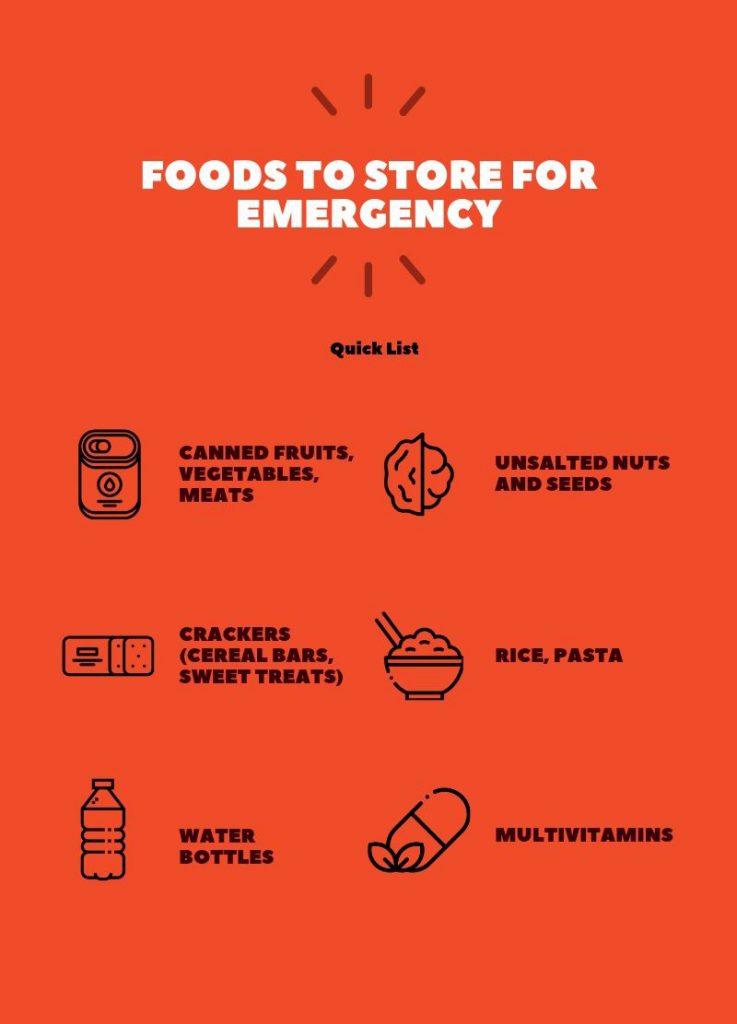
Food You Can Store
The most important
thing is to know what are the types of foods that can be stored.
Following are some
kinds of food items that can be stored for emergency.
Unsalted nuts and seeds (almonds,
walnuts, cashews)
Crackers (cereal bars, sweet treats)
Pasta
Rice
Peanut butter
Water bottles
Juice and shelf-stable milk or
nondairy alternatives
Multivitamins (calcium, fish oil,
vitamin C)
Honey
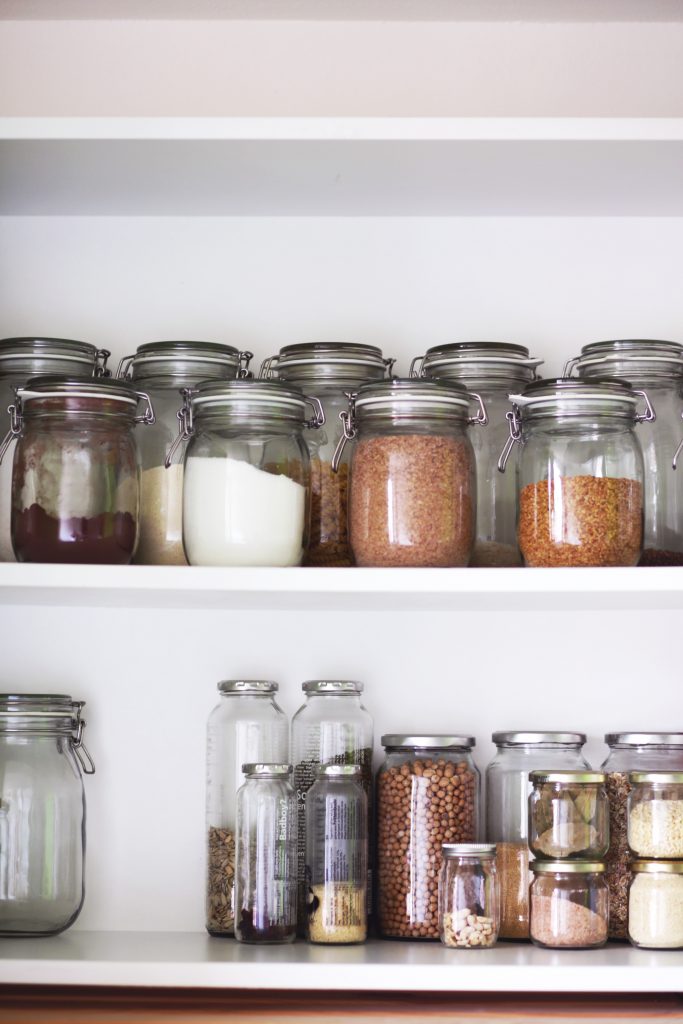
Important Things to Consider
There are several things to consider when storing food for
an emergency. Following are the significant things to concentrate,
– A well-organized pantry to store items for an emergency.
The pantry should be planned to store food for long term purpose without any
harm for food.
– Food security should be considered. When storing for an
emergency, it should be stored very safely because at the moment of emergency;
it should be safe if it is damaged can not use.
– Long term expiry dates. When purchasing the food items
should consider the expiry date, and it should be a long term one to store for
a long time.
– Make sure that storing fruits and meats are well dried up
to the storing condition — especially when preparing food at home for storing.
– Better to avoid frozen or refrigerated food for emergency
purpose. Because these kinds of food items can not keep outside for a long
time.
– Store the items for an emergency that are no need of
freezing or cooking as well as not taking much time for preparation.
Tips to Remember
There are various tips to store food for emergency purpose.
It is essential to know the tips to save correctly, as those things to be used
in an emergency.
If it is not stored correctly, no use at the time of crisis.
Following are few tips to remember:
– Food items should be well sealed and packed or canned to
avoid damages for the food.
– Properly label and categorize the food items to easy
access.
– Store with proper
quantities that are required for your family needs and wants.
– When storing food items do not forget to consider the
nutrition values.
– At the same time, give a significant consideration for the
tastes and flavors you and your family members prefer.
According to the things mentioned above, purchasing,
packaging, and storing properly holds significant importance at storing food
items for emergency purpose.
A bug out bag is basically pack of survival items that you can easily carry around with, especially with the aim of reaching your bug out location. The bug out backpack has to be resilient and comfortable enough for you to carry around, at least for 72 hours. The main reason of having a bug out bag is so that you can easily evacuate if there’s a need.
To have the ‘BEST’ bug out bag, you need to have an awesome
bag, and the bug out bag contents has to be planned as well. This would mean
you need a comprehensive bug out bag list. Having a quality bug out bag is only
half the battle, you need suitable survival gears and survival skills to face
the situation.
Do note, you can further split this into categories too such
as children’s Bug out bag or even a bug out bag for the elderly! There’s no
hard and fast rule as to how you should pack your bug out bag, but I’ll raise
some of the common items everyone should consider putting in their bug out bag.
In my view, there are some fundamental items your bag should
contain, and you can customize your bag for different emergency situations.
Important Rules
The purpose of making a bug out bag list is so that you will
have a clear idea of what you need (making a distinction between your wants and
needs). Although we don’t know what the future holds, you can’t be bringing too
many things. There’s no way you can carry it for long hours.
The goal is to keep only items that help you become
self-sufficient, surviving various situations. You don’t need to stuff any
fancy shmancy tools that you don’t use. With that said, let’s see what are the
top items you need for your bug out bag.
1. Water
Water is placed number 1 because of its importance. Without
getting proper water supply, your success of surviving a bug-out situation will
drastically decrease. I would suggest
prioritizing the need to get good water supply before even thinking about food.
Especially if you are caught in hot weather, you may suffer from dehydration.
Water can be seen in 2 aspects, (1) Storage and (2)
purification.
For Storage, you can use water bottles
or even sealed pouches. The water bottle you choose should be solid and has no
paint or coating.
Ideally, you should keep 3 liters of water in your bag
because it’s suggested that one adult should drink at least 1 liter of water
per day. Since you are aiming to survive for 72 hours, you’ll need 3 liters.
You can even get a Platypus Bladder, where most of them has
holsters for a bladder container which you can use to store water and drink
from it. Make sure to get one that is easily collapsible so that you can store
it with ease when you are not using it.
For Purification, you can keep some
iodine tablets or some other device to filter the water.
You need to pick your water purification tablets wisely
because there are a huge range of products in the market, manufactured for different
needs. For example, some tablets are made to purify water you obtain from
rivers.
Alternatively, you can pack water filters such as LifeStraw.
They are often compact, which makes packing them easy.
To kill two birds with one stone, I would suggest storing a
backpack stove because they are an excellent tool for cooking water and food.
Let’s be real, it’s extremely time consuming to get an A-frame logwood to
ignite. This would be highly dependent on your surroundings as well, if the
temperature is cold or its drizzling, the probability of you successfully
setting up a campfire would fall drastically.
Since water is heavy, you need to consider how to balance
the need to pack clean water, and getting water purifiers as substitute.
2. Food
Next, you may want to ensure that you have enough food
supply. There are several criteria to consider, including how long the food can
last, how much energy content does it contain and what nutrients it has.
You definitely need to keep some food supply packed in your
bug out bag to keep your body healthy and obtain stamina. You should definitely
consider the weight of the food as well.
If you live in a rural setting, you can consider packing
hunting gears so that you can hunt animals as a source of food when you are en
route to your bug out location.
If you don’t want to make things complicated, you can just
get any energy bars that is jam-packed with calories. If you want to be more
careful with what food you pack, you can check out this list of food which I
recommend having:
Energy bars – It’s
important that you distinguish between a food bar, a ration bar and even a
candy bar. Candy bar is self-explanatory, so I’ll skip that.
Ration bars are
often packed in mylar, which are made of a combination of flour, vitamins and
electrolytes. Ration bars usually have a bland taste, made to address a
particular emergency situation.
Since there are many types and flavors in the market, you
need to test them out to see which one you like. You can check out Mayday Apple
Cinnamon Bar which come in individual packets and they come with specific
flavours. Or, you can even choose the Datrex 3600 Food Ration Bar which comes
with multiple bars with each sub-packaged to ensure freshness.
Some do not consider this as food for your bug out bag
because they are designed to save lives (such as being stored in
lifeboats). But to me, they are
fundamental items you should store as well.
For Food bars,
they are portable bars which taste better than ration bars. Most of them taste
like candy or even cookies. These bars are made to give you energy and
sufficient nutrition as well. However, ration bars tend to give more nutrients
because they are ‘made’ that way.
You can check out Clif Bars to get food bars that have a
good source of protein and fiber.
MREs – Meals
Ready to Eat (MREs) or “wet food” often taste better than energy bars. Also,
most MREs are made to last for years. If you would like to prioritize long-term
storage, MREs would be your top pick.
However, your body may have some reactions to MREs if you
are not used to consuming them. This can be solved by getting your body used to
it.
Dehydrated Food –
Dehydrated foods are excellent for long-term storage but they are a bit pricey.
Dehydrated food requires a reasonable amount of water to re-constitute, which
cause you to use-up some clean water-supply.
Mountain House is THE company to look out for when it comes
to dehydrated food. They are known for producing survival food kits and
dehydrated food that taste awesome!
3. Clothing
Clothing comes hand in hand with shelter, because both of
them are aimed to protect you from external elements.
Although there are various disaster scenarios that you may
be caught in, you can still reasonably predict what environment you will be in
when Shit Hit the Fan.
To make your thought-system more systematic, you can think
of what layer of clothing you need to pack for.
For myself, I would like to see it as Base Layer Clothing,
Mid-layer clothing and outer-layer clothing. Each layer has different functions
and purposes.
The base layer is meant to keep your body as dry as
possible. This means that getting a fabric that easily absorbs moisture would
be ideal. Keeping your body dry throughout the bug out scenario is important to
avoid bacterial growth and it helps keep you comfortable. I’ll suggest that you
use cotton or wool for base layer clothing.
For mid-layer clothing, its purpose is to help maintain your
body temperature. Therefore, it’s important that you get a mid-layer clothing
with good insulative qualities. For this layer, the materials which you can
look out for is cotton, wool and fleece.
The Outer layer should be waterproof and durable but allows
moisture to escape. One excellent material you can consider is jackets that are
coated with membrane.
With that said, here are some general ideas for what clothes
you need to pack – spare clothes, long pants, coat, boots, extra socks,
mid-layer shirts and a hat.
4.Shelter
In your bug out bag, you need to include some type of shelter
to protect your body from external elements. You can either pack a tarpaulin
sheet, a tent or a sleeping bag.
Tents are really
comfortable to be in, but they are heavy and bulky. Try to get a tent that
weighs less than 5 lbs so that you won’t go overboard on the weight.
If you are looking for something more portable, you can opt
for tarps. Since you can set them up into different configurations, they are
definitely more feasible to be used in most situations.
Since ‘shelter’ include anything that protects your body
from external elements, it will include fire starting kits as well.
A general list of items you can consider include a space
blankets (first aid blankets), poncho, Tarp, sleeping bags and tents.
As for a list of items to help you maintain surrounding heat.,
you can consider getting a firestarting kit, single Burner Folding stove, hand
warmer and windproof torch lighter.
Shelter is important because exposure to cold temperature
for long hours can kill you. If you stay in a place with extreme weather, you
need to take shelter SERIOUSLY. For cold weather, you will need to find ways to
create heat sources so that you can retain your body heat. Make sure you don’t
lose your body heat unnecessarily.
If you live in an area with warm weather, you may have to
consider bringing more water and packing more loose clothing.
5. Medical Supplies
Getting ready a first aid kit in your bug out bag is a
MUST-HAVE. Usually, they won’t take up a lot of space.
Medical supplies are highly personalized, so you need to mull
through what you need to use. This includes going through what are the
potential diseases that you will likely contract.
To do this, you need to know what are the injuries that you
will most likely face in a bugging out situation. There are various categories
of injuries including Traumatic injuries, burn injuries, minor wounds, mobility
injuries, infectious diseases and your individual medical needs.
To understand your individual medical needs, you need to go
through a personal screening by talking to your doctor and ask what are the
medicines you need.
Generally, it’s important to include some basic items such a
bandage, disinfectants and scissors. Other items you can consider are
Tourniquets, Israeli Bandages, Hygiene Kit, Wet Naps or even ThyroSafe
Potassium Iodine Tablets.
To Sum Up
I hope that the bug out bag list has helped you consider
different aspects as to what you should pack. This list is aimed to help you
create a new bug out bag list, which is definitely not an exhaustive list. Feel
free to give your suggestions in the comments on what to add in the list.
Bear in mind the important factors when considering which items you want to store in your bag. Be sure to take into account other considerations too such as what location you live in, what bug-out skills you have, what are the likely threat you will face and how many people you need to protect. With all these factors considered, I am sure your success of surviving a calamity will drastically increase.
I have been an active prepper since 2016. Although it’s only been a few years, I have learnt a lot along the way. I have spent hours reading before purchasing a gear. Also, I have spent hours practicing survival skills such as building a lean-to shelter or getting an A-Frame fire kindling. Hope you love the blog as much as I enjoy writing it.
As a student, you need to view homework as more than just a way to improve your grades in school. Learning should not be centered around the four walls of a classroom. When you have the right attitude toward learning, and toward your biology homework, you will learn skills that are essential for survival in different situations. You see, biology as a science studies life forms. It dwells on everything regarding life from the single cell organisms to multi-cell organisms. Freelance writers who write about biology can testify to this fact that knowledge of biology is key to survival.
5 Reasons Why Interest In Biology Can Save
Your Life
1. In Case You Get Frostbite
Frostbite can happen when you stay in cold
regions for an extended period. Whether you’re there by choice or by force,
knowledge of biology can help you survive. While a mild case of frostbite will
not cause any lasting damage, a more serious case can lead to a number of
severe symptoms. Some of these include blistering, loss of feeling, cold
sensitive, and hypothermia all of which can lead to death. The worst mistake
you can make at a time like this is using friction to warm the part of your
body that is affected. This can damage your tissue.
2. In Case Of A Heart Attack
While heart attacks are more likely to happen
to people who are more advanced in age, youths still have a slight risk of
having a heart attack. When the body can no longer pump blood to the heart
efficiently, the heart muscles suffer a deficit in oxygen and die. From a
biology textbook or articles written by freelance writers, you can learn the
symptoms of a heart attack and seek out professional help. Taking an aspirin tablet as soon as you notice the symptoms
can reduce the risk of clot formation. If you’re not the one having the heart
attack and the patient is not responding, attempt cardiopulmonary resuscitation
with your hands.
3. In Case You Suffer Burns
There are several circumstances that can lead to burns. Whatever the case may be, knowing about the human body will help you get or provide instant relief before experts get there. Most people think the best way to relieve a burn is with ice. This is only going to damage the burnt skin more. The best thing to do in such a situation is to use a sterile dressing to cover the affected skin and wait for the medical team to arrive.
4. In Case Of Convulsions
If someone around you suffers a convulsion,
you can quickly check the internet for an article about how to provide first
aid. There are many articles by freelance writers about this emergency. A
convulsion is also called a seizure and it’s a situation where a person suffers
rhythmic movements of the muscles that cannot be controlled. It happens when
the brain receives abnormal electrical impulses. While these seizures can stop
without any first aid, you can help the victim by assisting them to lay down in
a comfortable position. It’s common to see people put objects in their mouths
but this should be avoided. Just remove harmful objects from the environment
and wait for a medical professional.
5. In Case Of A Traumatic Head Injury
You can suffer a traumatic head injury when you hit your head hard. If you don’t get medical attention as soon as it happens, you will be at risk of brain damage. The first thing to do would be to call for professional help. If you’re not the one who got injured, you can assist the victim by checking if their airways are blocked. If the person is not conscious, perform CPR.
There are many other ways to care for yourself or someone else during a medical emergency. Learning about how the human body works during biology lectures or from freelance writers will teach you more survival techniques in cases of emergency.
Sebastian Miller is a former Calling Lake School science teacher. After 4 years of teaching, he decided to become a freelance writer. In Sebastian’s opinion, math is the core of all science and his goal is to enlighten as many schoolers as possible through writing.
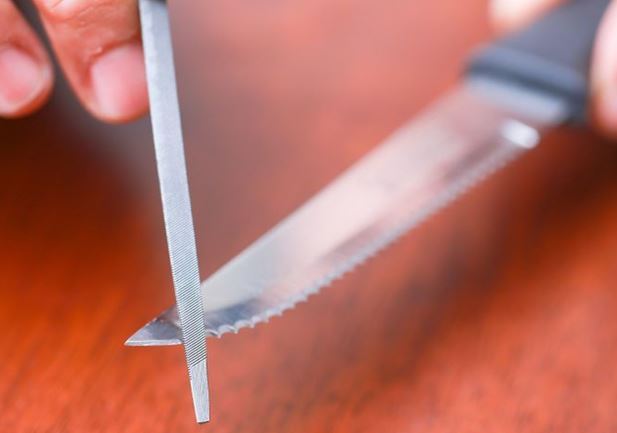
Today I thought I would talk about a little problem that many folks that carry and/or use knives in their homes seem to have all over the country. That little problem is serrated knives. We all own them in one form or another like a serrated survival pocket knife or serrated bread knife or even a serrated carving knife. There is an issue that arises for many people that own serrated knives. That issue is how to properly sharpen a serrated knife? The question of the ages for the modern knife owner. In this post, I am going to address this issue and when I am done with it you will know how to sharpen your serrated knives.
For the most part, your serrated kitchen or pocket knife will stay sharp longer than your straight edge pocket or kitchen knives will and they will even cut when the serrations are getting dull. As the scallops and teeth of a serrated knife get dull the quality of the cuts that you once got will slowly degrade into tearing, pulling and shredding of the item that you are cutting. When this tearing/shredding effect starts to happen then it is time to sharpen your knives.
For many people the chore of sharpening knives is time-consuming and for many, it is a daunting chore. The fact of the matter is that sharpening serrated knives for many is more problematic than sharpening standard straight edges. Proper care and maintenance of serrated knives will keep those scallops cutting cleanly for a long time. Have no doubt though; these serrated knives do need a greater level of experience to sharpen properly. Another thing to consider is that serrated knife blades take longer to sharpen than their plain edged counterparts.
As I said earlier serrated knives can and do stay sharper longer than plain edged knives and because of this it will take longer for a serrated blade to become dull, and this is even true for combination bladed pocket and kitchen knives. The “teeth” of a serrated blade “bite” or start the cutting process first and then the scallops of the blade follow through to complete the cut. The “teeth” take most of the cutting pressure and the scallops take the least amount of cutting pressure. Because the scallops take the least amount of cutting pressure they stay sharper longer.
Now let’s talk about how to sharpen your serrated knives. In order to do this, you will need to obtain the correct type of sharpener designed for sharpening these types of blades. There are many on the market made by many manufacturers that are specific to the chore. Some are good, and in my humble opinion, some are just plain old bad. Some of the types of serrated knife sharpeners are the “draw through” type. (I personally do not care for “draw” or “pull” through sharpeners)Then there are the sharpening rods that come both in standard and tapered versions and made of different materials from carbide to diamond coated. There are specialized serrated sharpening stones that are textured to accept the scallops of serrated knives. Many of the sharpening rods or sticks come in a triangular shape to work on the scallops between the teeth of the knife. The “rat tail” type of file or sharpener is tapered in order to naturally fit the diameter of the scallops of the blade. The one thing to keep in mind when wanting to sharpen serrated knives is that as with sharpening plain edges you will have to take the same considerations with serrated knife edges and that means that you will need to choose the correct sharpener and what materials you want that sharpener to be made of.
Many of the sharpeners that you would use to sharpen a serrated knife can be used to sharpen plain edged knives as well and you can get pocket-sized sharpeners for serrated knives and combo edged knives to carry with you for daily honing and sharpening of your daily carry knife.
When it is time to sharpen your knife whether it is a plain edge or a serrated edge one of the things to keep in mind is the angle that you will use to sharpen your knife. It does not make any difference what type of sharpener you use, keep the angle in mind. Most of the time when sharpening combo edged blades the serrated portion of the blade in the majority of cases will be of the same angle as the plain edged section of the blade. This means that when sharpening the serrated section of a combo edge it should be kept at the same angle as the plain edge section of the blade as well. Now there are many sharpeners out there that are referred to as “guided” sharpeners like the Lansky Sharpening Systems. This type of system will maintain the proper edge angle as you sharpen your knives and you can get stones or diamonds that are triangular in shape to sharpen your serrations at the correct angle with the Lansky System too!
Many people that I have met and many people that call themselves “professional knife sharpeners” for a living have sharpened serrated knives by either drawing the back/flat side of the knife across a bench stone, and in many cases I have seen them sharpened by drawing the back/flat side of the serrated knife across a sanding belt. This is not the correct way to sharpen this kind of knife. I order to sharpen the scalloped part of a serrated knife you can use the serrated sharpening stone or diamond from something like the Lansky System and work it into the scallops in a perpendicular movement to the cutting edge one scallop at a time. You can also do the same thing using one of the many diamond or ceramic files or tapered “rat tail” files and move them in the same perpendicular fashion to the cutting edge of the scallops.
Remember, you have to take your time and sharpen one scallop and one tooth at a time before moving to the next one. When you are done you should be able to feel a “burr” on the flat side of the knife. Many will tell you to lightly grind that burr off. I do not do this and I tell others not to do this. I have a small piece of 2X4 wood and I then lightly draw the serrated blade across a corner of the 2X4 to remove the burr this is also the way many people who sharpen Japanese kitchen knives do it as well. You can also take a hand held ceramic rod and start at the top of the rod and work your way down to remove the burr and polish the flat of the blade. When you “grind” you are removing metal and when you use a ceramic rod you are taking much, much less metal from the blade. I do it this way for the longevity of the blade.
Here is another way to sharpen a serrated knife really quick that I use all the time. Take corrugated sharpening steel and then take your serrated knife and start at the bottom of the steel at the handguard and take the very tip of the serrated knife and stroke the blade across and up the steel holding the blade at your chosen angle. Don’t just put the flat of the blade flat on the steel. Put the flat to the steel flat and then raise it up to your desired angle. If you know what 20 degrees looks like when sharpening on a flat stone then you should know what 20 degrees look like against the sharpening steel. Then after 10, 20, 30 reverse strokes up the steel the burr will be raised on the flat of the blade and I lop it off on the 2X4 and then a few strokes on the ceramic rod to polish the flat and I am good to go!
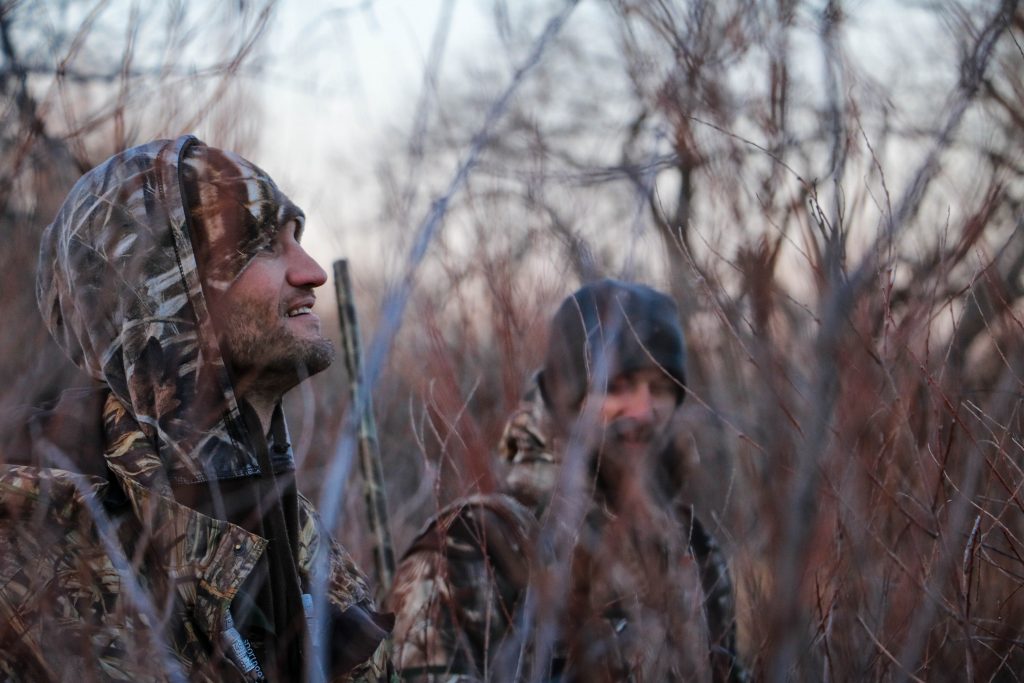
The first item that comes to mind for a hunting expedition is a riffle and a hunting vest, but what about all of the other needed essentials? It’s key to remember that you might be trekking out into the wilderness, and you might find yourself being there longer than expected. So, use this guide to remember the 5 important items that many hunters seem to forget.
The most obvious reason is that without a pair of good quality binoculars, you might miss some animal at a distance. Forgetting your binoculars means that you may come back with less to show for, making for a less enjoyable hunting trip.
But, more importantly, you can use binoculars for navigation, to discern your path and spot sources of water, roads, and civilization at a distance.
Other Benefits to Bringing Binoculars
• Be able to decipher an animal from a rock or foliage (Also, so you know you aren’t shooting at a human!).
• See your terrain more clearly to prevent injuries or see signs of animals that the naked eye would not be able to see.
• Allows you to spot predators or wildlife you’d rather avoid.
Important Features on My Binoculars?
You don’t want binoculars that magnify too far or too near. It’s important to get the right set that matches the terrain you will be hunting in. Generally, in wooded terrain you’ll want something with less magnification, such as 8x and in open terrain you can go as high as 12x. You can go higher, but you’ll end up needing a stand or tripod.
2. Cold Weather Gear?
Staying warm while you are out hunting is crucial for any tracking expedition. Even if you have double checked the weather forecast. It is always safe to stay prepared for unexpected cold fronts. You should keep some cold weather gear in your daypack and take it with you, just in case.
If you get disoriented or injured, you might find yourself spending the night in the woods. It doesn’t matter if it’s the middle of the summer or not, it will feel cold when compared to the daytime highs. Also, you can get hypothermia even if it’s as warm as 70 degrees if you are wet and not clothed properly.
Which Cold Weather Gear Should I Bring?
You’ll want properly fitted boots so as not to reduce blood flow to your toes along with spare socks. You’ll also want:
• Clothing articles that are not made out of cotton as this material absorbs moisture and doesn’t insulate when wet.
• Keep your head warm with a hat or beanie while protecting your face with a face mask.
• Bring gloves that are not made out of cotton.
• Have spare, loosely fitting layers available to add or take away as temperatures change.
• Hand warmers that you can keep in your pockets.
• A Winter coat, one of the most important items to help keep warm. See this guide on the best winter coats for extreme cold.
3. Water Purifier
The fact is you can only carry so much water. If you are unexpectedly stuck in the wilderness for more than a day, you’ll need to find a water source. Since unpurified water can leave you sick, weak, and unable to walk your way out, you need to clean all contaminants from water.
The most obvious way to do this is by boiling your water. But, starting a fire is not always practical and in many places there may be a high danger of fire. So, the best option is to bring a water purifier.
What Can I Use a Water Purifier On?
With a water purifier at your disposal, you can obtain water from the environment around you. This includes water from a creek or any other wild body of water.
Various Types?
There are different types of water purifiers that you can purchase for your next trip. Each type will have pros and cons and you should weigh what you need vs their price and other features.
Here are a few types:
• Water filtration pump
• Squeeze or gravity flow system filters
• Tablets or drops
• Lifestraw
• Lightweight backcountry stove
4. A Compass
Although we tend to use GPS to get around these days, it still is important to carry another location device such as a compass. Hunters are frequently out in the middle of nowhere to find the best prey, putting themselves in risk of either their phone losing service, getting destroyed, or running out of battery.
There are a variety of compasses based on how you plan to use them and the difficulty of the terrain you will be in.
5. A Topographical Map
A topographical map is a detailed and accurate representation of two-dimensional features on the Earth’s surface that are natural and human-made. It will allow you to know the features of the surround area without being able to actually see them.
Why Bring it?
According to Real Tree, topographical maps are an essential when hunting out in an area that is less familiar. You can even use these maps to locate deer travel corridors.
More importantly, even if you get completely lost or disoriented, you can figure out where you are and navigate back to safety. There are plenty of stories of people who have got lost and died less than a mile from well worn trails, you don’t want to be one of them. So, bring a compass and a map.
How Can I Read One?
Topographical maps can be confusing to read without the proper training. You’ll want to spend some time learning the major and minor terrain features, how to convert from grid to magnetic north, and how to determine your exact location in a variety of ways.
What Else Do I Need?
Hunting expeditions lead one far away from civilization, making it a priority to pack properly. While there are probably 100 different things you might want to take, you have to balance between necessity and your ability to carry it.
Regardless of what you do or do not bring, make sure you have these 5 items.
For most preppers, safety and food security is of paramount importance. Having your own food supply during an emergency or crisis situation will keep you and your family self-sufficient even during the toughest times. How do you build your own stockpile for survival?
Here are 5 things you should know about buying food to stockpile.
What Is Your Goal?
Before buying food to stockpile, you will need to set your goal. How much stock do you intend to buy? How long do you want the supplies to last? Ideally, your food and water supply should sustain you for at least 72 hours but for peace of mind during an emergency, go beyond the bare minimum.
Start by writing a list of foodstuff that can sustain you and your family for three days. Once you have achieved that goal, keep building until you have enough supplies to last a few months.
Decide On A Stockpile Budget
When buying food to stockpile, it is important to have a budget from the beginning. Determine how much you can afford and how much money you can spare from your weekly shopping to buy food to stockpile.
Make your budget conservative and reasonable. Avoid getting into debt. Know when to stop. There are times when you will have to pass up a great deal to avoid wasting money. Remember to go over your budget before you start shopping. You can always take advantage of store sales and product rebate offers.
Invest In Nutritionally Dense Foods
Sometimes, consuming food from a stockpile can get tiring and boring. This is why you will need to invest in a stock that includes nutritionally dense and tasty foods. Consider your family’s taste and make a list of ingredients they will enjoy. Some of the foods to buy include; multivitamins, dried fruits, cereal, canned meat and chicken, nuts and peanut butter.
Don’t buy food items that your family doesn’t eat. Don’t buy food that will go bad before you eat it. Check all the expiry dates and preservatives used to ensure that your food is safe for consumption for the entire period you will need it.
Prioritize On Water
Water is life. Without it, our bodies cannot survive for more than three days. Buy enough water. You should stockpile and safely store at least two weeks supply of water for every individual in your house.
Commercially bottled water is the best choice since it is safe and does not require sanitizing or disinfecting any further. However, it is advisable to consume or replace the water every six months.
Prepare Space For Your Stockpile
Stockpiling on food and water will take up a lot of space in your pantry. Before you head out shopping, ensure that you clean and prepare the space. If you intend to store the food in the basement, ensure that your basement is cool and dry.
Remember, seepage, mice or mold can make your entire stock of food unsafe. You can invest in additional storage shelving or identical boxes that take up minimum space.
Millions of people around the world have to face the trauma and consequences of an unforeseen disaster every year, and tens of thousands lose their lives.
You can rarely predict or avoid a disaster happening but you can often improve your odds of survival.
Ammo.com have put together a comprehensive guide for emergency preparation and looks at key reasons why you need to prepare for an emergency and what steps you can take to prepare.
The guidecan show ready you are if disaster strikes.