We have all heard of the dangers of dehydration, and it is important to know how to obtain drinkable water in an emergency situation. Water is essential for survival, and having access to it during a crisis can be the difference between life and death.
In this blog article, we will explore the sources of water during an emergency and how to make it safe to drink. We will also look at how to store water and how to clean containers for water storage.
Introduction to Water Shortages
Water shortages can be caused by any number of things, such as natural disasters, droughts, or contamination of water sources. In some cases, entire cities can be affected by water shortages. This can have a significant effect on the health and wellbeing of the population, as access to clean drinking water is essential for human survival.
Water shortages can also lead to famine and disease, as clean drinking water is necessary for food production and the prevention of communicable diseases.
The World Health Organization (WHO) estimates that more than 2 billion people lack access to safe drinking water. This is a major health issue, as access to clean water is essential for human health and survival. In addition, water shortages can lead to shortages in food production, which can lead to famine and malnutrition.
It is essential to be prepared for a water shortage in an emergency situation. Knowing how to obtain drinkable water in an emergency situation can save lives.
Signs of Dehydration
Dehydration occurs when the body does not have enough water. It is important to recognize the signs of dehydration so that you can take steps to obtain drinkable water in an emergency situation. Symptoms of dehydration include:
If you or someone you know is experiencing any of these symptoms, it is important to take steps to obtain drinkable water in an emergency situation as soon as possible.
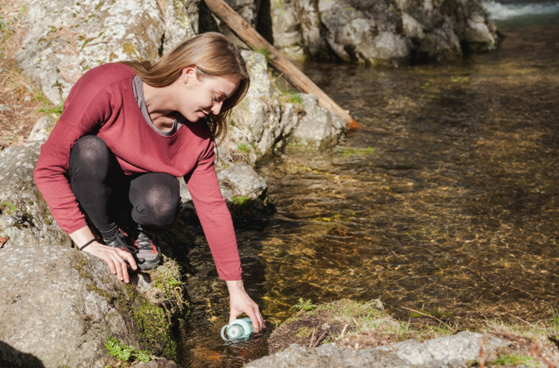
Sources of Water in an Emergency Situation
In an emergency situation, it is important to know where to find sources of drinkable water. Some of the most common sources of water include:
Rainwater
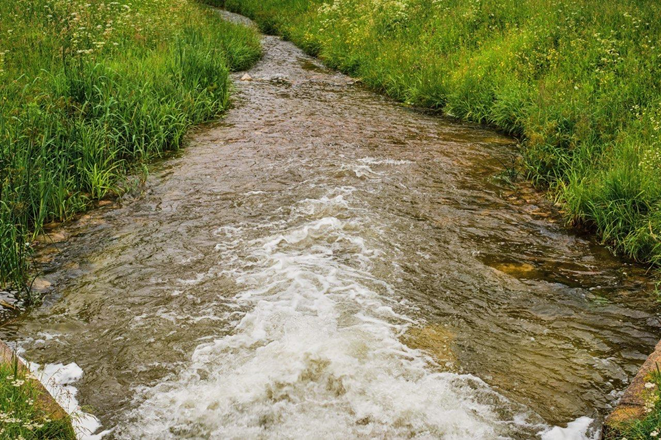
Streams
Rivers
Lakes
Ponds
Wells
Tap water
Bottled water
It is important to remember that not all of these sources of water will be safe to drink. It is essential to take steps to make the water safe before drinking it.
Boiling is one of the most effective ways to make water safe to drink. To boil water, you need to heat it to a rolling boil for at least one minute. This will kill any harmful bacteria in the water. It is important to remember that boiling water does not remove chemicals from the water, so if there are any hazardous chemicals in the water, you should not drink it.
Using Iodine Tablets to Purify Water
Iodine tablets are a good option for purifying water in an emergency situation. Iodine tablets are small tablets that contain iodine, which is used to kill any harmful bacteria in the water. It is important to follow the instructions on the package carefully when using iodine tablets.
Using Filters to Purify Water
Using a filter is another way to purify water in an emergency situation. Filters use a physical barrier to remove contaminants from the water. Filters come in many shapes and sizes, from small portable filters to large family-sized filters. It is important to make sure that the filter you are using is effective at removing contaminants from the water.
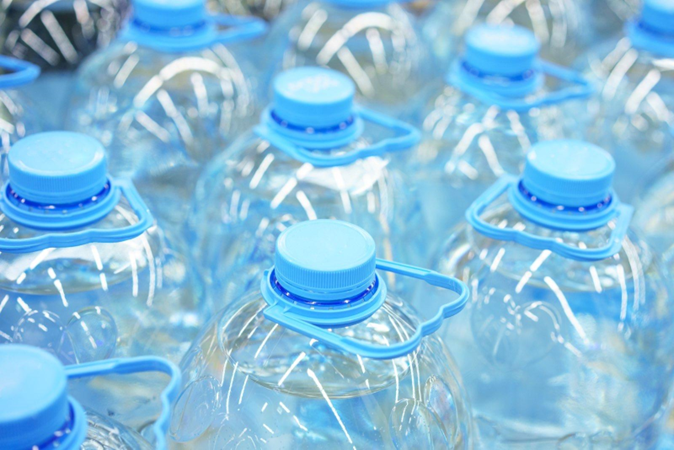
How to Store Water
In an emergency situation, it is important to know how to store water so that it remains safe to drink. It is important to use clean containers for water storage. Plastic containers are the best option for storing water, as they are lightweight and easy to transport. It is also important to make sure that the containers are completely sealed and that the water is stored in a cool, dark place.
Cleaning Containers for Water Storage
It is important to clean containers for water storage to make sure that the water is safe to drink. To clean containers, you should first rinse them with warm water and then scrub them with a brush.
You can also use a small amount of bleach or vinegar to disinfect the containers. It is important to make sure that the containers are completely dry before adding the water.
Conclusion
In conclusion, it is essential to know how to obtain drinkable water in an emergency situation. Knowing where to find sources of water and how to make it safe to drink will save lives in an emergency situation.
It is also important to remember to store the water in clean containers and to keep the containers sealed and in a cool, dark place. Knowing how to obtain drinkable water in an emergency situation can mean the difference between life and death.
Now that you know how to obtain drinkable water in an emergency situation, make sure to share this information with your friends and family.
About the Author
My name is Robert and those that know me know that I like to research and to always be prepared the best I can for whatever life brings my way. My website was born out of putting those two things together. I am married with 3 children, a dog, 2 hamsters, 3 fish, and a gecko. We have many life adventures.
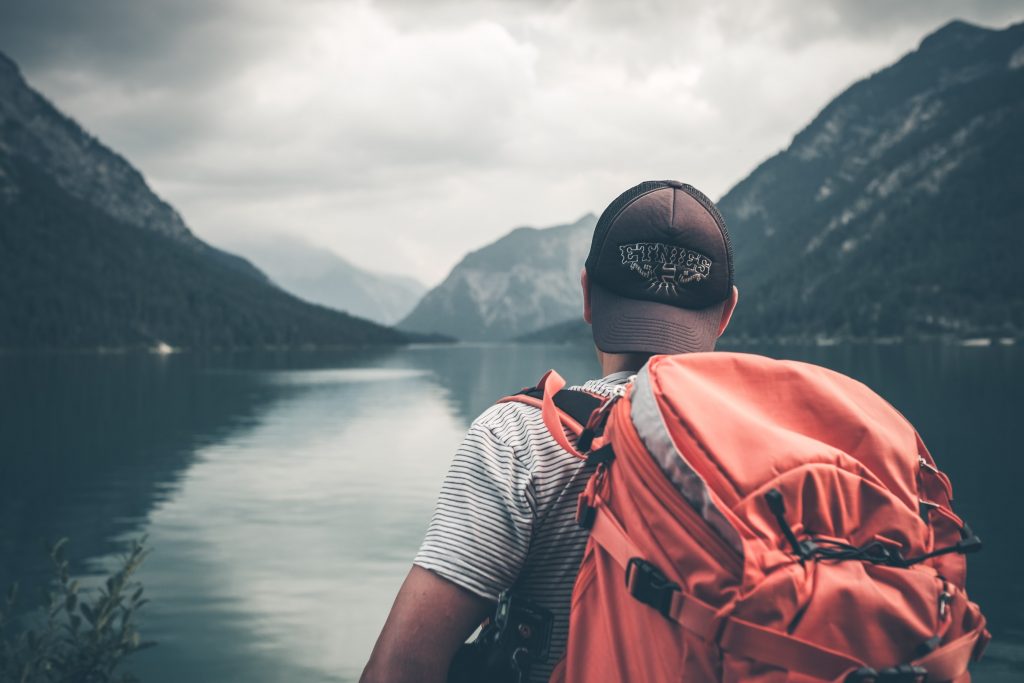
Camping is a fun, relaxing and memorable outdoor adventure. Connecting with Mother Nature, hiking and watching the stars at night while sitting by the campfire, is simply therapeutic. For inexperienced campers, however, leaving the comfort of your house to sleep outside in a sleeping bag can seem scary and intimidating. With adequate preparation and a few expert tips, you can achieve the perfect camping experience and enjoy your outdoor break to the fullest.
If you are new to camping, it is important to choose your campsite wisely. Your campsite will greatly determine how much you will enjoy your camping experience. Identify a location that is safe, warm and dry. Nothing feels worse than discovering that the campsite you chose flooded due to heavy rain and the facilities available are wanting. Ask for recommendations from family and friends on sites that are novice friendly.
Make A Checklist
Before you set off on your camping expedition, it is important to make a camping essentials checklist to help you gather everything and stay organized. Use your checklist to pack and tick off everything that gets into your bag. A checklist will ensure that nothing gets left behind. Start packing early in advance and update your checklist if needed to ensure you carry everything.
Pack The Right Gear
The right camping gear is of utmost importance to a new camper. Pack light but ensure you bring along the most important pieces needed for your camping trip. Carry warm clothing for the night. The weather could change drastically for the worst. It is also important to familiarize yourself with the gear before you go camping. Practice how to set up your camping tent in your backyard. Check if your sleeping bag fits just right. These important steps will help you survive and enjoy your first camping trip.
Buy A Big Enough Tent
If you want to be comfortable during your camping adventure then buy a bigger tent than what you actually need. Sleeping in a crowded tent with limited space will leave you cranky and drain your enthusiasm. Ideally, you should carry a head height tent that allows you to comfortably stand up inside it. Most tents are foldable and can easily fit in the trunk of your car.
Carry Your Own Portable Toilet
As a camping novice, having to run to the nearby woods every time the need to use a toilet arises can be stressful. That is why it is important to purchase your own portable toilet before leaving for the camp. Portable toilets are relatively inexpensive and hygienic. The new models are exceptionally light yet they are as good as your home toilet. Having a portable toilet will also prevent hygiene and sanitation problems that could arise from contamination from human waste.
Conclusion
I do hope that these 5 survival tips for camping novices will help you make your first camping trip enjoyable and memorable. Need to purchase a camping toilet? Home Worthy List has reviewed the best portable and camping toilets for 2018 on this page . Check out this comprehensive review and find the camping toilet you are looking for.
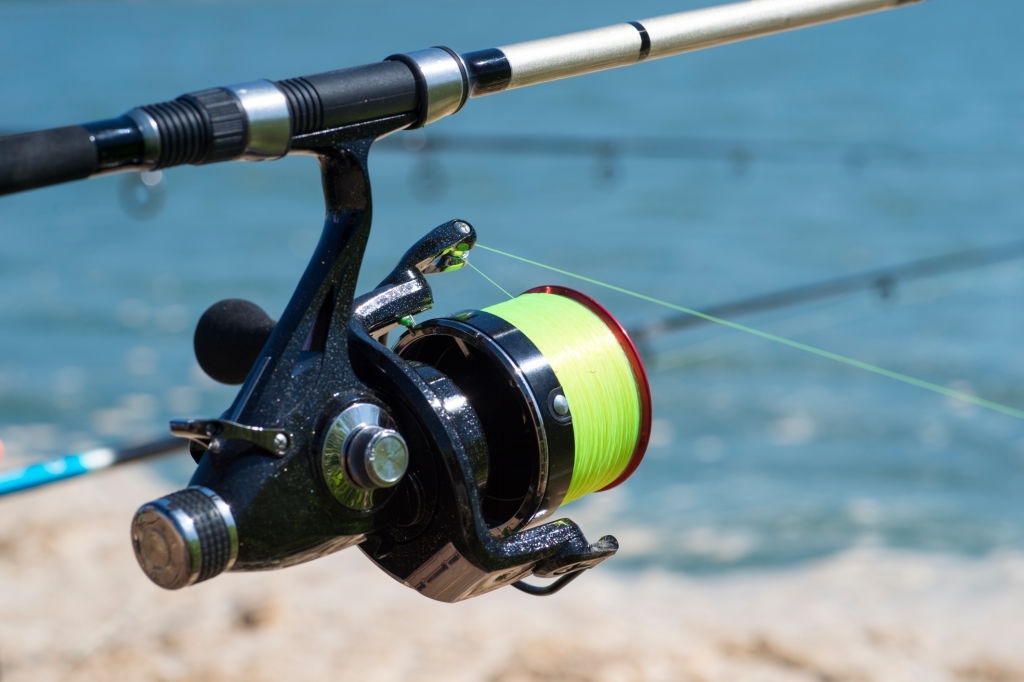
If you are a new fisherman, a question may come to your mind: how long does fishing line last? If you ask this question to a seasoned angler, he too will be unable to give a clear answer to this question. It is because there is no set of rules or criteria that help someone to figure out the lifespan of a fishing line. The longevity of a fishing line depends on several factors like the type of fishing line one is using, the materials from which the line is manufactured, and the proper maintenance of the line. Let’s discuss these factors in detail.
Factors That Determine the Longevity of a Fishing Line
The Type of Fishing Line
The type of fishing line you are using will give you a good idea regarding the durability of the fishing line. There are different types of fishing lines out there. These include braid, monofilament, and fluorocarbon.
Braid
Among all types of fishing lines out there, braid fishing lines come with the highest durability. If something did not happen unexpectedly, a braid fishing line could last up to a decade. Happening something unexpectedly means since fishing itself is quite unpredictable, so is happening of incidents like tangling of fishing line with a submerged object that may require you severing the line. So no matter whether you are using a tough fishing line like a braid, a sudden incident can drastically reduce the lifespan of a fishing line.
One common mistake of many people regarding braid is when they see their braid is losing color, they think that the line is worn out and needs to be replaced. But, it’s a wrong idea because a particular color does not stick well to a braid that quickens the fading of it. So discoloring the braid does not tell anything about the endurance of the line.
Braid receives harsh treatment from rods guides if they are sharp and chipped. They eat away your braid unnoticed. The bale of your reel may also limit the lifespan of your braid. If the bale has sharp chipped edges, your braid may be snapped anytime. One effective technique you can apply to increase the lifespan of your braid is flipping the line on the fishing reel. If a flipping task is difficult for you, go to a tackle shop. It will do the task for you. Or you can do it yourself. Transfer the line to a spare reel or object. Then transfer the line to another spare reel or object. When you spool the line back to the reel again, the line will be ready to use.
Monofilament
This is the most popular type of fishing line. Fishermen simply call this fishing line mono. The monofilament line is like a long continuous cord that is made of nylon or synthetic fiber. Since monofilament is one single strand. The line comes with a nice stretchable property when subject to pull. How much stretch the monofilament can withstand is indicated by a parameter which is called test. The text refers to the amount of poundage that the line can sustain before the breakage.
Though monofilament is the most popular type of fishing line among other types of lines, it takes the least amount of time to turn into a bad line. It does not resist the wear and tear resulting from exposure to elements and UV rays for a long time. One important tip for fishermen who use monofilament is to change the line once in a year to ensure getting trouble-free fishing experience. The durability of a monofilament line also depends on the proper use of the line and the extent of abuse you exert on it.
Fluorocarbon
This line is 3 to 4 times stronger than monofilament. In other words, it’s strength is similar to monofilament. So, you can apply the similar care and maintenance procedure as you do for monofilament. The longevity of a fluorocarbon line is not a big issue since the line is mostly used as a leader which often undergoes frequent changes. Fluorocarbon has a structural similarity with monofilament. Like monofilament, it’s one continuous strand of the line but since the line is made of polyvinylidene fluoride, it is much stronger than monofilament.
Though fluorocarbon is much stiffer than that of monofilament, one limitation of this line is it does not wrap well around a reel. But this is a minor limitation of this fishing line while fluorocarbon is a number one choice of many fishermen due to the fact that the line supports all fishing conditions-whether it is saltwater fishing or freshwater. Its Near invisibility coupled with the rigid stiffness of the line makes it a highly efficient line to catch different types of fish species like walleye and bass. If you want to use a fluorocarbon line, choose your fluorocarbon line after reading reviews of products of several brands.
Another plus point of Fluorocarbon is that UV rays can’t damage the line. So this line does not lose its shape over time allowing anglers to catch fish for a long time. Unlike monofilament, fluorocarbon lines are a bit heavier but they are easy to spool, and using them is hassle-free.
When to Replace Fishing Lines
It depends on your fishing habits. Based on the type of fishing line you are using, follow below replacement recommendations
Braid
Don’t use braid if it has been sitting idle for 10 years
If you only enjoy weekend fishing, replacing it 3 to 4 years is fine
For moderate fishing- replace the line twice a year
If you involve in heavy fishing, the line needs to replace every year
Monofilament
Don’t spool monofilament if it is not in use for 2 to 3 years
For weekend fishing, replace it once a year
For moderate fishing, replace it 2 or 3 times each year
For a heavy fishing change, it more frequently likes 3 or 4 times in every year
Fluorocarbon
Discard the line if it has not been used for the last 7 years
For weekend fishing, it is fine to replace in 2 or 3 years
For moderate fishing, the frequency of replacement need to exceed a couple of times in each year
For a heavy fishing change, it quite often likes 2 or 3 times each year.
Many different useful gadgets are great for family camping, but we will list only four of them in this list. We think that these will be the most helpful for your family because they are timesavers and very convenient. It is essential to ensure that you are prepared for your camping trip long before you go, not to be stranded once you get there.
1. Instant Cabin / Tent
An instant cabin-style tent will be handy for you and your family. It is pre-fitted with attached poles, a room divider, zipper doors, windows for ventilation and privacy, and a hanging storage pocket located in different tent places. This fully taped water-resistant rain fly is already attached, and it is set up and only 60 seconds on its own. This will help you and your family when you are just getting to your campsite, and you have other things to remove from the car and set up before you can sit down and relax. Setting up your camping tent can take the most extended amount of time and be the most stressful out of everything you have to set up on your trip. This invention takes the hassle out of all of that.
2. A Flashlight
A first-aid flashlight is an incredible invention that will be very helpful on your camping trip. This is a flashlight that has first aid kit items inside of it. It comes complete with painkillers, anti-subject wipes, tweezers, nitrile gloves, a compass, and an emergency whistle. This first aid flashlight can be easily attached to your outdoor gear or your belt. There should be perfect items you have when you were out camping because it includes most things that you would need in an emergency. This first aid flashlight has many items included in it for an actual emergency; however, it is also essential to have a more extensive first aid kit at your campsite that you were staying at.
3. A Portable Generator
A portable generator would be a very significant resource to have with you when you were camping. This could be there to help you charge your cell phones, your car battery if it dies, anything that can be plugged in to charge can use this outdoor generator. An inverter generator is a lightweight package that delivers 2000 running lots. It is easy to transport in your bag as well as store in your campsite. This generator is very quiet so that it does not disturb your trip or your neighbors trip, and the fuel consumption is low, so your generator will run for a long time and charge your electronics for a long time, probably even longer than you need it to.
4. A Portable Wood-burning Stove
A little stove is always handy and a great idea to bring to the campsite; therefore it’s an excellent addition to your camping equipment. This can be used whether or not you have a fire pit at your campsite. It is sleek, handy, and eco-friendly. If you happen to be at a utah state park campground, you will find this one a total asset because it will allow you to enjoy the sky and nature without all the bells and whistles that electric items have. You can use it for cooking your food, boil water; you can use the fire heat to keep yourself warm; you can use the firelight to make your camping trip have more visibility. And there is also an option where you can use it as electricity to charge your phones and other equipment.
This portable wood-burning camp stove does not have enough energy to power your car battery if it dies. Still, it is an excellent addition to your camping equipment because it can charge other necessities.
As mentioned above, it is imperative to be prepared for your camping trip way before you even go on it. Do you want to ensure that you have all the necessary equipment before leaving, not to be stranded once you get on your trip. There are many more fancy gadgets that we did not mention on this list that will help you to get the best out of your camping experience. As you go camping, you will learn what items work best for you and what items you would like to purchase to make your trip more enjoyable.
Author Bio
Stephanie Caroline Snyder graduated from The University of Florida in 2018; she majored in Communications with a minor in Mass Media. Currently, she is an Author, a Freelance Internet Writer, and a Blogger.
For every family and individual, it’s essential to be ready for the unexpected with an emergency preparedness kit. Situations like natural disasters, utility failures, or political unrest can and do happen. These events will leave you without access to your normal resources and supply chain for often a few days. While long term emergencies are a possibility, the most common length of time that you may be without water and power is 48 hours. That is why you should always have an emergency 48-hour survival kit on hand. This kit should include (at the least) food and water, light sources, sanitation items, first aid, and essential tools.
The Basics for Your 48 Hour Kit
While packing an emergency kit can seem like a large task, it is important to only pack things you need. Even though you are most likely to use it at home, keeping your kit compact and portable is also important so that you could grab it and go if need be. Store your kit somewhere dry and easily accessible.
Water & Non-Perishable Food
Arguably the most important thing you should include in your bug out kit is water. Ensuring you have drinkable water is extremely important, especially if your emergency occurs during hot weather. The average amount of water a person is supposed to drink a day is 13.5 cups a day, so you want to make sure you have enough for you and the people you are with. Understandably, packing a lot of water in your 48 hour kit can become heavy so consider purchasing a filtration straw that allows you to drink unfiltered water if it comes to that.
Additionally, you should make sure you have food in your kit. Pack healthy, easy to store, non-perishable food that you can eat at any time. You want your food to have nutritional value so food like canned meats or fish, granola bars, dry cereal, etc. are all good things to have in your kit. Several MREs (meals ready to eat) are a good idea to include as well.
Light Sources
The next most important items you should store in your 48 hour survival kit are light sources. Nothing is worse than not knowing what your surroundings are in an emergency situation. Many emergency situations can lead to power outages so being prepared with alternative lighting sources is essential.
For a portable light source, include one or two bright and long lasting flashlights in your 48 hour survival kit. If you have access to power in the form of a generator or solar powered outlets a rechargeable flashlight should be fine, but an AA battery light can be better for a long term emergency event. It is also a good idea to include a lantern in your emergency kit to illuminate larger spaces for more comfortable use in living spaces at night.
Additional Supplies
Having a few or all of these items in your 48 hour kit will definitely come in handy in an emergency situation. Keep these additional supplies in your short term survival kit:
Toilet paper
Hand sanitizer
Antibiotics
Bandages
Can opener
Mask
Flashlight batteries
USB charging cord
Whether these items help prevent infections or are simply sanitation items, you’ll definitely want to pack at least a few additional items to basic food, water, and lighting. Also, consider what types of events might be the most likely to happen in your area; if you live somewhere where dust storms happen often, a mask will be great to include. If you live in a very cold area, store extra blankets.
Your 48 Hour Survival Kit
Be prepared for the unexpected with everything outlined for your 48 hour survival kit. The most important items are water, non-perishable food, and adequate lighting gear. Don’t forget to pack additional supplies you might need to survive. While you will hopefully only need this kit for 48 hours, you could wind up relying on it for much longer.
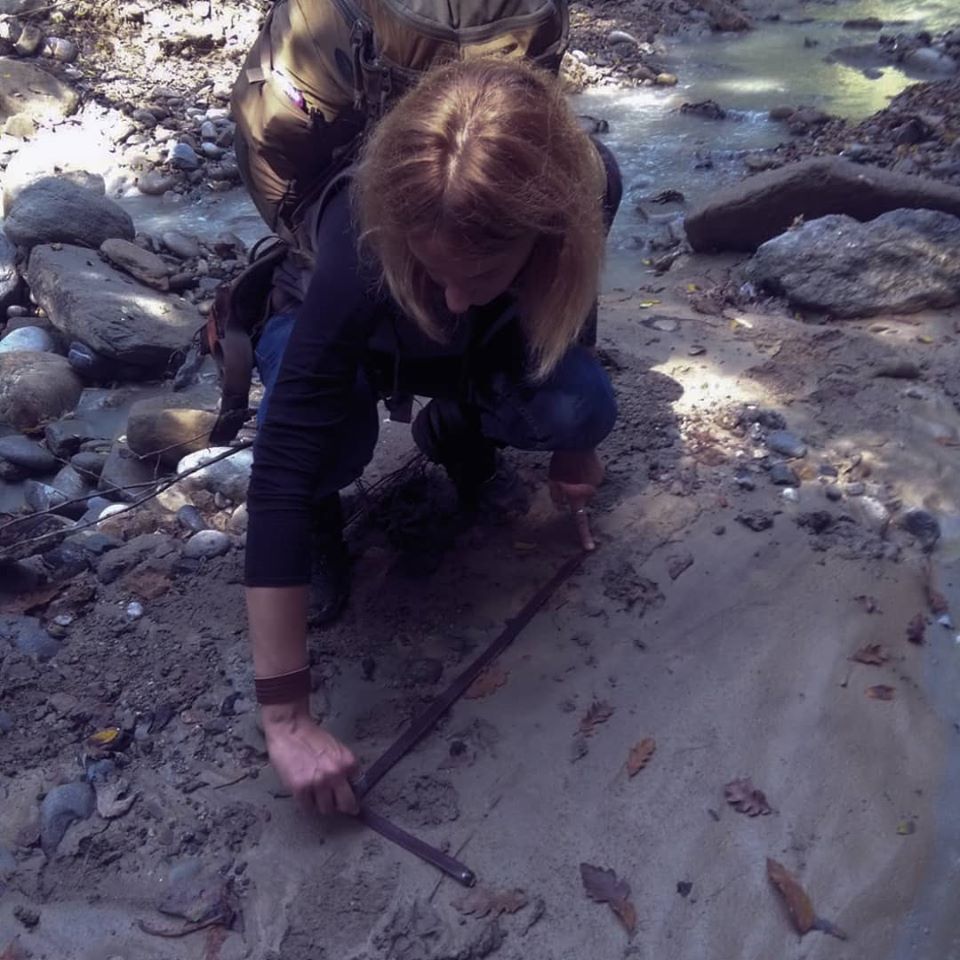
Kyt Lyn Walken is the official European representative and instructor for Hull’s Tracking School (Virginia, USA), and she is a certified Conservation Ranger for C.R.O.W. (Conservation Rangers Operations Worldwide). She has been an outdoors and tracking enthusiast since childhood. Kyt lives and works in Europe even if she often travels overseas, and can be contacted at man-tracking.com
Any worst case scenario has its own features and what we can actually define ” rules of engagement “. Prohibitive weather conditions, lack of proper gear, absence of cardinal points or unavailability of connection for mobile phones (or GPS): if we add to that an inadequate preparedness we can easily find ourselves abandoning soon every hope to get out sound and safe.
I am pretty sure that all the readers of YEAR ZERO SURVIVAL have not only the proper skills to face quite any kind of challenge and adversity, but, most remarkable thing, they can count on an ideal mindset to do that.
As I often stress with my Students during Basic Tracking Classes, the starting point is ATTITUDE, which is strictly connected to MINDSET. The vanishing point is to give up. I know no Skills in which you can’t apply this perspective. The Art of Tracking makes no difference in that.
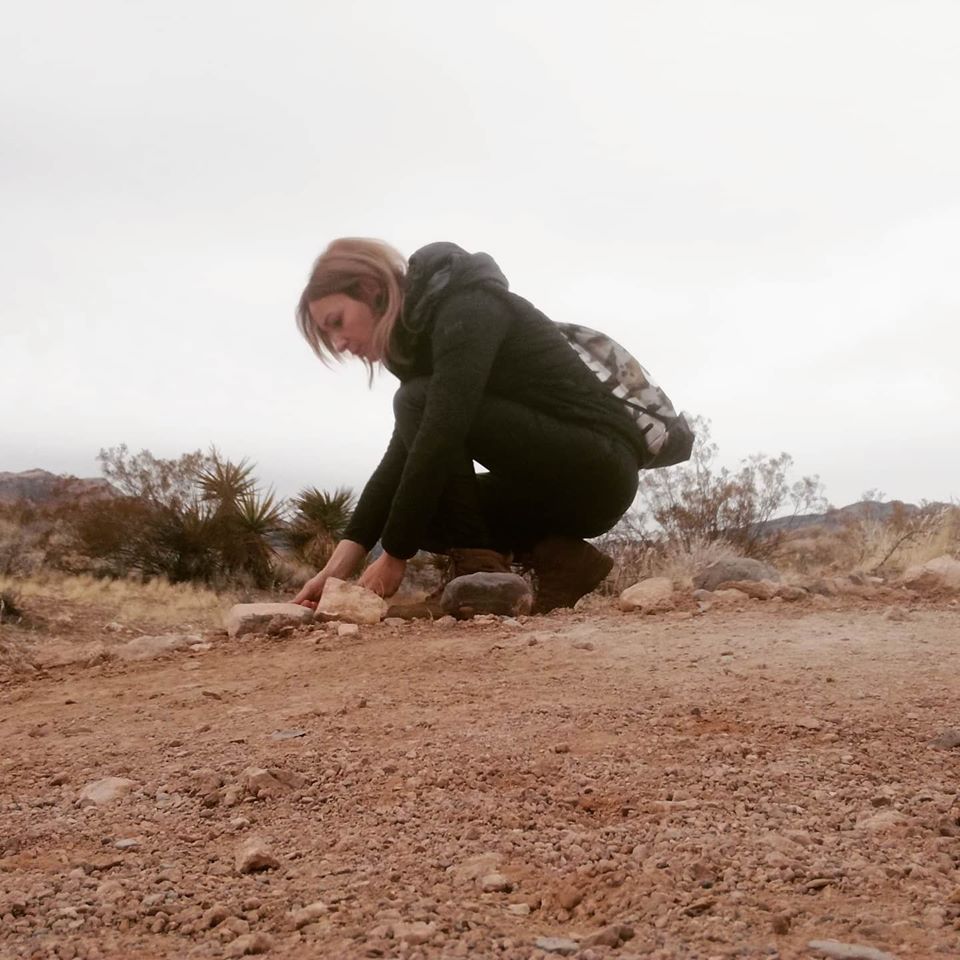
Our choices are always driven by our mindset and we gain benefits from them, if applied in the right moment and in the correct context. Personally speaking, I have been an Outdoor enthusiast all my life, but the needing of learning how to face an ongoing bad situation (and, consequently, how to fix it) came only with my mature age when I understood that accidents in life can easily happen. My approach to the Art of Tracking just crossed the same path, as from a young girl fascinated by those Native Americans in Western Movies I turned to be into an individual who deeply matured in her heart and mind the willing to learn how to read and follow tracks.
Necessity plus curiosity can spark, if united. So happened in my very own case, I can tell you. The critical point is: why should a person start to look at the ground, especially in an emergency situation? People who approach my classes often ask me that.
The answer is far away than being.. unphanthomale! Because the ground (and, sequentially, the entire environment you are in) provides us ALL the information we need to get out from a tough situation.
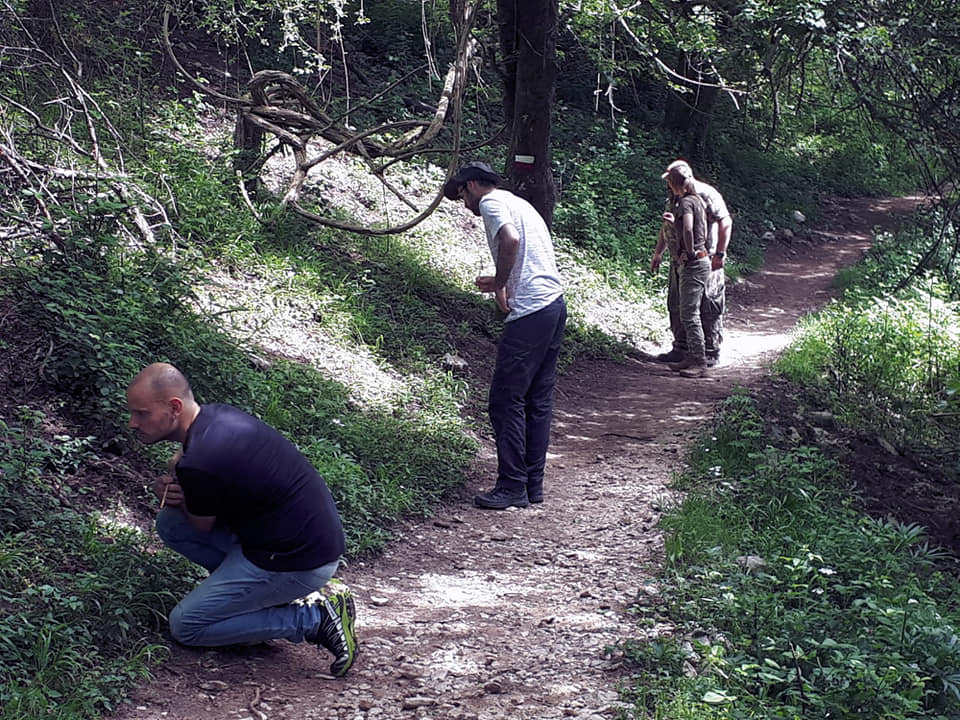
Search and Rescue Teams do know it very well, especially those who can count on the presence of Trackers inside their groups.
Trackers are not special breed persons. They didn’t deal with any Voodoo during their childhood and they are not guided by any Supernatural force when they inspect the ground to gain important information. They just rely on simple facts, and on Science. Their task is to read the ground, interpret what they see and follow the tracks which are of their interest. They collect clues (which are precious data for them) and put all the pieces together. In this manner, they can disclose how many persons passed on a specific trail, at what time, if they were carrying loads and so on.
Again, if they were women and/or men, if any animal passed before or after them, if anything relevant happened. I am talking of an unbelievable amount of information, I know.
If this can sound to you a bit odd, I recommend to do your researches on internet. A lot of cases – murders, mass killings and so on – have been solved applying the Art of Tracking. Yosemite Murders and Oklahoma City Bombing, both occurred in 1995, just to mention a couple.
Any disappearing in the woods can be handled through the application of the Art of Tracking, which happens to be extremely effective even if she comes straight from Primitive Era. Technological developments, in fact, seem to have no effects in successfully replacing the feasibility of this skill, anytime, any place. And surely I am not the only one who claims that!
Equally speaking, becoming a Tracker can be extremely useful if you find yourself lost, especially if you have no GPS and the connection is totally off.
Being stranded can surely be a good way to test your Survival (and Bushcraft, why not?) abilities, but we can’t ignore our very first instinct: move along before the darkness come, search for help. In few words, come back sound and safe.
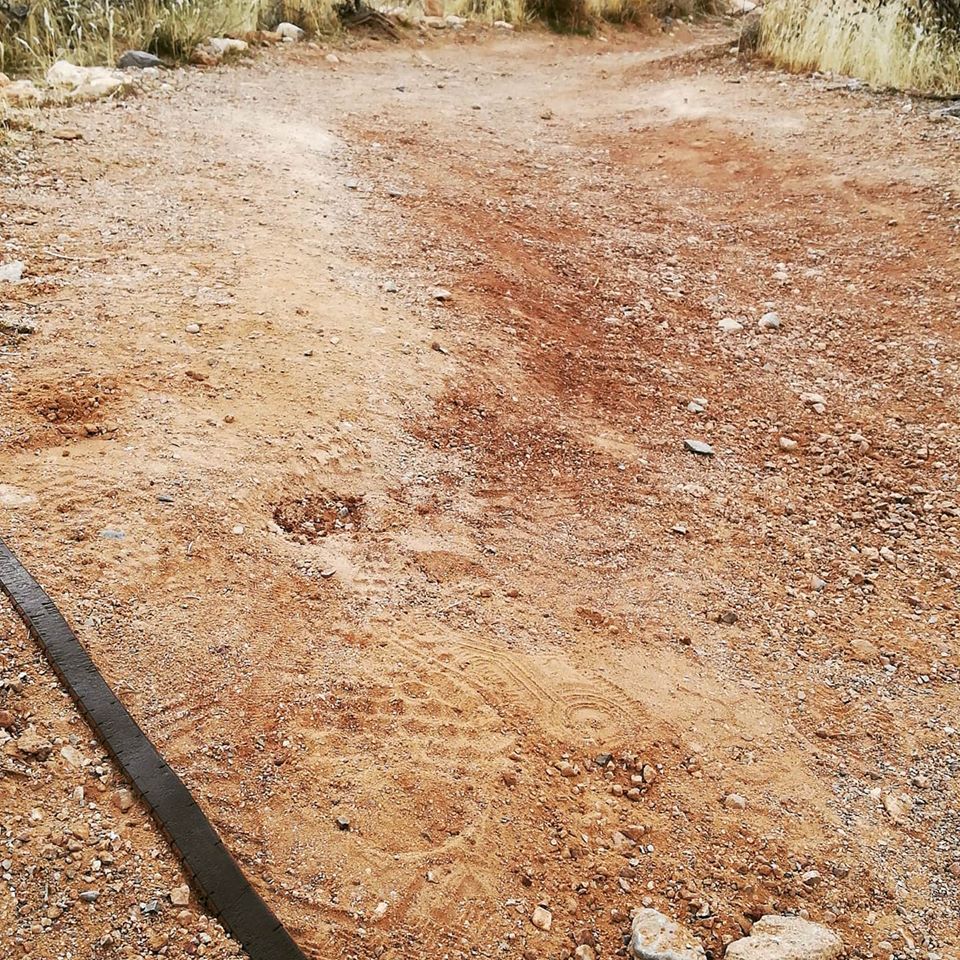
Reading the tracks of other people on ground, for example, can lead you to a safe place: a parking area, the next road, and so on. No doubt you need to be almost very good in that, principally if the soil is clearly tough to read to the presence of rocks, gravel, leaves, grass and so on. Sandy and muddy soils are certainly precious aids in locating the trail to follow: on them, in fact, we can clearly see the outline of footprints.
Considering the case you are an experienced Tracker, backtracking yourself will be probably your very first choice. You may be familiar with your stride (the total length of your pace, measured from heel of left footprint to heel of right, or from toe to toe) and you know how to recognize the pattern (the design) of your boots.
Sounds easy, right? You can’t be more wrong. In fact, to reach even the lowest level of being a proficient Tracker, you should have gained experiences in years and years of “dirt time on ground” (as defined by Tracking’s terminology).
Every skill that can save your life requires that, and the ancient (and still so valuable!) art of reading, interpreting and following Tracks makes no exception.
Storage space, unpredictable weather, and food supplies are
just some of the things you have to consider when preparing a trip to the great
outdoors.
This list of 17 life hack camping tips from GuideCool will tell you exactly what materials you need and how to put them together for the best trip possible.
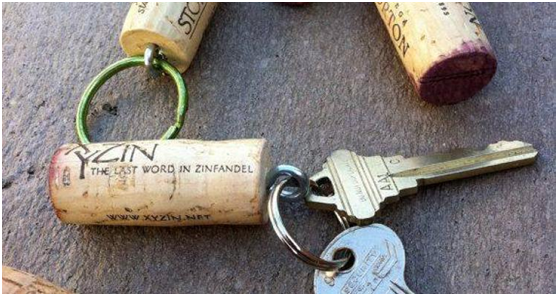
Camping Hack #1 – Keep Your Keys Safe with Cork
If you plan on being near the water on your camping trip
then get on board with this simple but effective trick.
Gone are the days of watching your keys fall to the bottom
of the lake.
Plus, attaching an old wine bottle cork to your key ring
takes less than a minute.
What Do You need?
A screw eye
A cork
How Do You Do It?
Simply twist the screw eye into the cork. Then attach your key-ring and you’ve got a buoyant set of keys.
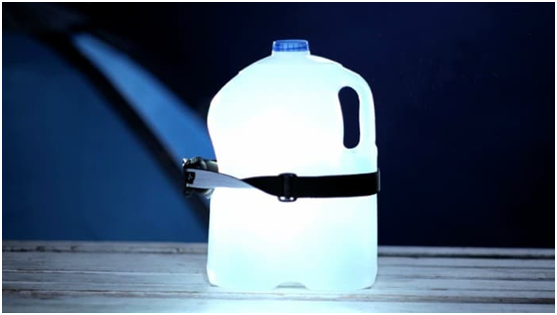
Camping Hack #2 – Light up Your Tent with a Water Bottle Lantern
A water bottle lantern will easily light up your camping tent or camping area with minimal fuss.
What Do You Need?
A head torch
A water bottle
Clear tape
How Do You Do It?
Firstly make sure the water bottle is full of water. Then
point the torch into the bottle.
Once you have the best angle that gives you the lightest, attach the torch to the bottle with clear tape.
Camping Hack #3 – Use a Bowl Speaker to Increase the Volume of Your Music
Most camping fans listen to music or podcasts through our
phones from time to time, but the sound is never loud enough for a group.
Luckily, this simple hack changes that.
What Do You Need?
Smartphone
Camping Bowl
How Do You Do It?
Place your phone with the music or podcast playing into the
bowl.
The key here is to point the phone’s
speaker towards the bottom of the bowl.
The sound waves then reverberate around the bowl as it acts as a speaker, filling the air with sound.
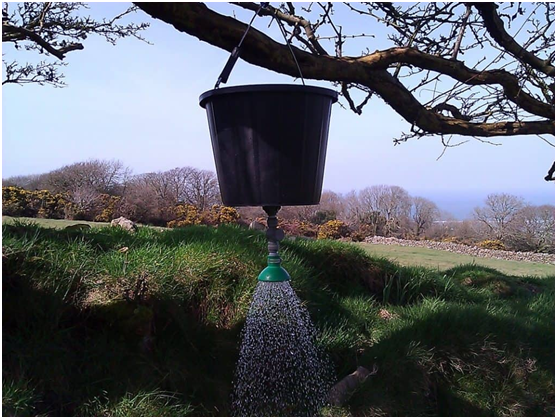
Camping Hack #4 – Use a Watering Can Shower to Wash off the Day’s Activities
Smelling fresh and staying clean on a camping trip can be
tricky, especially if you spend a few nights in the wild.
However, this homemade shower means the beauty of adventure
doesn’t have to mean sacrificing hygiene.
Watering cans can take up valuable packing space, so it’s
a good idea to use them for storage while they aren’t being
used.
Packing them up with your bathroom products or
plastic-wrapped foods like pasta works perfectly.
What Do You Need?
A good-sized watering can
Bungee Cord
How Do You Do It?
Fill the watering can full of water and put it out in the
sun.
You can even leave it by your camp in the morning before you
head out for the day.
When you get back your warm shower will be ready.
Your challenge is to find a place to hang the watering can
at an angle so it pours the water evenly.
Loop the bungee cord through the handle. Then find a tree
branch above head height to attach it to.
As the water slows down, simply move the bungee further along the handle to create an angle so the water keeps on flowing.
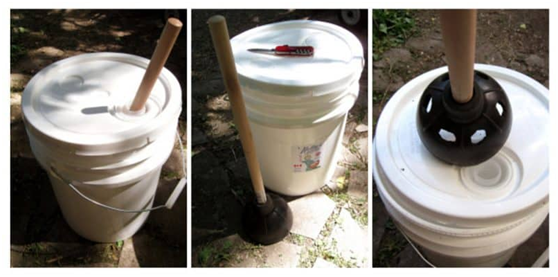
Camping Hack #5 – Keep Your Clothes Fresh with a DIY Washing Machine
Camping trips are almost always full of activities. And, while long hikes and kayak trips down river create amazing memories, they also create dirty clothes.
Luckily, this simple washing machine will have your t-shirts
and shorts feeling home washed in no time.
What Do You Need?
A standard bathroom plunger
Water Container (Size varies on storage space)
Knife
How Do You Do It?
The water container can be of any size.
Big18 liter water buckets are perfect because the water
really gets to move around.
However, standard plastic washing up basins also works well.
It all depends on how much space you have for storage.
Once you have the container, fill it up halfway with water
and some laundry detergent. (Baking Soda is a great camping substitute for
detergent).
Let your clothes soak for 10 minutes while you prepare the
plunger.
Using the knife, cut six evenly spaced holes in the plunger.
They should be the size of the top of your thumb. About half
an inch around.
Then start sloshing around the water with your plunger washing machine! The average item of clothing takes about 10 minutes to clean.
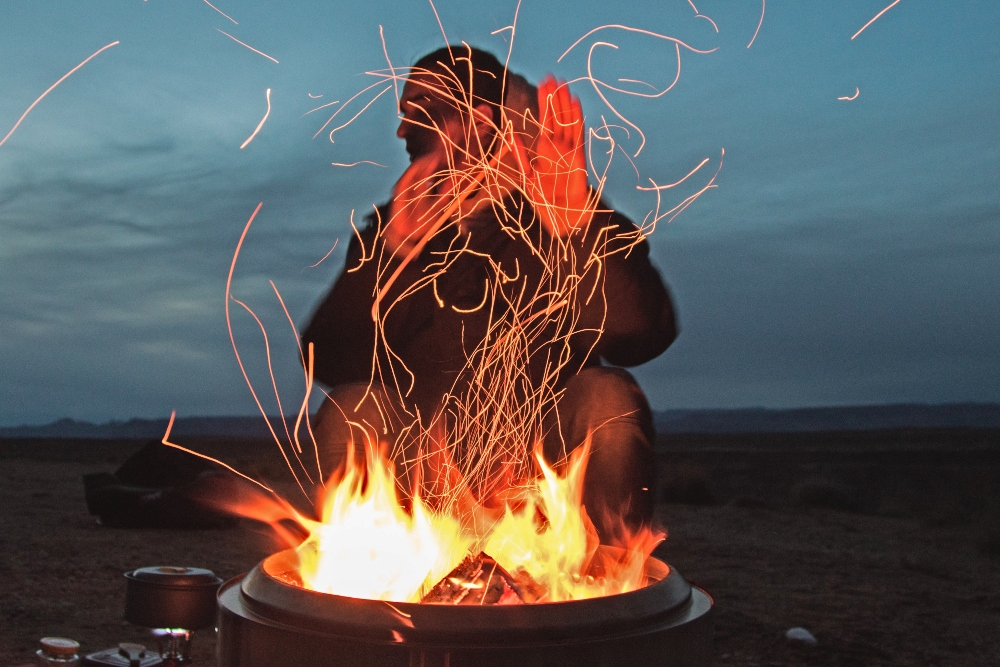
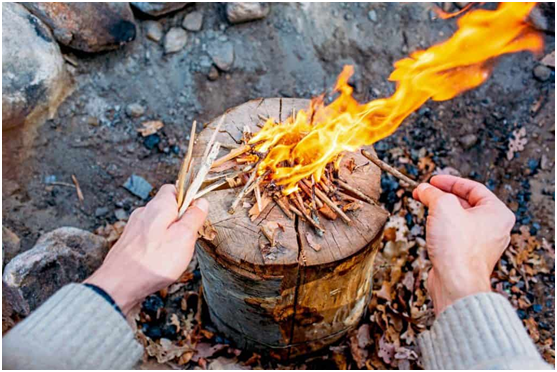
Camping Hack #6 – Eat Like a King (Even if it’s wet) on this Swedish Fire Stove
The Scandinavians know their fair share about surviving outdoors. This Swedish Fire Stove can be premade and then used if the weather takes a turn for the worst.
What Do You Need?
Six logs of wood
Strong Wire
Wood Shavings
Fire Lighters
How Do You Do It?
You can either buy the wood before you go or go out looking
for it once you’re at your campsite.
Either way, you will need six logs of a similar height.
Place the logs together so they make a circle and bound them
with wire.
The key here is to leave enough space in the center of the
logs to place your firelighters and wood shavings.
Mix the firelighters and wood shavings together before you
push them into the center of the six logs. This way, when you come to light
them you won’t have any trouble starting a flame.
You can also store the fire starter mix away from the logs
until you use them together.
Once the flame is lit you can expect your stove to be ready
in around 30 minutes. During this time you may need to gently blow into the
logs to stoke the fire.
The logs will start burning within the center and create an enclosed heat perfect for cooking on. So just place your pot or pan on top of your stove and enjoy your meal!
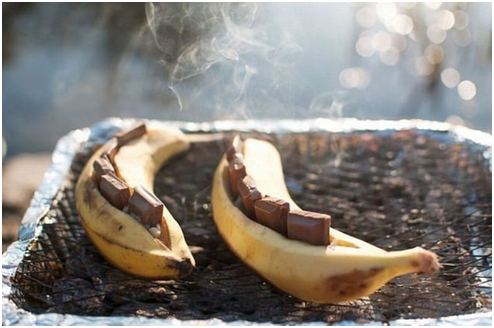
Camping Hack #7 – Satisfy Your Sweet Tooth with this Banana + Mars Bar Dessert
After a long day in the woods, there’s
nothing better than a sweet bite of this campsite dessert. Plus, the banana
offers a great source of magnesium to help with muscle recovery.
What Do You Need?
Bananas
Tin Foil
Mars Bars
How Do You Do It?
Make a cut in the banana from the top to the bottom. Do not
cut all the way through.
Slice the Mars Bar into slivers. Then push the slivers
inside the banana.
Wrap the Mars Bar filled banana in tin foil and then place into the fire. Try not to eat in 2 seconds!
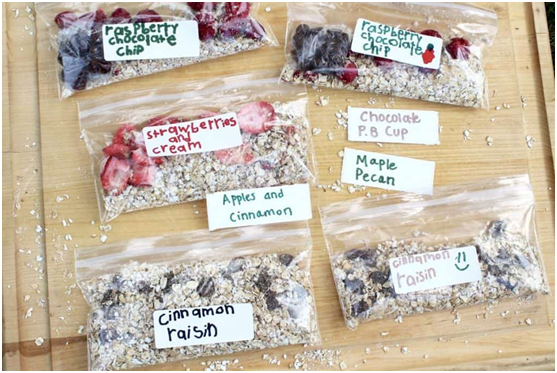
Camping Hack #8 – Save time and Boost Energy with Pre-made Oats
Oats are an amazing carbohydrate packed full of B-vitamins
that help to metabolize your energy so you can keep going way past lunchtime.
It can be tiresome preparing them every day, however, so
follow this guide for a tasty and convenient breakfast.
What Do You Need?
A Ziplock Bag or Jar
Rolled oats
Your favorite dried berries and fruit
Your favorite nuts and/or seeds
A dollop of honey
How Do You Do It?
There are two options. You can either make a large batch and
store it all in one container, or make separate daily rations.
In both cases, you mix at a ratio of:
1 cup of rolled oats
Half a handful of berries/Fruit
Half a handful of Nuts/Seeds
A teaspoon of Honey In the morning, add two cups of water for every cup of mix. Heat gently and stir until your desired consistency is reached.
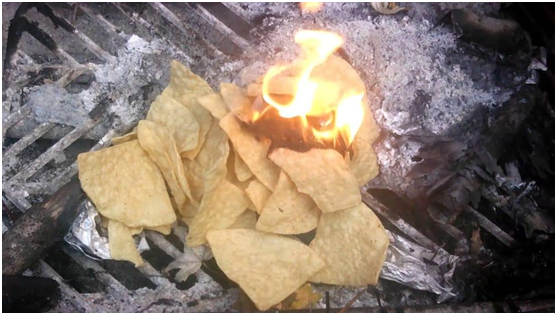
Camping Hack #9 – Take Corn Chips for Food and Fire
Corn chips are cheap and, like all good camping hacks, are
useful in more than one way.
We all know they are great for a trail snack on a long hike,
but actually they make a decent backup for firelighters as well.
What Do You Need?
Corn Chips of any variety
How do You Do It?
The eating part is pretty straightforward, obviously. And
actually so is the fire part.
Corn chips will burn a little slower than matches if you put a flame to them. Perfect for using inside your Swedish Wood Stove or tucked under some kindling in a traditional fire.
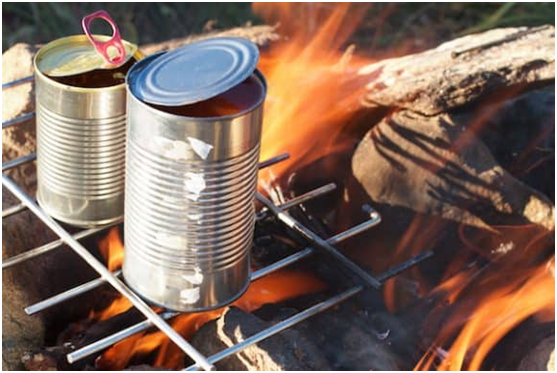
Camping Hack #10 – Throw Your Beans in the Fire, Get in the Cowboy Spirit
This little camping hack dates way back to the American
frontier, because cowboys didn’t much like washing plates
either.
A tin of beans will go straight in the fire and start
bubbling when they’re ready.
What Do You Need?
An open fire
How Do You Do It?
Peirce the top of the can with a knife. This gives the heat
inside the can somewhere to go and stops the contents inside from burning.
It also acts as a whistle to let you know when they’re
boiling.
Place your can of beans on the edge of the fire and wait.
Also, remember to use a wet cloth or a pair of tongs when you take the can back out of the fire.
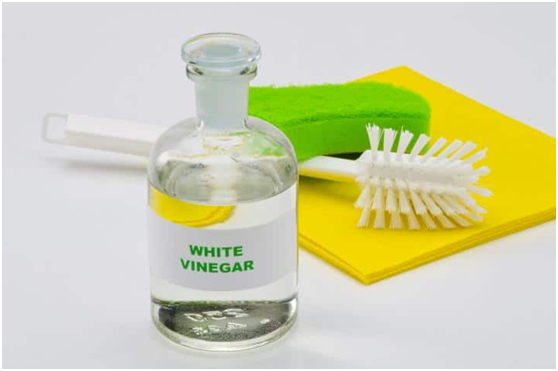
Camping Hack #11 – Pack Vinegar for the Ultimate Multi-Purpose Cleaner
Vinegar is one of those special substances that can do
everything.
First and foremost it’s a great cleaner because of
its acidity.
It’s perfect for camping because it’s
non-toxic, so you can freely clean with it without having to worry about your
effect on the surrounding environment.
The same cannot be said about most generic cleaning agents.
What do You Need?
White vinegar is best for cleaning because it doesn’t
have much of a smell.
Darker vinegars still work great but if you don’t
like the smell of vinegar you may want to avoid them.
How Do You Do It?
If your cool box or any cooking equipment starts to smell,
empty it out and soak it in undiluted vinegar.
After an hour or so wash it out with water and the bad smell
will be gone.
If you have a propane lantern you can soak the wicks in vinegar for half a day and expect your lantern to burn brighter and longer that evening.
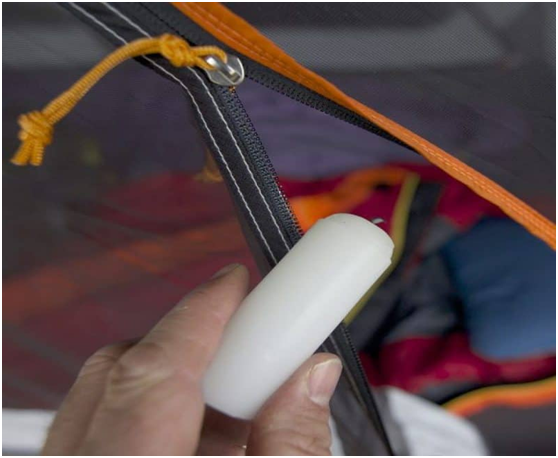
Camping Hack #12 – Use Candle Wax to Un-Jam Zips
There are few more irritating things than a jammed up
sleeping bag zip.
Apart from maybe a jammed up tent zip.
The process of delicately trying to move the zip without
breaking either your sleeping bag or tent door can be a painful one.
Luckily, that spare candle you packed can get rid of this
problem forever.
What Do You Need?
Any candle, preferably unscented. You want the wax to be as
pure as possible.
How Do You Do It?
Gently rub the wax onto the jammed area.
Then gently move the zip up and down. The wax will act as a lubricant and help you to slide the zip to safety. Do not use too much wax initially. This can lead to the wax itself jamming the zip.
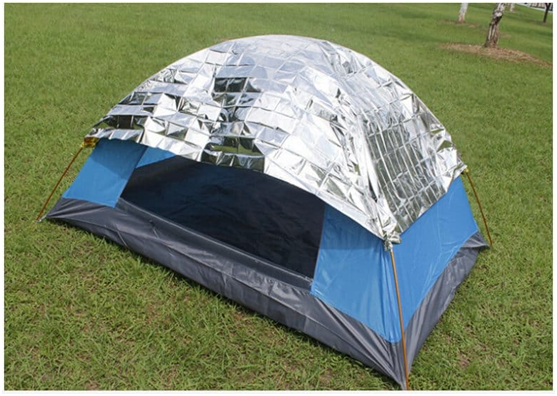
Camping Hack #13 – Stop Stifling Hot Mornings with an Emergency Blanket
Waking up in a hot, sticky tent can take the fun right out
of camping.
There is a really simple way of making life a lot more
bearable when the sun beats down through the trees, or if you’re
staying in an open campsite.
What Do You Need?
An emergency blanket (Foil Wrapped)
Reflective blanket
How Do You Do It?
Place the blanket over the tent where you expect the sun to
hit in the morning.
You can use more than one although consider the weight and
how it may affect your tent’s structure.
Well placed, the reflective blanket will keep the sun at bay until you’re good and ready to start your day.
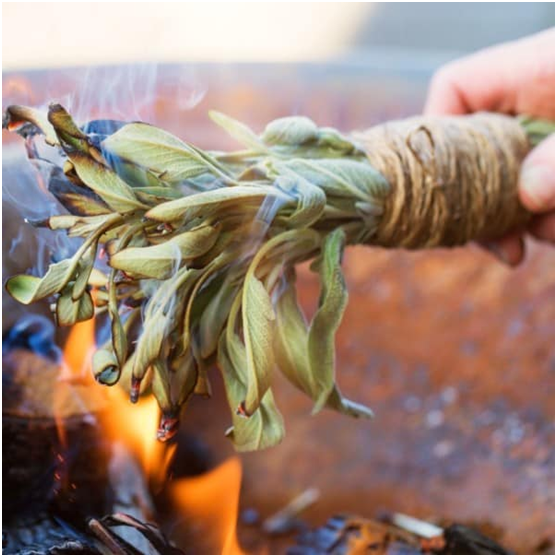
Camping Hack #14 – Keep the Mosquitoes Away by Burning Sage
Burning sage is an effective and natural alternative to
keeping mosquitoes away from your campsite.
The plant has also been found to clear almost all bacteria
from the air, creating a much cleaner and hygienic living area.
What Do You Need?
Sage leaves. Bundles of sage are available to buy online for
less than $4.
How Do You Do It?
Light the sage and blow gently so it begins to smoke.
Then place your bundle near to where you are sitting so the smoke wards off any mosquitoes.
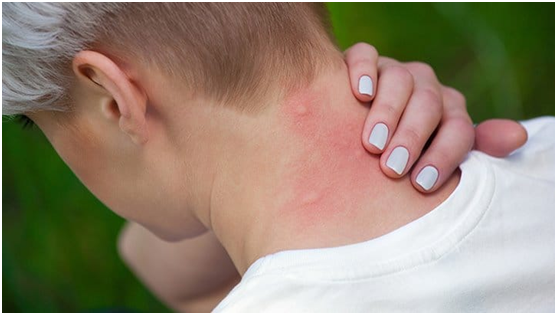
Camping Hack #15 – Stop the itching from bug bites with household items
It’s never fun getting bitten by a
mosquito, especially when you forgot to pack a soothing gel and the itchy pain
won’t go away.
Interestingly, there are loads of household items that will
help to soothe the irritation. Below is a list of the most effective ones.
What Do You Need?
Vapour Rub – The Eucalyptus extract helps
to soothe.
Aspirin – Salicylic Acid is an
anti-inflammatory
Thousand Island Dressing – This really works! How? It’s
just one of life’s big mysteries.
How Do You Do It?
Crush the aspirin down with water to make a paste and then
cover the bite.
The vapor rub and dressing can be gently applied to the area.
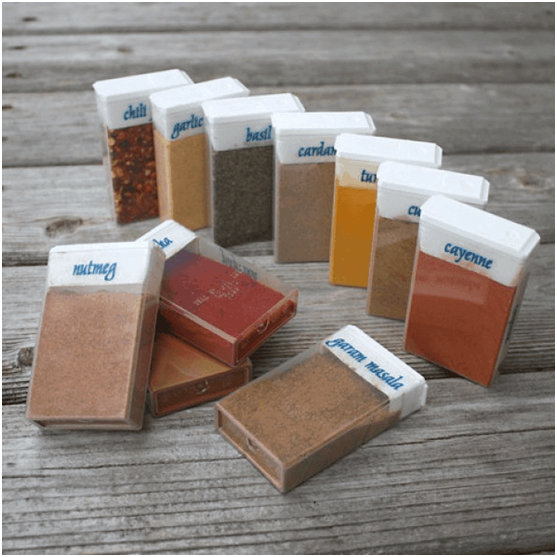
Camping Hack #16 – Store Your Seasoning in Tic Tac Boxes and Make Your Campfire Food Taste Great
Slow cooking on a campfire is one of the best ways to eat
food.
So it makes a lot of sense to bring your favorite spices and
seasoning with you.
The problem is that they often come in odd-shaped bottles
and are prone to spill.
That’s why those refreshing little mints
provide excellent storage cases for travel-size seasoning supplies.
What Do You Need?
Empty tic tac boxes
A marker pen for labels
Elastic band
How Do You Do It?
Fill the little boxes with your chosen delights and label
them.
Store them by tying them together with an elastic band.
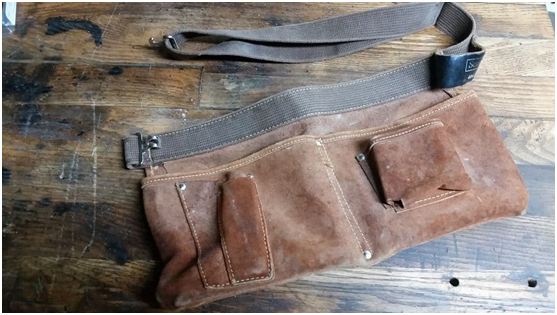
Camping Hack #17 – Use an Old Tool Belt to Keep your Camping Essentials Organized
It’s so easy to forget where you put the
torch when you need to leave the tent at midnight.
An old tool belt is a brilliant camping hack when it comes
to storing your essential items.
Plus, it’s a reusable item that’s
just been sitting in the garage collecting dust in its many useful pockets.
What Do You Need?
A multi-pocketed tool belt.
How Do You Do It?
Make a list of the items you think you will need the most
during your trip.
That will depend on the type of trip, but in most
environments, you’re going to want a torch, a knife and
some rope tucked into the conveniently place pockets of your new storage
system.
Conclusion
Little improvements to your camping experience can make a
huge difference to your enjoyment and safety in the great outdoors.
Preparation is everything.
We hope these 17 Lifehack camping tips will set you up for a
great trip and remember to share them with other people on the trail.
Bio
I am Jacob, the man behind GuideCool. I’m an incredibly enthusiastic (my friends would say nigh-on fanatical!) outdoors person and spend a lot of my time either in the mountains or planning my next trip. And my wife? She is passionate about seeing new places, meeting the people who live there, and immersing herself in another culture. We create GuideCool to share our travel life with others. I hope you enjoy our 17 life hacks camping tips.
Portugal is a highly rewarding country for tourists. It has natural wonders to savor and historical sites that cannot be found anywhere else around the world. If you prefer a more peaceful type of vacation, you can check Algarve golf tours for excellent personalized tour packages.
Portugal offers exciting opportunities for camping and
backpacking. Such opportunities allow you to travel on a budget and also avoid
crowded cities of brick and mortar. How do you ensure that you have an exciting
tour experience in Portugal whenever you visit? Here are practical tips to
consider.
There Is
More To Portugal Than Lisbon
Lisbon could be the capital of Portugal and the most popular
city. However, Portugal is bigger and has more to offer than Lisbon. Camping in
the city is an awkward idea for a vacation. There are outlying cities like Vila
Real, Porto, Braga, and Geres to the north. The south also offers excellent
camping locations like Setubal, Evora, and Beja, among others. Go away from
Lisbon and experience a wide range of beauty that Portugal has to offer the
tourists who pay homage.
Book Your
Flight And Accommodation Early
Camping sites are a hot cake in Portugal, especially in
summer. Locals and international tourists fight for the best spots around the
country. The spaces available for camping are also limited. You must,
therefore, book early to get the best site.
Camping sites in Portugal offer discounts to early bookers.
Early booking will allow you to enjoy the best location at a reasonably lower
price. It is the secret to enjoying the best value for money. Early bookers
also enjoy a wider range of options because most of the camping sites are still
open. Early booking gives you the best value for money.
Use
Experienced Tour Companies And Guides
The best camping experience in Portugal depends on how well you organize the trip. A good camping trip requires professionals who understand the options offered by the market. These are renowned companies that provide camping packages to locals and international tourists. Choose such tour operator to help in planning for your trip.
An experienced tour operator will provide a wide range of
options. The options help you save on transport, accommodation, and food, among
other elements, without affecting the quality of your tour experience. You will
also avoid risky camping areas that would compromise your health or safety.
Choose
Your Camping Season Well
Portugal has fantastic sites for camping throughout the
year. However, in all these opportunities, the weather is a huge factor
determining what you enjoy and how you enjoy it. There are seasons when it is
too hot to the point of being unbearable. In other instances, it gets so cold
that camping would be torture if you are not used to this weather. Camping
should be fun, and therefore, the weather must cooperate.
July and August are the favorites for most campers and
vacationers going to Portugal. It means that some camping sites will be too
full to provide a chance to rest. The most relaxing and uncrowded months are
May, June, September, and October. However, Portugal has something exciting for
campers all year round.
Prepare
For Emergency
Camping takes you away from central infrastructure into the
wild or less-inhabited areas. You must plan your trip with full consciousness
of your health and safety position. Inform the tour guide and organizers about
any health complication that already exists. Work with a tour company that
provides emergency rescue in case something happens in the wild. You’ll feel
safer and will enjoy your stay in Portugal.
Portugal remains a dream tour destination for campers. It offers world-class facilities at a reasonable price for all categories of tourists. Pick your camping options around Portugal and enjoy the outdoor experience of a lifetime.