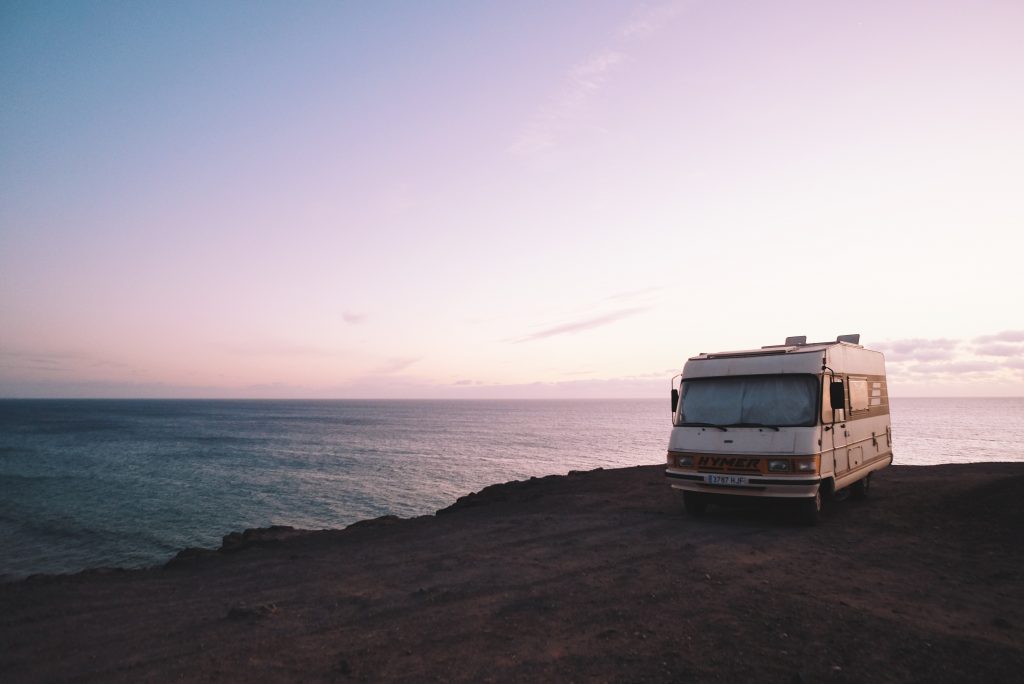
Are you an adventure enthusiast dreaming of escaping the hustle and bustle of city life and embarking on off-grid adventures? If so, a motorhome can be your ticket to freedom and exploration. However, selecting the perfect motorhome for your off-grid escapades is not a decision to be taken lightly. Here is some advice:
Determine Your Budget
First, establish a realistic budget. Motorhomes come in various price ranges, from budget-friendly options to luxurious models. Your budget will play a significant role in narrowing down your choices. Consider not only the initial purchase price but also ongoing costs like maintenance, insurance, and fuel. If you are looking to own an RV, there are many options in which you can do so. Financing options like Auto Finance Online have emerged as a game-changer, offering a convenient and streamlined approach to securing financing for your dream motorhome.
Define Your Off-Grid Needs
Going off-grid means you won’t always have access to campgrounds with full amenities. To choose the right motorhome, define your off-grid needs. Do you require solar panels for electricity, a freshwater tank for extended stays, and a robust heating system for cold nights? Make a list of must-have features to guide your selection.
Consider the Size
Motorhomes come in various sizes, from compact campervans to large Class A vehicles. Your choice should align with your travel style. If you plan on maneuvering through tight backcountry roads, a smaller motorhome might be a better fit. Conversely, if comfort and spaciousness are top priorities, opt for a larger motorhome.
Evaluate the Power Source
When you are off-grid, you’ll need a reliable power source. Many modern motorhomes are equipped with solar panels, generators, or a combination of both. Solar panels are eco-friendly and can keep your batteries charged during sunny days, while generators provide a reliable backup for cloudy weather or high energy consumption.
Prioritize Sustainability
Sustainability is a growing concern for many adventurers. Look for motorhomes with eco-friendly features like composting toilets, efficient energy systems, and water-saving appliances. This not only reduces your environmental footprint but also ensures you can enjoy off-grid living without harming the natural beauty you seek.
Inspect the Storage Space
You will need to carry extra gear, food, and water. Adequate storage space is essential. Check the motorhome’s interior and exterior storage options. Consider how you’ll secure your belongings during travel and whether there’s enough room for everything you need.
Think About Mobility
Your choice of motorhome should align with the terrain you plan to explore. If you intend to tackle rugged, off-road routes, a 4×4 motorhome might be your best bet. These vehicles are designed to handle challenging terrains, ensuring you can reach the most remote and breathtaking destinations.
Research Brands and Models
Research is crucial when choosing a motorhome. Read reviews, join online forums, and visit dealerships to get a feel for the different brands and models available. Pay attention to the reputation of the manufacturer, as well as the specific features and layouts of the motorhomes that catch your eye.
Test Drive and Inspect
Never underestimate the importance of a test drive and a thorough inspection. Get behind the wheel and drive the motorhome to ensure you’re comfortable with its handling. Inspect the interior and exterior for any signs of wear or damage, as these could indicate potential issues down the road.
Seek Advice
If you’re unsure about any aspect of choosing the right motorhome for your off-grid adventures, consider seeking advice from professionals or experienced RVers. They can provide valuable insights and help you make an informed decision.
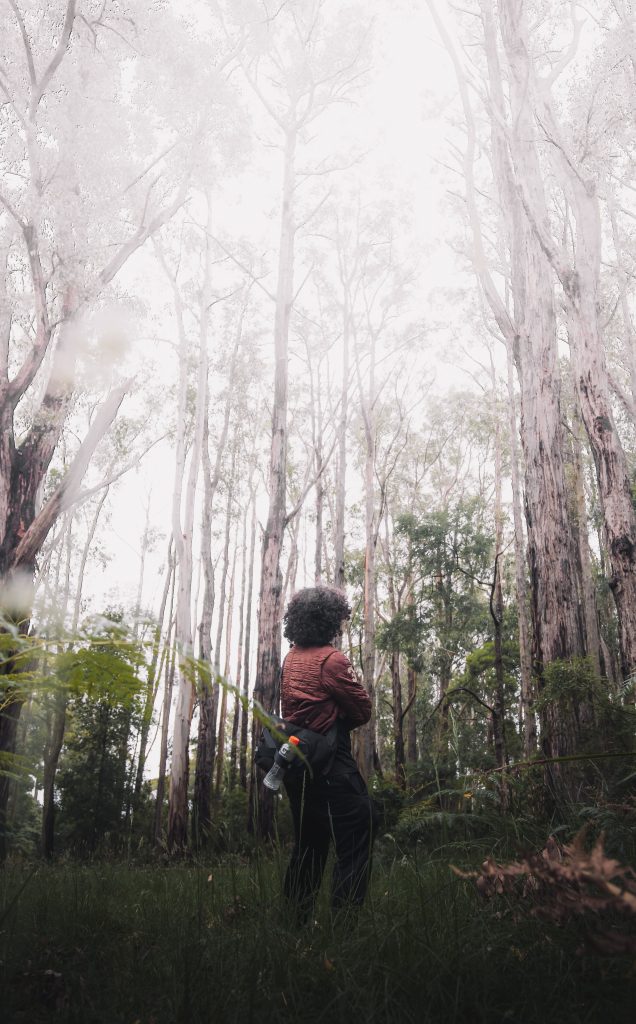
Getting lost in the wild might sound scary, but if you know what to do, you can stay safe even if you’re out there for a while.
Let’s learn about some things you can do to be okay during 11 days in the wilderness.
1. Stay Calm and Look Around:
If you realize you’re lost, don’t get too worried. Take deep breaths and try to figure out where you are. Look for things around you, like big rocks, rivers, or trees that can help you know where you are.
2. Make a Shelter:
Having a place to stay safe is really important. You can make a shelter using sticks, leaves, and things you find on the ground. It’s like building a little house to protect you from the wind and rain.
3. Find Water:
Water is super important for your body. Look for streams or rivers where you can get water to drink. If you can’t find any, you can collect rainwater using things like big leaves or your hands.
4. Make Signals:
Making signals is like sending messages to people who might be looking for you. You can make big fires with smoke so that rescuers can see it. You can also use shiny things like mirrors or even your phone screen to catch sunlight and make flashes.
5. Find Food:
Finding food can be tough, but there are things you can eat in the wild. Some plants have berries that are safe to eat, and you can also look for insects. It might not be like your regular meals, but it can help you stay strong.
6. Stay Warm:
When it’s cold, your body needs to stay warm. Wear lots of clothes in layers, like a sweater and a jacket. You can also use branches, leaves, and soft stuff to make a cozy spot to sit or sleep.
7. Rest and Be Positive:
Your brain and body need rest, so take breaks when you feel tired. Try to stay positive and think about good things. It’s like telling yourself that you can do it!
8. Leave Clues:
If you want people to find you, you can leave signs like colorful clothes or rocks in shapes. That way, if someone comes looking for you, they’ll see these signs and know where you’ve been.
9. Ask for Help:
If you’ve been waiting for help and it’s not coming, you can try to make noise with a whistle or shout loudly. You can also use things that shine to get the attention of airplanes or people who are searching for you.
Realistic Example:
Imagine you’re in a forest. You make a little house with sticks and leaves to sleep in. You find a small stream to drink water from, and you also see some berries you can eat. You build a fire and use a mirror to send shiny signals to people who might be looking for you.
Conclusion:
Being lost in the wilderness doesn’t have to be super scary. Remember to stay calm, make a shelter, find water, make signals, look for food, and keep a positive attitude. If you do these things, you can stay safe until someone comes to help you.
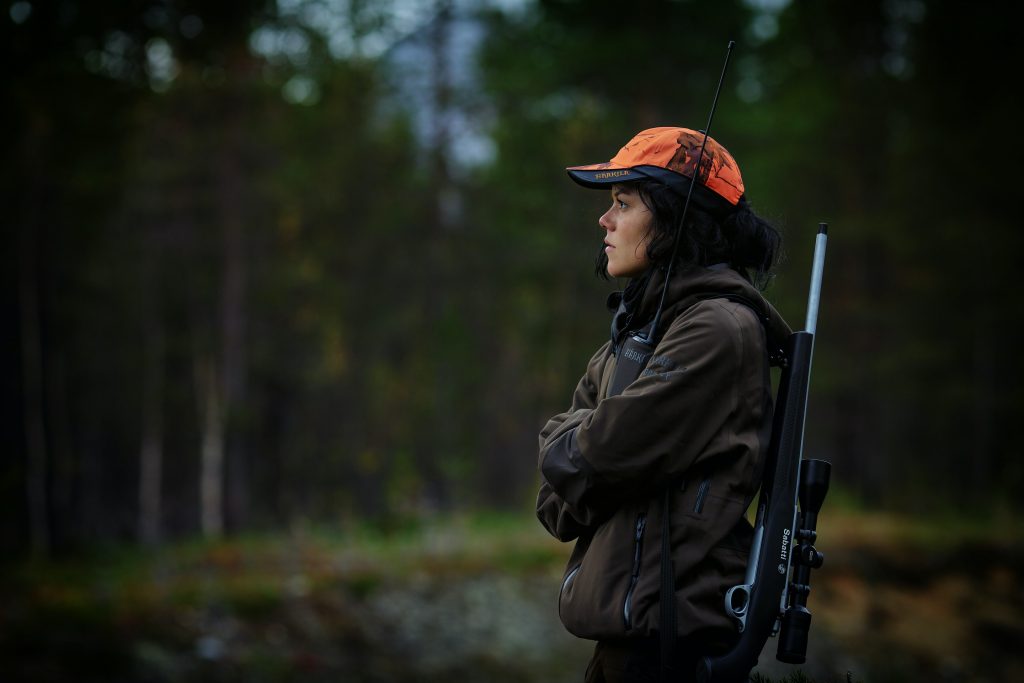
Just bought a hunting rifle scope and wonder how to protect it when you go on your outdoor adventures? Not sure how to do it or if you need to buy extra equipment?
Hunting isn’t a hobby you can do sitting at home where you’re protected from the elements. It’s a rugged activity where you and your equipment will be exposed to everything mother nature can throw at you.
From things like the rain, heat, or cold to accidents like dropping your rifle and scratching the lenses, there are many ways hunting rifle scopes can get damaged while you’re outside.
Fortunately, there are many ways you can protect and weather-proof your hunting rifle scope without spending a fortune or having to worry about it constantly. In this guide, we’ll teach you how to do it yourself.
5 Ways You Can Protect Your Hunting Rifle Scope
Here are five things you can do to protect your hunting rifle scope from the elements. Whether you’re using an LPVO or a simple scope, you’ll want to check these tips out.
(For more useful information about hunting rifle scopes and firearms in general, check out Shooting Mystery.)
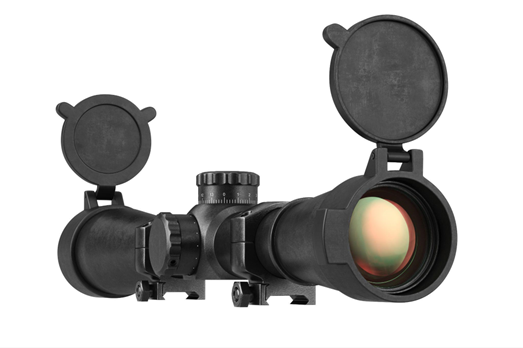
Buy a Scope Lens Cover or Dust Cap
The most effective way to prevent your scope lenses from getting damaged is by getting a scope lens cover (sometimes called a dust cap) for both ends of the scope.
There are an unbelievable number of lens covers that you can find that will fit any size rifle scope. In fact, many rifle scope companies sell it alongside the scope.
If your scope doesn’t come with one, you can get a pair that screws on and off, pops on and off, or flips up and away from the scope’s front and rear, allowing you to push the flaps down when you’re done.
While this part is up to personal preference, the flip-up lens covers are the most convenient — no need to worry about where to store them after use.
Get a Full-Size Scope Cover
Other than the lenses, the scope’s body also needs protection. The best ones are made of a neoprene material that protects the metal parts of the scope from corrosion and scratches.
The neoprene material is usually thick enough to absorb most normal bumps and knocks it can encounter during regular use. These covers also conform tightly to the scope’s housing, providing no extra bulk.
Even if dirt does get stuck between the neoprene cover and the scope, the material’s soft nature means it won’t scratch or damage your scope.
Don’t Store the Scope Outdoors
When you’re done using your hunting rifle and scope, make sure not to leave them exposed to the elements by storing them outdoors.
Factors like humidity, temperature, water, and oxidation will damage your scope over time, especially if you live in a more humid area or near the sea.
The safest thing to do with your hunting rifle scope is to store it indoors, where it won’t be exposed to harsh conditions.
You might also want to consider getting a storage case or bag for your scope and rifle, whether you always take your scope off or keep it on your rifle after use.
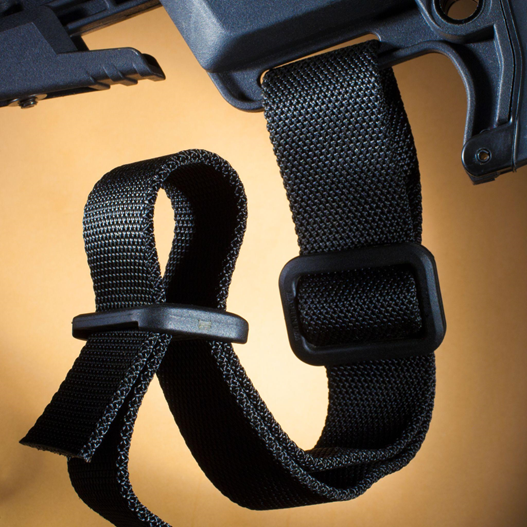
Use a Sling With Your Hunting Rifle
Using a sling with a hunting rifle is highly recommended for safety and convenience reasons. It keeps your hands free if you need to do other things like grip on trees for stability or dig the bullet out of your prey’s carcass.
However, using a hunting rifle sling can also prevent damage to your scope. If you accidentally drop the rifle while holding it, the sling prevents it from hitting the ground.
Imagine if you didn’t have a sling. The rifle would hit the ground hard, most likely damaging the sensitive scope, which would be a very costly mistake.
The sling allows you to be more mobile and walk freely without the rifle getting in your way while keeping it close to the body. This reduces the chances of it bumping into trees.
Clean Your Hunting Rifle Scope After Each Use
One step that can keep your hunting rifle scope looking brand new for years to come is regular cleaning. This is because your scope will be splattered with dirt, dust, moisture, and other external elements.
If you clean your scope each time after hunting and before storing it indoors (and in the case), you’ll prevent any dirt, dust, or particles from sticking to the scope.
You’ll want to remove any excess dirt particles because some are abrasive enough to scratch the material of your rifle scope, even if it’s marketed as scratch-resistant.
Just because your rifle scope is rated to be weather-resistant and scratch-resistant doesn’t mean you can be careless with it. It just means there’s a less likely chance it will get damaged if you are.
How You Can Protect the Rest of Your Rifle
While protecting your hunting rifle scope, you should also take care of the rifle it’s mounted on. Some of these tips and tricks can be done simultaneously to protect both the optic AND the weapon.
Put Muzzle Tape on Your Barrel
Your rifle’s barrel is one of the largest entry points where dirt, dust, and humidity enter. It’s also the part of the rifle most crucial to accuracy.
Having any rust or corrosion inside the barrel isn’t ideal and can lead to irreparable damage. Taping the front end of the barrel with electrical tape can help cover it up.
After shooting, the electrical tape will come off by itself. Then, Remove the extra pieces with your hands (unload the weapon first, of course).
Before you clean the gun and put it back into storage, you can put more muzzle tape again so that you don’t forget it the next time you go hunting.
Use Protective Anti-rust Coatings
Using anti-rust coatings on the outside of the rifle can help keep it rust and corrosion free. Make sure to apply these anti-rust or corrosive solvents on the outer part of your rifle.
Examples of anti-rust coatings are Rem Oil, WD-40, Kroil, and Corrosion-X. You can apply these by putting the liquids on a damp cloth and then rubbing it on your barrel’s exterior.
Disassemble and Clean After Use
You should disassemble and clean the parts of your rifle, especially after a particularly dusty, humid, or wet day in the field. You can do this as part of your end-of-day routine.
Disassembling and cleaning the rifle of all oils and grime helps, especially in icy or dirty conditions. For icy conditions, cleaning up the oil prevents it from freezing and getting too sticky.
For dirty and dusty conditions, the oil might mix with dirt and dry up as the day progresses, causing it to turn into a thick mush that will clog up your rifle.
If you’re hunting in frigid weather, consider disassembling it and leaving it in a cold but covered area. Putting it back in average temperatures might induce condensation.
Frequently Asked Questions
After learning more about how to protect your hunting rifle scope from the elements, you might have some related questions. Here are answers to the most commonly asked ones.
Can You Wrap a Scope?
You can choose to wrap your scope in vinyl skin as an additional layer of protection while you’re out and about instead of using a neoprene cover.
Most people buy it because you can choose custom designs or add camouflage to a plain-looking scope. Functionally, it can also repel some dirt and prevent rusting.
However, remember that it shouldn’t be used as a replacement for a full-size neoprene scope cover. This is because it won’t protect against any bumps or falls.
Can a Rifle Scope Go Bad?
Sometimes, the rifle scope will go bad (losing accuracy, clarity, or reliability) even if you take care of it properly. In this case, take some time to diagnose the problem before going hunting again.
If the rifle has just lost its zero, then all you need to do is zero it in again. However, if it constantly loses zero right after adjusting it, there might be another issue.
If you see fogging or liquids inside the scope, it means that the waterproofing seal has broken, and you won’t be able to trust the scope for any accurate shots.
If it makes weird sounds whenever you move it, like something is loose inside, then you’ll have to replace the scope. Check with your scope’s manufacturer for warranty claims.
Can a Rifle Scope Lose Zero?
If you miss even when your shot should be on target, the most likely cause is that your rifle scope has lost its zero. There are many reasons why a rifle scope loses zero.
Sometimes, it loses zero because of excessive recoil, improper installation, incorrect scope mounts, or because you’ve dropped the scope hard.
Some of these issues require reinstallation or even bringing it in for repairs, but you can try to zero in the rifle scope again to see if it still works well.
Final Thoughts
Protecting your hunting rifle scope from the elements isn’t as complicated as it sounds. Methods like buying covers for the scope and lenses help prevent damage in most cases.
However, the most crucial way to keep your rifle scope (and the hunting rifle itself) clean and working 100% is to clean it after every use. It might take up a bit more time out of your day, but 2-3 years down the road, your optic will look almost as fresh as the day you bought it.
Many people are striving to live off-grid and enjoy life in its more basic form. This can be merely because they want to be totally self-reliant while others are doing so with a more political mindset. Whatever reason you have, before you take that initial step, there are some fundamental things that you ought to think about.
#1 Find the right location
Finding the right location may sound far easier than it actually is. This is because you will be looking for an area that will sustain you and your loved ones. In order to do this, it will need to have a few very important aspects.
Water – it will need to have its own water supply; whether this is an underground spring or a trickling stream, it doesn’t matter at this point.
Accessibility – your plot will have to have accessibility so that you can get in and out of it. How much accessibility is entirely up to you and down to your beliefs and the reasons why you want to be off-grid.
Planning permits – you will no doubt want to build a dwelling to protect you and your loved ones from the elements and provide some safe to retreat to. For this, you are going to need to apply for or requestion a piece of land with the relevant permits in place.
#2 Find the right equipment
You will have to then invest in equipment that will help you survive while you are living off-grid.
Power generators – you shall have to decide what type of power generator you are going to have to provide you with basic forms of electricity, whether you choose to go for solar or wind turbine or any other suitable substitute.
Food sources – you are going to need food sources if you are choosing to go off-grid, of which you have a couple of options;
Stocking up from local stores
Living off of the land, both in the farming aspect and hunting wild animals
#3 Bringing it all together
Of course, the main point is to bring it all together. With stockists all over the world selling items that will be useful, if not crucial to the project that you are embarking upon, you may as well make use of the grid while you are still on it. This means that you will be able to send your items in a crate to the location that you choose. So, you can either have them delivered to your door or have your crate shipping sent to a location of your choice so that you can stay incognito and collect them to bring them on the last part of the journey home.
A few final thoughts
So, as you can see, there is certainly more to this project than finding a field and setting up camp. It requires very careful planning and forethought, especially if you are taking your family with you. Keeping your mind open to every eventuality is a must, as you will be totally alone without the ability to call the real world if you should require assistance in a hurry.
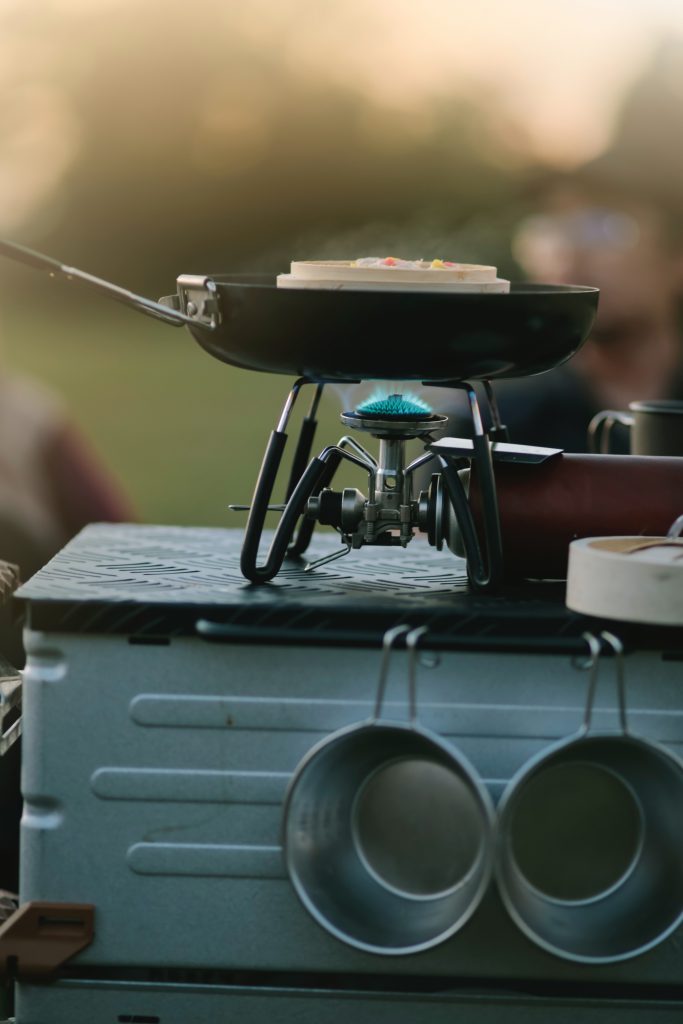
Emergencies come in various forms, ranging from severe storms to unexpected power outages. Just like having insurance coverage for your home or car, it’s crucial to be prepared for the unexpected by stocking up on long-term food items. These food reserves act as a safety net, ensuring that your family won’t go hungry during times of crisis.
By incorporating freeze-dried foods into your emergency food supply, you can be ready for almost any unexpected event. Consider how invaluable these foods can be when a storm knocks out your electricity for several days. With long-term food items and a simple one-burner stove or candle to heat water (cold water can suffice in a pinch), you can still enjoy a hot and satisfying meal in less than 10 minutes.
Creating a private food reserve makes perfect sense, both from a financial and security standpoint. Using pouches is ideal for limited short-term emergencies, while cans are more suitable for potential extended emergencies or situations that may affect a large number of people. You can also mix and match your short-term and long-term food items to cater to your specific needs.
Expert Advice:
1. Assess Your Family’s Dietary Needs: Consider the dietary requirements and preferences of each family member when planning your emergency food supply. Take into account any allergies, dietary restrictions, or special considerations to ensure that everyone’s needs are met during an emergency.
2. Calculate the Right Amount: Determine the appropriate quantity of food to store for your family based on the number of members and the estimated duration of the emergency. The general recommendation is to have at least a two-week supply of non-perishable food items.
3. Focus on Balanced Nutrition: While it’s essential to have a sufficient food supply, it’s equally important to maintain a balanced diet during emergencies. Include a variety of food items that provide essential nutrients, such as proteins, carbohydrates, healthy fats, and vitamins.
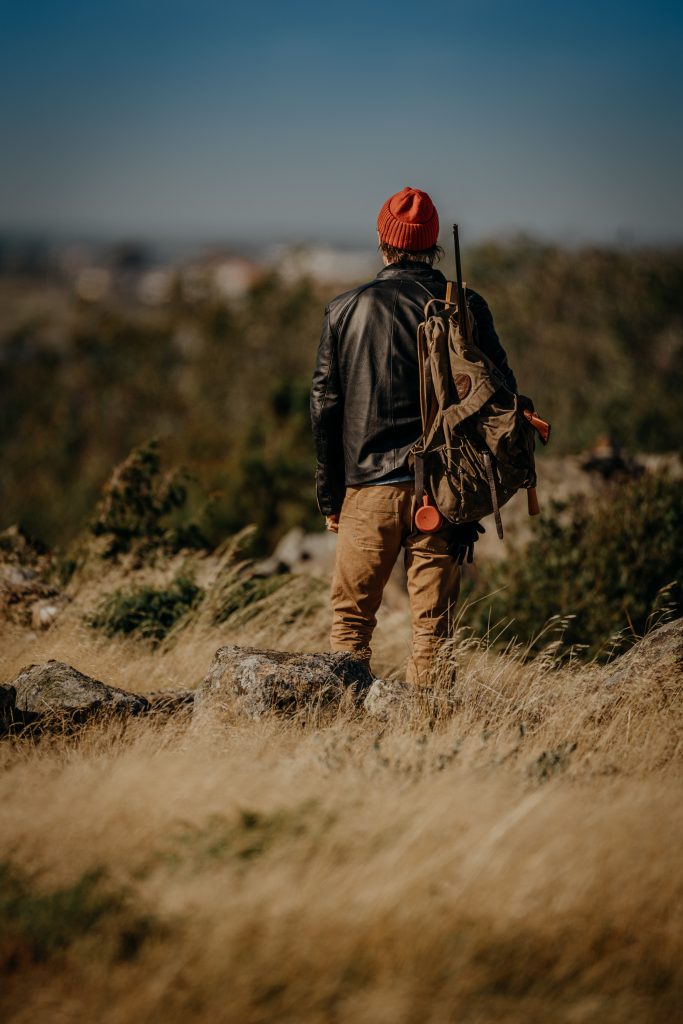
There’s something about hunting trips that’s so addictive. Spending a couple of days in nature is always something to look forward to, of course; but it’s really the thrill and the promise of success that keeps people coming back for more.
As exciting as the idea of going on a hunting trip is, though, the reality of making it happen – not so much. A lot of things need to come together to make a hunting trip work.
Venturing into the wilderness carries a high level of risk. Thus, safety must be top priority, but without sacrificing comfort and productivity. After all, nobody wants to spend several days in the wild and have nothing to show for it.
8 Useful Tips for Your Next Hunting Trip
Hunting trips may vary in length and location, but there are certain universal truths to consider when planning a successful hunt.
No matter the game or season; guided hunting trip or not; these tips will help you make the most of your time in the great outdoors.
1. Plan ahead of time.
It’s never too soon to start preparing for an upcoming hunt. You can use the off-season to inspect, clean, and fix your equipment; renew or apply for hunting licenses; or brush up your shooting skills.
It’s also a good idea to create a checklist and start packing your gear weeks before your trip, so you have time to address any issues that come up and make sure nothing important gets left behind.
2. Pick your prey.
You need to decide what animal you want to hunt early on for a number of important reasons. Your choice of prey will determine the location, cost, and length of your trip, and also influence the type of equipment you need.
Once you’ve set your mind on an animal, you can then work on improving your hunting technique to increase your chances of success. This is particularly important if you’re hunting larger prey like deer and bears.
3. Decide on a hunting location.
After you’ve decided on a target, it’s time to pick a location. When choosing a hunting location, you need to take into account your budget, the available accommodation, the terrain, and if you need to hire a hunting outfitter.
Also, do some research on what other hunters have to say about your chosen location. Did they have a pleasant time? Is there anything in particular that you need to prepare/watch out for? Have many of them had success? If many of them went home empty-handed, you might want to check out other locations.
4. Map the terrain.
Now that you’ve picked a location, you’ll want to get a detailed look of the terrain – especially if you’re hunting somewhere new. Behind every successful hunt is a well-thought-out route and hunting strategy.
You don’t have to personally visit the location to map the terrain. You can simply go online and look up other people’s detailed plans, recommendations, first-hand accounts of their experiences in the area. Every bit of information you gather will get you one step closer to success.
5. Prepare required permits and licenses.
Hunting laws vary by location, so make sure to check for required permits and licenses, especially if you’re planning to hunt overseas. Note important details like the duration of the validity of a hunting license and if there are any limits in the number of animals you can take per day.
Hunting violations can get very expensive. That said, don’t hesitate to get in touch with the local wildlife agency if you have any questions regarding the rules and regulations. It’s better to be safe than sorry, right?
6. Test your hunting gear and equipment.
Before embarking on a hunting trip, it’s only natural to check that you have all the necessary equipment and that they are in perfect working condition.
Most importantly, keep in mind that the quality of your equipment has a great influence on the outcome of your trip. As such, it will do you a lot of good to avoid low-cost hunting knives and weapons. Their lack of quality might end up jeopardizing the hunt or – worse – put you (or other people) in dangerous situations.
7. Brush up on safety rules.
Having safety precautions in place is crucial during a hunting trip. Even experienced hunters can lose focus and let their guards down, so see to it that everyone is aware and on the same page when it comes to safety rules and regulations.
Groups with inexperienced hunters will have to double down on their safety guidelines. Make sure everyone knows how to use their weapons properly. If you must, impose consequences for breaking safety rules, so nobody takes them lightly.
8. Check the weather and dress appropriately.
This should have been a no-brainer but, believe it or not, a lot of people fail to check the weather before a hunting trip. While a little rain is no reason to abandon your plans, a little preparation will go a long way – especially when you’re camping out in the middle of the woods.
Also, invest in good hunting boots and wool socks. High-quality wool socks will keep your feet dry and comfortable, allowing you to walk longer distances.
Should you hire a hunting outfitter?
Hunting guides and outfitters are essential to the success of your hunting trip, even more so if it’s your first time to hunt in the area or you’re hunting a game you’re not very familiar with.
Hunting outfitters will make your hunting trip much more convenient and enjoyable. They’ll arrange the details of your trip, locate the best places for hunting, secure the necessary licenses and permits, transport your hunting equipment, and even help you process the animals, in the event of a successful kill.
Moreover, experienced outfitters know the hunting grounds like the back of their hands and have a vast understanding of guns and the ammunition needed for different types of targets. Their expert guidance and advice could mean the difference between a frustrating and rewarding hunting experience.
Get Started with Prepping: Essential Tips for Beginners
In an unpredictable world, being prepared for unexpected events and emergencies is a wise choice. Prepping, short for preparedness, involves acquiring the knowledge, skills, and supplies necessary to effectively navigate and survive various crisis situations. Whether you’re interested in natural disasters, economic uncertainties, or personal safety, embarking on your prepping journey can provide peace of mind and the ability to take care of yourself and your loved ones.
This guide will help you get started with prepping by recommending online channels to follow, providing steps for exploring this new journey, and sharing essential tips for beginners.
1. Online Channels for Prepping:
The internet is a valuable resource for preppers, offering a vast array of educational and informative content. Here are some recommended channels to get you started:
a. Year Zero Survival: Is a comprehensive website that covers various aspects of preparedness. They share practical tips, gear reviews, and survival techniques.
b. Canadian Prepper: This channel provides a wealth of knowledge on prepping, survival skills, gear reviews, and discussions on current events. Canadian Prepper offers practical advice for both urban and wilderness survival scenarios.
c. The Urban Prepper: Focusing on urban preparedness, this channel offers tips for city dwellers, apartment preppers, and those with limited space. It covers topics such as food storage, self-defense, and urban gardening.
d. Sensible Prepper: Offers a wide range of prepping videos, including bug-out bags, gear reviews, DIY projects, and everyday carry items. The channel emphasizes practical and cost-effective solutions.
e. Wranglerstar: Is a homesteading and self-sufficiency channel that covers various aspects of preparedness, such as woodworking, off-grid living, and outdoor skills.
2. Exploring the Prepping Lifestyle:
To start your prepping journey on the right foot, consider the following steps:
a. Assess your needs: Identify the potential risks and hazards in your area and determine the specific areas of preparedness you want to focus on. This could include food and water storage, emergency shelter, first aid, self-defense, or alternative energy sources.
b. Research and educate yourself: Read books, articles, and online resources about prepping. Watch videos, attend workshops or classes, and seek advice from experienced preppers. Building a strong knowledge foundation is crucial.
c. Start with the basics: Begin by acquiring essential supplies like water storage containers, non-perishable food items, first aid kits, flashlights, and batteries. Gradually expand your inventory based on your needs and budget.
d. Practice skills: Prepping isn’t just about stockpiling supplies; it also involves acquiring practical skills. Learn first aid, basic self-defense techniques, fire starting, gardening, and other relevant skills that will be valuable in emergency situations.
e. Connect with the community: Join online forums, social media groups, or local prepping communities to connect with like-minded individuals. Networking with experienced preppers can provide valuable insights and support
3. Essential Tips for Beginners:
As a beginner in the world of prepping, keep the following tips in mind:
a. Prioritize the basics: Focus on the essentials first, such as water, food, shelter, and medical supplies. Aim to have a sufficient amount of clean water (at least one gallon per person per day) and non-perishable food to last for at least two weeks.
b. Create a bug-out bag: Prepare a portable emergency kit, often called a bug-out bag or go-bag, that contains essential items for survival on the go. Include items like a multi-tool, first aid supplies, a flashlight, extra clothing, cash, and copies of important documents.
c. Rotate and maintain supplies: Regularly check the expiration dates of food, medications, and other perishable items in your supplies. Create a rotation system to ensure items are consumed or replaced before they expire.
d. Develop a communication plan: Establish a communication plan with your family or household members. Determine how you will stay connected during emergencies, including meeting points, emergency contacts, and alternative communication methods like walkie-talkies or ham radios.
e. Practice and adapt: Regularly practice your prepping skills, such as setting up a tent, purifying water, or starting a fire. Conduct drills with your family to ensure everyone understands their roles and responsibilities during an emergency.
f. Stay informed: Stay updated on current events, weather forecasts, and potential hazards in your area. Sign up for emergency alerts and notifications to receive timely information.
g. Physical fitness and self-defense: Engage in regular exercise to maintain good physical fitness, as it will contribute to your overall preparedness. Consider learning self-defense techniques to enhance personal safety and security.
h. Consider sustainability: Explore sustainable practices such as gardening, composting, and renewable energy sources. These skills can provide long-term self-sufficiency and resilience.
Conclusion:
Prepping is a journey that requires ongoing learning, preparation, and adaptation. By following informative online channels like Year Zero Survival, Canadian Prepper, The Urban Prepper, Sensible Prepper, and Wranglerstar, you can gain valuable insights and guidance.
Remember to assess your needs, research, start with the basics, practice skills, and connect with the prepping community. Prioritize the essentials, maintain your supplies, and develop a communication plan. Stay informed, stay fit, and consider sustainable practices. Embrace the prepping mindset to ensure you and your loved ones are better prepared for whatever challenges may arise.
(Note: YearZeroSurvival.com is a comprehensive website that covers various aspects of preparedness. It offers practical tips, gear reviews, and survival techniques. Visit the website for more in-depth information.)
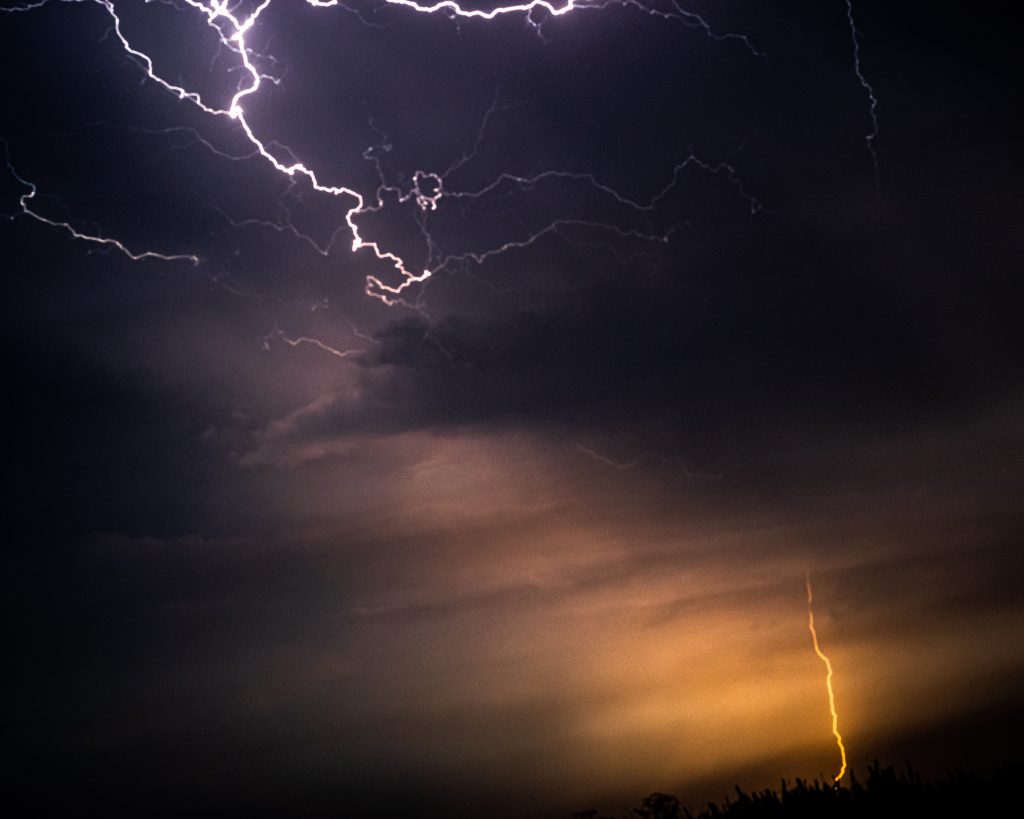
In a world filled with various hazards, it is crucial to be prepared for emergencies before, during, and after an event. Each hazard requires unique actions and planning, specific to the potential risks in your area. By identifying the hazards that have occurred or could occur in your locality, you can create a comprehensive disaster plan. Local emergency management offices are valuable resources that can help you identify hazards and provide recommendations tailored to your community. This article explores hazard-specific actions, notification systems, evacuation planning, and essential information about different types of hazards.
Identifying Hazards and Planning Unique Actions:
To effectively prepare for emergencies, it is important to identify the specific hazards present in your area. Local emergency management offices can assist you in determining the potential risks and provide comprehensive information about each hazard. By understanding the unique actions required for each hazard, you can take proactive measures to mitigate risks. Sharing hazard-specific information with family members and including pertinent materials in your family disaster plan ensures that everyone is well-prepared and informed.
Notification Systems: Staying Informed:
Staying informed during emergencies is crucial for timely response and ensuring personal safety. Contact your local government emergency management office to inquire about the notification methods used for different types of disasters, whether natural or man-made. Additionally, ask about the alert and warning systems in workplaces, schools, and other community locations. Alert methods may vary from one community to another, with common options including emergency radio and TV broadcasts, special sirens, telephone calls, or door-to-door visits by volunteers and emergency workers. Understanding the notification systems empowers you to respond effectively in emergency situations.
Evacuation and Sheltering In Place:
When faced with an emergency, one of the primary decisions to make is whether to stay in your current location or evacuate. Understanding the nature of the emergency and assessing your circumstances are crucial in making this decision. It is essential to plan for both possibilities: staying in place and evacuating. Learn about evacuation routes, nearby shelters, and the appropriate actions to take in different scenarios. Evacuation plans should be flexible and adaptable, taking into account various hazards and their specific requirements. Additionally, familiarize yourself with sheltering in place protocols for situations where it is safer to stay where you are.
Exploring Hazard Types:
To comprehensively prepare for emergencies, it is essential to familiarize yourself with different hazard types. Natural disasters, such as hurricanes, earthquakes, floods, and wildfires, require specific preparedness measures. Additionally, technological and accidental hazards, including chemical spills, industrial accidents, and transportation incidents, demand unique actions. Moreover, understanding the potential risks posed by terrorist hazards and knowing how to respond appropriately is crucial. By gaining knowledge about these hazard types, you can better prepare yourself, your family, and your community for emergencies.
Conclusion:
Emergency preparedness is vital in safeguarding lives and minimizing the impact of disasters. By identifying hazard-specific actions, understanding notification systems, and planning for both evacuation and sheltering in place, you can effectively respond to emergencies. Local emergency management offices are valuable resources that can provide essential information tailored to your area. Additionally, educating yourself about different hazard types ensures a comprehensive approach to emergency preparedness. Stay informed, create a family disaster plan, and be proactive in your efforts to protect yourself and your loved ones during times of crisis.