Who doesn’t enjoy boating? Floating on a boat in the middle of a beautiful lake at sunset is sure to give you the rejuvenation that you’ve always longed for. But when boating, safety comes first. You need to choose the right functional accessories. You do not want to be troubled by flimsy accessories and gears while boating. Boating requires you to make a quality investment in boating accessories, which would help in increasing the life of your boat in general. So, listed below are 10 key boating accessories from which you can benefit and would not want to forget while going for a trip to the waters –
Personal Flotation Device (PFD) – If fishing is your hobby; a PFD cannot be dispensed with. You must have one flotation device for every person on board. Make sure that the life jacket is USCG approved. You can also keep throw cushions on your boat, which are mandatory in some states.
GPS Devices – A GPS device like a GPS-Emergency Position indicating Radio Beacon (EPIRB) or PLB (Personal Locator Beacon) is important installations for your boat. These devices can communicate your exact location to search and rescue satellites. These work even on inland waterways. It is not uncommon for your phone’s battery to die or become dysfunctional due to an accident on the boat. These devices come handy when your phone runs out of the network coverage area.
Phone Charger – It won’t be an understatement to say that our phones have become an indispensable part of our lives. The need to use it may arise anytime and so a 12-volt charger comes handy then. Some people even install solar-powered phone chargers. For Example – You may have to use your phone as a flashlight. But what if the battery of the phone runs out altogether? In this case, a phone charger or more suitably a power bank would be a helpful option.
First Aid Kit – One of the most underrated items that ought to be carried are mostly the first aid kits. Do not underestimate its functionality and always keep one in your boat. It is one of the most important boating accessories. The palm-sized container can store bandages, antibiotics, antiseptics, scissors, tweezers, adhesive tapes, flexible adhesive bandages of several sizes, etc. Sterile tools are also packed and they should be used when a medical need arises.
Polarized Sunglasses & Fishing Shoes – Protecting your eyes from the harmful UV rays is a must on a sunny day. There are variants of sunglasses that are available for offshore, inshore and cloudy days, which is for you to choose. You should not forget to buy a pair of anti-skid non-marking shoes. They are always better than flip-flops. They cover your feet and keep them protected from fish hooks or pokes, gears and fish fins as well. You wouldn’t want to ruin your experience because of a pair of shoes and a pair of sunglasses. Would you?
Marine Radio – These are tremendously convenient devices as they are independent of a boat’s electrical system. A marine radio can transmit information about the weather, the boat traffic or the movement of large commercial vessels. Mishaps and accidents can occur in seconds and you would never want to be caught in one because of erratic weather conditions. To be self-sufficient and not dependent on the help of local authorities is a good plan. These radios come preset with major international and all local maritime frequencies.
Correct Anchor – The anchor which you choose for your boat must be according to the size of your boat. You must also take into consideration the location where you plan to set sail. Preferably, you may buy an anchor which is larger than the size recommended for your boat. This is when your boat is not too tiny. Most anchors adjust to the sea bed or the floor of the lake. The length of the chain or rope is what helps to pull and fix a position for your rest. Make sure that it is adequately long. The fluke and grapnel type are recommended based on many experiences and knowledge.
Waterproof Dry-Bag – This is undoubtedly one of the best companions of a sailor. It can carry your clothes, electronics, devices like phone and camera and food! These items are travel essentials and you do not want excessive sunrays, water or dust to ruin them. It is practical and thus recommended to carry them safely in a waterproof dry-bag. They come in several shapes and sizes and even high-quality ones are available for an inexpensive price.
Basic Tool Kit or A Multi-Tool – A good tool kit or a set of tools is paramount and one of the best investments on boats. They contain replacement fuse, tapes, wrench, pliers and different sizes of screw nuts and bolts. They fix small problems on the spot and you can feel much relaxed and have a comfortable boating experience. They are to the boat what a Stepney toolkit is to a car. Buy a high-quality mechanical tool kit ideal for boats and marine applications.
Ropes/Dock Lines – There are numerous situations when you would need ropes as boating accessories. You should keep a decent number of these on board. If anchored out with other boats, they come handy to tie-up with them. If your boat needs to be towed, a sturdy rope will be functional. It might be helpful when you need to tie your boat to a post. They will also be helpful if you are caught up in mechanical troubles.
But
gathering these one by one would be a tedious and time taking task. So where do
you go? A one-stop destination for all your boating accessories is RS Marine.
They provide high-quality products with unparalleled functionality. They build
tools for boating enthusiasts which are realistic, resourceful and reliable.
Prepare for the most testing trek of your lifetime – an ice
stroll on the solidified Zanskar River, an encounter for the valiant hearted
and daredevil while you trek the Himalayas, its magnificence flabbergasting
your and panting for additional!
Why Zanskar?
Wind up encountering the adrenaline surge in one of the most
looked for after treks on the planet, splendidly excellent yet incredibly
testing, unique, rare experience, before long turning into a prevailing fashion
among explorers and experience sweethearts from nation and the world the same.
Chadar Trek on Frozen Zanskar River
The trek is about ingenuity and survival – of figuring out how
to get by in the cruel landscapes at below zero temperatures, interfacing with
local people and understanding their method for living, particularly in one of
the most inhabitable areas on the planet, while you trek over an emotional
crevasse with solidified cascades on the solidified trail of Zanskar spread
over out like a “Chadar” (thus the name) that demonstrations like a
mirror for the sky. After all there aren’t a significant number of such
restrictive experience interests where you get the chance to share in the base
rush of snoozing caverns, pondering over blasting blazes in frosty temperatures
with most unquestionably the ever-present feeling of risk, yet enduring
everything – making it the “Do before you pass on” venture!
Course
The excursion begins from Leh, where one leaves for Tilat Sumdo, the main achievement in the Chadar Trek. From Titat Sumdo the trek encourages till Shingra Kogma and from that point the longest piece of the trek from Shingra Koma to Tibb and further on Trek from Tibb to Nerak and outdoors in Nerak town. At that point there is Lingshed to Tsarak Dho to Padum and back. The course is brimming with ice sheets, solidified cascades, nature’s marvels – An uncommon locating and unique experience.
Temperatures
Temperatures on the trek fluctuate from – 10° in the day to –
30° in the night relying upon radiant and shady atmosphere. While the
temperature is essential to observe, one needs to remember battling the solid
breezes.
You have to altogether investigate the apparel required, for it
is fundamental to shield yourself from such extraordinary temperatures.
Likewise one needs to receive a couple of wellness schedules before taking the
outing, for it tends to be a hazardous call and you should be fit and arranged
for doing combating the cruel climate conditions and different issues like
elevation infection and so on so the medical problem winds up fundamental. You
should most likely run 3 to 4 km in 30 minutes or walk consistently in 10º
slope for in any event 45 minutes In request to get ready for Chadar, while one
should investigate tips and FAQs for getting knowledgeable with respect to how
one should approach the Trek.
Absolute necessities
You have to make a nitty gritty rundown of the Must haves for
an excursion – while you get together all the portable bags be it the trek
embellishments and rigging, attire things, a medicinal unit, additional money,
and significant archives among others.
Step by step instructions to Reach
The best way to reach Ladakh during winters is via air, so you
can decide on the customary flights from Delhi to Leh by Jet Airways, Air India
and Go Air and so forth and remember to book your tickets well ahead of time.
The airborne view is just the best start one can have before the visit
Dos and Don’ts
Plan up with a day or two close by, if there should arise an
occurrence of any unanticipated common deterrents or losses.
Ensure you don’t litter and keep the earth clean.
Adhere to the exhorted dress and rigging reasonable for the
excursion to keep away from any pointless impediments. Likewise keep up just
the vital things for ideal development and let go of any unnecessary things
that may trouble the heap of portable items.
Try not to attempt any unsafe undertakings, as the area is
hazardous and delicate. Adhere to your movement gathering, take up master help
and warning before you take up the outing and adhere to directions and rules
cautiously.
Try not to expend liquor, as it gets dried out the body quick
and may turn unfavorable in such temperatures and locales.
It is with the disclosure of this uncanny course that initially
came to be the help of the Zanskaris, for it was their best way to go for a
vocation in the hours of extraordinary winters, which has now host to numerous
an experience sweethearts and trekkers from over the world! One can settle on
movement gatherings, or travel organizations that offer the trek – either with
arranged schedules or tweaked visits, whichever you pick. Likewise, one ought
to carefully pursue the rules for the visit, as prompted by the specialists.
So apparatus up for the most out of control excursion of your
life – do your examination, get fit and livened up, stock your rigging and get
moving to encounter a definitive trek of the Himalayas!
Hiking
is literally not a walk in the park. It involves walking on trails of various
terrains, elevations, and steepness. Given the right weather conditions and
preparations, even a couch potato can successfully complete or even enjoy a
hike.
The
beauty and tranquility that can be offered by Mother Nature is usually a great
way to dilute the stress of the daily grind. However, there are certain
considerations that you must keep in mind to reduce untoward incidents––and
have as much fun as you possibly can.
If you are a novice hiker, you might be at a loss on how to go about it. The list below shares what’s essential for your very first hike––in order of importance.
1. Choose a Trail that is Suited to Your Fitness Level
The
best way to increase your chances of surviving any endeavor is to carefully
plan ahead. Hence, if you wish to make your first hiking trip memorable in the
right way, you must choose a trail that suits your current fitness level.
Given
that most hikers post great photos of their adventures, it can be easy to
underestimate the trail level if you just rely on “Instagrammable” views. Here
are some of the things that you should take note of when you do your trail
research:
Trail
difficulty and trail type
Trail
length
Elevation
gain
Hiker
reviews
Best months to go
Once you start your hike, make sure that you don’t rush into it. Pacing is vital to a successful hike. You are not in a competition—you are here to enjoy what’s around yo
2. Prepare an Appropriate Hiking Pack
The contents of your hiking pack will depend on the weather and the season you’re currently in. Outdoorcommand has a number of buyer’s guides to help you choose which gears are best suited for your upcoming adventure. Here are the bare essentials that must you must bring with you in any hike:
Daypack: 20L to 35L capacity should be enough, though you can go for bigger ones if you eventually plan to level up.
Water Bottle or Hydration Pack: The general rule is 500mL of water for every hour of hiking.
Trail Food: Go for food items that don’t need cooking, such as dried fruits, energy bars, biscuits, and nuts.
Headlamp or Flashlight: You may not plan on night hiking, but you never know when it would come handy.
Multi-tool or Knife: These will always prove to be useful at one point or another.
Navigation Device: This can be a compass, a map, or a GPS device. The trail may be well-labeled, but it’s better to be prepared.
First Aid Kit: Include antihistamines, antiseptics, bandages, pain killers, and tweezers, just to name a few.
Extra Clothes: Weather conditions can be unpredictable, so you’re better off bringing some extra clothes.
3. Wear the Right Clothes
It
might be tempting to choose stylish clothes just to look good on your photos, but
you will be sorry if you wear the wrong clothes and footwear to your hike. For
clothes, go for moisture-wicking fabrics and wool (for cold weather hikes) as
these materials dry quickly.
You should also bring sun protection accessories such as hats and sunglasses if you are hiking in the heat. Make sure that you do your research on the best hiking clothes for men and women so that you’re well-protected when hiking day comes.
4. Fuel and Hydrate Adequately
The importance of hydrating before, during, and after the hike cannot be stressed enough. Additionally, snacks can also keep you going when you’re already feeling weak. Make sure that you also pack a “victory snack,” or the snack that you will eat at the end of the hike. This will serve as your reward for a job well done.
5. Follow Outdoor Etiquette
“Leave
No Trace” is probably the most widely known outdoor etiquette in existence. It
just simply means that you should clean up after yourself, and leave the trails
exactly as you found it––or even better than you found it, if you chanced upon
it in bad condition.
Be
considerate of other people and the wildlife that live in the area. As the
saying goes, “Take nothing but pictures, leave nothing but footprints.”
Conclusion
Even
if it might take a lot of physical effort, hiking can be a tremendously
rewarding experience. The key to surviving hikes is to ensure that you know
exactly what you are getting yourself into. If you are fully prepared for the
challenges of the trails, you’d surely enjoy your first hiking trip.
Boat owners need a lot of tools and equipment so that the boat functions as expected. Right form oars and engine fuel to boat hooks, every element needs to come together well so that the boat’s performance is as per the owner’s needs.
If
you have been out sailing or have some experience on a boat, you must have
understood the need for boat hooks. Boat hooks are an important aid for
pushing, pulling and retrieval of objects from the sea. These not only help in
retaining ropes, objects or boats in the water but are also used for docking
and undocking the boat. With the wide range of features and functions available
with the boat hooks, it becomes easy to get objects that are submerged below
the sea level.
Aside
from docking and undocking, you can use these boat hooks for the following
purposes:
Fishing objects out of the water, like
buckets, hats, or any of your much-loved things. Generally, it happens more
than you would think
When you want to pass objects to someone
else on your boat
Cutting through objects
When you want to test water depth
Pushing yourself off boats that you have
drifted too close to
Putting ropes on bollards that you
cannot reach
Pushing yourself off the dock when there
is a blustery weather
Passing rope up to your lock assistant
To grab objects those are rung on walls
Different
boats have different requirements. It is, therefore, important to choose the
boat hook suitable for your boat. Be it boat loops or electrical remote hooks, every
type of boat hook perform a separate set of function. Selecting the right boat
hook could be confusing if you are new to this. Here are a few boat hooks for
you to choose from:
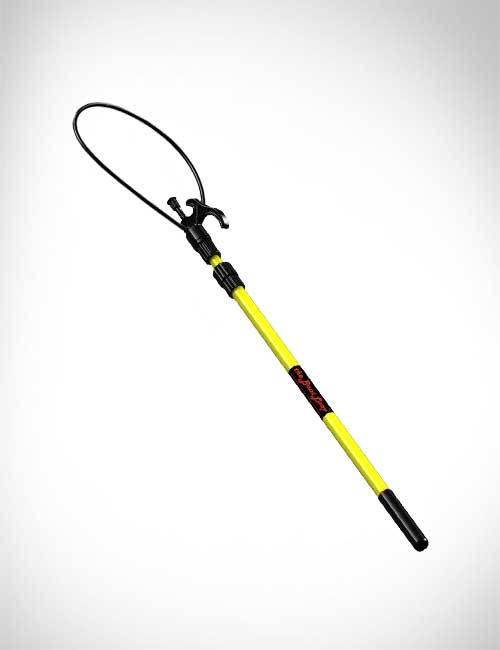
Boat Loops: Boat loops are gaining a lot of popularity as boating equipment these days. Boat loops are very versatile and can be used for commercial or recreational purposes alike. The boat loops usually have a hook attached to them which helps in launching or retrieving things out of the water. The boat loops by RS Marine have a quick lock and release hook mechanism along with a flexible loop. You can order these great quality boat loops from rsmarine.com.
Telescopic Boat Hooks: Telescopic boat hooks are designed for heavy boats. These boat hooks can stand a lot of force and don’t break easily. These boat hooks are of either 4 or 6 feet and can be extended to a length of 8 and 12 feet. You should buy a telescopic boat hook if you are using a heavy boat, to maximize effectiveness. This type of boat hook can be used for docking, undocking, and pulling up lines. This type of tough boat lock is a valuable asset when launching, docking, or retrieving your favorite things.
Electrical Remote Hooks: Remote hooks have an electric system along with a controlling remote which is used to lift as well as perform other functions. The biggest advantage of such boat hooks is that the owner doesn’t have to be present near the hook all the time. Choose an electrical remote hook if you don’t have enough manpower on the boat.
Economy Boat Hooks: If you have a small boat, this could be the best option for you. These boat hooks are lightweight and have special air chambers which make it easy to float. Economy boat hooks are relatively cheaper and are the best option available for people with small boats.
Snap Hooks: Snap hooks are the best option for you if you use sailboats. Snap hooks function best for mooring as well as fastening purposes. These are made of stainless steel and have a spring for quick attachment and release. These are very versatile but work best for all the needs of a sailboat. If you own a sailboat and want to make mooring easier, snap-hooks could be the right thing for you.
Where can you buy them?
Any
store that carries boating equipment should have a selection of hooks. If not
then you can always buy them online from websites like eBay, Amazon.
To conclude
Different
boats require different types of boat hooks. However, if you are new, it might
be difficult to understand what boat hooks work best for your boat. In such
cases, the boat loop is a savior.
Boat loops can be used on any kind of boat and perform a range of functions like mooring, docking, and revival of objects. The boat loops on sale by RS Marine are not only of great quality but are also priced reasonably. Get a boat loop today to make your boating experience a lot more relaxed and easy.
You can’t go to a camp site without a tent. This is because you will not have somewhere to lay your head at night or when you just want to rest during the day. With a quality net, you can be sure that you will be protected from the bad elements of weather. Besides that, you will enjoy being able to do certain things in privacy, such as changing into fresh clothes and grooming. However, buying a new tent can be a daunting task, especially when you don’t know what to look for. As a matter of fact, tents come in various shapes and sizes. Selecting the right tent will go a long way towards improving your experience at the campsite. Here is a list of things you should consider when shopping for a tent.
1. Size Matters
Your choice of a tent should be guided by the number of people that it can accommodate. In fact, every tent describes the number of people that can comfortably stay in it. If it’s just you and your spouse, a tent with a capacity of 4 people is highly recommended. This is because you will use the space that’s left to keep your stuff. If you have a bigger family, it’s recommended you narrow down to a king size tent. This helps in ensuring that the occupants are able to move inside without being clumsy. It’s also important you consider the height of the tent, especially if you want to be able to stand inside. A tent with a cubicle design is ideal for such purposes.
2. Easy to Set Up
As an amateur camper, you might get carried away by the looks of various tents. Some tents look very appealing when they are already set up. What the sales people will not tell you is that you can’t set up such tents on your own. In fact, some tents can only be pitched by professionals. Going to a camp with such a tent is a recipe for disaster. This is because you will not be able to set it up fast when you arrive late at the camp or it starts raining. By the rule of thumb, you should select a tent that pops up instantly.
3. Proper Weather Protection
Sleeping under canvas is fun as long as the tent doesn’t allow bad weather to penetrate to the inside. An ideal tent is one that’s designed to prevent water from penetrating through. Tents made from canvas are usually the best because they are breathable, meaning they allow fresh air to circulate inside while repelling water. Such tents help in maintaining dryness in the inside by encouraging evaporation. Since they are also breathable, they prevent heat from building up. You should also select a tent that’s insulated on the edges to keep cold weather at bay during winter.
4. Price
The price of tent is not constant across various stores. You should actually keep looking until you find a tent that you can afford to pay for. At the end of the day, you will only get what you pay for. This means that a bigger tent and more features will obviously cost more than a smaller tent. Besides that, tents made from canvas cost a premium price due to their durability. On the other hand, those that are made from nylon material tend to be cheaper. The downside is that they need to be replaced every now and then.
Keep in mind, if something terrible happens, food stores are
not going to operate as usual, and you are going to figuring out how to find
your supplies.
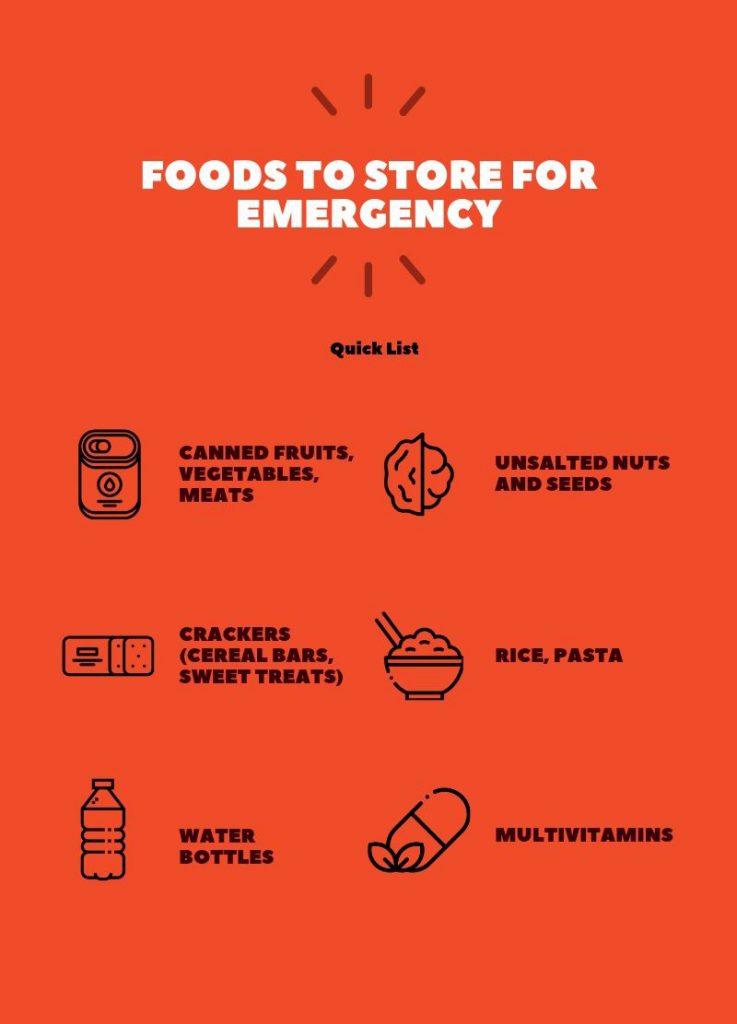
Food You Can Store
The most important
thing is to know what are the types of foods that can be stored.
Following are some
kinds of food items that can be stored for emergency.
Unsalted nuts and seeds (almonds,
walnuts, cashews)
Crackers (cereal bars, sweet treats)
Pasta
Rice
Peanut butter
Water bottles
Juice and shelf-stable milk or
nondairy alternatives
Multivitamins (calcium, fish oil,
vitamin C)
Honey
Important Things to Consider
There are several things to consider when storing food for
an emergency. Following are the significant things to concentrate,
– A well-organized pantry to store items for an emergency.
The pantry should be planned to store food for long term purpose without any
harm for food.
– Food security should be considered. When storing for an
emergency, it should be stored very safely because at the moment of emergency;
it should be safe if it is damaged can not use.
– Long term expiry dates. When purchasing the food items
should consider the expiry date, and it should be a long term one to store for
a long time.
– Make sure that storing fruits and meats are well dried up
to the storing condition — especially when preparing food at home for storing.
– Better to avoid frozen or refrigerated food for emergency
purpose. Because these kinds of food items can not keep outside for a long
time.
– Store the items for an emergency that are no need of
freezing or cooking as well as not taking much time for preparation.
Tips to Remember
There are various tips to store food for emergency purpose.
It is essential to know the tips to save correctly, as those things to be used
in an emergency.
If it is not stored correctly, no use at the time of crisis.
Following are few tips to remember:
– Food items should be well sealed and packed or canned to
avoid damages for the food.
– Properly label and categorize the food items to easy
access.
– Store with proper
quantities that are required for your family needs and wants.
– When storing food items do not forget to consider the
nutrition values.
– At the same time, give a significant consideration for the
tastes and flavors you and your family members prefer.
According to the things mentioned above, purchasing,
packaging, and storing properly holds significant importance at storing food
items for emergency purpose.
A bug out bag is basically pack of survival items that you can easily carry around with, especially with the aim of reaching your bug out location. The bug out backpack has to be resilient and comfortable enough for you to carry around, at least for 72 hours. The main reason of having a bug out bag is so that you can easily evacuate if there’s a need.
To have the ‘BEST’ bug out bag, you need to have an awesome
bag, and the bug out bag contents has to be planned as well. This would mean
you need a comprehensive bug out bag list. Having a quality bug out bag is only
half the battle, you need suitable survival gears and survival skills to face
the situation.
Do note, you can further split this into categories too such
as children’s Bug out bag or even a bug out bag for the elderly! There’s no
hard and fast rule as to how you should pack your bug out bag, but I’ll raise
some of the common items everyone should consider putting in their bug out bag.
In my view, there are some fundamental items your bag should
contain, and you can customize your bag for different emergency situations.
Important Rules
The purpose of making a bug out bag list is so that you will
have a clear idea of what you need (making a distinction between your wants and
needs). Although we don’t know what the future holds, you can’t be bringing too
many things. There’s no way you can carry it for long hours.
The goal is to keep only items that help you become
self-sufficient, surviving various situations. You don’t need to stuff any
fancy shmancy tools that you don’t use. With that said, let’s see what are the
top items you need for your bug out bag.
1. Water
Water is placed number 1 because of its importance. Without
getting proper water supply, your success of surviving a bug-out situation will
drastically decrease. I would suggest
prioritizing the need to get good water supply before even thinking about food.
Especially if you are caught in hot weather, you may suffer from dehydration.
Water can be seen in 2 aspects, (1) Storage and (2)
purification.
For Storage, you can use water bottles
or even sealed pouches. The water bottle you choose should be solid and has no
paint or coating.
Ideally, you should keep 3 liters of water in your bag
because it’s suggested that one adult should drink at least 1 liter of water
per day. Since you are aiming to survive for 72 hours, you’ll need 3 liters.
You can even get a Platypus Bladder, where most of them has
holsters for a bladder container which you can use to store water and drink
from it. Make sure to get one that is easily collapsible so that you can store
it with ease when you are not using it.
For Purification, you can keep some
iodine tablets or some other device to filter the water.
You need to pick your water purification tablets wisely
because there are a huge range of products in the market, manufactured for different
needs. For example, some tablets are made to purify water you obtain from
rivers.
Alternatively, you can pack water filters such as LifeStraw.
They are often compact, which makes packing them easy.
To kill two birds with one stone, I would suggest storing a
backpack stove because they are an excellent tool for cooking water and food.
Let’s be real, it’s extremely time consuming to get an A-frame logwood to
ignite. This would be highly dependent on your surroundings as well, if the
temperature is cold or its drizzling, the probability of you successfully
setting up a campfire would fall drastically.
Since water is heavy, you need to consider how to balance
the need to pack clean water, and getting water purifiers as substitute.
2. Food
Next, you may want to ensure that you have enough food
supply. There are several criteria to consider, including how long the food can
last, how much energy content does it contain and what nutrients it has.
You definitely need to keep some food supply packed in your
bug out bag to keep your body healthy and obtain stamina. You should definitely
consider the weight of the food as well.
If you live in a rural setting, you can consider packing
hunting gears so that you can hunt animals as a source of food when you are en
route to your bug out location.
If you don’t want to make things complicated, you can just
get any energy bars that is jam-packed with calories. If you want to be more
careful with what food you pack, you can check out this list of food which I
recommend having:
Energy bars – It’s
important that you distinguish between a food bar, a ration bar and even a
candy bar. Candy bar is self-explanatory, so I’ll skip that.
Ration bars are
often packed in mylar, which are made of a combination of flour, vitamins and
electrolytes. Ration bars usually have a bland taste, made to address a
particular emergency situation.
Since there are many types and flavors in the market, you
need to test them out to see which one you like. You can check out Mayday Apple
Cinnamon Bar which come in individual packets and they come with specific
flavours. Or, you can even choose the Datrex 3600 Food Ration Bar which comes
with multiple bars with each sub-packaged to ensure freshness.
Some do not consider this as food for your bug out bag
because they are designed to save lives (such as being stored in
lifeboats). But to me, they are
fundamental items you should store as well.
For Food bars,
they are portable bars which taste better than ration bars. Most of them taste
like candy or even cookies. These bars are made to give you energy and
sufficient nutrition as well. However, ration bars tend to give more nutrients
because they are ‘made’ that way.
You can check out Clif Bars to get food bars that have a
good source of protein and fiber.
MREs – Meals
Ready to Eat (MREs) or “wet food” often taste better than energy bars. Also,
most MREs are made to last for years. If you would like to prioritize long-term
storage, MREs would be your top pick.
However, your body may have some reactions to MREs if you
are not used to consuming them. This can be solved by getting your body used to
it.
Dehydrated Food –
Dehydrated foods are excellent for long-term storage but they are a bit pricey.
Dehydrated food requires a reasonable amount of water to re-constitute, which
cause you to use-up some clean water-supply.
Mountain House is THE company to look out for when it comes
to dehydrated food. They are known for producing survival food kits and
dehydrated food that taste awesome!
3. Clothing
Clothing comes hand in hand with shelter, because both of
them are aimed to protect you from external elements.
Although there are various disaster scenarios that you may
be caught in, you can still reasonably predict what environment you will be in
when Shit Hit the Fan.
To make your thought-system more systematic, you can think
of what layer of clothing you need to pack for.
For myself, I would like to see it as Base Layer Clothing,
Mid-layer clothing and outer-layer clothing. Each layer has different functions
and purposes.
The base layer is meant to keep your body as dry as
possible. This means that getting a fabric that easily absorbs moisture would
be ideal. Keeping your body dry throughout the bug out scenario is important to
avoid bacterial growth and it helps keep you comfortable. I’ll suggest that you
use cotton or wool for base layer clothing.
For mid-layer clothing, its purpose is to help maintain your
body temperature. Therefore, it’s important that you get a mid-layer clothing
with good insulative qualities. For this layer, the materials which you can
look out for is cotton, wool and fleece.
The Outer layer should be waterproof and durable but allows
moisture to escape. One excellent material you can consider is jackets that are
coated with membrane.
With that said, here are some general ideas for what clothes
you need to pack – spare clothes, long pants, coat, boots, extra socks,
mid-layer shirts and a hat.
4.Shelter
In your bug out bag, you need to include some type of shelter
to protect your body from external elements. You can either pack a tarpaulin
sheet, a tent or a sleeping bag.
Tents are really
comfortable to be in, but they are heavy and bulky. Try to get a tent that
weighs less than 5 lbs so that you won’t go overboard on the weight.
If you are looking for something more portable, you can opt
for tarps. Since you can set them up into different configurations, they are
definitely more feasible to be used in most situations.
Since ‘shelter’ include anything that protects your body
from external elements, it will include fire starting kits as well.
A general list of items you can consider include a space
blankets (first aid blankets), poncho, Tarp, sleeping bags and tents.
As for a list of items to help you maintain surrounding heat.,
you can consider getting a firestarting kit, single Burner Folding stove, hand
warmer and windproof torch lighter.
Shelter is important because exposure to cold temperature
for long hours can kill you. If you stay in a place with extreme weather, you
need to take shelter SERIOUSLY. For cold weather, you will need to find ways to
create heat sources so that you can retain your body heat. Make sure you don’t
lose your body heat unnecessarily.
If you live in an area with warm weather, you may have to
consider bringing more water and packing more loose clothing.
5. Medical Supplies
Getting ready a first aid kit in your bug out bag is a
MUST-HAVE. Usually, they won’t take up a lot of space.
Medical supplies are highly personalized, so you need to mull
through what you need to use. This includes going through what are the
potential diseases that you will likely contract.
To do this, you need to know what are the injuries that you
will most likely face in a bugging out situation. There are various categories
of injuries including Traumatic injuries, burn injuries, minor wounds, mobility
injuries, infectious diseases and your individual medical needs.
To understand your individual medical needs, you need to go
through a personal screening by talking to your doctor and ask what are the
medicines you need.
Generally, it’s important to include some basic items such a
bandage, disinfectants and scissors. Other items you can consider are
Tourniquets, Israeli Bandages, Hygiene Kit, Wet Naps or even ThyroSafe
Potassium Iodine Tablets.
To Sum Up
I hope that the bug out bag list has helped you consider
different aspects as to what you should pack. This list is aimed to help you
create a new bug out bag list, which is definitely not an exhaustive list. Feel
free to give your suggestions in the comments on what to add in the list.
Bear in mind the important factors when considering which items you want to store in your bag. Be sure to take into account other considerations too such as what location you live in, what bug-out skills you have, what are the likely threat you will face and how many people you need to protect. With all these factors considered, I am sure your success of surviving a calamity will drastically increase.
I have been an active prepper since 2016. Although it’s only been a few years, I have learnt a lot along the way. I have spent hours reading before purchasing a gear. Also, I have spent hours practicing survival skills such as building a lean-to shelter or getting an A-Frame fire kindling. Hope you love the blog as much as I enjoy writing it.