Step 1:

Step 2:

Step 3:

Step 4:

Step 5:

Step 6:


Fishing knots are created to be tied with either a mono or a coated or un-coated braided line and should have the ability to pass through fishing rod eyes and rings as well as a fishing rig. For that reason they need to be as small and as strong as possible. Learning a new knot takes patience and practice. Some knots may seem challenging at the beginning but with some practice you will soon tie all these knots for fishing like a master.
Fishing line knots must be pulled extremely tight before it is used. To ensure fishing knots tighten smoothly, and to help minimize the amount of heat generated, the knot should be moistened with either water or saliva. Trim the ends of all knots closely against the knot. A nail clipper is a very good tool for this purpose.
“Click for more resources on learning how to fish”
Some of the most popular knots for fishing include the Palomar Knot (one of the well-known fly fishing knots), Nail Knot, Blood Knot, Clinch Knot and the Knotless Knot. The different fishing knots all have their own unique uses and it is wise to learn as many fishing line knots as possible to make sure that you have the right fishing knot for the right situation.
The Tie-Fast Knot Tool is a handy little tool that ties several different types of fishing knots. These fishing knots are quick to tie and they are very strong.
In this fishing knots video you get some good tips on snelling and flipping plus you get to learn how-to tie a Snell Knot
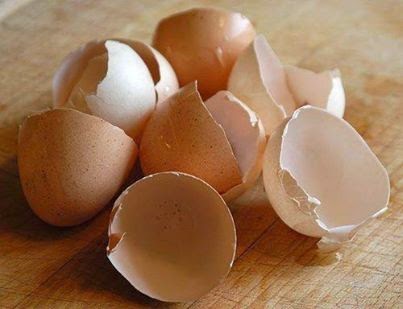
Gardening Top Tip: Tomatoes need calcium to achieve their full flavor potential, and calcium is often greatly lacking in our soils. 95% of a dry eggshell is calcium carbonate.
When planting your tomato plants crush up (to powder) about 4 or 5 egg shells and put them in the bottom of the hole. Then plant your tomato on top. They’ll provide calcium and prevent blossom end rot.
See Which Vegetables to Grow During Summer : Click Here
If you are looking for vegetables to grow during summer, these should be the ones you must consider. Plant Heirloom Seeds : Survival Seeds
Drinking enough water is essential for maintaining good health, especially in survival situations. This infographic highlights the crucial role that water plays in keeping our bodies functioning properly, as well as the harmful effects of dehydration and its implications for our overall well-being. Make sure you stay hydrated to keep your body in top shape!
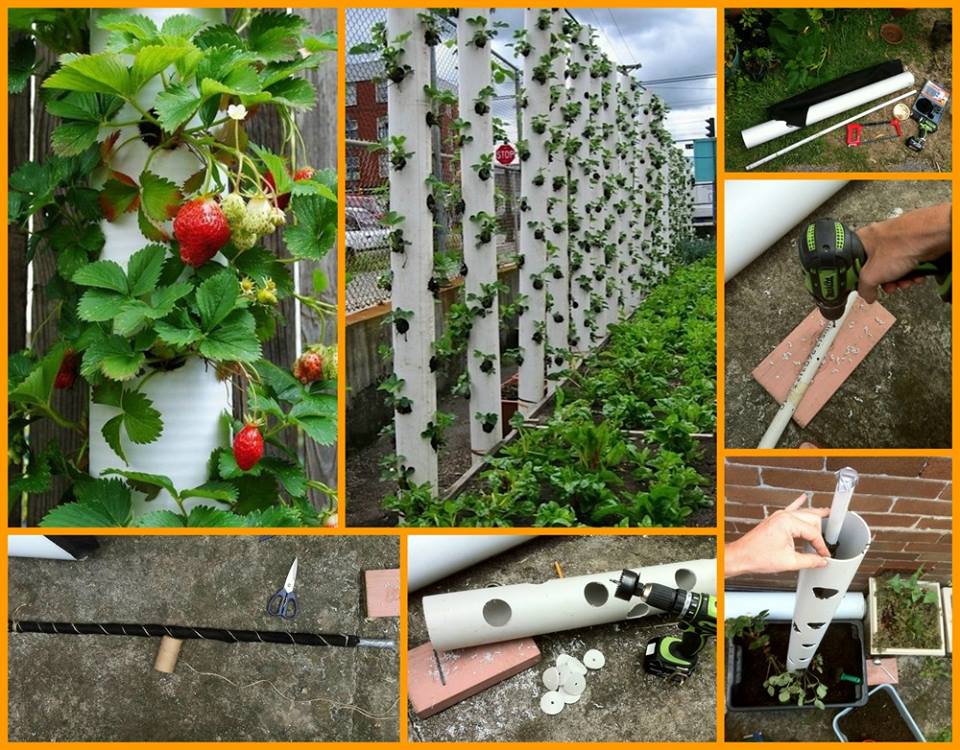
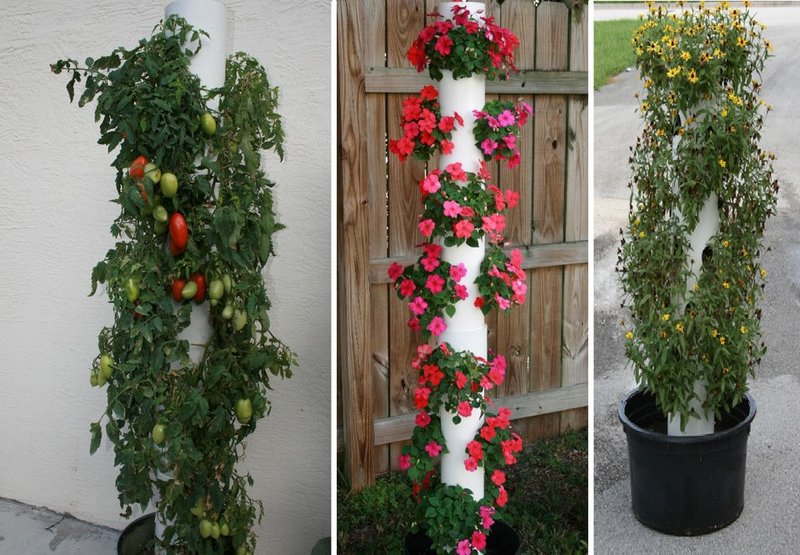
Short on space for your garden? Go vertical. Upright planters let those short on space still experience the joys of gardening. I’m so glad that there are options out there! The Owner Builder Network has put together a fantastic tutorial on how to make one of your own from PVC pipe.
Here’s a step by step guide on how to make your own vertical planter.

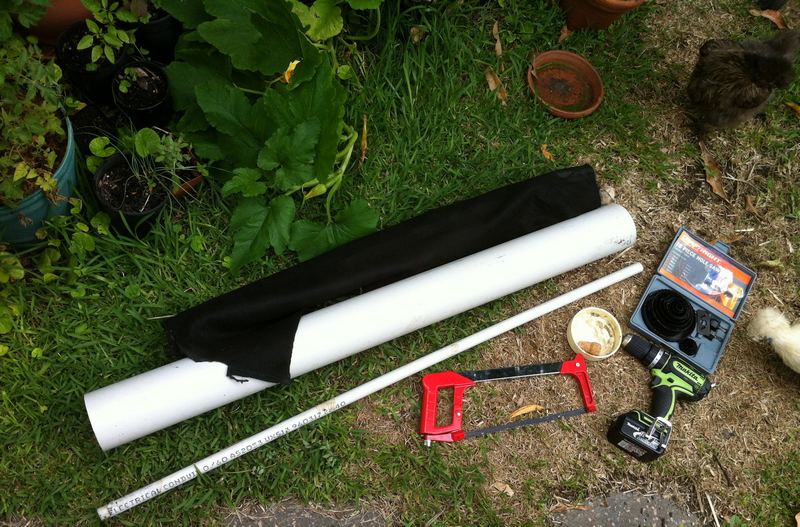
Materials:
– Any length 100mm-150mm (4″ – 6″) diameter PVC or any other kind of pipe
– Potting mix and compost
– Plants (not large plants or bushes)
– Large pebbles of about the same size for added support/stability
– A drip irrigation pipeline (or you can simply water from the top and it will trickle down) *
Tools:
– A drill and circular drill bit OR
– A jigsaw if you don’t own the above
– A hacksaw (if pipe needs to be cut down)
– Marker pen

Important:
A minimum of 25% of your above ground height needs to be below ground, to ensure stability. e.g. if you want your planter to be a metre high then the overall length of your pipe must be 125cm (or more).
How to:
If you are using an off cut or leftover material from a previous job, then the size and height of your project have already been determined for you.
If you are buying the materials you need to decide on the height and width of the pipe. For a 100mm pipe it is recommended to have only one hole in a horizontal row so the plants have enough room for their roots to grow. For 150mm pipes you can have up to 3 holes in each horizontal row depending on which plants you choose (three holes for flowers only, the rest either one hole or two).
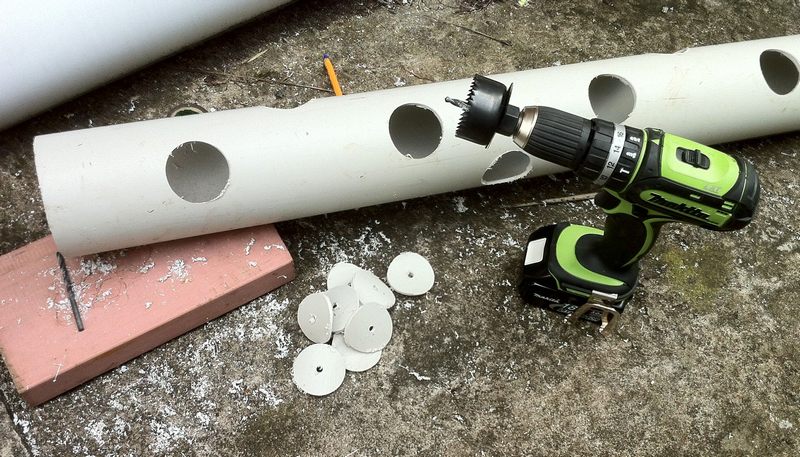
Using a marker pen, mark out the holes you want to cut for your plants using the guidelines above. The size of the hole directly depends on the plants type and size.
Using the markings, cut the planting holes using either a hand drill with circular drill bit or a jigsaw.

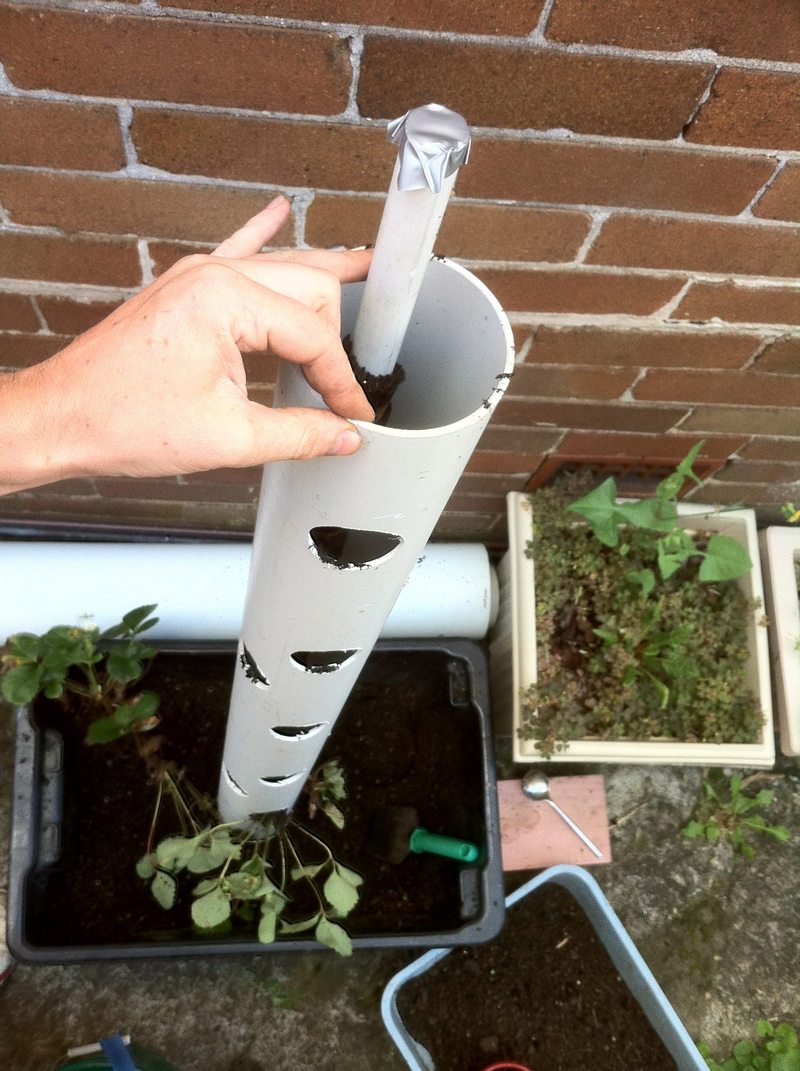
Set up the pipe in a large pot or directly into the soil, using the pebbles for additional stability.

Finally, put the compost and soil into your pipe and start planting.
Keep the water up to your plants and sit back and reap the rewards.
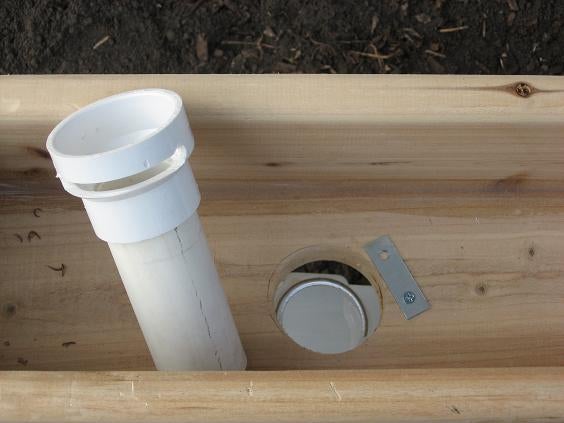
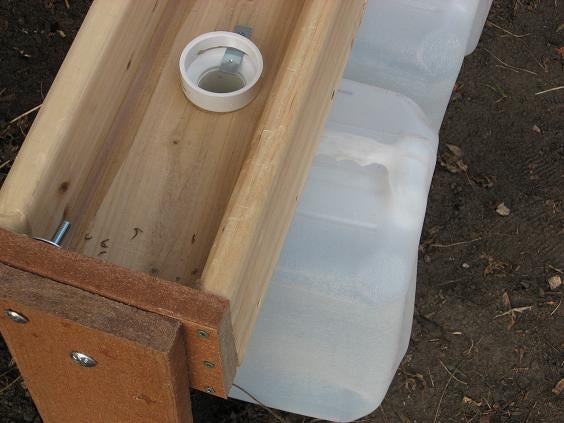
* Because the planters hold only a limited amount of soil, it is essential you keep the water up to your plants. If you are relying in watering only at the top of the pipe, you’ll find that the plants at the top will get plenty of water but those at the bottom will get a lot less dry. That’s fine if you plant accordingly, but the best solution is to insert a weeper hose into the main pipe. This can be purchased or simply made by using 1″ conduit drilled with weep holes down it’s length. Wrap this inner conduit in geo-fabric or weed-cloth to prevent it getting blocked over time.
[source]


Optional:


Get the complete recipe here. You can also just use sliced bread and a little butter.
You can go from grilled cheese to apple pie pocket with practically no clean up.
The cabbage is dense and moist enough to create the perfect nonstick barrier. No more accidental charred-to-a-crisp meals!
They can stick things on, like tiny pebbles, flowers, or leaves, and create a souvenir from their nature walk. Just make sure the sticky side is on the outside.
8. Stovetop popcorn (like Jiffy Pop) can be made over a campfire.
They’re so easy to transport, and kids will be amazed when the foil begins to expand. Just be careful, as the handle will become very hot.
You can also make your own out of popcorn kernels and aluminum foil. Directions here.

It’s an easy way to make multiple breakfasts at once. Get the recipe/directions here.
Get the step-by-step instructions here.
Purchase here.
Toast a marshmallow over hot coals, and then dip the warm marshmallow into a cup of Bailey’s. They’re so delicious and addictive, you’ll want to make them even when you’re NOT camping.
HOW COOL IS THIS. Fill the marshmallows with a Jell-o mixture and dip into rum. Get the full recipe/directions here.
The jugs mean that you won’t get water all over your food when the ice melts. The salt will make the cold last longer — however, it also means that the water in the jugs won’t double as emergency drinking water.
Read more about it here.
Just use a lighter to re-seal.
Label with a Sharpie.
Get the full directions here.
Use a small stick to help secure the main center line. When pressure is put on one end, the line will tighten evenly, keeping the grommets from being torn out.
You can buy one here for $9.95 or make your own.
Not only are you less likely to bump into them in the dark, but they’ll be padded!
You can also use a pool noodle to cushion a canoe before strapping it to your car to protect from scratching.
Especially if you’re going to be venturing off on a hike or nature walk.
Pre-scrambling your eggs will save you the trouble of having to figure out a way of transporting them. It also eliminates the need for a separate bowl and whisk.
And it has a super high Amazon.com rating. Get it here for $10.99.

The foil will reflect the light and create more glow. It could potentially block some wind, as well.
Spread them out on a plate, let them dry for 2–3 days, and then sprinkle baking soda over them. Once they dry, just pop them into a resealable plastic bag.

If you’re trying to save space because you’re backpacking, take the tube out and flatten the toilet paper. Keep it in a plastic bag instead.
Just sprinkle wherever you see the ants.

Keep it on the tick for at least 20 seconds. The tick will cease biting, back out, and will remain stuck to the cotton ball when it’s pulled away. If the tick has been embedded for awhile, keep it in a jar so you can test it for Lyme disease.
Note that there is debate on whether this actually works. Here’s a testimonial that says it does, but there’s no scientific evidence to back it up, so try at your own risk and keep a pair of tweezers in your first aid kit.
And you won’t smell like bug repellent.
Keeping your matches in a tupperware or stainless container will ensure they don’t get wet.
Get the full directions here.
No, you don’t have to go camping to try this delicious sangria. Get the full recipe here.
Click here for more ingenious camping spots!
[source]
According to a survey by the Food Marketing Institute, such confusion leads nine out of 10 Americans to needlessly throw away food. The survey found 90 percent of Americans “at least occasionally throw food away prematurely because they mistakenly interpret the date label to mean their food is unsafe” — and 25 percent say they always discard food on or before that date.
Related: Long Term Food Storage
The researchers blame “a lack of binding federal standards, and the resultant state and local variability in date labeling rules” for the inconsistency in date-labeling practices.”
In 2012, one national study estimated that 40 percent of the country’s food supply goes uneaten. The cost of that wasted food is about $165 billion, including $900 million in “expired” food.
A family of four, the study found, spends an average of $455 a year on food it doesn’t eat. The researchers recommend making “sell by” dates invisible to the consumer, and have the food industry establish a standard, uniform labeling system.
There are three types of dates on a food that is purchased. If the package says “Sell By,” be sure to purchase the food before the date listed. The “sell by” date tells the grocer how long to display the food. The food should remain good for a period of time once you get it home.
The “Best if Used By” is not a purchase or safety date. The date stamped after that term is the date the food should be used by for best flavor or quality. A “Use-By” date is the last date recommended for peak quality of the product.
All three terms are guides to help a purchaser determine the quality of the food. The food can be safe and of good quality after any of the three above open-dating terms are used.
This Infographic below explains a bit more:
[source]