9 Prepping Lessons from American Blackout

Like millions of others on Sunday night, I plopped down in front of the TV to watch National Geographic’s American Blackout. I was curious to see how the hypothetical scenario of a 10 day nationwide power outage caused by terrorism would be portrayed. I was also watching this as I do with each episode of Doomsday Preppers to gain new insight or ideas from the other people on the show. While there are some silly moments and outlandish situations on some of the more notorious prepping shows, there are always nuggets of information if you know where to find them and are willing to look at things with an open mind.

As I watched American Blackout, I pulled some obvious conclusions out of the examples of people who were videoing themselves after this pretend emergency and jotted them down.

1 – Always have some cash

The scenario is a nationwide power outage and like we discussed in our Blackout checklist, that means that a lot of life’s modern conveniences aren’t going to work. Things we take for granted like running to the ATM for a little cash aren’t going to be possible in a power outage. One of the characters was a father who was trying to get his very pregnant wife and child back home as he navigated the streets that had descended into pandemonium because the traffic signals were out. Sensing how this might be a problem he tells his wife that he was going to go “get some cash” only to come back to the car with an empty wallet and a worried look on his face.

Don’t let this happen to you! There is no reason to not have some cash on hand with you at all times or at least where you can get to it. I recommend having at least a month’s worth of cash on hand if you can afford this, but even a couple hundred dollars would have kept this family in water and some food if they acted quickly enough. If ATM’s and Banks are closed, chances are your credit cards, debit cards and EBT cards won’t work either. If stores can’t take credit, you will need cash. Make sure you have some cash stored in a safe place at home or in your car that is never spent and is ready if needed in an emergency.

2 – Water and food are necessities

1Yuppies-300x168

We have covered this topic in a lot of different ways, but it bears repeating until it is never any issue anymore. In any disaster or crisis, food and water will be snatched up first and food and water are two of the most important things you need to have. Make sure that you aren’t the Yuppie couple who live day by day eating at restaurants and who only have some old caviar and a bottle of champagne in their apartment. Ensure you have stored food to last you as long as possible. Most of us have at least 3 days’ worth of food in our homes, but for an event that lasts 10 days as in American Blackout, three days isn’t enough. What if you have others staying with you?

Food and water are the simplest items you can stock up on because you use them every day. You are already buying them on a weekly basis I bet. In a power outage, the pumps that run water to the city will shut down and if you have no water coming out of the pipes, what will you do for drinking and sanitation? Actually, the sanitation part was only so briefly covered in the show that I was surprised. People will still need to go to the bath room regardless of what calamity is happening outside.

3 – If you are going to leave, get out of town fast

Even though this show was a dramatic hypothetical, the situations presented have all happened before and on a much more catastrophic scale, so it isn’t complete fiction. Power outages are probably the least horrible “disaster” to live through but can still be deadly. People will get scared and when they do, the absolute worst in your fellow human beings will come out. This has been played out time and time again in history.

If you have plans to bug out, you should be hitting the road as soon as possible in a situation like this. Power outages were being reported all over the country so the token prepper loaded his family plus 1 tag along into his Bug Out Vehicle and skedaddled out of town. As the crisis goes on, people will become more desperate. The early hours of a crisis could be marked with good natured people having block parties, cooking the contents of their freezers and drinking the last of their beer. By day 4, people are going to be stressed out, frazzled and possibly dangerous. You don’t want to be around at this point if you have somewhere else to go away from the mass of people.


The Almost Perfect Bug Out Bag


4 – Don’t trust others to keep your secrets

2Family-300x224

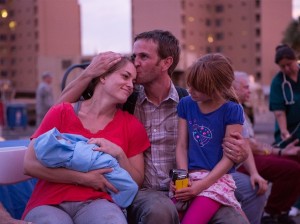
Photograph by National Geographic Channels/ Stewart Volland

There have been hundreds of posts written on OPSEC and the need to keep your prepping information on a need to know basis. This is done for security and the show documented how this can quickly spiral out of control. The “prepper” took his daughter’s boyfriend, Jason along with them when they bugged out to his hidden retreat “Somewhere in Colorado”. Upon arrival Jason was given a tour of the facility, shown the food storage and how the food they had in the pantry wasn’t all the food the family had. It was meant for decoy to keep the real food storage safe.

In a later scene a few days into the power outage, a neighbor comes to the Prepper’s property asking for food. At this, the prepper said “We don’t have anything for you” and good little Jason piped in to say that “We have two years’ worth of food”. My mouth hit the floor when this happened; because that is the last thing that prepper wanted anyone to know. The begging escalated between the neighbor and the prepper to the point where the prepper pulled a gun and finally made his neighbor leave. Cue the ominous music.

My wife and I had a slight disagreement on how the prepper handled this which I’ll address later but the point for this topic is that you can’t tell desperate people information like this unless you are ready and willing to deal with the consequences. In desperate times, people will do desperate things and you soon find out how this situation turns south for the prepper. If I were in the same scenario, I don’t think I would have taken anyone along with me to my retreat unless they were family. Had I no choice, I think I would have treated them with extreme suspicion until they had proven themselves. There is no way I would have shown this kid,  who I didn’t know, who also just so happened to want to sleep with my daughter, anything about what I had stored at the retreat and I would have instructed my family to do the same. This topic is worthy of its own post, but the main point is people will kill you for nothing very quickly. People will kill you much faster if you have something their starving children need.

5 – Have a grid-down way to communicate

Along with the power being out, communications will go out as cell towers rely on power to push that signal out. Just asimple pair of walkie talkies can be a huge advantage if we have only lost power. For longer communications, HAM radio would be the next best bet and it’s easy to get into this hobby. For less than a hundred dollars in equipment you can talk to people hundreds of miles away in a disaster situation.

6 – A little kindness goes a long way

OK, so the neighbor who was asking for food wasn’t being mean. He was nicely asking for food and may have gone away for a while if the prepper wasn’t yelling at him to leave and saying “I got nothing for you”. If the situation demands an escalation, you can do that, but I think in most situations, a calm level-headed approach is the best first option. The prepper may have been able to talk to the man in a calmer way if Jason the idiot hadn’t opened his mouth, but even after he did I don’t think the neighbor did anything to warrant getting a gun pulled on him. He was asking for food and maybe he was being insistent, but I didn’t see him crossing the fence or threatening the prepper.

Now, I am not advocating you to invite a crack head back home and make him a bowl of soup and let him sleep on your couch, but if you are trying to avoid confrontation for as long as possible, you should be calm and rational. There is nothing wrong with anyone asking you for something. These two hypothetical people occupied a lot of land away from everyone else in the middle of nowhere. The prepper in my opinion should have tried well before a crisis to get to know his neighbor for just this reason. When the grid goes down you might very well have to rely on your neighbors for safety and you could just as easily be threatened by them as people in the city if they want what you have. A neighbor who is hungry and hates your guts is a bigger threat in my mind than someone who is just hungry.

7 – Have a way to recharge electric devices

The entire show was presented as footage from cell phones and cameras after the power went out. There was one kid who mentioned a solar charger and a young girl who was given a whole box of batteries by her dad before he left to find food for the family. The last guy actually had a crank cell phone charger like this one here from Eton that I thought was pretty cool.

Now, whether or not you believe that everyone’s cell phones would stay on that long much less record days of video the idea of charging your batteries is one that you will be faced with. Make sure you have a way to charge electronics that you could depend on. I have a couple of options. First, I have plenty of Eneloop AA and triple AAA’s for the flashlights and radios. We also have an inverter to run off the car battery for electricity and a generator with some fuel. The fall back is a solar charger that will take longer and requires sun, but it is another option. I probably won’t be charging a cell phone to take video if we do have a terror attack that takes out our country’s power grid, but there are several devices I will depend on that will need recharging.

8 – First aid for minor/medium injuries

One of the characters dies from either dehydration or a cut on his arm. The reason wasn’t clear but to me they made it out to be the small cut on his arm and I assume infection. It’s hard to believe someone can die from what appeared to be so minor of an injury but first aid is definitely a priority. If the power is out, streets are crowded with abandoned cars and people are looting and robbing every house on your block the last thing you want to do is try to make it to a hospital. The hospitals are already going to be crowded with people injured in all manner of ways and that is if they are even open in the first place.

Part of your prepping supplies should be plenty of level one trauma items in the form of minor pain killers (aspirin), bandages, antibiotic creams and possibly sutures or a surgical stapler. You need to be prepared to handle these minor injuries because you don’t want to risk going out. They guy who died was trapped in an elevator, but the lesson still applies for people who are safe in their house.

9 – Having Stuff doesn’t make you smart

Getting back to the Prepper representative of the show, I had high hopes for him. The show started with him loading gear into a nice heavy duty SUV. His gear was pre-staged and it looked like he had planned ahead. His first mistake was bringing along his daughter’s boyfriend. My own daughter looked at me and said “there is no way you would do that” and she was right. Not solely for the obvious reasons either.

The prepper on the show had a plan; he had gear and an unbelievably awesome retreat location in the woods of Colorado. He had backup power and tens of thousands of gallons of water, 2 years’ worth of food and a fully stocked underground bunker with cameras over the entire property. From all of this, one would assume that he had really thought about SHTF and had planned accordingly.

Yes and no. The prepper would seem to have everything you need to be able to live as comfortably weather the grid-down scenario presented even for up to 2 years. His actions quickly showed that he was taking some things for granted.

For starters, he thought that anyone with him (Jason the boyfriend) would know everything about how security minded they should be. Secondly, he was soundly asleep while his 11 year old son was captured and forced to give up their decoy supply of food. Then when he retreated to the bunker, he foolishly went out to confront a gang of obviously desperate men who were stealing his stored fuel and was quickly captured.

Taking the time to plan for survival is great. Beginning the journey toward learning new skills and acquiring the tools and knowledge you need to be better prepared in a crisis like this is a vital and important step, but you can’t be misled into thinking that just because you have some preps, that they can’t be taken from you. An underground bunker won’t prevent you from making stupid mistakes and just because you tell someone to go away, it doesn’t mean they will listen to you.

I believe that being prepared is the smart thing to do, but you can’t stop when you have some stuff. You can use the time you have now to think and learn and plan for events like this so that you will have some time to figure out what you will do if you are faced with a situation that could be life threatening. Life will be even more precious when there are people who have a strong motivation to take yours from you.

[source]


Survival on the Cheap: Preparing for an Emergency without Losing your Savings

By Guest Blogger –  Survival Life

Being prepared for any eventuality is one of the keystones of being a survivalist. However, if you’re just starting out, it can be a little overwhelming thinking of all of the supplies you need to be ready for three days, a week, a month or even more living on your own. Being prepared doesn’t have to cost a fortune though. In fact, re-using items and finding alternative (and affordable) sources for food, clothing and other essentials goes hand-in-hand with being a prepper. It’s a more modern variation of “living off of the land.”

How to stretch your prepping dollars

If you’re looking to start building your survival stockpile, below are a few hints to help you gather everything you need without breaking the budget. (And, remember: you don’t have to buy everything at once; a better plan is to build your stockpile gradually and thoughtfully. Your ideas about what you need will evolve over time.)

Tips for preparing for an emergency on a budget

1. Learn from the couponers. Although you may be buying different items (they’re buying baby food; you’re buying beans), there’s a lot to be learned from the extreme couponing crowd. Combining coupons with store specials can net you regular savings of 30 percent or more on non-perishable food items and toiletries. Take it a step further and join the grocery and drug store reward programs and you can find things like hand sanitizer, toothpaste and a host of other items for free that you can use in your survival kit. To learn more about couponing, check out sites like the KrazyCouponLady.com.

Surplus stores, stores that sell dented cans or half lots of boxed items, can also be good places to find non-perishable food items.  Learn how to create a price binder.

2. Be a regular at estate and garage sales. Estate and garage sales are other good places to find gear and supplies. Estate sales are especially good hunting grounds, since they feature an entire house full of goods. Some sales may require that you dig around in the attic a little bit, but there are often treasures to be found at cents on the dollar. Good things to look for at such sales are water containers, camping equipment and kitchen items. Some people also find good bargains on food at such sales. (I prefer to buy food directly from the grocery or market.) If you do look at food items, be sure to check the sell-by dates.

3. Shop off-season sales. Off-season sales are another good place to find seasonal gear like camping equipment and gardening supplies at prices that are 50 percent or even 75 percent off of their original price.

4. Host your own swap meet. If you know others that are interested in the survival life, you can combine preparing your stockpile with a social night by hosting a swap meet. Have everyone bring something extra from their stockpile and let the trading begin.

Review these 70+ survival items that cost less than $5!

Being prepared for any emergency or situation doesn’t have to be expensive or all consuming. Like other aspects of life, it’s all about smart shopping and always keeping an eye out for a bargain.
About the Author
At Survival Life our mission is to provide vast array of knowledge, tactics, and skills in the survival and preparedness fields, to any and all who wish to become more prepared for whatever may come. We strive to maintain a truthful and unbiased compendium of knowledge, both in original content, product reviews and survival tips, as well as curated articles from other top survival websites. Click here to visit our site and learn more.

Researcher Find That Plant Has Water Purification Properties: Cilantro

A simple illustration of why we should keep trees and plants living on our soil…

Why we should keep trees and plants living on our soil…

Researcher Find That Plant Has Water Purification Properties: Cilantro

Commonly found in Mexican and Asian dishes, the leafy, bright green leaves of the cilantro plant might not only be tasty, but also help to purify polluted water. Scientist have recently discovered that, in developing countries, cilantro might actually help to absorb some heavy metals found in contaminated ground water.

Students, along with Professor Douglas Schauer of Ivy Tech Community College, were searching for a cheap and accessible way to filter ground water. They dried and crushed numerous wild plants while conducting their research, and found that cilantro was the most effective.

“And then we put that into a solution that has a known amount of lead in it,” Schauer said. “That’s the metal we used as our test metal. Shake it up for a little bit, and then we let the particles settle out, and then we test the water to see how much lead is left behind.”

The researchers found that their cilantro filters were successful in removing many of the pollutants, especially nickel and lead.

Biosorbents are used in environmental cleanups, and help to remove contaminants like lead, arsenic, and other harmful metals. According to the research, the outer wall structure that makes up the cilantro plant is what makes the plant perfect for absorbing the metals.

“The organic toxins we can take care of pretty easily with a number of different methods, but the only way to really get rid of those heavy metals is to treat them with filtering agents like activated charcoal (like what’s found in a Brita filter), but those types of materials are kind of expensive,” said Schauer to CNN. “They are a little expensive for us to use, but they are very expensive to the people living in that region.”

One method of purification using the cilantro filtering method is grinding up cilantro and passing water though it using a tube, which allows clean water to trickle out of the opposite end of the tube, ultimately leaving even cleaner water. Another method involves drying cilantro and putting it in tea bags, which are then placed in a pitcher of water, helping to take out some of the toxic metals.

Schauer believes that, since cilantro is a common herb in poor countries, it could substantially and positively affect access to water in many developing nations.

“Our hope is for somebody who lives in that region to simply be able go in their back yard and grab a handful of cilantro, maybe let it dry out for a couple days sitting on a rock in the sun, and then maybe a handful of that would purify a pitcher of water,” he said.

[source]

How To Build Your Own Aquaponic System With Garden Scraps

You can turn a small yard, a corner in a community garden or an unused space in your home (or Bunker) into a thriving vertical farm for vegetables and fish. A household-sized vertical aquaponic system can fit into a 3ft by 5ft (1m x 2m) area and feed a family year-round.

diagram

Sean Brady, the aquaponics projects coordinator at the Center for Sustainable Aquaponics and Nourish the Planet in Loveland, Colo., showed us how to build a system from scrap he found around the greenhouse.

This is how to build Sean Brady’s low-cost vertical aquaponic system. All the photos are his, and if you have questions for him, you can contact Sean Brady here or email him at 

Materials:
You can use the following materials or swap out anything for whatever you have on hand. Brady built this system from scrap he had around the greenhouse. We’re including pictures of other, fancier systems that he built out of similar materials to show the diversity that this kind of build affords. Measurements are in feet and inches. Sorry, rest of the world.

*Pipes
15-20 ft. of 4-in. diameter PVC or ADS
Four 4-inch elbows
Four 4-inch T connectors

*Two 50-gallon drums
*15-20 ft. of pex tubing, or aquarium tubing
*Plastic cups
*Strips of cloth, such as burlap sack, cable ties or another fastener
*Scrap wood
*Two rolls of electrical tape

*Pumps
One water pump – the size depends on how much flow it would need. An aquarium pump is enough to keep the flow going.
One air pump (optional). The system can aerate itself but it can produce more if it has an air pump.

Tools:
*Power drill or hand drill
*1-in hole saw
*3-in hole saw

Build time: About two hours.

Recommended plants and fish:
Leafy vegetables, tomatoes and herbs do well in these systems. So do flowers. You can experiment to find which do well and fit your needs.
Tilapia and trout do well, they grow quickly and they’re delicious.


diagram

Cut the pipe into six 1ft. sections for the sides and two 14in. sections for the ends.
Drill two 3in-diameter holes in each of the 1ft side pieces.
Drill a 1in-diameter hole into the side of one of the end pieces.
Tip:You can use any kind of durable plastic or pipe, not just what’s pictured.

diagram

Assemble the pieces with electrical tape.

diagram

Cut the vertical pipes to the length that suits you. Drill 1in-diameter holes in the vertical pipes, evenly spaced. Insert the vertical pipes as shown.
The photo on the right shows the mostly finished structure to give you an idea of how it looks.

diagram

Perforate the bottoms of the plastic cups and place them in the holes you drilled in the side pipes. Cut a piece of 1in-diameter pipe to insert into the 1in hole in the end pipe to make a drain. The drain should pour into one of the 50-gallon drums.

diagram

You can use two 50-gallon drums like these or any other kind of container that holds water for fish. You could even scale this down and put it on top of an indoor aquarium.

diagram

Cut the tops off below the rims.

diagram

This is the assembled garden structure on top of the drums, seen from two slightly different angles.

diagram

Adjust the structure’s balance and support its joints with wooden boards. You could tilt the structure slightly toward the drainpipe to improve the water flow. Most systems will have vertical columns of equal height, but these are cut at different heights to show the range of options available.

diagram

Seed the plants in these. Put them in the cups and the holes in the vertical columns.

The final steps are not pictured, but easily explained. Cut strips of burlap or some other material, fasten them to the tops of the vertical pipes and drape them down the inside of the pipes. Stuffing the pipes with cloth like this will give the plant roots something to latch on.

Next, cut and assemble the tubing so that you can pump water from one barrel up to each of the four vertical pipes. You could also pump water from the barrel that receives drainage to the barrel that feeds the system.


diagram

These systems can scale up to commercial size, too. Brady and his colleagues at the Center for Sustainable Aquaponics set up this greenhouse for leafy vegetables, herbs and fish.

diagram

Another view of the commercial greenhouse.

diagram

This arrangement portrays some of the creativity and even the beauty possible with an aquaponic system. Among its features, there is a rocky waterfall into the fish tank and a drip-irrigation system watering soil-free plants in a rock bed.

diagram

These are different views of the above system.

diagram

Our guide Sean Brady shows what these systems can produce. He’s holding a trout here.

Now go plant your own survival garden.

There are no products in this group.

Cool Cargo Bike from trioBike

Fighter Pilot Inspired trioBike

The trioBike is yet another iteration on the classic bicycle, but this time the concept is actually quite useful for anyone located in an urban area or close to a beach where bikes are often used as transportation for daily errands like grocery shopping.

The trioBike is essentially a pedal powered cargo hauler. The real kicker is the cargo can be anything you would like, including children. That’s right, the trioBike can safely haul 2 children up to 176 pounds in cumulative weight, all while giving you a great workout, and saving on sky high gas prices. This particular one has been covered in army green, with fighter pilot inspired shark graphic across the actual cargo carrier.

At trioBike we design, develop, produce, manufacture and sell transportation solutions for urban families. Since 2004 we have given urban families a choice to think alternative; a choice that offers a safe, cool, healthy, non- polluting way to commute through traffic congested cites around the globe. What could be more obvious? In Denmark we have been riding bikes forever, not just for fun but for everyday commuting – it is a cultural thing.

via Cargo bike from trioBike – Experience trioBikes cargo bikes here.

USA – resellers and distributors

Modernmini LLC
187 Bedford Ave Apt 7
Brooklyn, NY 11211
Tel.: + 1 917 476  4122

Making Your Own Vegetable And Nut Oils

The operation is equally simple. I think the most complicated part was mounting the expeller on a sturdy platform which could then be clamped securely to the kitchen counter.

Nut and Seed Oil Expeller / Oil Press

Nut and Seed Oil Expeller/Press

This operation uses quite a bit of cranking force at times and needs to be very securely mounted. It’s not difficult to operate (any 10 year old boy could do it) but it does take a bit of muscle, similar to hand grinding wheat for flour. I made a funnel out of a water bottle which fits the opening of the expeller perfectly and I ran a piece of clear tubing from the oil drip down from the expeller to where I set a bottle to collect the oil. At this point I was able to begin making oil and after lighting the heating lamp and filling the funnel with canola seed I was cranking away and my oil jar was filling rapidly. I wouldn’t want to set out to make several gallons of oil in an afternoon but the first time I tried it I made a quart of oil during a half hour phone conversation so it is not a real difficult or time consuming project.

You can use the oil directly from the expeller or you can let it set in a jar in a warm place overnight so the particulates can settle to the bottom and then pour or siphon the top portion of the oil which is nice and clear. I prefer to leave the sludge in with the nut oils as it gives the oil a stronger flavor and more substance but it’s nice to have a “normal” bottle of canola oil for every day cooking use.

I found the oil quality to be far better than anything I had ever tried before, which was not a surprise because anything made fresh seems to be better than what you get at the store. The oil is quite a bit darker than the oil from the store, but I found this is because it hasn’t been bleached or chemically treated – one more reason in my opinion to make it myself.

I was really interested in finding out what other types of oil I could make with this since the manufacturer says it can be used to make just about any oil you can think of. I’ve tested every oil producing seed and nut I could get my hands on and so far have had nothing but smashing success.

Some of my favorites are:

  • Walnut oil – The leftover walnut meal is wonderful in bread
  • Sunflower oil
  • Almond oil
  • Flax (linseed) oil
  • Coconut oil
  • Canola oil

Each oil has unique expelling needs as well as looks and tastes different, but all are wonderful. All leave you with an abundance of leftover seed meal which can be used as a high quality animal feed protein supplement or are excellent used in the kitchen in breads or on oatmeal.

Canola meal, which I tend to have a lot of, is not very tasty so I use it as a protein supplement for my animals. It’s around 40% protein and chickens, goats and pigs all seem to love it. It can also be used as a high quality natural fertilizer for the garden.

The manufacturer of the expeller can be found at www.piteba.com. The website has a lot of information on different oilseeds and detailed instructions for using the expeller.

[source]

Someone’s Got To Be The Cook When The SHTF – Why Not You?

Big Baby Double-Barreled Cooker

Big Baby Cooker

This design is from the book “Real Barbecue” by Greg Johnson and Vince Staten. Their philosophy with the Big Baby is to take stuff that’s more or less lying around and turn it into a smoker that works on the same principles as the $1,600 models that the pros sell. 

The essential function of a top-notch barbecue smoker is to keep the meat entrusted to it comfortably separated from flames and direct heat and yet in the path of the hot air and smoke that give it its flavor. Big Baby does this by burning a hardwood fire in her bottom barrel and using the top barrel to contain the meat and direct the smoke. The top barrel also serves as a big, self-contained drip pan that catches meat juices. And the vents and dampers located all along the air path mean that the fire can be precisely controlled, keeping it from dying or flaring up.

Besides two 55-gallon drums, the “trick” to the smoker is in making use of wood-stove kits designed to convert such drums into cheap stoves for heating storage sheds and such. The kits come with a cast-iron door, cast-iron legs on which to mount the smoker, cast-iron supports to connect the bottom drum to the one above it, plus flues to connect the two drums. From a hardware store or wood-stove shop, you toss in some dampers and a couple of neat little smokestacks for each end to let the smoke escape from the top drum.

Building Big Baby

Before you get started, make sure you have the stuff you’ll need.

The drums you should be able to find for about ten or twenty dollars; the stove kits (it takes two) are available at hardware and wood-stove stores or by mail order from Northern Hydraulics, 801 E. Cliff Rd., P.O. Box 1219, Burnsville, ME 55337, for less than forty or fifty dollars.

The two twenty-two-by-fifteen-inch grill surfaces can be had at a barbecue supply house for twenty-five dollars or so.

Add some bolts, brackets, hinges, smokestacks, fire bricks, paint and such, and you’re up to a total expense of about a hundred and fifty dollars, more than the price of a simple covered grill but considerably less than the cost of a B1 bomber, which, by the way, does a simply horrible job on a rack of ribs.

The steps are simple: Paint the barrels first, then start cutting them with your saber saw. Use a fresh metal-cutting blade (ask the guy at the hardware store or tool rental place for one), and prepare yourself for a violently annoying noise roughly akin to five hundred colicky babies with the croup. Cutting through a hollow drum with a buzzing saber saw makes enough racket that you may want to consider earplugs. Or suicide. But persevere, and cut a hole for the fire door at one end of the bottom barrel and matching holes in both barrels for the flues that connect them. Cut the top barrel in half horizontally, setting the top half aside. Then do your drilling and mounting and bolting, referring to the directions in the wood-stove kit whenever appropriate. Basically, you want to mount the bottom barrel on its legs (and we recommend connecting these to a couple of two-by-fours for a sturdier base), and then mount the fire door to it, followed by the connecting supports and the two flues (remember to insert the dampers before you bolt on the top barrel). Then you add the top barrel, bolting together the supports and flues between the two. At this point, lay the top half of the top barrel in place and mark holes for the hinges and handles. After the lid is in place, you can drill holes and bolt in place a small chain to keep the lid from falling over backwards. About now you can use the saber saw one last time to cut holes in either end of the bottom half of the top barrel and mount the two smokestacks (again, don’t forget those dampers). Drill a hole for your thermometer (an inexpensive dial-type candy thermometer works fine, and even includes a clip that will hold it in place). Line the bottom of the bottom barrel with fire bricks, which keep it from burning through. Then drill and mount the brackets that support the grill surfaces, slap those puppies in place, and call one of those fellows who delivers wood. You’re ready to barbecue!

It’s best to operate this smoker over a nonflammable surface, from something as basic as packed dirt to concrete. The Babe sits a bit low to the ground, and her firebox gets more than a mite hot, so she will send any grass in the area to Turf Heaven almost immediately. For a neater look, you could put down gravel and even border the area with bricks.

Cooking With Big Baby

Big Baby is designed to burn real wood, not charcoal. She’ll be happy with just about any hardwood – hickory, oak, mesquite, whatever – but stay away from soft stuff like pine. Build a good-sized fire in the bottom barrel and let it go for a while, maybe an hour or more, until it has formed a healthy pile of hot coals. Avoid cooking over a “fresh” fire, since such fires send up a lot of soot and creosote like goo. Go for a hot bed of coals onto which you can toss the occasional log, keeping the temperature as even as possible. Barbecue is not set-it-and-forget-it food; cooking it requires almost constant tinkering and tending to keep the heat even over a period of hours. But with a big base of coals for consistency and the proper combination of damper settings for the wind and outdoor temperature, the Babe will chug along at a constant heat for an hour at a time, certainly time enough to go out for more beer or cassette tapes.

There will be very little in the way of barbecue that Big Baby can’t handle, from a suckling pig to three twelve-quart stockpots of smoky chili. But she’s more than a simple smoker.Big Baby is a sculpture in basic black, a life-style statement, a conversation piece, a badge of honor, and a joy forever. And on a hot summer day, even when you’re not cooking anything, it still smells like barbecue.

Where To Get The Parts

Parts for the Big Baby are available from Vogelzang International Corp. In Holland, MI.

Here are some pictures of a Big Baby smoker built by Stuart MacMillan of Seattle, WA using parts from Vogelzang. He reports that it took him about 12 hours and $275 to construct the smoker. He also reports that it works great.

bigbaby2.jpg (37861 bytes)BigBaby1

 [source]