
This is a great article from Eat The Weeds, on the benefits of Cattails as a survival food source. It is a readily abundant wild edible in North America.

No green plant produces more edible starch per acre than the Cat O’ Nine Tails; not potatoes, rice, taros or yams. Plans were underway to feed American soldiers with that starch when WWII stopped. Lichen, not a green plant, might produce more carbs per acre. One acre of cattails can produce 6,475 pounds of flour per year on average (Harrington 1972).
It is said that if a lost person has found cattails, they have four of the five things they need to survive: Water, food, shelter and a source of fuel for heat—the dry old stalks. The one item missing is companionship. Of course, the other thing to point out is that no matter where the water flows, down stream is civilization in North, Central and South America.
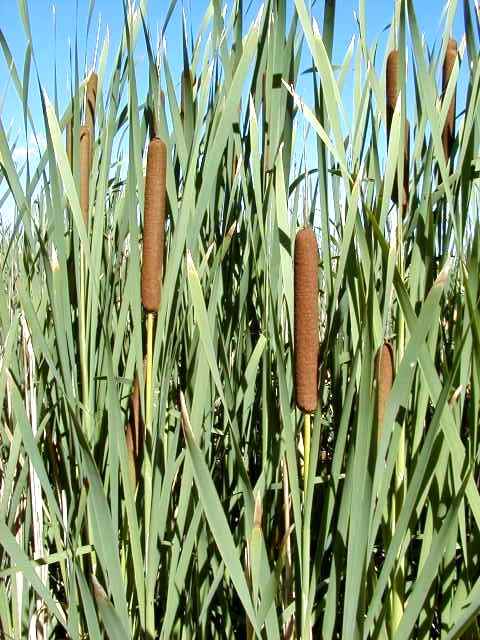
Cattails are the supermarket of the wilds. The young cob-like tips of the plant are edible as is the white bottom of the stalk, spurs off the main roots and spaghetti like rootlets off the main roots. They have vitamins A, B,and C, potassium and phosphorus. The pollen can be used like flour. I like their convenience as a trail nibble, or canoe nibble as it were. Just pull on one and where it pulls from the stalk there’s usually a tasty bite or two.
Cattails are the champion of starch production. The way you get the starch is to clean the exterior of the roots and then crush them in clean water and let them sit. The starch settles to the bottom then one pours off the water. It may take several drain and settle sessions get rid of the fiber. I sampled the starch raw once and got a bit of a stomach ache. Once you have just the starch it is excellent for cooking as you would any flour. Getting starch that way is quite labor intensive. Here are three other ways to get to the root starch:

Dry the peeled roots (peel roots while they are wet–they are difficult to peel when dry). Chop roots into small pieces, and then pound them wtih a little water. When the long fibers are removed, the resultant goup powder can be dried and used as flour. The roots also can be boiled like potatoes then the starch chewed out (spitting away the fibers) or you can also roast the root in a fire until the outer spongy core is completely black. Then chew the starch off of the fiber. Don’t eat the fiber. It will give you a stomach ache. I know from personal experience. The advantage of the latter method is no pots or pans are needed. If you have fire and a pond you have a nutritious meal. You can also put the roots on the barbecue.
[source]


 Infographic